Friday, December 31, 2010

Cardamom Honey Cutout Cookies


These cookies have been on my "to bake" list for quite some time, since I found the recipe at Finecooking.  So, with Coriaunty in close baking proximity for a couple of weeks and her new interest in cardamom, the two of us got together and made these.  The dough is easy to work with, and the cardamom gives these cookies a distinct flavor with a touch of warmth from the honey.

Cardamom Honey Cutout Cookies

3 cups (13 1/2 ounces) all purpose flour
1 teaspoon ground cardamom
1/2 teaspoon table salt
1/4 teaspoon baking soda
1 cup (8 ounces)  unsalted butter, room temperature
3/4 cup granulated sugar
1/4 cup honey
1 large egg
1 teaspoon vanilla extract

Preheat oven to 350F, and line two baking sheets with parchment paper.  In a medium mixing bowl, combine the flour, cardamom, salt, and baking soda, and whisk until blended.

In the bowl of a stand mixer with the paddle attachment, beat the butter and sugar on medium speed until well blended and fluffy, about 3 minutes.  Scrape down the bowl and add the honey, egg, and vanilla.  Continue mixing on medium speed until well blended.  Add the flour mixture and beat on low speed until no streaks of flour remain, and dough comes together in moist clumps.  Divide the dough in half, form into disc shapes, and wrap in plastic wrap.  Refrigerate for 1 to 2 hours until chilled and firm.

Working with one disc of dough at a time, roll the dough on a floured surface to about 3/16 inch thick (a little more than 1/8, but less than 1/4).  Cut dough with a 2 1/2 inch cookie cutter, and arrange the cookies about 1 inch apart on prepared baking sheets.  Gently press the scraps together, re-roll and cut.  Repeat with remaining disc of dough.

Bake one sheet at a time for 11 minutes or until the edge of the cookies have a 1/4 inch wide light brown rim.  Let the cookies cool on the baking sheets for a couple of minutes, then transfer to a wire cooling rack to cool completely.  Decorate with frosting or royal icing.  The plastic-wrapped dough may be refrigerated for up to 3 days, or frozen for 1 month.  Thaw overnight in the refrigerator before proceeding with the recipe.  Makes about 2 dozen cookies.

Enjoy and Mahlzeit!  -Cardamommy and Coriaunty

Wednesday, December 29, 2010

Pebber Nodder

I love trying out new things! Two of those things include foreign food and unusual/rare ingredients. This recipe tackles both. Recently I have become interested in the spice Cardamom (a very good description found here). I had heard of it but had never actually used, seen, or smelled it. Since I'm home for Christmas and now have access to my mom's extensive array of spices, I'm able to go through each one and examine it. So I found the cardamom, smelled it, tasted it, and became excited to begin experimenting.

Through my cardamom research I found a Danish cookie recipe. Since I've never made anything like this, I was uncertain if the recipe I had found was reliable (and legitimate). So I asked my roommate's mom, who is from Denmark, if that recipe was ok. She replied that it would work, but then gave me a list of things I could add to it. The following is my combination of her recipe and another recipe found here. These cookies produce a bite-size snack-cookie that are crunchy and slightly chewy on the outside while still being soft on the inside. The cardamom pulls through but is not overpowering. Pebber Nodder is very good, however, I didn't find it good enough to make a second time.

1 C Butter
1 C Sugar
2 Eggs
2 1/2 C flour
2 tsp Cardamom
2 tsp Cinnamon
1/2 tsp Cloves
1/4 tsp White Pepper
1/2 tsp Mace

In a mixer combine butter and sugar and beat until smooth. Add eggs one at a time, stirring until light and fluffy. Combine flour, cardamom, cinnamon, cloves, white pepper, and mace. Stir into sugar mixture until just blended. You may need to add more flour. Separate the dough into 6 balls and roll each, on a lightly floured surface, into a rope a little larger in diameter than your index finger. Cut into 1/2 inch pieces and place on an ungreased baking sheet. Bake for 10 minutes at 350 or until lightly browned.

Mahlzeit!
-Coriaunty

Eggnog Fudge


So, Christmas is over and so is the baking...except for one or two little things that didn't quite make it in.  I figure that New Years is the official end to the holiday season, so I can still squeeze in one or two more holiday type baking things this week.  I found this eggnog fudge recipe on this Wisconsin Cheese website, and new that I had to try it out, with  minor modifications.  I was a little worried that the eggnog flavor wouldn't be very strong, but was reassured that it came through when my first blind taster said, "EGGNOG?!".  Mission accomplished.

Eggnog Fudge

1/2 cup butter
3/4 cup eggnog
2 cups sugar
1 1/4 cups (10 ounces) white chocolate chips
1/2 teaspoon nutmeg
1 7-ounce jar marshmallow cream
1/2 teaspoon rum extract

Line a 9x9 inch square pan with foil, then grease the foil.  In a heavy saucepan, combine butter, eggnog, and sugar.  Bring to a full rolling boil over medium-high heat, stirring constantly.  Reduce heat to medium and continue to boil for 8 to 10 minutes until mixture reaches 234F, stirring frequently.

Remove saucepan from heat and add white chocolate and nutmeg, then stir until smooth.  Add the marshmallow cream and rum extract, and mix well.  Pour the mixture into the prepared pan and cool completely.  Cut into small squares.  Store in an airtight container in the refrigerator.

Enjoy!  -Cardamommy

Tuesday, December 28, 2010

Cinnamon Rolls


If you love these cinnamon rolls as much as I do, you might have a serious problem on your hands.  This is my go-to recipe for cinnamon rolls.  The dough is fast and easy, and is so tender and soft that you won't believe it.  I can't stand when cinnamon rolls go stale, and the bread gets dry.  These don't do that.  They stay tasting fresh even the day after you bake them.  Use as much cinnamon sugar as you like, and top with a glaze or don't.  You can also make these the night before and chill the fully formed rolls overnight.  Just take them out of the refrigerator while you preheat the oven, and bake as normal.

Cinnamon Rolls

Dough:
1 1/2 cups warm water
1 egg
1/4 cup powdered milk
1/4 cup shortening
1/4 cup sugar
1/2 cup mashed potato flakes
1 1/2 teaspoons salt
3 to 3 1/2 cups flour
1 Tablespoon instant yeast

Filling:
1/4 cup sugar
1/2 cup brown sugar
1 teaspoon cinnamon
1/8 teaspoon cloves
1/4 cup (1/2 stick) butter, melted


Combine all dough ingredients in the pan of a bread machine an select the dough cycle.  If mixing by hand, combine all ingredients but flour, then stir in flour until a soft dough forms.  Knead until smooth, about 5 to 10 minutes.  Let rise until double in size. 

Preheat oven to 350F.  Grease a 9x13 inch pan.  After the dough has risen, remove from the bread machine and roll into a large rectangle.  Pour the melted butter over the rolled dough, and spread evenly over the surface of the dough (the best tool to use for this is your hands...messy, but the most effective).  Combine the sugar, brown sugar, cinnamon, and cloves in a small bowl and stir until well mixed.  Sprinkle on top of the buttered dough and spread evenly (again, hands work incredibly well).  Roll up the dough, jelly roll style, starting at the widest edge.  Pinch the seam to seal the dough. 

For perfectly round cinnamon rolls, take a long piece of unflavored dental floss and slide underneath the log of dough.  Bring the ends of the floss up and over the rolls, then cross them and pull tight, slicing off a piece of dough.  Or, using a sharp knife, cut the log into 12 slices.  Place the cinnamon rolls in the prepared pan, and press down on the tops just lightly.  Cover loosely with plastic wrap and let rise for about 25 to 30 minutes.  Bake for 25 minutes, or until golden brown and done in the center.  Top with a glaze if desired.  Makes 12 generous cinnamon rolls.

Enjoy!  -Cardamommy

Saturday, December 25, 2010

Christmas Morning Eggnog Cranberry Muffins

Merry Christmas!


For the past several years, I have made cream cheese cranberry muffins for breakfast on Christmas morning.  This year, I decided to change it up just a bit by getting some eggnog involved.  I firmly believe that it is acceptable to have eggnog all day on Christmas, so we might as well start with breakfast.

Eggnog Cranberry Muffins

Muffins:
2 1/4 cups flour
1 Tablespoon baking powder
1/4 teaspoon salt
1 cup +2 Tablespoons sugar, divided
4 ounces cream cheese, softened
2 eggs
3/4 cup eggnog
4 Tablespoons (1/2 stick) butter, melted
1 teaspoon almond extract
1 cup fresh cranberries, coarsely chopped
1/2 cup dried cranberries

Topping:
1/2 cup sugar
1/2 cup flour
1/2 teaspoon nutmeg
4 Tablespoons cold butter

Preheat oven to 350F.  Line 20 muffin cups with paper liners.  For the topping, in a small bowl combine sugar, flour, and nutmeg.  Cut in the cold butter, using a pastry blender or a fork, until you have pea size crumbs. 

For the muffins:  In another small bowl, combine flour, baking powder, and salt.  Mix and set aside.  In a large bowl, mix 1 cup of the sugar with the softened cream cheese until well blended.  Whisk in eggs, one at a time until incorporated, then stir in eggnog, melted butter, and almond extract.  Toss the chopped cranberries and dried cranberries with the remaining 2 tablespoons sugar.  Add the dry ingredients to the eggnog mixture and mix until just blended, and no streaks of flour remain.  Fold in the cranberries.

Spoon the muffin batter into paper lined muffin cups.  Spoon the topping over the batter in each cup.  Bake for 23 minutes, or until a toothpick inserted in the center comes out clean.  Let cool in the muffin tins for 5 minutes, then remove to a cooling rack.  Serve warm.  Makes about 20 muffins.

Enjoy!  -Cardamommy

Friday, December 24, 2010

Fruit Cake

Fruit cake gets a bad wrap. And it should. If I grew up knowing the fruit cake everybody else knew (commercial), I would hate it equally as much as everybody else. Fortunately for me (and for you) I did not grow up on commercial anything, including fruit cake. My mom has made this every year for as long as I can remember. This year, though, I am going to be an active participant in the making process instead of solely an active participant in the eating process. That way I can continue this tradition for myself and future (yeah right!) family.

3 C Raisins
2 3/4 C Canied Cherries
4 C Walnuts, halves or large pieces
2 1/4 C Dates, cut in half
2 C Candied Pineapple, cut up
1 C Candied Orange Peel
1 C Candied Lemon Peel
1 C Candied Citron
5 C All-Purpose Flour
1 tsp Nutmeg
1 tsp Cloves
1 tsp Ginger
2 tsp Cinnamon
1 tsp Baking Soda
1 1/2 tsp Salt
2 C Butter
2 1/2 C sugar
6 Eggs
3/4 Light Molasses
1/2 C Sherry Wine or Grape Juice

Prepare one 9in bundt pan, and two large loaf pans by lining with greased foil. Mix half of the flour with the fruits and walnuts. Combine remaining flour with spices, soda and salt. Cream butter with sugar. Add eggs, one at a time, beating well after each egg. Stir in molasses and wine. Blend in flour mixture, then foured fruits, mixing well. Turn into prepared pans. Bake at 300 for 2-3 hours.

Thursday, December 23, 2010

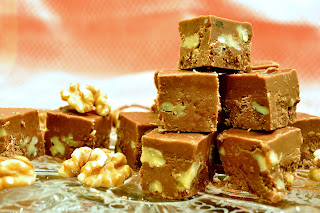
Creamy Chocolate Fudge

I'm a big fan of chocolate. Well, who are we kidding? I'm a big fan (big meaning large in like, not large in size, of course) of pretty much anything homemade, delicious, sweet, and calorie-packed. So am I interested in learning how to make fudge of the non-marshmallow-cream variety? Ohhhh yeah. I am. Again, this is one of my mom's famous and time-tested recipes (which originally came from Fine Cooking). I have to warn you, though: If you are not a patient person and do not have a lot of time to set aside for fudge, do not attempt this recipe! It isn't that difficult, but it is time consuming. It's definitely worth it, though! This fudge is almost truffle-like because it is so rich and creamy; if done properly it will not be grainy at all. It really does melt in your mouth. You can mix in a number of ingredients to suit your fancy: nuts, coconut, peppermint, etc. It will take them all. Also make sure you have a good candy thermometer. If, at the end, your fudge is shiny, you've done it right. Just for the record, mine was.

3 T Cold Unsalted Butter; more at room temperature for buttering pan and thermometer
3 3/4 C Granulated Sugar
1 1/2 C Heavy Cream
4 oz Unsweetened chocolate, coarsely chopped
3 T Light Corn Syrup
1 tsp table salt

1. Lightly butter the face of a candy thermometer and set aside.

2. Put the sugar, cream, chocolate, corn syrup, and salt in a large (4 qt) heavy-duty pot and stir with a spoon or heatproof spatula (make sure it's heat proof--some spatulas will bubble because they cannot handle the heat) until the ingredients are moistened and combined. Stirring gently and constantly, bring the mixture to a boil over medium heat, 7-12 minutes. Cover the saucepan and let the steam clean the sides of the pan for 2 minutes.

3. Clip the candy thermometer to the pot, being careful not to let the tip of the thermometer touch the bottom of the pot, or you might get a false reading. Let the mixture boil without stirring until it reaches 236-238° F, 2-5 minutes. Take the pan off the heat and add the butter, but do not stir. Set the pan on a rack in a cool part of the kitchen. Don't disturb the pan in any way until the mixture has cooled to 110° F, about 1-1.5 hrs.

4. Line the bottom of a 9x9 baking pan with foil, leaving a 2 in overhang. Butter the foil and set aside.

5. Remove the thermometer from the fudge mixture. Using a hand mixer, beat the mixture on high speed until it is a few shades lighter in color and thickens enough that the beaters form trails that briefly expose the bottom of the pan as they pass through, 10-20 minutes. Pout the thickened fudge into the prepared pan, using a rubber spatula to help nudge it out of the pot. You can scrape the bottom of the pot u=but not the sides; any crystals that stick to the pot stay in the pot. Smooth the top of the fudge with the spatula. Set the pan on a rack and let the fudge cool completely, about 2 hours. The fudge will be slightly soft the day it's made but will firm up overnight.

6. Turn the fudge out onto a clean cutting board and peel off the foil. Turn the slab of fudge right side up and cut it into 25 equal pieces.

The fudge will keep for a week to 10 days stored in an airtight container at room temperature.

Yield: 25 pieces
Mahlzeit!
-Coriaunty

Wednesday, December 22, 2010

Fiddle Faddle

Fiddle Faddle is another one of our family's traditional Christmas treats. It's simple to make and so so delicious! My mom usually keeps it in a big Tupperware container with the lid tightly shut. As if that will stop us from gobbling it all up.

1 Cube Butter
1 1/2 C Sugar
1 Cube Margarine
1/2 C White Karo Syrup
4 qts Unsalted Popped Popcorn (about 3/4 C unpopped popcorn)

Combine butter, sugar, margarine, and syrup in a medium pot and cook over low-medium heat, stirring constantly, until it is a light caramel color. When it reaches 290° remove from heat and pour over popped popcorn. Stir and separate as it cools.

Mahlzeit!
-Coriaunty

White Chocolate Trail Mix


I decided that this year I would make my job easier, and not bake 16 different types of cookies for our Christmas treat tins.  I decided to make this trail mix to fill the tins and give away, thus also getting rid of it so that I don't find it residing in my stomach.  Sounds like a great way to make my life easier, huh?  Sure!  That is unless I make the trail mix and still bake 16 different types of cookies.  Tis the season for giving, though, and it is a good thing because if you don't give it away, you  my find this treat residing in your stomach as well.

White Chocolate Trail Mix

16 cups popped popcorn (1/2 cup + 2 heaping Tablespoons), unpopped kernels removed
3 cups whole grain cheerios (or any other flavor)
1 (14 ounce) package M&Ms
1 (12 ounce) bag butter spindle pretzels
1 (10 ounce) bag toffee bits
2 (12 ounces each) bags white chocolate chips
2 Tablespoons canola oil

In a very large bowl (you may need to divide between two bowls), combine the popcorn, cereal, M&Ms,  pretzels, and toffee bits.  Set aside.  In a medium bowl, combine the white chocolate chips and oil.  Microwave in 30 second intervals until chocolate is melted, stirring until smooth.  Pour melted chocolate over the popcorn mixture and toss to coat.  Immediately spread onto two baking sheets, or on sheets of wax paper.  Let stand until cool and dry, about 2 hours.  Store in an air-tight container.  Makes 37 servings (1-cup each).

Enjoy!  -Cardamommy

Monday, December 20, 2010

Marshmallow Hot Chocolate


A snow storm, shoveling snow, hot chocolate...sound familiar?  Probably, because I wrote a similar story last week.  Well, here we are again, same situation, different day.  This hot chocolate is the current favorite at my house.  It is smooth and foamy, with the perfect amount of chocolate.  It is fast and easy, and will disappear faster than you can make more.  Use different kinds of marshmallows, such as caramel or gingerbread, to flavor your hot chocolate.

Marshmallow Hot Chocolate

8 teaspoons sugar
4 teaspoons unsweetened cocoa powder
4 cups milk
1 1/2 to 2 cups (about 4 ounces) miniature marshmallows (may use large marshmallows)
1 teaspoon vanilla extract

In a saucepan, whisk together sugar and cocoa powder.  Over medium-high heat, pour in milk and whisk until blended.  Add marshmallows and continue to cook and stir until the marshmallows are melted.  Remove from the heat and stir in the vanilla.  Serve hot.  Makes 4 servings.

Enjoy!  -Cardamommy

Sunday, December 19, 2010

Trio of Chocolate Cake


I welcome any opportunity to create something in my kitchen, but I especially love creating birthday cakes for my family.  Each family member likes something different, and it is fun to mix and match flavors and techniques to create something that they will like.  My little brother is home for Christmas, and just in time for his birthday!  Enter sister with the birthday cake (that would be me). 

The cake has a nice chocolate flavor and is incredibly moist.  This is my go-to chocolate cake recipe (you are lucky that I am sharing!).  The pastry cream is a nice departure from a heavy ganache or frosting based filling.  The frosting provides a nice contrast to all the chocolate going on.  Not that there is anything wrong with lots of chocolate going on, the white chocolate just gives it a new dimension.  And yummy, too!

Trio of Chocolate Cake

Dark Chocolate Cake:
2 1/4 cups all-purpose flour
1/2 cup special dark cocoa powder

1/2 cup black cocoa powder
2 1/4 teaspoons baking soda
1 1/4 teaspoons baking powder
1 teaspoon salt
2 1/2 ounces unsweetened chocolate, coarsely chopped
1 cup milk
1 1/4 cups hot water

2 eggs
1 cup mayonnaise
1 1/2 teaspoons vanilla extract
2 1/4 cups sugar


Chocolate Pastry Cream Filling:
1 cup + 2 Tablespoons milk

2 egg yolks
1/3 cups sugar
2 Tablespoons cornstarch
2 Tablespoons flour
1 Tablespoons vanilla extract
1 1/2 ounces semisweet chocolate, melted
1/2 ounce unsweetened chocolate, melted

White Hot Chocolate Frosting:
1/2 cup vegetable shortening
1/2 cup (1 stick) butter, softened
1 teaspoon vanilla extract
Pinch of salt
4 cups powdered sugar (approximately 1 lb.)
2 to 4 Tablespoons white hot chocolate (or milk if you don't have the hot chocolate)

For the cakes:  Preheat oven to 350F. Grease the bottom and sides of three 9-inch round cake pans. Line the bottom of each pan with parchment paper, and grease the paper. In a small bowl, sift together the flour, cocoa powders, baking soda, baking powder, and salt.  Set aside.  Place the chopped chocolate in a medium bowl.  Bring the milk to a simmer, then pour over the chocolate.  Let stand for one minute, then stir until smooth.  Stir the hot water into the chocolate mixture and let cool slightly.  In a large bowl, beat together the eggs, mayonnaise, and vanilla until well blended.  Gradually beat in the sugar.  Add the dry ingredients and the chocolate liquid mixture alternately in three additions, beating until smooth and fully incorporated.  Divide the batter equally among the three pans.

Bake the cakes for 25 minutes, or until a toothpick inserted into center comes out clean.  Let cakes cool in the pans on cooling racks for 10-15 minutes. Carefully turn out cakes and peel off the paper lining.  Set right side up on cooling racks and let cool completely.


For the Chocolate Pastry Cream:  Bring 1 cup of the milk to a boil.  Beat the egg yolks with the sugar and remaining 2 tablespoons of milk.  Whisk until smooth.  Add cornstarch and flour and stir until combined.  Gradually whisk the hot milk into the egg mixture, then return the mixture to the saucepan.  Cook over medium heat, stirring constantly until mixture boils and thickens.  Reduce the heat to low and stir for 2 minutes longer, then remove from the heat.  Stir in the vanilla and melted chocolates.  Pour the pastry cream into a shallow bowl, and cover with plastic wrap.  Let the plastic wrap touch the surface of the pastry cream to prevent a skin from forming.  Cool to room temperature, then refrigerate for 2 hours or overnight. 

For the White Hot Chocolate Frosting:  In a large bowl, combine shortening, butter,vanilla extract, and salt, and beat until well blended.  Add the powdered sugar one cup at a time, beating well after each addition.  When all the powdered sugar is incorporated, add 2 tablespoons (adding more as needed for desired consistency), and beat well on high until light and fluffy.

To assemble:  Place one cake layer upside-down on a cake plate.  Spread with half of the pastry cream, then top with a second cake layer.  Spread this cake layer with the rest of the pastry cream, then place the last cake layer on top.  Frost the top and sides of the cake with white hot chocolate frosting, and decorate as desired.  Makes a 9-inch triple layer cake, 16 servings.

Enjoy!  -Cardamommy

Saturday, December 18, 2010

Rolled Brownie Cookies


My hungry puppies asked me today if we could make Christmas tree cookies.  Well, that wasn't actually on my list of Christmas baking, but okay.  I made sugar cookie snowflakes a couple of weeks ago, and so wanted to try something different.  I am so glad that I did, because this is a great recipe.  They actually do taste kind of like brownies, and are nice and soft.  The dough is very smooth, not grainy, and tastes a bit like fudge.  Ahh, do we really have to bake them?  This is a small batch, but you can easily double the recipe (then you can eat half the dough and bake the other half).  Use your favorite frosting or royal icing to decorate these fun treats.

Rolled Brownie Cookies

1 1/2 cups all-purpose flour
1/4 teaspoon salt
1/4 teaspoon baking powder
1/2 cup (1 stick)  butter, softened
3/4 cups sugar
1 large egg
1/2 teaspoon vanilla extract
1/3 cup unsweetened cocoa powder

Preheat oven to 350F.  Whisk together flour, salt, and baking powder in a small bowl and set aside. Cream the butter and sugar until well combined, then add the egg, vanilla and cocoa powder, beating gently until incorporated.  Gradually add the flour mixture, and beat until smooth. Gather dough into a ball and flatten to a disk.  Wrap in plastic wrap and chill for at least one hour.

Roll out the cookie dough on a floured counter to 1/8 to 1/4 inch thick.  Cut into desired shapes, brushing any extra flour off the top of the dough.  Bake on a parchment-lined baking sheet for 6 to 9 minutes (the former for 1/8-inch thick cookies, the latter for 1/4-inch cookies) until the edges are firm and the centers are slightly soft and puffed.  Transfer to a wire rack to cool completely before decorating.

Enjoy!  -Cardamommy

Friday, December 17, 2010

Malted White Hot Chocolate


Since I have some serious hot chocolate lovers at my house, I couldn't pass up the opportunity to try this recipe (slightly adapted) out today.  My hungry puppies and I were outside shoveling the driveway.  Well, I was shoveling.  They were anti-shoveling.  Anyway, this was my self imposed punishment for having a piece of pie for lunch.  So why would I make a super rich pot of hot chocolate right afterwards?  Good question.  In my defense, I only had one taste (a mouthful size taste, not an "I just tasted half the batch" taste.  This hot chocolate is quite sweet, and very rich.  Perfect for a cold winter day.

Malted White Hot Chocolate
 
2 cups half-and-half
1 cup whole milk
1 cup skim milk
6 ounces whited chocolate chips
1 teaspoon vanilla extract
1/8 teaspoon kosher salt
1/2 cup malted milk powder

In a saucepan over medium heat, combine the milks, half-and-half, white chocolate, vanilla extract, and salt.  Whisk until the white chocolate is completely melted, and the mixture is very hot (not boiling).  Add the malted milk powder, and whisk until completely dissolved.  Makes 4 servings.

Enjoy!  -Cardamommy

Thursday, December 16, 2010

Pumpkin, Sweet Potato, and Coconut Pie


I don't know what to say.  "This is a yummy pie" doesn't even come close to hitting the mark on this one.  I initially found this recipe in a cookbook that my husband bought me, and have made a few minor changes to it.  I have made this pie every year for the past several years, and when I am not making it, I am thinking about making it.  It is incredible, and my absolute favorite pumpkin pie.  Ever.  Does it taste like pumpkin?  Sweet potato?  Coconut?  The different components of this pie bring an incredible depth of flavor.  Each ingredient adds a subtle note to create the full effect of this pie.  Yes, this pie is a little more difficult to make, and it takes some time.  Please try it, though, because we just made pumpkin pie better.

Pumpkin, Sweet Potato, and Coconut Pie

1 1/4 pounds sweet potatoes, peeled and cut into 1-inch chunks
1 small cinnamon stick, broken into pieces
3 cloves
1 teaspoon ground ginger
1 15 ounce can of pumpkin puree (I use homemade pumpkin puree)
1 egg, lightly beaten
1 egg yolk, lightly beaten
2 Tablespoons butter, melted
1/2 cup sugar
1/2 cup packed light brown sugar
2 Tablespoons all purpose flour
3/4 teaspoon salt
1/2 cup canned coconut milk, well stirred
1 9-inch single pie crust, chilled

In a medium saucepan, combine the sweet potatoes, cinnamon, cloves, and ginger with enough water to just cover.  Bring to a boil over high heat, then reduce heat and simmer about 10 minutes until potatoes are very tender.  Drain the potatoes, reserving the boiling liquid.  Discard the cinnamon and cloves.  Finely mash the warm potatoes.  Boil the reserved boiling liquid (if necessary) until it is reduced to 1/4 cup.  Let the mashed sweet potatoes and the boiling liquid cool to room temperature.

Adjust the oven rack to the lower half of the oven, and preheat to 350F.  In a large bowl, whisk together the pumpkin and the sweet potato puree.  Whisk in the egg, egg yolk, melted butter, and reserved boiling liquid.  Sprinkle the sugar, brown sugar, flour, and salt over the pumpkin mixture and stir well until fully incorporated.  Blend in the coconut milk.

Pour the filling into the chilled pie crust and smooth the top.  Bake for 1 3/4 to 2 hour, rotating the pie occasionally so it bakes evenly.  The center of the filling should be firm, and a thin bladed knife inserted in the center should come out clean.  If the crust browns too much before filling is done, cover with strips of foil.  Let pie cool completely on a wire cooling rack.  Serve with whipped cream.  Makes one 9-inch pie, 8 to 10 servings. 

Enjoy!  -Cardamommy

Wednesday, December 15, 2010

Sweet Potato Toffee Pie


Sweet Potato Pie is a pleasure that I have only come to know in the past several years, but now that I have found it, it will hold a place in my recipe file forever.  This is a pie that I found in a Paula Deen Holiday magazine, and first tried last Christmas.  However, due to the brand new torturous orthodontic appliances stuck to my teeth, I was not able to enjoy much of this pie (because I couldn't suck it through a straw).  This year I vow to eat and enjoy every single piece that I can hoard, bribe, or steal from anyone who lays a finger on this pie (braces not withstanding).  No, I don't think that is excessive.

The filling for this pie uses sweetened condensed milk in it instead of sugar.  You can find toffee bits in the sweet potato filling as well as in the crumble top.  The filling is smooth and rich with a nice sweet potato flavor, and the crumble gives this tender pie a nice crunch.  When baked, the crumble top tends to fuse together in the center, so be gentle when cutting to not squish the pie.  Use whichever pie crust is your favorite.  My pie crust recipe can be found at the end of this post.  Finish this pie off with a (generous) dollop of whipped cream, and you'll fight for that last piece.

Sweet Potato Toffee Pie

1 9 inch unbaked pie shell (recipe at end, or use your favorite)
3 cups cooked mashed sweet potatoes
2 1/2 cups toffee bits, divided
1 (14 ounce) can sweetened condensed milk
1/2 cup unsalted butter, melted and divided
2 large eggs
1 teaspoon vanilla extract
1/2 teaspoon ground cinnamon
1/2 teaspoon ground nutmeg
1/4 teaspoon salt
1 cup firmly packed brown sugar
1 cup all purpose flour, sifted
Garnish:  whipped cream, toffee bits

Preheat oven to 350F.  In a large bowl, combine sweet potatoes, 1 cup toffee bits, condensed milk, 1/4 cup butter, eggs, vanilla, cinnamon, nutmeg, and salt.  Beat at medium speed with an electric mixer until well blended.  Pour into prepared crust.  Bake loosely covered with foil, for 40 minutes. 

While pie is baking, in a  medium bowl, combine remaining 1 1/2 cups toffee bits, remaining 1/4 cup butter, brown sugar, and flour.  Stir until combined.  Gently spread on top of pie, and bake, uncovered, for an additional 20 minutes.  Cool for 1 hour.  Garnish with whipped cream and toffee bits, if desired.  Makes 1 9-inch pie.

Single Crust Pie Dough

1 1/4 cups all purpose flour, plus extra for rolling out the dough
1 Tablespoon sugar
1/2 teaspoon salt
3 Tablespoons vegetable shortening
4 Tablespoons (1/2 stick) butter, cut into 1/4 inch pieces
4 to 6 Tablespoons ice water

Process the flour, sugar, and salt in a food processor until combined.  Add the shortening and process until the mixture has the texture of coarse sand.  Scatter the butter pieces over the top and pulse until the mixture resembles coarse crumbs.  Transfer to a bowl.  To make without a food processor, mix the dry ingredients in a bowl, and cut in the shortening and butter using a pastry blender, fork, or two knives. 

Sprinkle 4 Tablespoons of the water over the flour mixture, then stir and press the dough together using a firm spatula, until the dough sticks together.  If the dough does not come together, stir in more water,  1 tablespoon at a time until it does.  Form the dough into a disk, wrap with plastic wrap, and refrigerate at least 1 hour.

On a floured surface, roll the dough into a 12-inch circle, then fit it into a pie plate.  Trim, fold, and crimp the edges as desired.  Freeze the unbaked pie crust for about 30 minutes before filling or baking.

Enjoy!  -Cardamommy

Monday, December 13, 2010

Mint Marshmallows


I have sort of a thing for marshmallows.  I love to try out the seasonal varieties like gingerbread, chocolate, and french vanilla in the store when I find them.  Nothing, however, beats a homemade marshmallow.  After making (and eating) a batch of homemade marshmallows, I have a hard time going back to store bought.  This is another perfect recipe for Christmas time.  I use a basic marshmallow recipe from Alton Brown, and put my own spin on it.  Don't be intimidated by the thought of homemade marshmallows.  They are unbelievably easy, and well worth it.

The mint is interesting and a bit unexpected coming out of a marshmallow, and the red swirl gives this sweet confection a festive flair.  In a giant mug of hot chocolate, these marshmallows just melt away into nothing, creating a rich minty flavor.  Can it get better?  I'll let you know. 

Mint Marshmallows

3 packages unflavored gelatin
1 cup cold water, divided
12 ounces (about 1 1/2 cups) granulated sugar
1 cup light corn syrup
1/4 teaspoon kosher salt
3/4 teaspoon mint extract
red food coloring
1/4 cup powdered sugar
1/4 cup cornstarch

In the bowl of a stand mixer (using the whisk attachment), place the gelatin along with 1/2 cup of the water.  In a small saucepan, combine the remaining 1/2 cup of water, granulated sugar, corn syrup, and salt.  Bring to a boil over medium-high heat and let it continue to cook until it reaches 240F (use a candy thermometer, or monitor closely with an instant read thermometer).  Once the mixture reaches 240F, remove from heat immediately.

Turn the mixer on low speed, and slowly pour the sugar syrup (while mixer is running) down the side of the mixer bowl into the gelatin.  Once all of the syrup is added, increase the mixer speed to high.  Continue to whip on high for 12 to 15 minutes, or until the mixture becomes very thick and is just warm.  During the last minute of whipping, add the mint extract.

While the marshmallows are whipping, lightly spray a 9x13 inch pan with cooking spray.  In a small bowl, combine powdered sugar and cornstarch.  Dust the bottom and sides of the pan with the cornstarch mixture to cover completely, then return any extra mixture to the bowl.  When the marshmallow is through whipping, pour into the prepared pan, using a lightly oiled spatula to spread it evenly.  Place drops of red food coloring all over the top of the marshmallow (working quickly before the mixture sets up too much to swirl), then take a toothpick and run it through the marshmallow and food coloring to create a swirl effect.  Dust the top of the marshmallow with enough of the remaining cornstarch mixture to lightly cover, saving the rest for later.  Allow the marshmallows to sit, uncovered, for 4 hours or overnight.

After the marshmallows have set up, turn them out onto a large cutting board, and using a pizza cutter, cut into 1-inch squares.  Once cut, roll the marshmallows in the remaining cornstarch mixture.  Store in an airtight container for up to 3 weeks (I store mine in an airtight container in the freezer).

Note:  You can use a hand mixer with a whisk attachment to make these marshmallows, but be prepared to hold the mixer for a long time, and it may stress your mixer quite a bit.

Enjoy!  -Cardamommy

Chocolate Covered Cherry Cookies


These are such pretty cookies, and perfect for Christmas.  If you can believe this, coming out of the oven, they actually smelled like the chocolate glaze on a fresh donut...?  Wow.  So incredibly good.  They are kind of like a chocolate thumbprint cookie with a maraschino cherry inside the thumbprint and covered with a chocolate-cherry ganache.  Making the thumbprint was a perfect job for my two hungry puppies, and their little fingers were the perfect size.  The best part?  They finally got the okay from me to stick their fingers in the cookie dough.

Chocolate Covered Cherry Cookies

1/2 cup melted butter (1 stick)
1 cup white sugar
1 egg
1/4 teaspoon baking powder
1/4 teaspoon baking soda
1/4 teaspoon salt
1 teaspoon vanilla
1/2 cup cocoa
1 1/2 cups all-purpose flour
1 10-oz. jar maraschino cherries (drain cherries (about 30) and reserve juice)
1/2 cup chocolate chips
2 Tablespoons sweetened condensed milk

Preheat the oven to 350F.  Line a baking sheet with parchment paper.

Melt the butter and mix in the sugar.  When the mixture has cooled off a bit, add the egg and beat well.  Add the baking powder, baking soda, salt, vanilla and cocoa, then beat carefully (or you  might get a cocoa cloud) until well combined.  Add the flour and beat until incorporated.  The dough will be stiff.

Using a small cookie scoop, scoop the dough onto a parchment lined baking sheet.  Press down in the center of each ball to make an indentation.  Place one cherry in each indentation.  You probably won't use all of the cherries.

Melt the chocolate chips and sweetened condensed milk together, being careful not to scorch the chocolate. Start adding in some of the reserved cherry juice, 1 teaspoon at a time, until the sauce is thick, but will still drop off of a spoon.  Spoon a small bit of the sauce over the cherry in each cookie, just enough to cover the cherry and not run down the sides.

Bake for 10 minutes, then remove to a wire rack to cool completely.  Makes about 30 cookies.


Enjoy!  -Cardamommy

Sunday, December 12, 2010

Dark Chocolate Mint Chip Cookies


I enjoy mint.  I also enjoy chocolate.  Mint goes well with Christmas.  Chocolate goes well with any time.  These cookies combine the richness of dark chocolate with the coolness of mint.  The texture is soft and fudgy, but please don't overbake as a cakey texture will result.  This recipe is supposed to make a dozen perfect sized cookies (extremely large), but for the sake of Christmas giving, I used a small cookie scoop to make smaller cookies.  I will include both baking times in the instructions.

Dark Chocolate Mint Chip Cookies

1 cup (2 sticks, 8 ounces) butter, room temperature
1 1/4 cup + 2 Tablespoons (10 ounces) granulated sugar
2 eggs
1/2 cup (2 ounces) dark cocoa powder
2 1/4 cups (10 ounces) all purpose flour
Large pinch of Kosher salt
1/4 teaspoon baking powder
1 1/2 cups Nestle Toll House Dark Chocolate & Mint Morsels

Preheat oven to 350F.  Line a baking sheet with parchment paper.  In a large bowl, cream together butter and sugar until fluffy.  Add eggs, one at a time, and beat until well-incorporated.  Carefully, with mixer on low speed, beat in cocoa powder.  In a separate bowl, mix flour, salt, and baking powder, then add to creamed mixture and beat slowly until just combined.  Gently stir in the baking chips. 

For one dozen perfect sized (large) cookies, divide the dough into 12 equal portions and place on parchment lined baking sheet.  Bake for 12 minutes, being careful not to overbake.  For quite a few more smaller cookies, use a small cookie scoop to drop the dough on the baking sheets.  Bake for 6 minutes, being careful not to overbake.  Let cool on a cooling rack.

Enjoy!  -Cardamommy

Saturday, December 11, 2010

Black Forest Oatmeal Cookies


These cookies really remind me of oatmeal raisin chocolate chip cookies, but with a twist.  In this oatmeal cookie recipe, white and semi sweet chips, dried cherries, and sliced almonds come together to create bites of flavor similar to a black forest cake.  Don't think that these cookies will taste like black forest cake.  They taste like oatmeal cookies with black forest components, and are quite good.

Black Forest Oatmeal Cookies

1/2 cup (96 g) butter flavored shortening
1/2 cup (96 g) shortening
1 cup packed brown sugar
1 cup granulated sugar
2 eggs
3 Tablespoons half and half (or milk, whatever you have)
2 teaspoons vanilla extract
1/2 teaspoon almond extract
1 2/3 cups all purpose flour
1 teaspoon baking soda
1 teaspoon salt
1/2 teaspoon baking powder
3 cups quick oats
6 ounces (about 1 cup) white chocolate chips
6 ounces (about 1 cup) semi sweet chocolate chips
3/4 cups coarsely chopped dried cherries
1/2 cup sliced almonds

Preheat oven to 375F.  Line a baking sheet with parchment paper.  In a large mixing bowl, combine shortenings, brown sugar, sugar, eggs, half and half, vanilla, and almond extract.  Beat at medium speed until well blended and creamy.  In a separate bowl, combine flour, baking soda, salt, and baking powder.  Add to creamed mixture, beating on low speed until flour is incorporated.  Stir in oats, white chocolate, semi sweet chocolate, cherries, and nuts.

Drop dough by rounded tablespoonfulls about 2 inches apart on baking sheets.  Bake for 9 minutes, or until set.  Cool for 2 to 3 minutes on baking sheet, then transfer to cooling racks to cool completely.  Makes about 3 dozen cookies

Enjoy!  -Cardamommy

Friday, December 10, 2010

Birthday Gingerbread Christmas Tree

Today is my best friend's birthday (Happy birthday, Best Friend!). Instead of requesting her usual German Chocolate Cake, though, she requested a gingerbread house. I was really excited about this because gingerbread houses are a tradition in my family, but I have never been the one to make the gingerbread or the pieces to the house. I started looking for templates and found one just in time for my friend to change her mind about what she wanted. She sent me this link and told me she wanted a gingerbread Christmas tree. No problem, right?

I was super excited to try this out! I used Cardamommy's gingerbread recipe (which came together absolutely beautifully) and while it was chilling, I drew and cut out all the patterns (yep, I made every single pattern I used for this) and planned more or less what I hoped it would look like. When all the pieces were baked, I started to assemble them. As it came together I got more and more excited because it was looking so good. Then it came to the icing part. I really didn't want to mess it up with this stage of the project. Being a college student, I don't have a lot of kitchen tools. Such as an icing kit. So I improvised by snipping jagged edges off the tip of a bag in order to get a textured pipe. Fortunately, my little contraptions all worked out for me and soon I was icing like crazy. For the sake of time and lack of equipment, I did not try Cardamommy's icing recipe. Rather, I simply snagged some vanilla icing from my dear friend Betty Crocker. I soon found it to be extremely soft, so i added some powdered sugar to make it a little sturdier. This was really helpful for the icicles because the original frosting was so soft it all sort of dropped off, giving me a melty effect rather than a frozen one. The resmaining frosting was  mixed with some food dye to provide clothing for our poor (previously) naked gingerbread couple or swooped around on the plate in order to create a drift-like effect. When I was finished I sprinkled my little scene ever so slightly with powdered sugar for some fresh snow.

I'm pretty proud and impressed with myself, actually. For having no cookie cutters, patterns, icing kits, mixers, etc etc and for it being the first time around, I'd say I didn't do too badly. I have to warn you, though. If you decide to do it this way, be prepared to spend 8 hours doing everything. This is coming from my very much fatigued brain (which is wondering why I'm still up at 4:25AM).


Hopefully this all makes sense. The real point, though, is to wish my absolutely wonderful and very best friend a very very happy birthday!

Love,
Coriaunty

PS--If want my pattern for the tree with specific instructions, email cardamommyandcoriaunty@gmail.com

Thursday, December 9, 2010

Honey Cornbread


I love honey.  I love to eat it.  Straight out of the jar.  You think that's wierd?  Maybe you've never tried it.  So, what goes great with honey?  Cornbread, of course.  I like my cornbread a little sweet (have you noticed a trend here?), so the honey in the batter makes it just perfect.  I purchase raw local honey, which is incredibly delicious, and in my opinion kicks anything store bought out of the running (I don't eat store bought honey straight out of the jar).  Whichever you like, you will like it in this cornbread.

 Honey Cornbread

 1 cup Flour
1 cup Corn Meal
1/4 cup sugar
1 Tbsp Baking Powder
1/2 tsp Salt
1/4 cup Honey
1/2 stick Melted Butter
2 Eggs, lightly beaten
1 cup Buttermilk

Preheat oven to 375 degrees. Lightly grease a small baking dish or cake pan.
In a small bowl, combine flour, corn meal, sugar, baking powder,and salt.  In a separate larger bowl, whisk together the melted butter, and honey.  Add the beaten eggs and buttermilk, and whisk until well combined. Pour the wet ingredients into the dry ingredients and mix just until they are combined. Do not over mix.  Pour into the prepared baking dish. Bake for 30 minutes, until a toothpick inserted in the middle comes out clean.

Enjoy!  -Cardamommy

Baked Bean Chili


This is a fast and easy chili with a shortcut.  Baked Beans.  Yup, baked beans in chili.  I like a little sweet to go along with the classic chili flavors, and this recipe does just that.  Add whichever spices you prefer in the amounts of your liking.  I use chili powder and cumin, adding a small amount first then adding more if necessary.  Remember, you can add spices, but you can't take them out.  This is a flexible recipe that works every time, even though I don't measure my ingredients.  Fewer dirty dishes that way, and my husband can appreciate that.


Baked Bean Chili

1 small onion, chopped
1 clove garlic, diced
1 lb. ground beef
1 can (14 oz.) diced tomatoes with green chiles
1 can (28 oz.) baked beans
1 beef bullion cube dissolved in 1 cup of water
Chili powder to taste
Cumin to taste

 
In a saucepan, cook onion, garlic, and ground beef until beef is cooked through completely.  Add diced tomatoes, baked beans, beef broth, chili powder, and cumin.  Bring to a boil, then reduce heat to low and simmer 15 to 20 minutes.
Makes 4 servings.

Enjoy!  -Cardamommy
Related Posts Plugin for WordPress, Blogger...