Showing posts with label Sour Cream. Show all posts
Friday, April 8, 2016
Blueberry White Chocolate Chip Brownies with White Chocolate Frosting
I've been kind of thinking lately that I need to make brownies. So I found this recipe and decided to give it a try. Of course, I couldn't just make the brownies plain, so I decided to top them with a white chocolate frosting. Which sounded amazing to me! But then I decided that it might be slightly better if I added blueberries to the brownies. And some white chocolate chips as well. I just can't help myself sometimes. Note: You can use fresh or frozen blueberries. If you use frozen berries, your baking time will be slightly longer.
Blueberry White Chocolate Chip Brownies with White Chocolate Frosting
Brownies:
10 Tablespoons butter
8 ounces (about 1 1/4 cups) semi sweet chocolate chips
1 1/2 cups granulated sugar
2 eggs
1 teaspoon vanilla extract
1 teaspoon coffee extract
1 cup +2 Tablespoons all purpose flour
1/2 teaspoon salt
1 cup blueberries (fresh or frozen)
1/2 cup white chocolate chips
White Chocolate Frosting:
3 ounces white chocolate chips
2 Tablespoons butter
2 ounces sour cream
1/4 teaspoon vanilla extract
1 1/4 cups powdered sugar
Preheat the oven to 350F. Line a 9x9 inch square baking pan with parchment paper, letting the long ends of the parchment hang over the sides as handles. Grease the pan and parchment.
Place the butter and chocolate chips in a microwaveable bowl, and microwave in 30 second intervals, stirring after each, until chocolate is melted and smooth.
Place the sugar, eggs, vanilla, and coffee extract into a large bowl and whisk until completely smooth and well blended. Add the melted chocolate mixture and whisk until incorporated. Stir in the flour and salt, until no streaks of flour remain. Fold in the blueberries and chocolate chips.
Pour the batter into the prepared pan and smooth the top. Bake in the preheated oven for 30 to 45 minutes (if you used frozen blueberries, it will take longer to bake), or until a toothpick inserted in the center comes out with moist crumbs. Remove brownies from the oven and let cool completely. While the brownies are cooling, make the frosting.
For the frosting, place the white chocolate chips and butter in a microwaveable bowl, and microwave in 30 second intervals, stirring after each, until melted and smooth. Using a hand mixer (or mix by hand), beat in the sour cream and vanilla until blended. Beat in the powdered sugar on low speed until combined, then increase the speed and beat until the frosting is smooth. Spread the frosting over the cooled brownies. Chill the brownies for an hour or two to let the frosting set up. Makes 16 brownies.
Enjoy! -Cardamommy
Labels:
Bars
,
Blueberry
,
Brownies
,
Chocolate
,
Dessert
,
Frosting
,
Sour Cream
,
White Chocolate
Monday, February 15, 2016
Chocoloate Orange Layer Cake
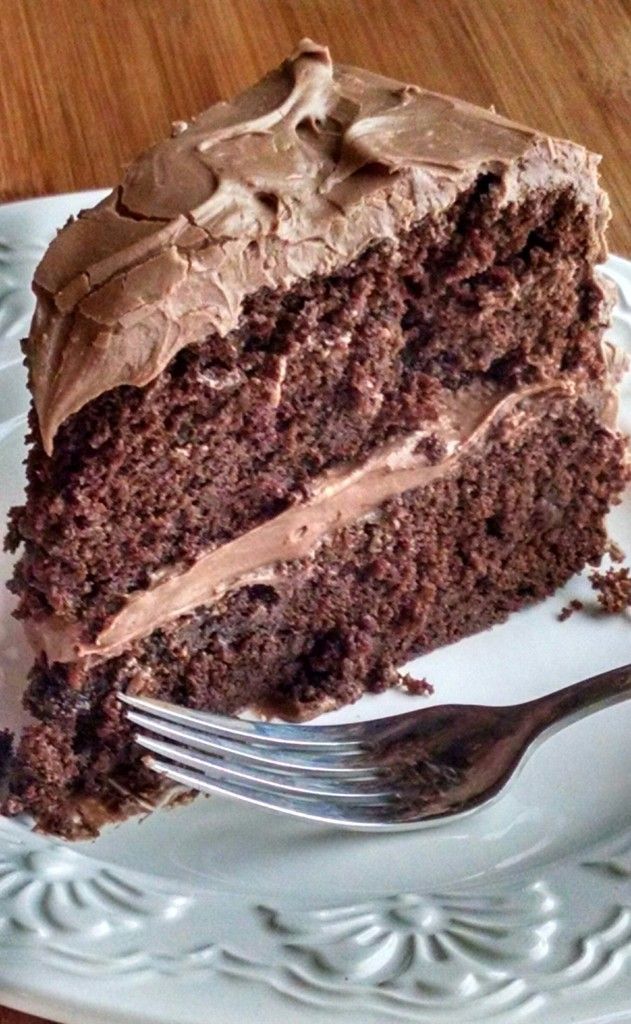
Hello, most fabulous cake ever. My birthday was right after Thanksgiving, and I had planned on making this for my birthday cake. Then Thanksgiving happened, and life happened, and I couldn't even deal with cooking anything else. So this is my belated birthday cake, and it was totally worth the wait!! This rich fudgy chocolate cake is full of orange zest and chopped orange chocolate. The frosting is thick and rich and smooth and also quite fudgy. Altogether, this cake is pretty close to perfection, in my book! Note: I used Terry's Chocolate Oranges in this cake. You can substitute regular chocolate chips and orange extract and more orange zest if you can't find the chocolate oranges. Original frosting recipe found here.
Chocolate Orange Layer Cake
Cake:
3/4 cup cocoa powder
1 cup semi sweet chocolate chips
Zest of 2 oranges
3/4 cup boiling water
1 3/4 cup all purpose flour
1 1/2 teaspoons baking soda
1 teaspoon kosher salt
1 cup (2 sticks, 16 Tablespoons) butter, room temperature
2 cups brown sugar
4 eggs
2 teaspoons coffee extract
1 teaspoon vanilla extract
1 1/4 cups sour cream
1 1/4 cups chopped Terry's Chocolate Orange (or substitute milk chocolate chips)
Frosting:
12 ounces (2 chocolate oranges) Terry's Chocolate Orange
1/2 cup butter
8 ounces sour cream
1 Tablespoon light corn syrup
1 teaspoon vanilla extract
4 1/2 cups powdered sugar
Preheat the oven to 350F. Lightly grease 2 9-inch round cake pans with cooking spray, then line the bottoms with parchment paper and lightly grease the parchment. Set aside.
For the cake, place the cocoa powder, semi sweet chocolate chips, and orange zest in a medium bowl. Pour the boiling water over the chocolate and stir until melted and smooth. Set aside. In a separate bowl whisk together the flour, baking soda, and salt. Set aside. In a large bowl, cream together the butter and brown sugar until light and fluffy. Beat in the eggs, one at a time, followed by the coffee extract and vanilla, scraping down the sides of the bowl if necessary. Beat the mixture until well blended. On low speed, beat in 1/3 of the flour mixture, followed by 1/2 of the sour cream. Repeat with another 1/3 of the flour and the remaining sour cream, finishing with the last of the flour. Beat just until blended. Add the chocolate mixture and beat on low until incorporated. Stir in the chocolate chips.
Divide the batter evenly between the two prepared pans and smooth the tops. Place the cakes in the oven and bake for about 35 to 40 minutes, or until a toothpick inserted in the center comes out with a few moist crumbs. Remove the cakes from the oven and place on a cooling rack to cool for about 10 minutes. Run a knife around the edge of the cakes to loosen from the pans, then carefully turn the cakes out of the pans and let cool completely on a cooling rack.
For the frosting, place the chocolate oranges and butter in a microwaveable bowl, and microwave in 30 second intervals, stirring after each, until melted and smooth. Using a hand mixer, beat in the sour cream, corn syrup, and vanilla until blended. Beat in the powdered sugar on low speed until combined, then increase the speed and beat until the frosting is smooth.
To assemble the cake, place a cake layer on a serving plate and spread with frosting. Place the second cake layer on top and frost the top and sides of the cake. Makes 16 to 20 servings.
Enjoy! -Cardamommy
Labels:
Cake
,
Candy
,
Chocolate
,
Chocolate Chips
,
Cocoa
,
Dessert
,
Frosting
,
Orange
,
Sour Cream
Friday, December 18, 2015
Eggnog Swig Sugar Cookies
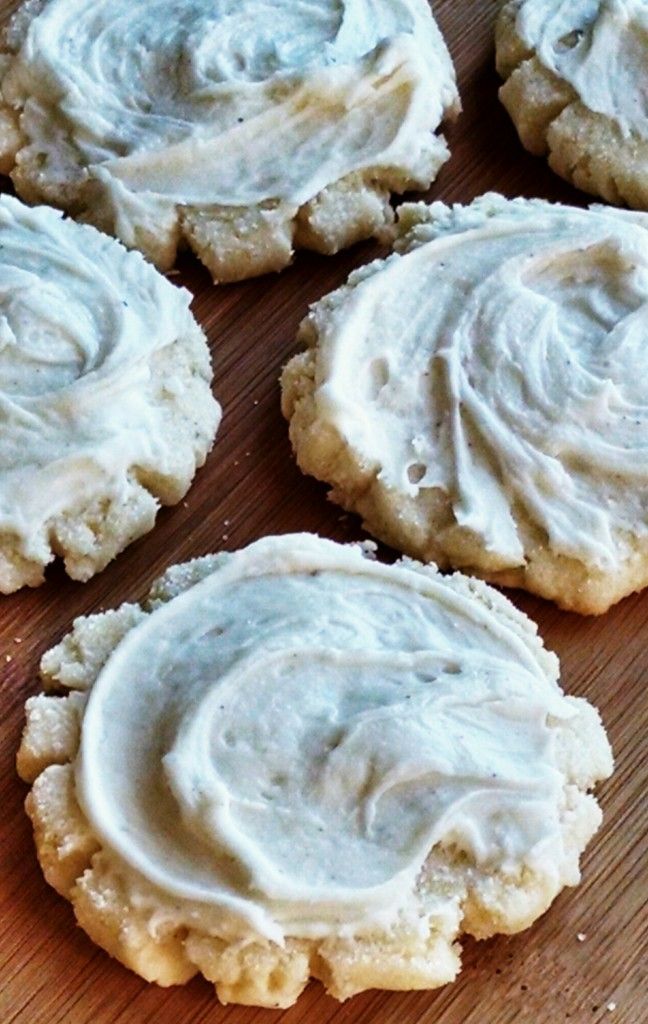
A while ago, I made these Swig Sugar Cookies with Chocolate Coconut Sour Cream Frosting. For the cookie recipe, I linked to this Swig Sugar Cookies recipe. I've made these cookies several times because my family loves loves loves them. Since it is Christmas time I decided to make them again, but this time eggnog flavored! And since I made about 70 of them, I am donating most of them to a cookie drive for the new Airmen at the Air Force Base here. I am so excited about these cookies because the eggnog flavor is totally spot on. I let my Hungry Puppies taste test the dough and they said "Oh my goodness, Mom, it's eggnog!!!" These soft eggnog sugar cookies are topped with a sweet sour cream eggnog frosting.
Eggnog Swig Sugar Cookies
Eggnog Cookies:
1 cup butter, room temperature
3/4 cup canola oil
1 1/4 cup granulated sugar (plus extra for pressing cookies)
3/4 cup powdered sugar
2 Tablespoons eggnog
2 eggs
1 teaspoon rum extract
5 1/2 cups all purpose flour
1 teaspoon nutmeg
1 teaspoon salt
1/2 teaspoon baking soda
1/2 teaspoon cream of tartar
Sour Cream Eggnog Frosting:
4 Tablespoons (1/2 stick) butter, room temperature
1/2 cup sour cream
6 to 7 cups powdered sugar
1/2 teaspoon nutmeg
1/2 teaspoon salt
1 teaspoon rum extract
3 to 4 Tablespoons eggnog
Preheat the oven to 350F. Line a baking sheet with parchment paper.
Cream together the butter, oil, granulated sugar, and powdered sugar. Beat in the eggnog, eggs, and rum extract. Add the flour, nutmeg, salt, baking soda, and cream of tartar, and beat until blended.
Scoop the dough into tablespoon size balls, and place on the prepared baking sheet. Using a glass dipped in sugar, flatten the dough balls until they are flat, and the edges are cracked.
Bake the cookies in the preheated oven for 8 to 9 minutes. Remove cookies from the oven and transfer to a cooling rack to cool completely before frosting.
For the frosting, cream together the butter and sour cream. Add the sugar and beat until well blended and very thick. Beat in the nutmeg, salt, rum extract, and 3 tablespoons of eggnog until smooth. Add the remaining eggnog if needed to reach your desired consistency. Spread the frosting on top of the cooled cookies. Makes 70 cookies.
Enjoy! -Cardamommy
Labels:
Butter
,
Cookies
,
Dessert
,
Eggnog
,
Frosting
,
Sour Cream
,
Sugar Cookies
Monday, October 26, 2015
White Cheddar Sour Cream Apple Raisin Pie
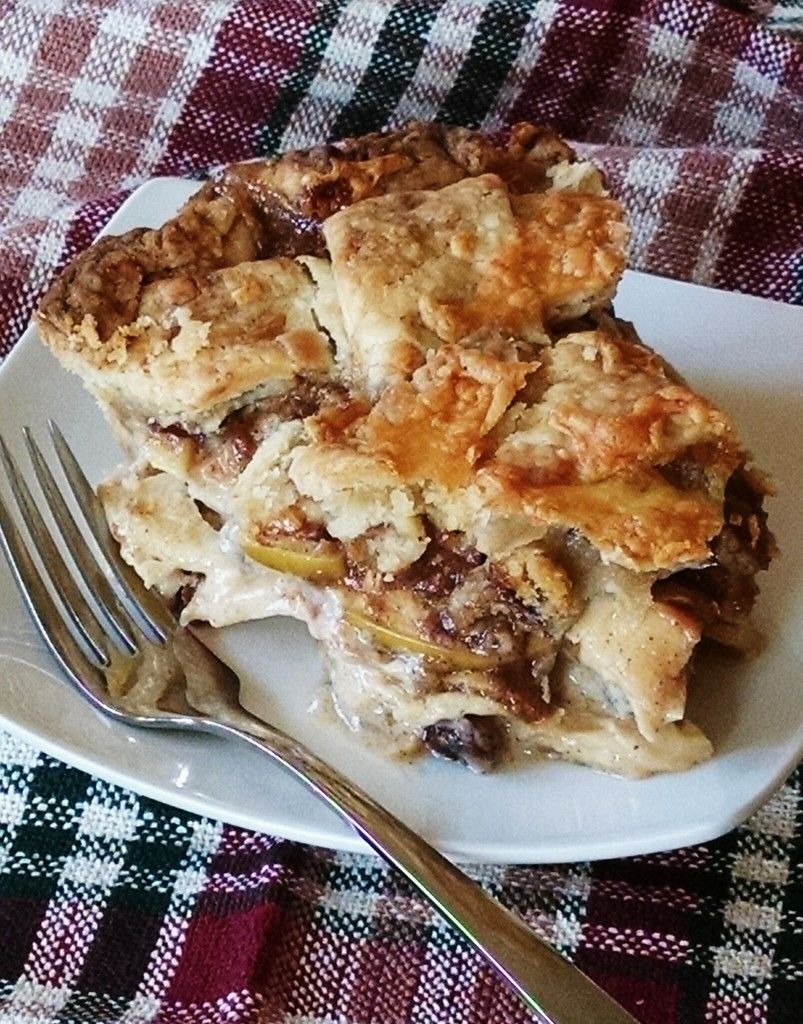
I've been planning to make an apple pie for a little while now, but I wanted it to be special. I wanted to do something a little different, not just a plain old ordinary apple pie. Don't get me wrong, I love plain apple pie!!! I just also really love to try new things. For some weird reason, while I've been thinking about this pie, I've also thinking about this apple rice pudding. I actually haven't made it in years, but I love it. The flavor is wonderful and the raisins and cheese in it are brilliant! I knew I wanted to do a cheddar crust with this pie, so I decided to base the rest of it on that rice pudding. The sharp white cheddar crust is perfect with the sour cream apple raisin filling and the brown sugar crumble on top. More white cheddar is mixed into the filling, and even more white cheddar is sprinkled on top of the crust. A delightful blend for a delicious pie!
White Cheddar Sour Cream Apple Raisin Pie
Crust:
2 1/2 cups all purpose flour
2 Tablespoons granulated sugar
1 teaspoon kosher salt (or 3/4 teaspoon table salt)
14 Tablespoons cold butter
6 Tablespoons shortening
1 cup (4 ounces) sharp white cheddar cheese, grated
6 Tablespoons cold water
1 ounce (about 1/4 cup) sharp white cheddar cheese, grated (for topping the pie)
Apple Filling:
1/2 cup granulated sugar
1/4 cup packed brown sugar
2 Tablespoons all purpose flour
1/2 teaspoon cinnamon
1/4 teaspoon nutmeg
1/4 teaspoon salt
1 cup sour cream
1 egg
1 teaspoon vanilla extract
3 pounds apples, peeled and sliced
1 cup raisins
3 ounces (about 3/4 cup) sharp white cheddar cheese, grated
Brown Sugar Crumble:
1/2 cup packed brown sugar
2 Tablespoons all purpose flour
1 teaspoon cinnamon
2 Tablespoons butter, melted
Preheat the oven to 425F.
For the pie crust, place the flour, sugar, and salt in a food processor (if you don't have a food processor, just use a large bowl and cut in the butter with a pastry blender), and pulse several times to blend. Place the cold butter and the shortening over the top of the flour mixture in the food processor, and pulse 20 to 25 times, or until the mixture is crumbly.
Pour the pie crust mixture into a large bowl and stir in the grated cheese. Sprinkle the water over the top. Toss and press the mixture together with a large spoon until it forms a ball. Divide the dough in half and form into disks. On a floured surface, roll out one half of the dough, and fit it into your pie plate.
For the apple filling, in a large bowl, whisk together the sugar, brown sugar, flour, cinnamon, nutmeg, and salt. Stir in the sour cream, egg, and vanilla extract until smooth. Fold in the apples, raisins, and grated cheese.
For the brown sugar crumble, in a small bowl, stir together the brown sugar, flour, cinnamon, and melted butter.
Pour the apple mixture into the prepared pastry, then sprinkle the brown sugar crumble over the apple mixture. Roll out the remaining crust and cut it into strips. Make a lattice crust over the top of the apple filing, then seal and crimp the edges.
Bake for 15 minutes, then reduce oven temperature to 375 and bake for an additional 45 to 60 minutes, or until the filling is bubbling. If the crust gets too brown, loosely cover with foil. During the last 10 to 15 minutes of baking, sprinkle the remaining 1/4 cup of cheese over the top of the pie. Remove the pie from the oven and let cool completely on a cooling rack. Makes 8 servings.
Enjoy! -Cardamommy
Friday, August 14, 2015
Swig Sugar Cookies with Chocolate Coconut Sour Cream Frosting
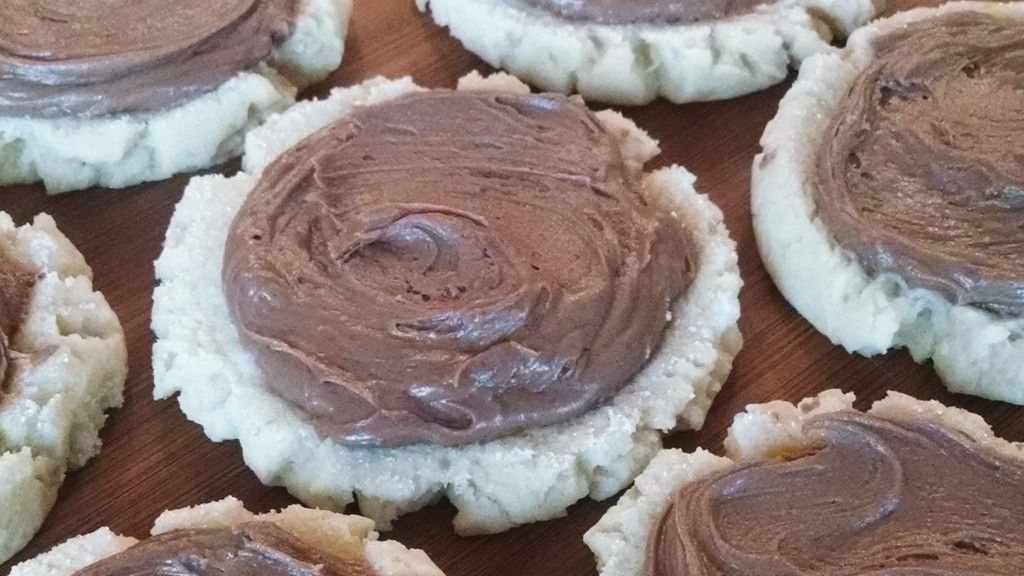
I've been hearing about these amazing cookies for a really long time now, and have run across the recipe a handful of times, but have always just kind of shrugged it off and moved on. I finally decided to make them, and they were absolutely a hit with my family. This is actually the second time making them in a week! The first time, I used Vintage Revivals' recipe and it turned out perfectly. This time, I used her cookie recipe, but changed the frosting to chocolate coconut instead! Totally delicious. I linked up to the original cookie recipe, and just posted my own frosting here.
Swig Sugar Cookies with Chocolate Coconut Sour Cream Frosting
Swig Sugar Cookies:
Vintage Revivals Swig Sugar Cookies
Chocolate Coconut Sour Cream Frosting:
5 Tablespoons butter, room temperature
1/2 cup sour cream
1 teaspoon coconut extract
1/4 teaspoon salt
5 cups powdered sugar
1 cup semi sweet chocolate chips, melted and cooled
2 Tablespoons milk (if necessary)
For the frosting, beat together the butter, sour cream, coconut extract, and salt until smooth. Beat in the powdered sugar, one cup at a time, until incorporated. Add the melted chocolate and beat until combined. Beat in the milk, if necessary, to reach the desired consistency.
Spread the frosting over the cooled cookies. Makes about 24 to 30 large cookies.
Enjoy! -Cardamommy
Labels:
Chocolate
,
Chocolate Chips
,
Coconut
,
Cookies
,
Dessert
,
Frosting
,
Sour Cream
,
Sugar Cookies
Friday, July 31, 2015
Norwegian Sour Cream Porridge
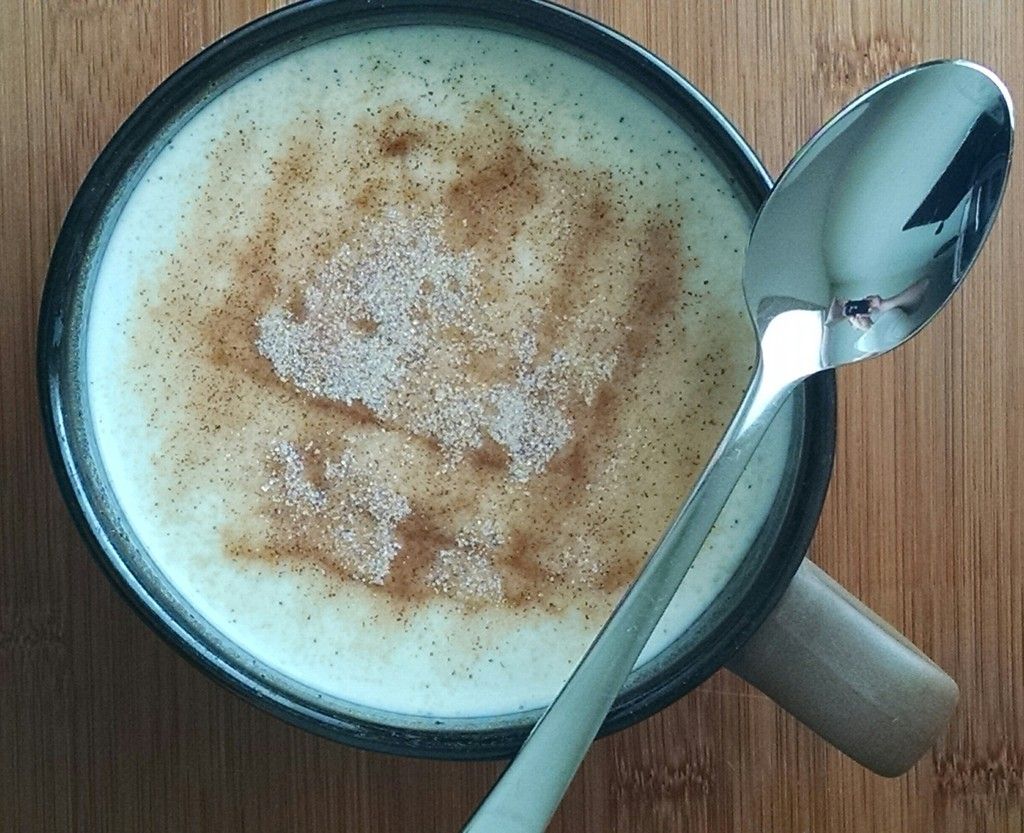
Last year I made Rommegrot during Hostfest here. My husband totally loves it, and this classic Scandinavian dish isn't too hard to make. I while ago I wrote about an old unsalvagable Scandinavian cookbook that belonged to my grandmother. This Norwegian Sour Cream Porridge (a different version of Rommegrot) was in that cookbook, and I knew that I had to give it a try. This recipe uses sour cream in it which gives it a bit of a tang, and cream of wheat cereal to help thicken it up. It is more of a soupy texture than a pudding texture as well. Everyone enjoyed this version of Norwegian Sour Cream Porridge, but the original Rommegrot is still our favorite!
Norwegian Sour Cream Porridge
1 cup sour cream
1 Tablespoon quick cooking cream of wheat
2 cups milk
1 teaspoon granulated sugar
3/4 teaspoon salt
3 Tablespoons melted butter
1/2 cup granulated sugar
1 teaspoon cinnamon
In a saucepan, simmer sour cream 3 minutes, stirring. Mix the wheat cereal with a little of the milk to make a smooth paste; beat into sour cream. Gradually stir in milk, sugar, and salt, cooking and stirring until soup is smooth and thickened. Ladle soup into warm bowls. Pour melted butter over soup and sprinkle with sugar mixed with cinnamon. Makes 4 servings.
Enjoy! -Cardamommy
Monday, April 6, 2015
German Chocolate Cake
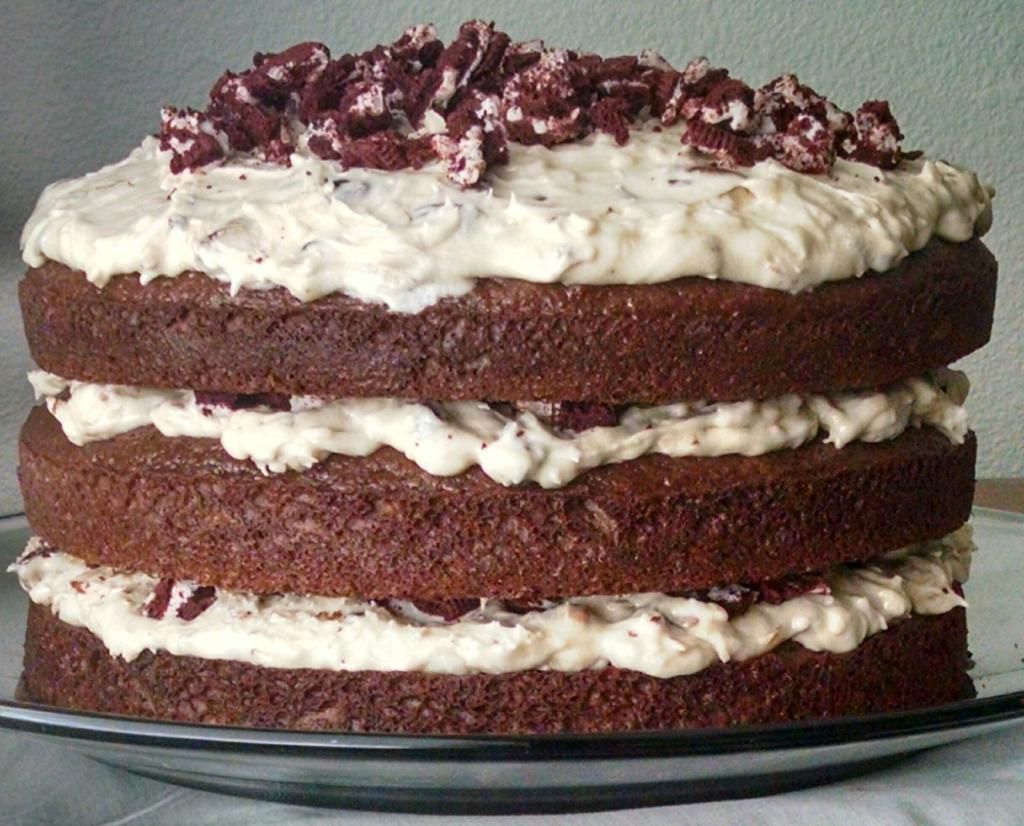
A couple of months ago, my oldest Hungry Puppy asked me to make a German Chocolate cake, which totally surprised me because she isn't really a big chocolate lover. Okay, though, sure. Twist my arm. Of course I'll make her a German Chocolate Cake. I didn't feel like doing a traditional German Chocolate cake, though. I needed something different. So I found this recipe and asked her if she was okay with it, then decided to run with it. I doctored up a cake mix, then made my own frosting instead of using store bought. We loved it!
German Chocolate Cake
Cake:
1 chocolate cake mix
1 cup all purpose flour
1 cup granulated sugar
3/4 teaspoon salt
3 eggs
1 cup water
1/4 cup oil
1 cup sour cream
2 teaspoons vanilla extract
Frosting:
1/2 cup
solid vegetable shortening
1/2 cup
(1 stick) butter or margarine softened
1 teaspoon vanilla extract
4 cups
sifted confectioners' sugar (approximately 1 lb.)
2
tablespoons milk
1/3 cup thick caramel sauce
1 cup shredded coconut, toasted
1 cup chopped pecans, toasted
12 Oreo cookies, chopped
Preheat the oven to 350F. Grease 3 9-inch round cake pans and line the bottoms with parchment paper, then lightly grease the parchment.
In a large bowl, whisk together the cake mix, flour, sugar, and salt. Add the eggs, water, oil, sour cream, and vanilla, and stir until well blended. Divide the batter evenly between the 3 cake pans, and smooth the tops. Bake in the preheated oven for 16 to 18 minutes, or until a toothpick inserted in the center comes out with moist crumbs. Remove cakes from the oven and let cool for about 10 minutes, then turn the cakes out of the pans and remove the parchment from the bottoms. Let cakes cool completely on a cooling rack.
For the frosting, in large
bowl, cream shortening and butter with electric mixer. Add vanilla. Gradually
add powdered sugar, one cup at a time, beating well on medium speed. Scrape sides and
bottom of bowl often. When all sugar has been mixed in, icing will appear dry.
Add milk and beat at medium speed until light and fluffy. Beat in the caramel sauce, then the coconut and pecans until evenly distributed.
To assemble the cake, place 1 cake layer on a serving plate. Spread with 1/3 of the frosting and sprinkle with 1/3 of the chopped oreo cookies. Place the 2nd cake layer on top and spread with another 1/3 of the frosting and oreos. Place the last cake layer on top and spread with the remaining frosting and oreos. Makes 16 to 20 servings.
Enjoy! -Cardamommy
Friday, January 9, 2015
Sour Cream Bundt Cake with White Chocolate Glaze
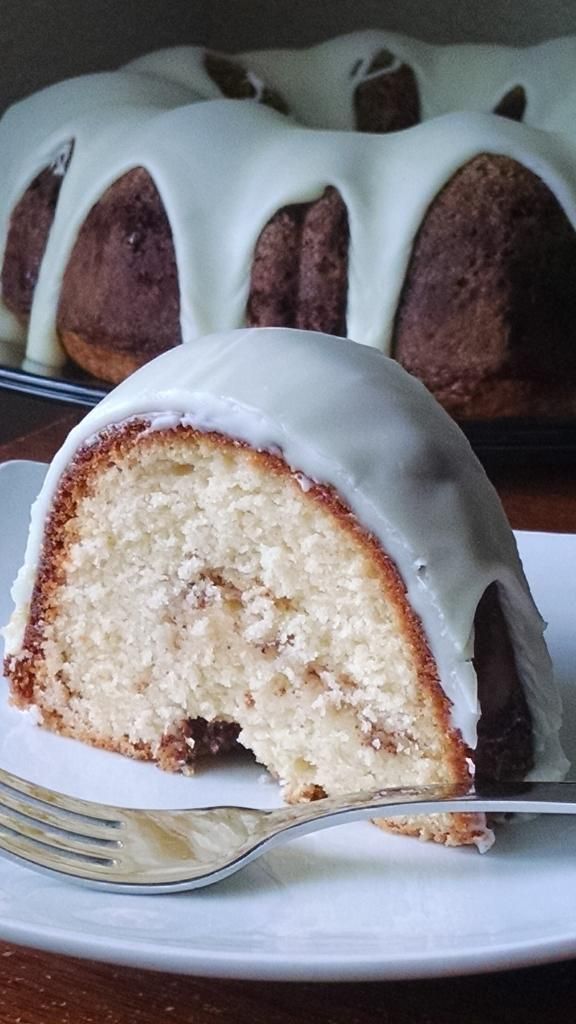
A couple of months ago, a friend of mine invited our family over for dinner. She served this cake for dessert and I was blown away. It was seriously so amazing. She kindly shared the recipe with me, and I made it, and we just can't get enough of it. I used a different glaze than she used. A basic powdered sugar glaze isn't my favorite, so I made a white chocolate glaze instead, and it is wonderful!
Sour Cream Bundt Cake with White Chocolate Glaze
Cake:
1 cup (2 sticks) butter, room temperature
2 cups granulated sugar
2 eggs
1 cup sour cream
1/2 teaspoon vanilla extract
2 cups all purpose flour
1/4 teaspoon salt
1 teaspoon baking powder
Cinnamon Ribbon:
1 teaspoon cinnamon
1/4 cup packed brown sugar
White Chocolate Glaze:
3/4 cup white chocolate chips
3 Tablespoons whipping cream
3/4 cup powdered sugar
Preheat the oven to 350F. Grease and flour a standard size bundt pan.
In a large bowl, cream together the butter and sugar until light and fluffy. Beat in the eggs, followed by the sour cream. Beat in the vanilla extract until smooth. Add the flour, salt, and baking powder, and beat on low until just combined and no streaks of flour remain.
For the cinnamon ribbon, in a small bowl, stir together the cinnamon and brown sugar. Pour half of the batter into the prepared bundt pan, smoothing the batter. Sprinkle half of the cinnamon/brown sugar mixture over the batter. Spoon the remaining batter over the cinnamon sugar and smooth the top. Sprinkle the remaining cinnamon sugar mixture over the top.
Place the cake in the oven and bake for 50 to 60 minutes, or until a toothpick isnerted in the center comes out clean. Remove the cake from the oven and let cool in the pan for about 15 minutes. Carefully turn the cake out of the pan and let cool completely on a cooling rack.
For the glaze, place the white chocolate chips and whipping cream in a microwave safe bowl. Heat for about 30 to 45 seconds, stirring every 15 seconds, until the mixture is melted and smooth. Remove from the microwave and stir in the powdered sugar until smooth. Place the cooled cake on a serving plate, and spoon the glaze over the top. Makes about 16 servings.
Enjoy! -Cardamommy
Labels:
Cake
,
Cinnamon
,
Cream
,
Dessert
,
Sour Cream
,
White Chocolate
Monday, December 29, 2014
Chocolate Peppermint Cheesecake Layer Cake
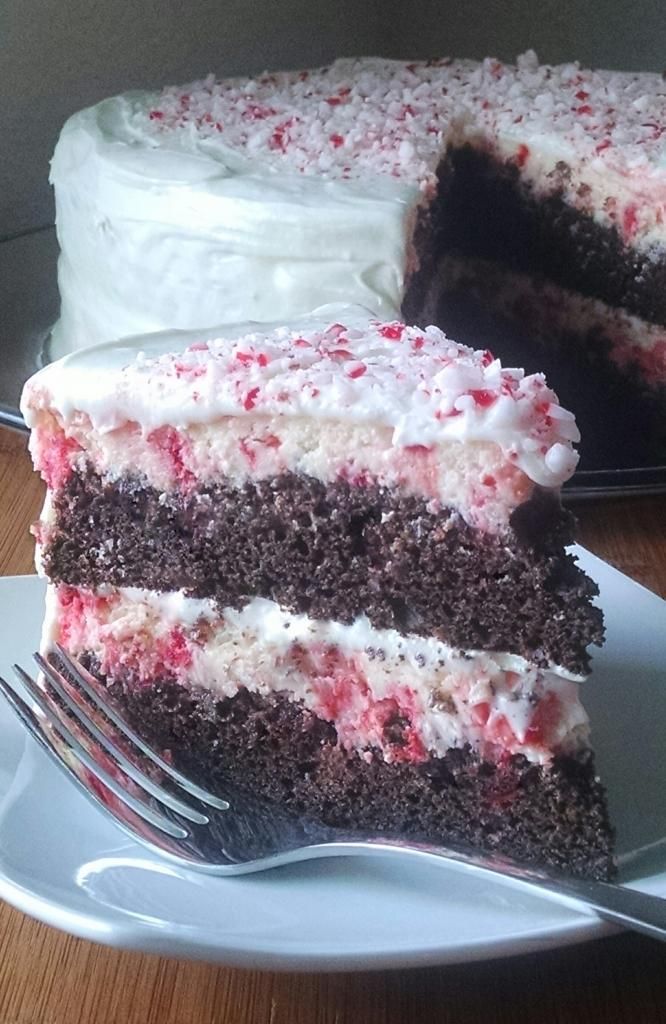
This cake. This made me happy. Partly because it was moist chocolate cake. Partly because it was peppermint cheesecake. Partly because it had peppermint cream cheese marshmallow frosting on it. Partly because I seriously tweaked the recipe and it turned out amazing! I'm going to be honest and tell you that I wasn't sure it would come together, but it totally did, and it was perfecty! The flavors and textures together are awesome, but it also just looks pretty, and so easy! Believe it or not, it wasn't that difficult to put together. Totally worth it! Recipe adapted from here.
Chocolate Peppermint Cheesecake Layer Cake
Chocolate Cake:
1 box chocolate cake mix
1 cup water
1/2 cup sour cream
1/3 cup canola oil
3 eggs
1 box (4 serving size) instant chocolate pudding
Peppermint Cheesecake:
24 ounces (3 8-ounce packages) cream cheese, room temperature
3/4 cup granulated sugar
1 teaspoon vanilla
3/4 cup sour cream
3 eggs
1 bag (10 ounces) peppermint baking chips
Peppermint Cream Cheese Marshmallow Frosting:
4 ounces cream cheese, room temperature
1/4 cup butter (1/2 stick), room temperature
12 ounces (about 3 cups) powdered sugar
1 teaspoon peppermint extract
7 ounce jar marshmallow cream
Preheat the oven to 350F. Place 2 strips of foil (about 3 to 4 inches wide) inside two 9 inch round cake pans (2 strips per pan) in the form of an X, with the ends hanging over the sides. Spray the pan and foil with cooking spray. Set aside.
For the chocolate cake, in a large bowl whisk together the chocolate cake mix, water, sour cream, oil, and eggs until well blended. Add the chocolate pudding mix and whisk until combined. Batter will be thick. Spread the batter evenly into the prepared pans and smooth the top. Bake the cakes for 20 to 25 minutes, or until a toothpick inserted in the center comes out clean. Remove the cakes from the oven and carefully flatten the top of the cakes by pressing down gently with the back of a spatula.
While the cakes are baking, make the peppermint cheesecake. In a large bowl, beat together the cream cheese, sugar, and vanilla until smooth. Beat in the sour cream. Beat in the eggs, one at a time, and beat until well blended and smooth. Stir in t he peppermint baking chips. Pour the cheesecake batter evenly over the two flattened cakes (still in the pans) and smooth the tops. Bake for 25 to 30 minutes, or until the center of the cheesecakes slightly wobbly. Remove the cakes from the oven and run a knife around the edges to loosen the cakes from the pans. Let the cakes cool, then chill for 2 to 4 hours, until completely cold.
When you are ready to assemble the cake, make the frosting. Beat together the cream cheese and butter until smooth. Beat in the powdered sugar, 1 cup at a time, until blended. Beat in the peppermint extract and marshmallow cream until smooth.
Remove the cakes from the refrigerator, and using the foil as handles, carefully lift the cakes out of the pans. Place one cake layer on a serving plate and spread about 1/2 cup of frosting over the top, just enough for a very thin layer to cover the cheesecake. Place the second cake on top of the first and use the remaining frosting to frost the top and sides of the cake. Garnish with crushed peppermints, if desired. Makes 16 to 20 servings.
Enjoy! -Cardamommy
Labels:
Cake
,
Cheese Cake
,
Chocolate
,
Cream Cheese
,
Cream Cheese Frosting
,
Dessert
,
Frosting
,
Marshmallows
,
Peppermint
,
Sour Cream
Friday, June 20, 2014
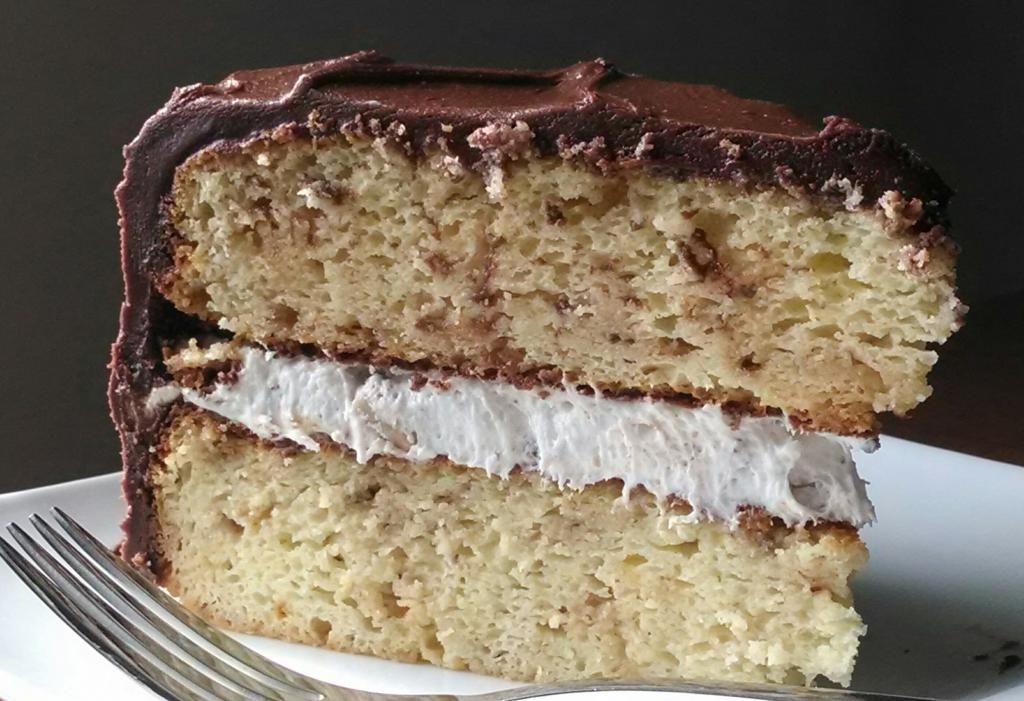
Cream Filled Toffee Cake with Chocolate Frosting
I've had some leftover chocolate frosting sitting in my fridge for a couple of weeks now, and I've been intending to use it on a white cake. I decided that a white cake with toffee bits and a toffee cream filling would be totally amazing with chocolate frosting (I feel like I'm working a little bit backwards here...). My baking motivation, however, has been a little lacking. So I've been sitting on the idea for a while. Finally, here it is! And it was a perfect blend of vanilla, toffee, and chocolate. A quick note on the frosting: I used leftover frosting, so I didn't have enough to frost the entire cake which is why I used a can of chocolate frosting sitting in the pantry. If you don't want to use store bought, just double the frosting recipe and leave out the store bought frosting.
Cream Filled Toffee Cake with Chocolate Frosting
Toffee Cake:
1 box white cake mix
1 box (4 serving size) instant vanilla pudding mix
1 cup sour cream
1 cup canola oil
4 eggs
1/2 cup milk
1 bag toffee bits
Cream Filling:
1 container (7 ounces) marshmallow cream
1/2 cup shortening
1/3 cup powdered sugar
pinch of salt
1 teaspoon clear vanilla extract
2 teaspoons hot water
1/2 cup chocolate covered toffee bits
Chocolate Frosting:
1/2 cup shortening
2 Tablespoons powdered non dairy coffee creamer
1/2 teaspoon vanilla extract
1 3/4 cups powdered sugar
1/4 cup cocoa powder
2 Tablespoons water
1 container (16 ounces) chocolate frosting (store bought)
Preheat the oven to 375F. Lightly grease and flour 2 9-inch round baking pans.
In a large bowl, combine the cake mix and pudding mix. Add the sour cream, oil, eggs, and milk, and whisk together until completely combined (batter will be thick). Stir in the toffee bits until evenly distributed. Pour the batter into the two pans and smooth the tops. Bake in the preheated oven for 24 to 26 minutes, or until a toothpick inserted in the center comes out clean. Remove cakes from the oven and let cool for about 10 minutes, then turn the cakes out of the pan and let cool completely on a cooling rack before frosting.
In a medium bowl, place the marshmallow cream, shortening, powdered sugar, salt, vanilla, and hot water. Stir vigorously until completely combined, smooth and fluffy. Stir in the toffee bits. Set aside.
For the frosting, beat together the shortening, coffee creamer, and vanilla. Add the powdered sugar and cocoa powder and beat until combined. Add the water and beat until smooth. Add the store bought chocolate frosting and beat until combined.
To assemble the cake, place one cake layer on a serving plate and spread the cream filling on top. Place the second cake layer on top, then frost the top and sides with the chocolate frosting. Makes 16 servings.
Enjoy! -Cardamommy
Labels:
Cake
,
Chocolate
,
Dessert
,
Frosting
,
Marshmallows
,
Pudding
,
Sour Cream
,
Toffee Bits
,
Vanilla
Monday, May 19, 2014
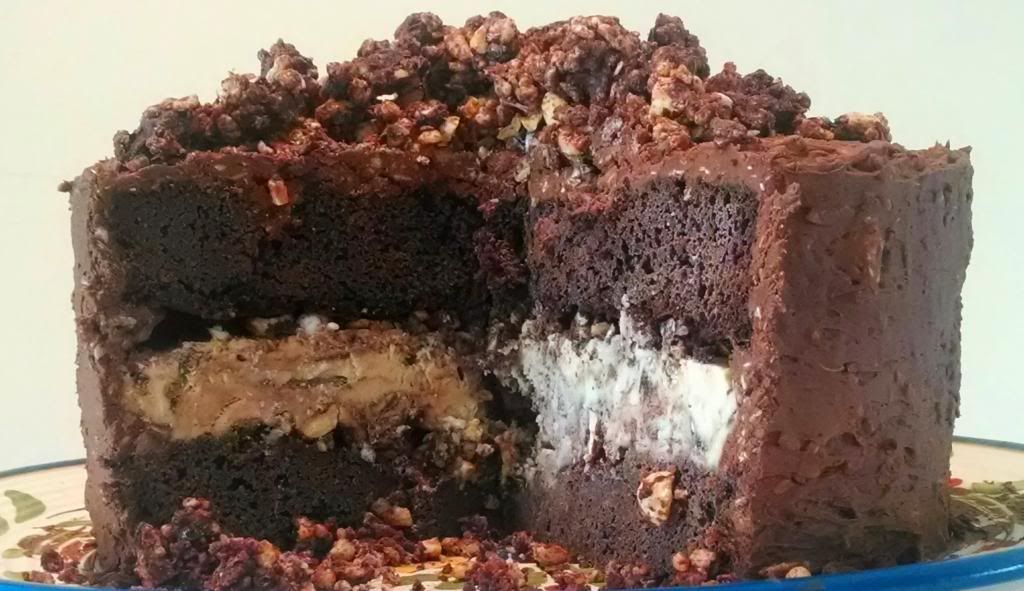
Hazelnut Coconut Crunch Ice Cream Cake
I made this ice cream cake for Easter and am only now getting around to posting it, but I figured it should be fine because it'll still be Summer for a while, right? Usually, I would have made this cake from scratch, but I was visiting my family in Salt Lake City, and we were so busy that making an ice cream cake from scratch was totally stressing me out. I decided to go half and half, and I got this cake made in one morning. I'm thinking that I've maybe gone a little overboard with these flavors, but I seriously can't help it. This cake starts with a box mix (but you're no one would ever guess), and is filled with coconut flavored ice cream and hazelnut crunch and covered with coconut hazelnut chocolate frosting and more hazelnut crunch.
Hazelnut Coconut Crunch Ice Cream Cake
Cake:
1 box chocolate cake mix
1 box (4 serving size) chocolate pudding mix
1 cup sour cream or plain unsweetened greek yogurt
1 cup canola oil
4 eggs
1/2 cup milk
Hazelnut Crunch:
2 ounces chocolate chips
2 Tablespoons butter
1/2 cup Nutella
1/4 to 1/2 cup chopped toasted hazelnuts
3/4 cup shredded coconut
3 cups rice krispies
1/2 gallon Coconut Ice Cream (we used samoas flavored ice cream)
Coconut Hazelnut Chocolate Frosting:
2 cans of Almond Joy Chocolate (or regular chocolate) frosting (or make your own)
1/2 cup Nutella
1 cup shredded coconut
Preheat the oven to 350F. Grease 2 9-inch round cake pans and line the bottoms with parchment paper (or coffee filters) and lightly grease the papers.
In a large bowl, combine the cake mix, pudding mix, sour cream or yogurt, oil, eggs, and milk. Mix together for a minute or two, until well blended. Divide the batter between the two prepared pans and smooth the top (the batter will be thick). Bake in the preheated oven for about 25 to 27 minutes, or until a toothpick inserted in the center comes out clean. Remove cakes from the oven and let cool for about 5 minutes. Turn the cakes out of the pans and let cool completely on a cooling rack.
While the cakes are baking, make the hazelnut crunch. Melt together the chocolate chips, butter, and Nutella until smooth. Add the hazelnuts, coconut, and rice krispies, and stir until evenly coated. Pour the mixture onto a waxed paper lined baking sheet and refrigerate until set. Break into small chunks.
For the ice cream layer, line a 9-inch round cake pan with plastic wrap. Press all of the ice cream evenly into the pan. Cover with plastic wrap and freeze until ready to assemble.
For the frosting, in a large bowl, combine the 2 cans of frosting (or about 3 cups of homemade), the Nutella, and the coconut, stirring until combined.
To assemble the cake, place one cake layer on a serving plate. Sprinkle with some of the hazelnut crunch. Place the unwrapped ice cream layer on top, and sprinkle some more of the hazelnut crunch on top. Place the second cake layer on top of the ice cream layer. Frost the top and sides with the frosting. Sprinkle more hazelnut crunch on top. Makes 16 to 20 servings.
Enjoy! -Cardamommy
Labels:
Cake
,
Chocolate
,
Chocolate Chips
,
Coconut
,
Frosting
,
Ice Cream
,
Nutella
,
Nuts
,
Rice Krispies
,
Sour Cream
,
Yogurt
Monday, October 21, 2013
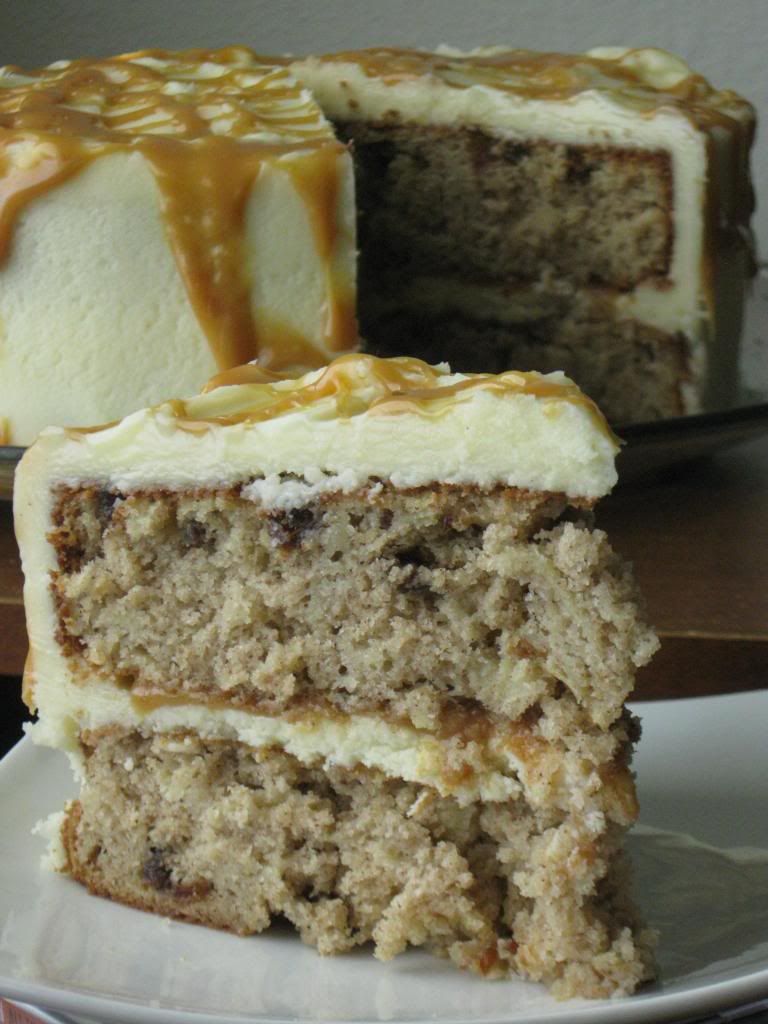
Apple Date Cake with Mascarpone Buttercream and Caramel Drizzle
I found this amazing cake recipe the other day and absolutely had to make it. Having decided that, I had to mess with the recipe. Quite a lot. In fact, I had to make this cake twice. In two days. I was having guests over for dinner on Thursday, so I made the first cake on Wednesday. Good thing too, because the frosting was a totally broken separated molten gooey fail. It was awful and disastrous and I knew I needed a do-over. However, how do you justify making another 2 layer cake when one is sitting in the fridge already? So I took it to our church on activity night (which luckily was that very night) and left it in the kitchen with a note that said "Free Cake! Help Yourself!" The cake was made short work of and I brought home an empty plate.
Cake take two was also a bit vexing. This time, the cake came out of the pan in two separate pieces. My youngest Hungry Puppy dubbed it the "bummer cake" because it was totally a bummer. So we went shopping to decompress while the cake cooled. This story ends on a positive note, as the cake totally came together, was delicious, and I bought a fabulous new pair of shoes! The cake is moist and spiced and delicious, and the frosting is a perfect pairing. The caramel drizzle is just icing on the cake.
Apple Date Cake with Mascarpone Buttercream and Caramel Drizzle
Apple Date Cake:
1 cup (2 sticks) butter, room temperature
2 cups granulated sugar
4 eggs
2 teaspoons vanilla extract
2 cups all purpose flour
2 teaspoons cinnamon
3/4 teaspoons baking soda
1/4 teaspoon salt
1/4 teaspoon allspice
1/4 teaspoon nutmeg
2/3 cup sour cream
2 medium granny smith apples, peeled and shredded (about 1 cup shredded)
8 ounces chopped dates
Caramel Drizzle:
7 ounces caramels, unwrapped (I used 1/2 of a 14 ounce bag)
1 Tablespoon heavy whipping cream
1 tablespoon butter
Mascarpone Buttercream:
1 1/2 cups (3 sticks) butter, room temperature
2 Tablespoons heavy whipping cream
1 teaspoon vanilla bean paste (or substitute vanilla extract)
3 cups powdered sugar
8 ounces mascarpone cheese
Preheat the oven to 350F. Grease the bottom and sides of 2 9-inch round cake pans, then line the bottoms with rounds of parchment paper, then lightly grease the paper (don't skip this step!). Set aside.
For the cake, cream together the butter and sugar until light and fluffy. Beat in the eggs, one at a time, followed by the vanilla extract. Add the flour, cinnamon, baking soda, salt, allspice, and nutmeg, and beat on low until the dry ingredients begin to incorporate. Stop the mixer and add the sour cream, shredded apples, and dates. Beat the mixture until incorporated.
Divide the batter equally between the prepared pans, smoothing the tops. Place the cakes in the preheated oven and bake for 25 to 35 minutes, or until a toothpick inserted in the center comes out clean. Remove the cakes from the oven and let cool in the pans for about 15 minutes, then run a knife around the edges of the cake to loosen, and turn the cakes out of the pans. Peel off the parchment paper from the bottom of the cakes and let the cakes cool completely on a cooling rack before frosting.
For the caramel drizzle, place the unwrapped caramels in a microwave safe bowl. Add the cream and butter, and microwave in 30 second intervals, stirring after each, until the caramels are melted and smooth. Set aside to cool slightly.
To make the mascarpone buttercream, beat the butter until smooth. Add the cream, vanilla bean paste, and powdered sugar and beat until light and fluffy. Add the mascarpone and beat on low speed just until barely incorporated (if you overbeat the mascarpone, the frosting will break and separate).
To assemble the cake, place one cake layer on a serving plate and spread with a layer of frosting. Drizzle half of the caramel over the frosting. Place the second cake layer on top and frost the top and sides of the cake with the remaining frosting. Drizzle he remaining caramel on top of the cake. Makes 12 to 16 servings.
Enjoy! -Cardamommy
Labels:
Apples
,
Butter
,
Cake
,
Candy
,
Caramel
,
Dates
,
Dessert
,
Frosting
,
Mascarpone
,
Sour Cream
Friday, August 23, 2013
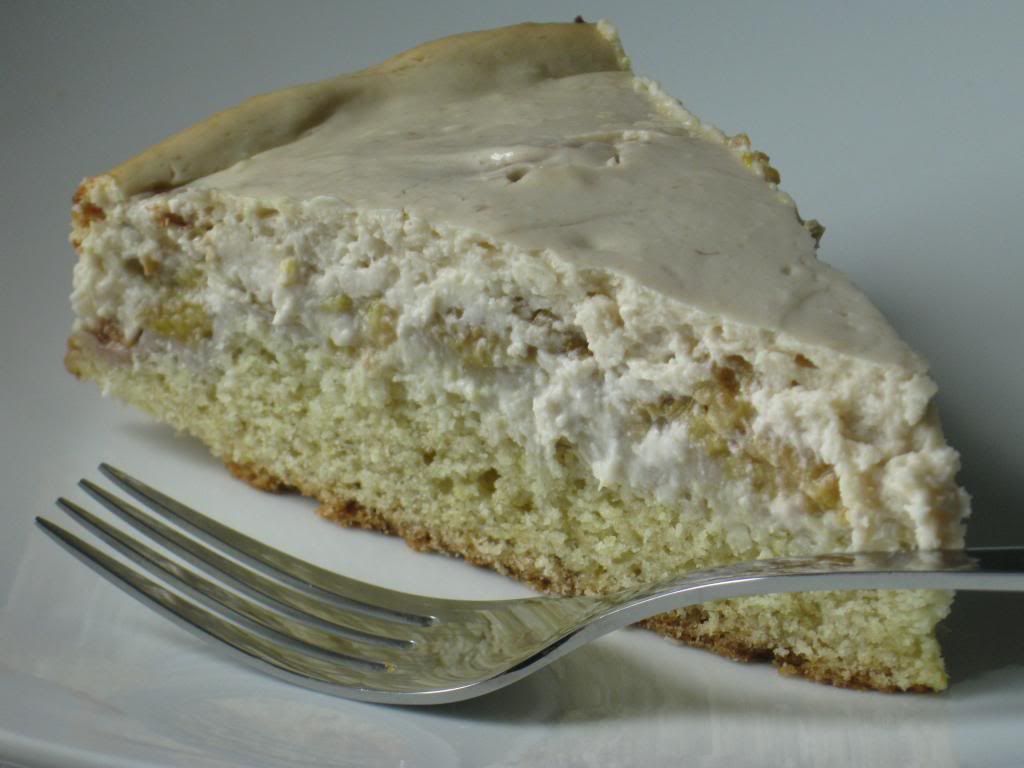
Raspberry Cream Cake
My Dad has an amazing garden. Grapes, raspberries, potatoes, rhubarb, carrots... all kinds of fabulous things. Least year I made more pints of grape jelly than I can remember at this point. I made jelly for an entire day. The. Entire. Day. And absolutely the best grape jelly ever. So far this week, I have made two batches of red raspberry jam. I had some golden raspberries as well, but I didn't know what to do with them. I needed something simple and delicious, where the raspberries would take center stage and not be drowned out by the dessert. I think this recipe fits the bill. Start with a simple press-in crust, followed by berries, followed by a cream filling. Recipe adapted from King Arthur Flour.
Raspberry Cream Cake
Crust:
1 1/2 cups all purpose flour
1/2 cup granulated sugar
1 1/2 teaspoons baking powder
1/4 teaspoon salt
1/2 cup (1 stick) butter, room temperature
1 egg
2 teaspoons vanilla
4 cups fresh raspberries (I used golden raspberries, but red is perfect as well)
Filling:
1 cup (8 ounces) sour cream
1 (8 ounce) package cream cheese, room temperature
1/2 cup granulated sugar
1 egg
2 teaspoons vanilla
Preheat the oven to 350F. Spray a 9 1/2 inch springform pan with cooking spray.
Combine the flour, sugar, baking powder, salt, butter, egg and vanilla in the bowl of a stand mixer, and with the paddle attachment, beat until combined. The dough will be very stiff. Press the dough evenly onto the bottom of the prepared pan. Pour the raspberries evenly over the dough.
In a medium bowl (or re-use your stand mixer), beat the sour cream, cream cheese, sugar, egg, and vanilla until well blended. Pour the cream mixture on top of the raspberries and spread evenly.
Bake the cake in the preheated oven for 60 minutes, or until the edges of the cake are lightly browned. Remove the cake from the oven and let cool to room temperature before serving (or refrigerate until ready to serve). When ready to serve, run a knife around the edge of the cake to loosen from sides of the pan, then remove side of pan. Makes about 16 servings.
Enjoy! -Cardamommy
Labels:
Butter
,
Cake
,
Cream Cheese
,
Dessert
,
Raspberry
,
Sour Cream
,
Vanilla
Friday, May 10, 2013
Cream Cheese Crumb Cake
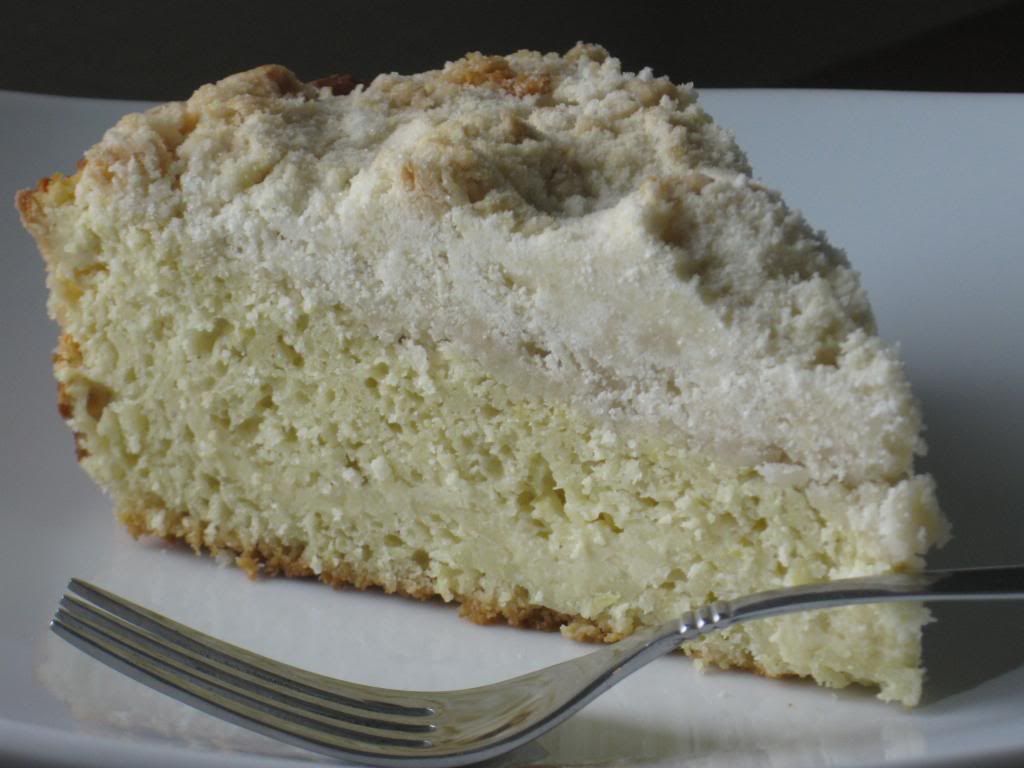
This is such a delicious crumb cake. I think that it is a new favorite in my house. My Hungry Puppies couldn't get enough! A light and tender crumb cake with a ribbon of cream cheese, topped with a crisp and buttery crumb topping. Perfect for any occasion, dessert, snack, breakfast, or a Mother's Day brunch!
Cream Cheese Crumb Cake
Crumb Topping:
1 1/4 cups all purpose flour
1/2 cup granulated sugar
1/4 teaspoon salt
1/2 cup (1 stick) cold butter
Cake:
6 Tablespoons butter, room temperature
3/4 cup granulated sugar
Grated zest of 1 lemon
2 eggs
1 teaspoon vanilla extract
2/3 cup sour cream
1 1/4 cups all purpose flour
1 teaspoon baking powder
1/2 teaspoon salt
1/4 teaspoon baking soda
Cream Cheese Ribbon:
8 ounces cream cheese, room temperature
1/4 cup granulated sugar
1 teaspoon vanilla extract
1 egg
Preheat the oven to 350F. Grease and flour a 9 inch round cake pan or springform pan.
For the crumb topping, stir together the flour, sugar, and salt in a medium bowl. Using a pastry blender, cut in the butter until pieces are pea size. Place in the refrigerator while you prepare the cake batter.
For the cake, cream together the butter, sugar, and lemon zest until light. Beat in the eggs, vanilla, and sour cream. Add the flour, baking powder, salt, and baking soda, and beat until just combined. The dough will be very stiff.
For the cream cheese ribbon, place the cream cheese, sugar, vanilla, and egg in a bowl, and blend together using a spoon or hand mixer until the mixture is completely combined and smooth.
Evenly spread half of the cake batter into the prepared pan. Pour the cream cheese mixture over the cake batter, then spoon the remaining cake batter over the cream cheese layer, being careful to spread the cake batter evenly. Sprinkle the crumb topping over the cake batter. Place the cake in the oven and bake for 50 minutes, or until a toothpick inserted in the center comes out clean. Remove cake from the oven and place on a cooling rack to cool completely before serving. Makes 8 to 12 servings.
Enjoy! -Cardamommy
Labels:
Butter
,
Cake
,
Cream Cheese
,
Dessert
,
Lemon
,
Sour Cream
,
Vanilla
Wednesday, November 14, 2012
Sour Cream Chocolate Chip Cookies
Here we go with another chocolate chip cookie recipe. This one is different due to the addition of sour cream. I don't think I have ever made chocolate chip cookies with sour cream before, and I was a bit skeptical. I was worried that I would end up with chocolate chip cake drops. I don't like a cakey cookie. I like my cookies to be crispy and chewy. These cookies turned out to be kind of cakey chewy. A slightly different texture than I am used to, and these probably won't replace my favorite chocolate chip cookie recipes, but they are yummy and have a good flavor. This recipe makes giant chocolate chip cookies, but if you want to bake regular size cookies, just scoop smaller dough balls and reduce the baking time accordingly.
Sour Cream Chocolate Chip Cookies
1/2 cup butter, softened
1 cup packed brown sugar
3/4 cups granulated sugar
2 eggs
1 1/2 teaspoons vanilla extract
1/4 cup sour cream
3 cups all purpose flour
1 teaspoon baking powder
1/2 teaspoon baking soda
1/2 teaspoon salt
3/4 cup semi sweet chocolate chips
3/4 cup milk chocolate chips
1/2 cup chopped pecans
Preheat the oven to 375F. Line a baking sheet with parchment paper.
Cream together the butter, brown sugar, and granulated sugar. Beat in the eggs, vanilla, and sour cream. Add the flour, baking powder, baking soda, and salt and beat until just combined. Stir in the chocolate chips and pecans.
Use a 1/4 cup measure to scoop the dough and form into balls. Place the balls of dough 6 to a baking sheet, about 3 inches apart. Bake for about 14 minutes, or until golden brown at the edges. Remove cookies from the oven and transfer from the pan to a cooling rack. Makes 18 giant cookies.
Enjoy! -Cardamommy
Labels:
Chocolate
,
Chocolate chip cookies
,
Chocolate Chips
,
Cookies
,
Dessert
,
Pecan
,
Sour Cream
Subscribe to:
Posts
(
Atom
)