skip to main
|
skip to sidebar
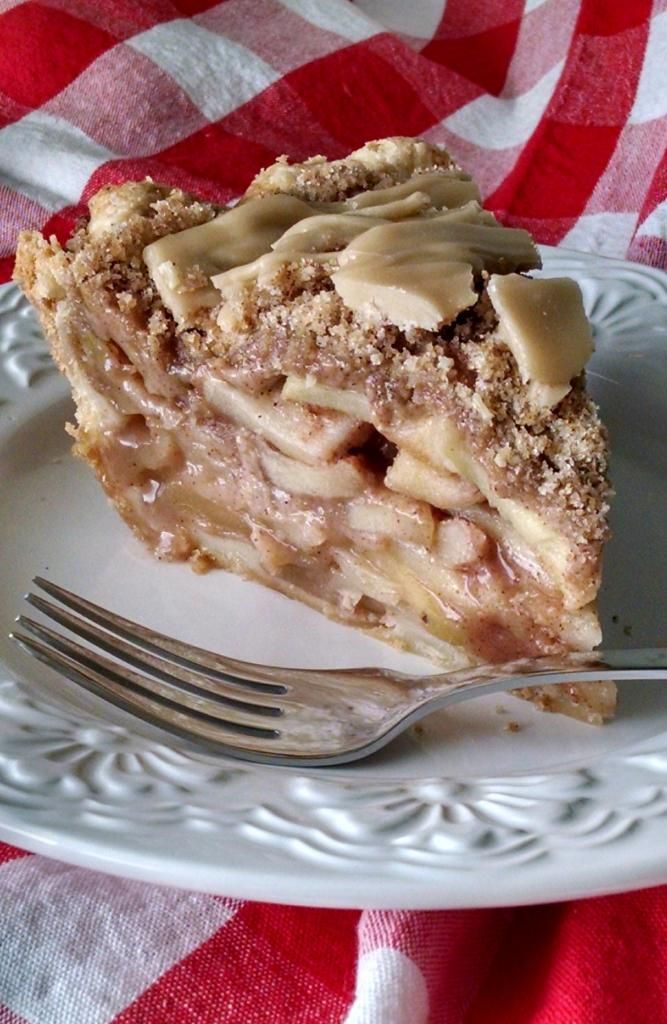
My oldest Hungry Puppy requested an apple pie, so we decided to make one together. I love when my Hungry Puppies help out in the kitchen! It's so fun for them to be hands on and participating in creating the food that we eat, and the math skills! This pie turned out brilliantly! I wasn't sure at first, but it is luscious. I tried a new crust recipe this time and I adore it, so I'll link to the recipe I used, but you can use your favorite or even store bought (no shame, life is busy!). I almost want to scrape off the apples and just eat the crust. Almost. I read an interesting article on apple pie recently that suggested only partially peeling the apples. By the time they are fully cooked, the skin is so tender anyway that you don't even notice, and save yourself some time and effort. The apple filling is moist and not overspiced, letting the apple flavor really come through. The crumble topping provides a wonderful crunchy texture and the glaze caps it off with a burst of brown sugar sweetness. Original recipe found here.
Cinnamon Apple Crumble Pie with Brown Sugar Glaze
9 inch unbaked pie crust, fitted into a pie plate (I used this one and it was amazing!)
Apple Filling:
3 1/4 pounds (about 6 to 7 large) apples, halfway peeled, cored, and sliced
2/3 cup granulated sugar
3 Tablespoons all purpose flour
2 teaspoons cinnamon
2 Tablespoons melted butter
Crumble Topping:
1 cup all purpose flour
1/2 cup granulated sugar
1/4 cup packed brown sugar
1 1/2 teaspoons cinnamon
1/2 teaspoon salt
6 Tablespoons cold butter, cut into slices
Brown Sugar Glaze:
2 Tablespoons butter
2 Tablespoons packed brown sugar
1 Tablespoon milk
1/2 teaspoon vanilla extract
1/2 to 3/4 cup powdered sugar
Preheat the oven to 400F.
Place the sliced apples in a large bowl, set aside. In a small bowl, combine the sugar, flour, and cinnamon. Sprinkle the mixture over the sliced apples and toss to coat evenly. Pour the melted butter over the apples, and toss again, to coat. Set aside.
For the crumble, in a food processor, place the flour, sugar, brown sugar, cinnamon, and salt, and pulse several times until blended. Scatter the sliced butter over the top and pulse until the mixture resembles sandy crumbs.
Toss the apple mixture one more time, then arrange the apples in the crust. Sprinkle all of the crumble mixture over the apples, letting it fall between the cracks and gaps in the apples. Place the pie in the oven and bake for 40 minutes, covering loosely with foil to prevent the top from overbrowning. Reduce the oven temperature to 350F and bake the pie for an additional 40 to 45 minutes, or until the apples are tender in the center and bubbling at the edges. Remove the pie from the oven.
For the glaze, place the butter and brown sugar in a small saucepan and bring to a boil, stirring frequently. Boil for several minutes, then remove from the heat and stir in the milk, followed by the vanilla. Stir in the powdered sugar (starting with 1/2 cup and adding more as needed to reach your desired consistency) until smooth. Drizzle the glaze over the warm pie. Serve warm, or chill and serve cold. Makes 8 servings.
Enjoy! -Cardamommy
A couple of weeks ago I seriously botched a batch of coconut oil frosting. I mean major. I didn't even know how to start salvaging it but I totally hated to throw it away! I figured it was just coconut oil and powdered sugar and maple syrup anyway, so why not just add an egg, some flour and oatmeal and a bit of baking soda and make coconut oil oatmeal cookies? I found this recipe and used it as a very very very loose guide (considering that I had no idea how much coconut oil or sugar was in there...ah the joys of not measuring). And it worked. And the cookies were so good, that I decided to try them again, but for real this time. With a real recipe. And they are still yum!
Whole Wheat Coconut Oil Raisinet Cookies
1/2 cup butter, room temperature
1/2 cup coconut oil
1 cup granulated sugar
1 cup loosely packed brown sugar
3 eggs
1 teaspoon vanilla extract
2 1/2 cups white whole wheat flour
1 1/4 teaspoons baking soda
1 teaspoon salt
1 1/4 cups quick cooking oatmeal
1 1/4 cups old fashioned oatmeal
1 1/2 cups Raisinets, or other chocolate covered raisins
Preheat the oven to 350F. Line a baking sheet with parchment paper.
In a large bowl, cream together the butter, coconut oil, sugar, and brown sugar until smooth. Add the eggs and vanilla and beat for about 2 minutes, or until very light and fluffy. Add the flour, baking soda, salt, quick oats, and old fashioned oats, and beat until almost combined. Beat in the chocolate covered raisins until evenly distributed.
Scoop the dough into tablespoon size balls and place on the prepared baking sheet. Bake in the preheated oven for 8 to 9 minutes, or until very lightly browned at the edges. Remove cookies from the oven and let cool on the pan for several minutes before transferring to a cooling rack to cool completely. Makes about 5 dozen cookies.
Enjoy! -Cardamommy
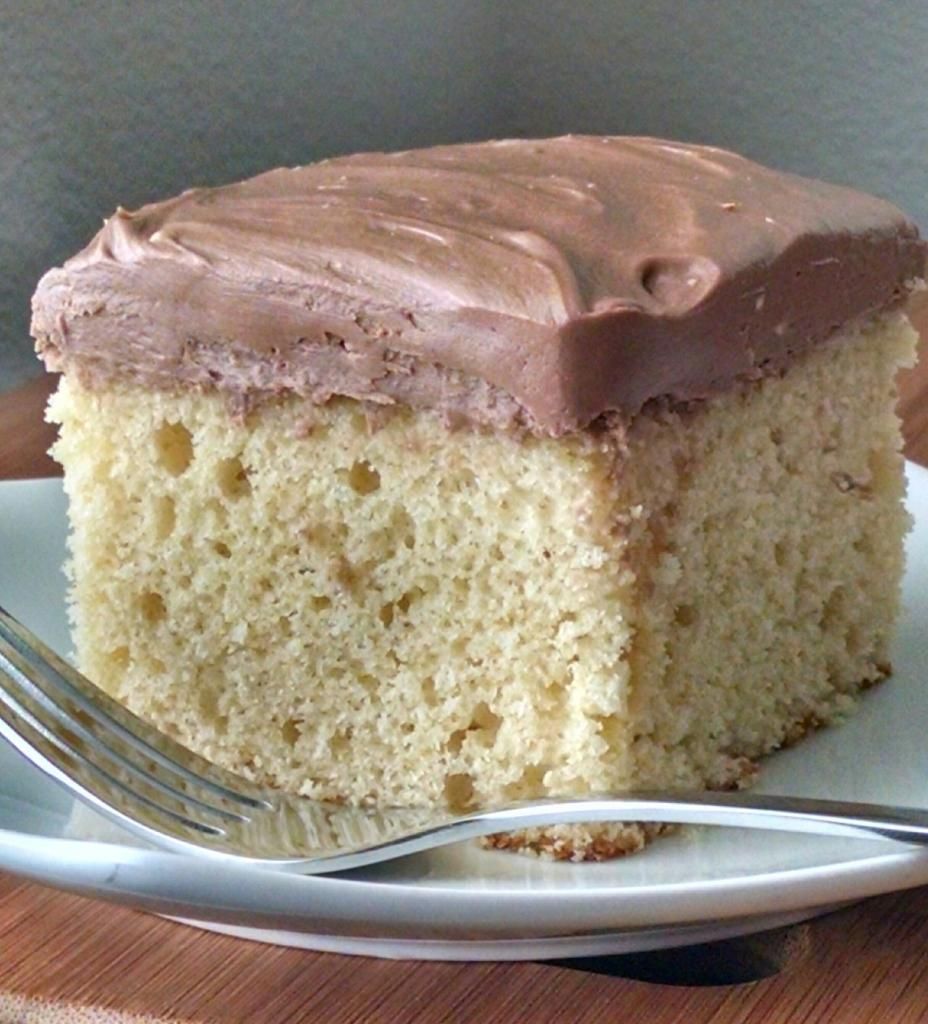
I found this frosting recipe a while ago and have been searching and searching for a malted white cake to put it on. I wanted a simple recipe that didn't use a cake mix. I couldn't find one that fit what I needed. Anywhere! There are hardly any options at all! So I made up my own. This is a super easy one bowl cake with a delicious malted flavor. I have a bit of a weakness for mascarpone cheese, and it is amazing in this frosting. It's so light and chocolatey, but the mascarpone shines through nicely! This cake makes a one 9 inch layer, but you can easily double the cake and the frosting to make a 9x13 cake.
One Bowl Malted Vanilla Cake with Malted Chocolate Mascarpone Frosting
Malted Vanilla Cake:
1 1/3 cups all purpose flour
1/3 cup granulated sugar
1/3 cup malted milk powder
2 teaspoons baking powder
1/2 teaspoon salt
2/3 cup milk
1/4 cup butter, softened
1 egg
1 teaspoon vanilla extract
Malted Chocolate Mascarpone Frosting:
6 Tablespoons whipping cream
1/2 cup chocolate malted milk powder
2 teaspoons cocoa powder
8 ounce conatiner mascarpone cheese
Preheat the oven to 350F. Grease a 9 inch square baking pan. Set aside.
In a large bowl, whisk together the flour, sugar, malted milk powder, baking powder, and salt. Add the milk, butter, egg, and vanilla and whisk until combined. Continue to whisk until the batter is smooth. Pour the batter into the prepared pan.
Bake the cake in the preheated oven for about 20 to 25 minutes, or until a toothpick inserted in the center comes out clean. Remove the cake from the oven and let cool completely before frosting.
While the cake is cooling, make the frosting. Place the whipping cream, malted milk powder, and cocoa powder in a bowl. Beat on low speed until blended. Add the mascarpone and beat until smooth. Increase the speed and beat the frosting until thick and fluffy. Spread the frosting on the cooled cake. Makes 9 servings.
Enjoy! -Cardamommy
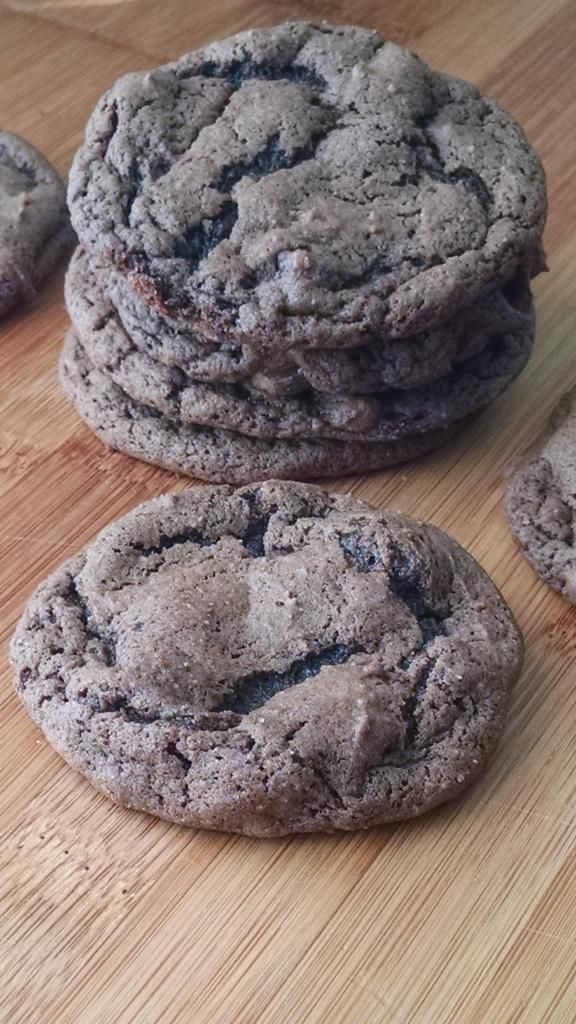
I've been seriously needing a chocolate cookie the past couple of days, and this is the one I settled on. I found the original recipe here, and fiddled with it just a bit. These cookies are soft and chewy with the perfect amount of chocolate flavor! These cookies get their triple chocolate from cocoa powder, chocolate malted milk powder, and chocolate chips. So delicious!
Malted Triple Chocolate Cookies
1/2 cup butter, room temperature
1/2 cup packed brown sugar
1/4 cup granulated sugar
1 egg
1 teaspoon vanilla extract
1 1/4 cups all purpose flour
6 Tablespoons chocolate malted milk powder
1/4 cup cocoa powder
1 teaspoon baking soda
1/2 teaspoon salt
1 cup milk chocolate chips
Preheat the oven to 350F. Line a baking sheet with parchment paper.
Cream together the butter, brown sugar, and granulated sugar until light and fluffy. Add the egg and vanilla and beat until well blended. Add the flour, malted milk powder, cocoa powder, baking soda, and salt, and beat until just combined. Stir in the chocolate chips.
Scoop the dough into tablespoon size balls and place them on the prepared baking sheet. Bake the cookies for 8 to 9 minutes, or until just set in the center (you want them to stay soft when they cool, so take care not to overbake). Remove the cookies from the oven and let cool on the pan for several minutes. Transfer cookies to a cooling rack to cool completely. Makes about 30 cookies.
Enjoy! -Cardamommy
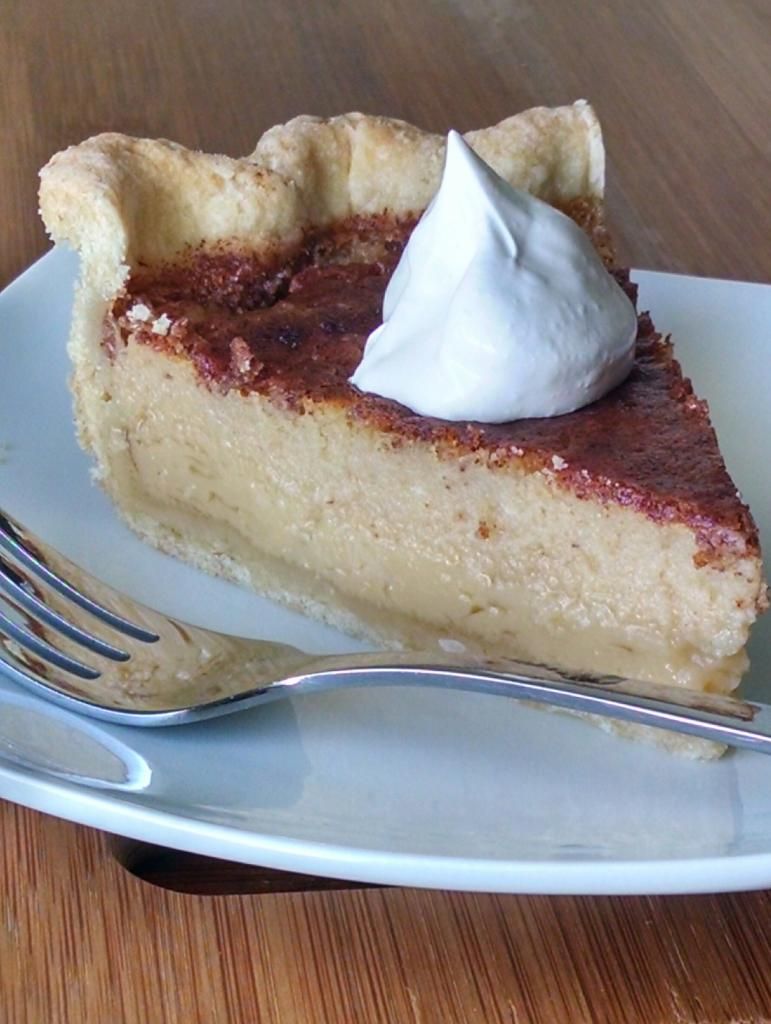
I don't think that I have ever made a buttermilk pie. Mostly, I think, because I was a tiny bit afraid that it would taste like buttermilk. In a pie. Now, don't get me wrong, I like buttermilk. Just not in pie form, I don't think. I once made a buttermilk chocolate pudding and I really wasn't a fan because I could really taste the buttermilk tang through the chocolate. This pie is so amazing! It doesn't taste like tangy buttermilk, but has a wonderful custard flavor and the honey comes through very nicely. Just lightly spiced with cinnamon, this pie is just perfect!
Cinnamon Honey Buttermilk Pie
9 inch unbaked pie crust
1/2 cup butter, melted
2/3 cup granulated sugar
1/2 cup honey
1/2 teaspoon salt
3 Tablespoons all purpose flour
3 eggs, lightly beaten
2 teaspoons vanilla extract
1 cup buttermilk
1 teaspoon cinnamon
Preheat the oven to 350F.
Stir together the melted butter, sugar, and honey until smooth. Add then salt and flour, and stir until combined. Stir in the eggs and vanilla. Add the buttermilk and cinnamon and stir until completely incorporated.
Pour the mixture into the unbaked pie crust and bake in the preheated oven for 15 minutes. Reduce the oven temperature to 325F, and continue to bake the pie for 40 to 45 more minutes, or until the filling jiggles slightly. Remove the pie from the oven and let cool completely (and chill if desired) before serving. Makes about 8 servings.
Enjoy! -Cardamommy
I remember when I was a kid, my mom would make tunnel of fudge cake. And it was full of nuts. Full! When I asked her if she could make it without the nuts, she said it wouldn't work without the nuts. Bummer. So I've never made until now...with no nuts. And it totally worked! This cake is totally chocolatey with a really nice fudgy center. I actually overbaked mine just slightly... I wish that the center was a tad bit more fudgy. So here's the tip. I researched several recipes when I was planning this cake, and several of them said that you won't think it is done when you take it out of the oven. Take it out anyway! I let it go an extra 5 minutes, hence not as fudgy of a center. So, take the cake out of the oven! Even though it goes against every cake baking instinct you have. Also, please paint your pan with the cocoa/oil mixture. It is magical. Original recipe found here.
Tunnel of Fudge Cake
For the pan:
1 Tablespoon cocoa powder
1 Tablespoon canola oil
Cake:
1/2 cup boiling water
2 ounces semi sweet chocolate, chopped
2 cups all purpose flour
3/4 cup cocoa powder
2 cups powdered sugar
1 teaspoon salt
5 eggs
1 Tablespoon vanilla extract
1 1/4 cups (2 1/2 sticks) butter, room temperature
1 cup granulated sugar
3/4 cup packed brown sugar
Ganache:
4 ounces milk chocolate, chopped
4 ounces semi sweet chocolate, chopped
3/4 cup whipping cream
1/4 cup light corn syrup
1/2 teaspoon vanilla extract
Preheat the oven to 350F. In a small bowl, combine the cocoa powder and oil, and stir until smooth. Using a pastry brush, paint the cocoa mixture evenly over the inside of a standard size bundt pan. Set pan aside.
For the cake, place the boiling water and chopped chocolate in a small bowl and let sit for several minutes. Stir until smooth. In a large bowl, combine the flour, cocoa powder, powdered sugar, and salt. In a medium bowl, whisk together the eggs, and vanilla extract.
In a large bowl with an electric mixer or using a stand mixer, cream together the butter, granulated sugar, and brown sugar until light and fluffy. Gradually beat in the eggs, scraping down the sides of the bowl as necessary, until blended. Beat in the melted chocolate mixture until combined. Gradually beat in the flour mixture until no streaks of flour remain in the batter. Pour the batter into the prepared bundt pan and smooth the top.
Bake in the preheated oven for about 45 minutes. The sides of the cake will start to pull slightly away from the sides of the pan. Do not test with a toothpick, because it will not come out clean. This is supposed to happen. Take out the cake anyway.
Let the cake cool in the pan for about 1 hour. Turn out the cake onto a cake plate (it should pop right out with no trouble at all thanks to the painting job!), and let cool completely before glazing.
For the ganache, place the chopped milk and semi sweet chocolate into a large bowl. Pour the whipping cream and corn syrup over the chocolate. Heat in the microwave for about 1 minutes, or until the liquid is hot, but not necessarily boiliing. Stir the mixture until smooth, then add the vanilla and stir until combined. Let the ganache cool for about 30 minutes to 1 hour (depending on how thick you want it to be when you glaze the cake), then spoon it over the top of the bundt cake, letting it run down the sides. Makes about 16 servings.
Enjoy! -Cardamommy
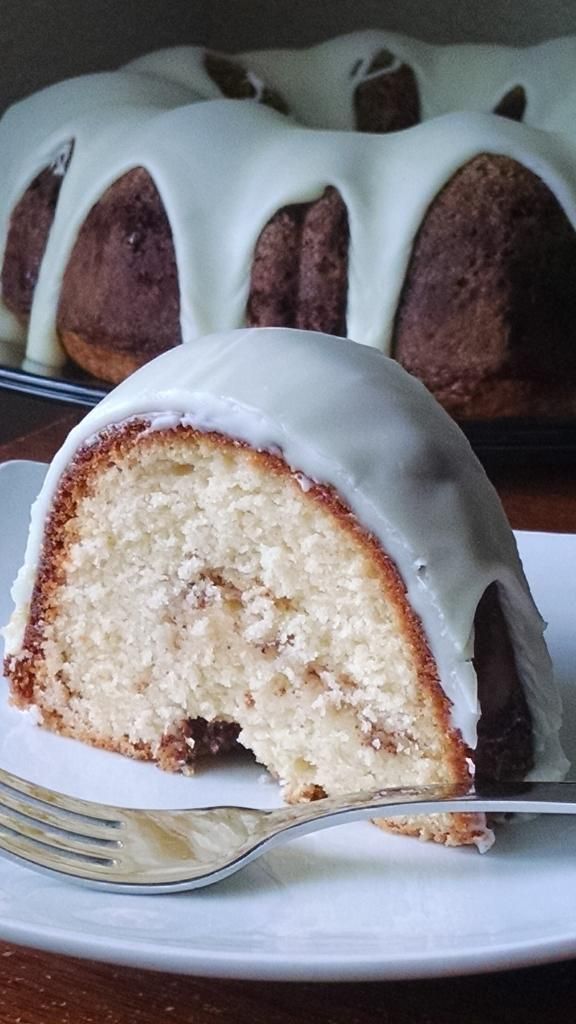
A couple of months ago, a friend of mine invited our family over for dinner. She served this cake for dessert and I was blown away. It was seriously so amazing. She kindly shared the recipe with me, and I made it, and we just can't get enough of it. I used a different glaze than she used. A basic powdered sugar glaze isn't my favorite, so I made a white chocolate glaze instead, and it is wonderful!
Sour Cream Bundt Cake with White Chocolate Glaze
Cake:
1 cup (2 sticks) butter, room temperature
2 cups granulated sugar
2 eggs
1 cup sour cream
1/2 teaspoon vanilla extract
2 cups all purpose flour
1/4 teaspoon salt
1 teaspoon baking powder
Cinnamon Ribbon:
1 teaspoon cinnamon
1/4 cup packed brown sugar
White Chocolate Glaze:
3/4 cup white chocolate chips
3 Tablespoons whipping cream
3/4 cup powdered sugar
Preheat the oven to 350F. Grease and flour a standard size bundt pan.
In a large bowl, cream together the butter and sugar until light and fluffy. Beat in the eggs, followed by the sour cream. Beat in the vanilla extract until smooth. Add the flour, salt, and baking powder, and beat on low until just combined and no streaks of flour remain.
For the cinnamon ribbon, in a small bowl, stir together the cinnamon and brown sugar. Pour half of the batter into the prepared bundt pan, smoothing the batter. Sprinkle half of the cinnamon/brown sugar mixture over the batter. Spoon the remaining batter over the cinnamon sugar and smooth the top. Sprinkle the remaining cinnamon sugar mixture over the top.
Place the cake in the oven and bake for 50 to 60 minutes, or until a toothpick isnerted in the center comes out clean. Remove the cake from the oven and let cool in the pan for about 15 minutes. Carefully turn the cake out of the pan and let cool completely on a cooling rack.
For the glaze, place the white chocolate chips and whipping cream in a microwave safe bowl. Heat for about 30 to 45 seconds, stirring every 15 seconds, until the mixture is melted and smooth. Remove from the microwave and stir in the powdered sugar until smooth. Place the cooled cake on a serving plate, and spoon the glaze over the top. Makes about 16 servings.
Enjoy! -Cardamommy
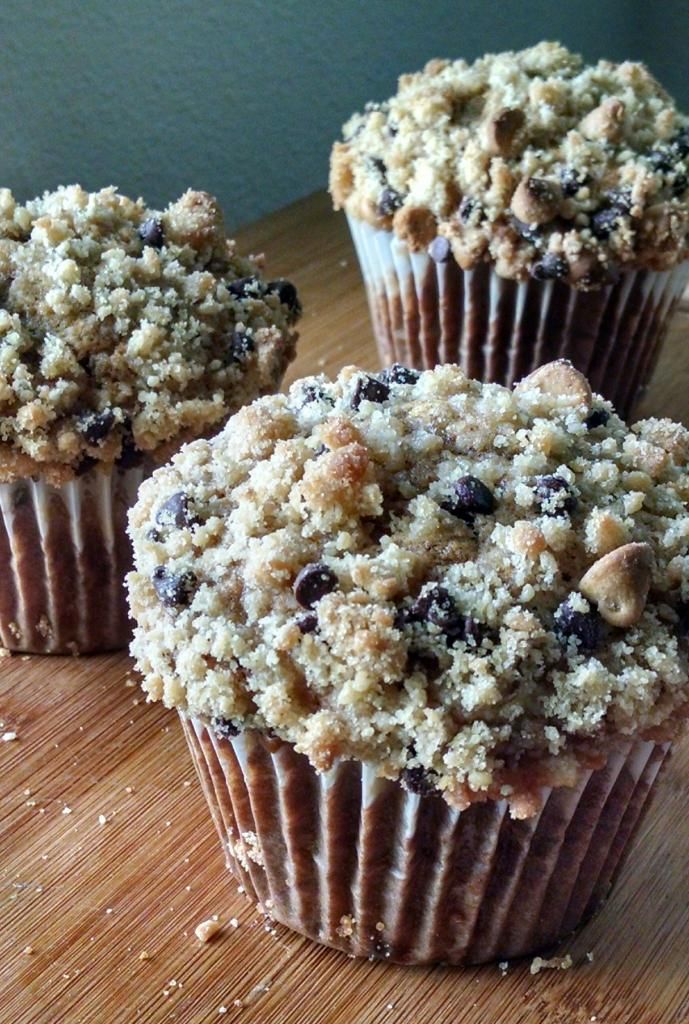
I made these gigantic muffins as thank you gifts for some ladies at our church. I don't make muffins often, and I make banana muffins even less often, but I thought that these would be the perfect casual treat to say thanks. These muffins are stuffed with banana flavor and topped with a crispy streusel studded with peanut butter chips and chocolate chips. Delicious! Original recipe found here.
Banana Peanut Butter Chocolate Chip Streusel Muffins
Banana Muffins:
1/2 cup butter, room temperature
2/3 cup packed brown sugar
4 ripe bananas, mashed (about 2 cups)
2 eggs
1 teaspoon vanilla extract
2 cups all purpose flour
1 teaspoon baking soda
1 teaspoon cinnamon
1/2 teaspoon salt
Peanut Butter Chocolate Chip Streusel:
1 cup all purpose flour
1/2 cup packed brown sugar
1/4 cup butter, melted and cooled slightly
1/4 cup peanut butter chips
1/4 cup mini chocolate chips
Preheat the oven to 350F. Line 6 jumbo muffin cups with paper liners (if you'd like smaller muffins, line 12 to 18 regular size muffin cups with paper liners).
In a large bowl, cream together the butter and brown sugar until light and fluffy. Beat in the bananas, eggs, and vanilla extract. Add the flour, baking soda, cinnamon, and salt, and beat on low just until combined and no streaks of flour remain. Scoop the batter into the prepared muffin cups, filling each about 2/3 to 3/4 full. Set aside.
For the streusel, stir together the flour and brown sugar. Add the melted butter and toss mixture together until evenly moistened and crumbly. Stir in the peanut butter chips and mini chocolate chips. Spoon the streusel over the unbaked muffin batter (you may have a little bit left over). Bake the muffins for about 25 to 30 minutes (for regular size muffins about 15 to 20 minutes), or until a toothpick inserted in the center comes out clean. Remove muffins from the oven and place on a cooling rack. Makes 6 jumbo muffins (12 to 18 regular size muffins).
Enjoy! -Cardamommy
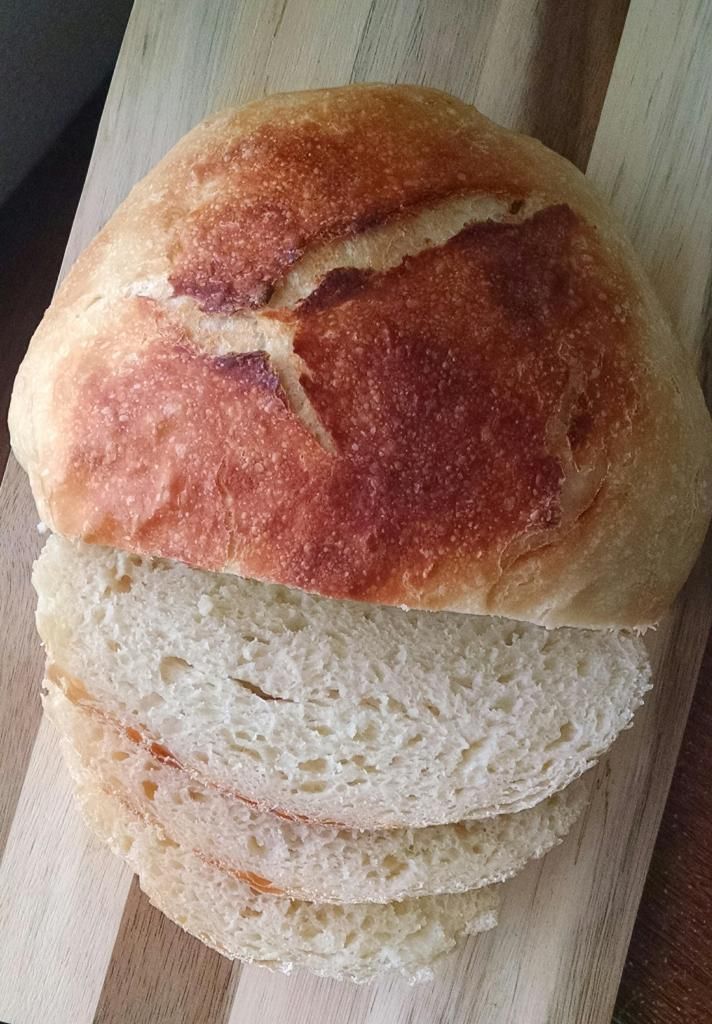
I am a serious lover of sourdough, but don't often make it. I used to have a starter that I kept up with, but it's been quite a while. I was intrigued by this recipe that I found for sourdough bread using yogurt instead of starter. What a perfectly simple way to have a fresh baked loaf of sourdough bread without messing with a starter! The dough comes together very quickly and is mostly unattended. This bread takes 18 hours to proof, plus about an additional 2 hours or so for the shaping, final rising, and baking, so plan ahead.
Easy No Starter Sourdough Bread
3 cups all purpose flour
1 1/2 teaspoons salt
1/4 teaspoons yeast
1 1/2 cups plain unsweetened yogurt with live cultures
In a large bowl, stir together the flour, salt, yeast, and yogurt until a shaggy dough forms. Turn the dough out onto a lightly floured surface and knead for several minutes until smooth. The dough should be slightly tacky, so be careful not to add too much flour.
Place the dough in a greased bowl, and lightly spray the top of the dough with cooking spray. Cover the bowl tightly with plastic wrap and let the dough sit at room temperature for 18 hours.
After 18 hours, take the dough out of the bowl and shape it into a ball, trying to retain as much of the rise as possible (don't flatten it or press the air bubbles out). Place the shaped dough on a piece of lightly greased parchment paper and loosely cover with a bowl or plastic wrap. Let the dough rise for about 1 1/2 hours.
Place a lidded french oven, dutch oven, or heavy bottomed pot in the oven. Preheat the oven (and the french oven with lid) to 450F. When the oven is ready, remove the french oven or pot from the oven and remove the lid. Lightly dust the top of the dough with a bit of flour. Use the edges of the parchment as handles, and lift the bread and place it inside the hot french oven or pot. Put the lid back on and place the bread in the oven. Let bake for 30 minutes, then remove the lid and continue baking for about 10 to 15 minutes, or until the top is golden brown. Remove bread from the oven and carefully remove it from the french oven or pot. Let the bread cool slightly on a cooling rack. Makes 1 loaf.
Enjoy! -Cardamommy