We love chocolate at my house. Well most of us. There are some who prefer vanilla over chocolate. Unfortunately, whenever I make something vanilla, I usually offset it with something chocolate. This cake, then, is for my oldest Hungry Puppy. Just because. The cake is a fabulously fun cake to make. You combine all of the dry ingredients (flour and all!) then beat the butter into that. Then add the milk and eggs. Seem totally backwards? It totally works! And you don't have to worry about adding the wet then the dry, in which order, and how many additions. Super simple. Super delicious.
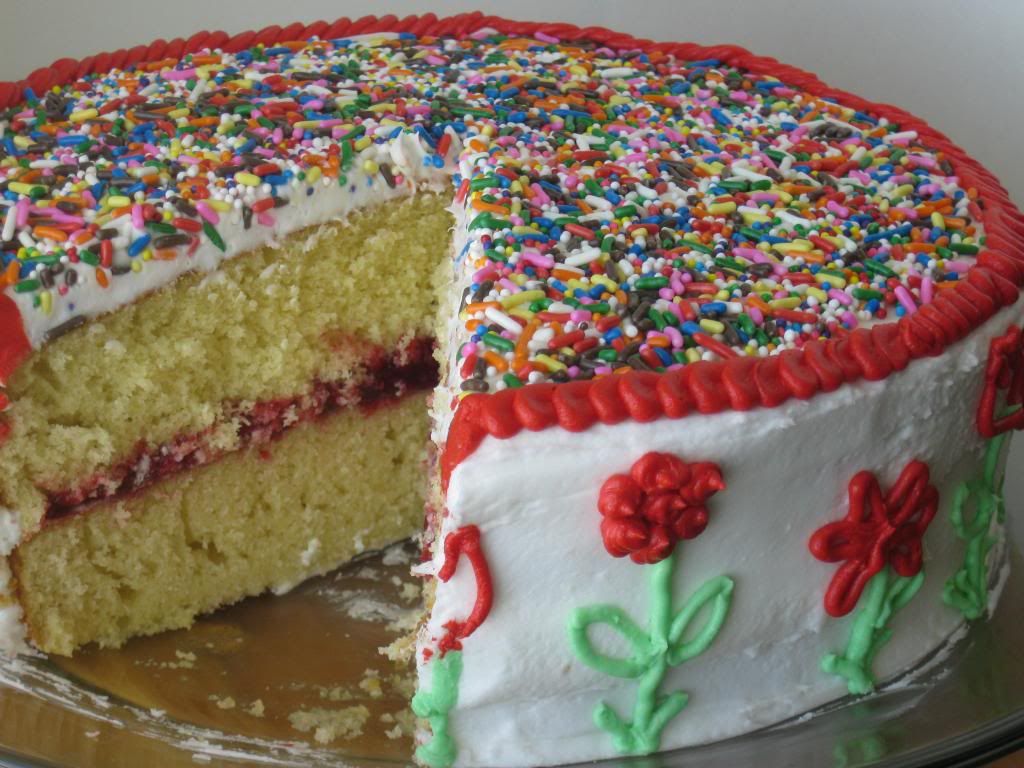
Raspberry Filled Vanilla Butter Layer Cake
Vanilla Butter Cake:
2 3/4 cup all purpose flour
1 1/2 cups granulated sugar
3 3/4 teaspoons baking powder
3/4 teaspoon salt
12 Tablespoons (1 1/2 sticks) butter, room temperature
3/4 cup milk, room temperature
2 teaspoons vanilla extract
4 eggs, room temperature
1 cup canned raspberry pie filling
Bakery Style Frosting:
1 cup shortening
1/4 cup powdered non-dairy creamer
1/2 teaspoon almond extract
1/2 teaspoon clear vanilla (for really white frosting)
16 ounces (about 4 cups) powdered sugar
4-6 Tablespoons water
Sprinkles (optional)
Preheat the oven to 350F. Spray 2 9-inch round cake pans with cooking spray, then dust with flour, tapping out any excess.
In a large bowl, combine the flour, sugar, baking powder, and salt. Add the butter, and beat on low speed until the mixture resembles crumbs (no larger than pea size). Add the milk and vanilla extract and beat until well blended. Add the eggs one at a time, beating well after each addition.
Pour the cake batter evenly in the two pans, using a spatula to smooth out the top. Place the cakes in the preheated oven and bake for about 25 minutes, or until a toothpick inserted in the center of the cakes comes out clean. Remove the cakes from the oven and place on a wire rack for 20 minutes to cool. Run a butter knife around the edge of each cake, then turn the cakes out of the pans. Place the cakes on the cooling rack to cool completely.
For the frosting, cream together the shortening, creamer, almond extract, and vanilla extract. Gradually beat in the powdered sugar (mixture will be very dry and maybe a bit crumbly). Add the water (starting with 4 Tablespoons and adding more if necessary) and beat the frosting until smooth.
To assemble the cake, place one cake layer upside-down on a serving plate. Spread with the raspberry pie filling to within about 1/2 inch of the edge of the cake. Place the second cake layer upside-down on top of the raspberry filling. Frost the top and sides of the cake with frosting, decorate with sprinkles and piped designs if desired. Makes 12 to 16 servings.
Enjoy! -Cardamommy