Showing posts with label Vanilla Bean. Show all posts

Friday, August 5, 2016

Strawberry Vanilla Bean Sherbet


My sister made this simple and delicious sherbet when she was here a couple of weeks ago.  I have made lots of home made ice cream, but never sherbet, and I was so impressed with how it turned out!  It was really delicious.  I was a little bit skeptical about the flavor of the vanilla bean coming through, but you could really taste the vanilla flavor with the strawberry.  And honestly? Not difficult at all to make. So you should.  Original recipe found here.

Strawberry Vanilla Bean Sherbet

4 cups chopped strawberries, fresh or frozen
1/2 cup granulated sugar
2 Tablespoons lemon juice
Pinch of salt
1 cup heavy cream
1 vanilla bean, halved and seeds scraped out

Place the strawberries, sugar, lemon juice, and pinch of salt in a food processor or blender and process until pureed.  Pour into a large bowl.

Place the whipping cream in a bowl and add the vanilla bean seeds.  Beat the whipping cream until soft peaks form.  Fold the whipped cream into the strawberry puree.  Chill for several hours, or until cold.

When you are ready to freeze the sherbet, pour the strawberry mixture into your ice cream maker and process according to the manufacturer's directions.  Transfer the sherbet to a freezer container and freeze until firm.  Makes about 1 1/2 quarts.

Enjoy!  -Cardamommy


Friday, April 4, 2014

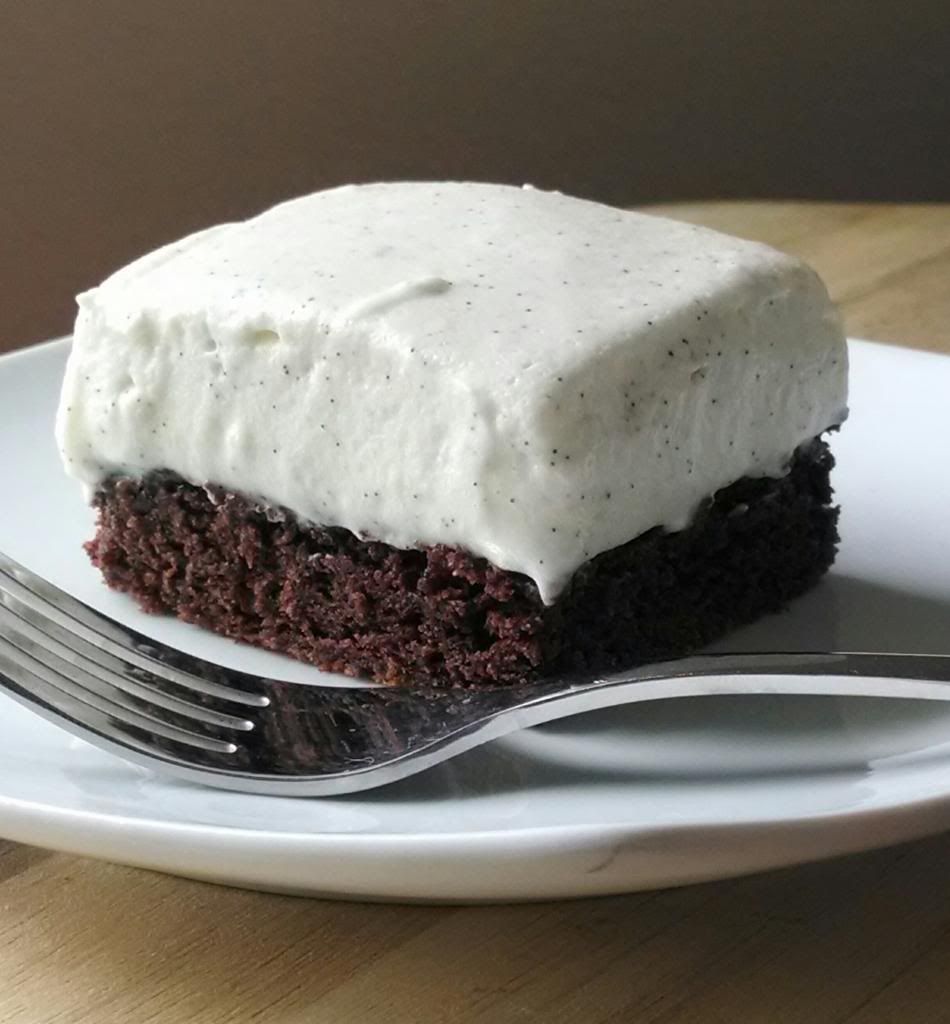
White Chocolate Vanilla Bean Mousse Brownies


So, I've had some vanilla beans in my possession for a really really long time.  So long, in fact, that they dried out completely.  So I plumped them back up, then didn't use them, causing them to dry out again.  I won't mention how many times this occurred.  I finally had to just buckle down and figure something out to do with them.  So here we are.  I love this combination of a moist and fudgy chocolate brownie topped with a sweet and light white chocolate mousse.  So delicious, and not too difficult.  Mousse recipe adapted from here.

White Chocolate Vanilla Bean Mousse Brownies

Brownies:
1/2 cup butter, room temperature
1 cup granulated sugar
1 teaspoon vanilla extract
2 eggs
1/2 cup all purpose flour
1/2 cup cocoa powder
1/4 teaspoon baking soda
1/4 teaspoon salt

White Chocolate Vanilla Bean Mousse:
6 ounces white chocolate, chopped
1/4 cup heavy whipping cream
2 egg whites
1/4 cup granulated sugar
1/2 cup heavy whipping cream
Seeds of 1 vanilla bean

Preheat the oven to 350F.  Spray a 9x9 inch square baking pan with cooking spray, then line with parchment paper, leaving the edges hanging over the sides (for handles), then lightly spray the parchment.  Set aside.

In a large bowl, beat together the butter and sugar until combined.  Add the vanilla extract and eggs and beat until incorporated.  Add the flour, cocoa powder, baking soda, and salt, and beat until just combined.  Scrape the brownie batter into the prepared pan and bake for about 25 minutes, or until a toothpick inserted in the center comes out with moist crumbs.  Remove brownies from the oven and let cool completely.

For the mousse, place the white chocolate in a large medium sized bowl.  Heat the 1/4 cup of whipping cream until it is at a simmer, then pour over the white chocolate and let sit for a minute or two.  Stir the chocolate mixture until completely melted and smooth.  Let cool to room temperature.

In a separate bowl, beat the egg whites until frothy, then add the sugar one tablespoon at a time, while continuing to beat, until stiff peaks form.  Set aside.  

In another bowl, combine the 1/2 cup of whipping cream and the vanilla bean seeds.  Beat the cream until stiff peaks form.  Set aside.

Gently fold the egg whites into the cooled white chocolate mixture.  Gently fold the whipped cream into the egg white and chocolate mixture.  Spread the mousse over the completely cooled brownies and chill until firm.  Cut into squares and serve.

Enjoy!  -Cardamommy


Friday, April 26, 2013

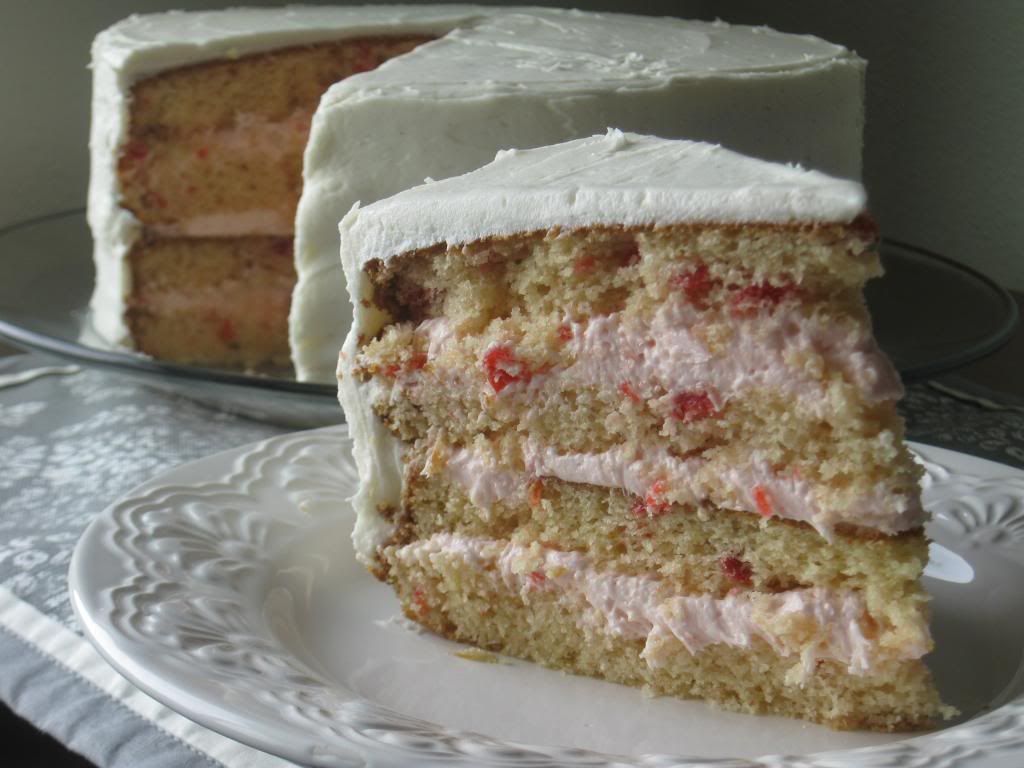
Cherry Chip Layer Cake


I recently found myself with a jar of maraschino cherries and no thoughts on how to use them.  After staring at them in the refrigerator for several weeks, I decided to make a cherry chip cake from scratch.  The cake is a super easy yellow cake using self rising flour that I adapted from King Arthur Flour.  The layers are filled with a cherry marshmallow cream filling, and the entire confection is covered with a glorious layer of vanilla frosting.  

Cherry Chip Layer Cake

Cake:
1 cup (2 sticks) butter, room temperature
2 cups granulated sugar
1 teaspoon vanilla extract
1 teaspoon cherry extract
4 eggs
3 1/4 cups self rising flour
1 cup milk
1 cup finely chopped maraschino cherries

Cherry Cream Filling:
1 container (7 ounces) marshmallow cream
1/2 cup shortening
1/3 cup powdered sugar
2 - 3 Tablespoons maraschino cherry juice

Vanilla Frosting:
1/2 cup (1 stick) butter, room temperature
1/2 cup shortening
1 teaspoon vanilla bean paste
4 cups powdered sugar
2 - 4 Tablespoons milk

Preheat the oven to 350F.  Grease and flour 2 9-inch round cake pans.  Set aside.

For the cake, beat together the butter, sugar, vanilla extract, and cherry extract until smooth.  Beat in the eggs, one at a time.  Beat in 1/3 of the flour, followed by 1/2 of the milk.  Beat in another 1/3 of the flour, then the remaining milk, then the last 1/3 of the flour.  Mix just until smooth.  Stir in the maraschino cherries.

Divide the batter evenly between the prepared cake pans, smoothing the tops, then tap the pans firmly on the counter several times to knock any air bubbles to the surface.  Bake the cake for about 30 minutes, or until a toothpick inserted in the center comes out clean.  Remove cakes from the oven and let cool in the pans for about 10 minutes, then run a knife around the edge of the cake and turn out onto a cooling rack to cool completely.

For the filling, beat together the marshmallow cream, shortening, powdered sugar, and maraschino cherry juice until smooth and fluffy.

For the vanilla frosting, cream together the butter, shortening, and vanilla bean paste.  Beat in the powdered sugar, 1 cup at a time (mixture will be dry).  Add enough milk to reach the desired consistency, and beat until the frosting is  light and fluffy.

To assemble the cake, cut each cake layer in half horizontally to equal 4 cake layers.  Place one layer on a serving plate, then spread 1/3 of the cherry cream filling on top.  Place another layer on top, then spread with another 1/3 of filling.  Set the 3rd cake layer on top of the filling, and spread with the remaining filling.  Place the last cake layer on top, then frost the top and sides of the cake with the vanilla frosting.  Makes 12 to 14 servings.

Enjoy! -Cardamommy


Friday, April 12, 2013

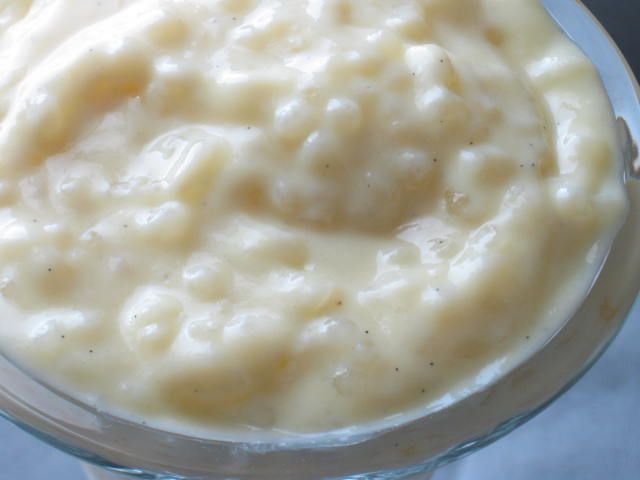
Tapioca Pudding


Tapioca is a well loved but rarely enjoyed treat at my house.  I have made it a grand total of one time, using quick cooking tapioca.  It was less than impressive.  I was browsing around chow.com a while ago and came across this recipe.  It looked amazing, so I tried it out.  Holy cow was it ever incredible.  This pudding was devoured.  Seconds were requested.  I actually had to make a second batch so I could take a picture of it to post here.  This pudding can be eaten warm, but I recommend eating it cold.  But I am a cold dessert person.  Warm pie, warm pudding...just doesn't do it for me.  Whichever way you like to eat it, this tapioca pudding will not disappoint.

Tapioca Pudding

3 cups whole milk
1/3 cup small-pearl tapioca (not instant)
1/2 cup granulated sugar
2 large egg yolks, lightly beaten
1 vanilla bean, split lengthwise, seeds scraped and reserved (I used 1 Tbsp vanilla bean paste)
1/8 teaspoon fine salt

Place 1 cup of the milk and the tapioca pearls in a medium saucepan and stir to combine. Let the pearls soak uncovered at room temperature for 1 hour.

Add the remaining 2 cups of milk, sugar, egg yolks, vanilla seeds, and salt and stir to combine. Place the pan over medium heat and cook, whisking frequently, until the mixture just comes to a simmer, about 10 minutes (do not let the mixture boil). Reduce the heat to low and cook, whisking frequently, until the mixture thickens and the tapioca pearls are softened and translucent, about 15 minutes. 

The pudding will thicken as it cools.  Serve warm if desired.  If serving cold, pour the pudding in a bowl and place a piece of plastic wrap directly onto the surface of the pudding and place in the refrigerator for 4 hours or overnight.  Makes 4 - 6 servings.

Enjoy!  -Cardamommy

Wednesday, August 29, 2012

Carrot Cake with Vanilla Bean Cream Cheese Frosting


Since I had a recent request for carrot cake, I decided that I would give it a go today.  This cake is moist and delicious, and full of carrots, raisins, and fresh shredded coconut.  Topped with cream cheese frosting, it is a hearty and delicious cake that will disappear quickly.

Carrot Cake with Vanilla Bean Cream Cheese Frosting

Cake:
2 1/2 cups all purpose flour
1 1/4 teaspoons baking powder
1 teaspoon baking soda
1/2 teaspoon salt
1 1/4 teaspoon cinnamon
1/2 teaspoon nutmeg
1/8 teaspoon cloves
4 eggs
1 1/2 cups granulated sugar
1/2 cup packed brown sugar
1 1/2 cups canola oil
1 pound carrots, peeled and grated (I used a food processor to grate)
1/2 cup raisins
1/2 cup fresh shredded coconut

Vanilla Bean Cream Cheese Frosting:
4 ounces cream cheese, room temperature
4 Tablespoons (1/2 stick) butter, room temperature
1 teaspoon vanilla bean paste (or just use regular vanilla)
3 cups powdered sugar

Preheat the oven to 350F.  Grease a 9x13 baking dish.

In a small bowl, combine the flour, baking powder, baking soda, salt, cinnamon, nutmeg, and cloves.  In a large bowl, whisk together the eggs, granulated sugar, and brown sugar until well combined.  Add the oil and whisk gently until the oil is completely incorporated.  Stir in the flour mixture until no streaks of flour remain.  Stir in the carrots, raisins, and coconut.

Pour the batter into the prepared baking dish.  Bake for about 35 to 45 minutes, or until a toothpick inserted in the center comes out clean.  Remove from oven and let cool completely.

For the frosting, cream together the cream cheese and butter.  Add the vanilla bean paste and mix well.  Gradually beat in the powdered sugar until completely combined.  Spread the frosting over the top of the cooled cake.  Makes 12 to 15 servings.

Enjoy!  -Cardamommy

Monday, January 17, 2011

Honey Vanilla Bean Marshmallows


I think that we have already established my love and devotion for homemade marshmallows, so we probably need not overdo it.   The honey flavor comes through in these marshmallows, as does that luscious vanilla bean flavor.  Toasting or melting these marshmallows before eating them would bring out those flavors even more (my hungry puppies gave them high marks).  You can find the original recipe here.  Just let me say that these are quite possibly my favorite marshmallows ever.  So far.  We'll have to see what the future holds.  


Honey Vanilla Bean Marshmallows


1 cup cold water, divided
3 1/4-ounce packages unflavored gelatin
1 1/2 cups sugar
1/4 cup honey
2/3 cup light corn syrup
1/4 teaspoon salt
2 teaspoons vanilla extract
1 vanilla bean, seeds scraped out and reserved
1/4 cup cornstarch
1/4 cup powdered sugar


In a small bowl, whisk together the cornstarch and powdered sugar.  Spray a 9x13 pan with cooking spray, and then coat with the cornstarch mixture.  Set both aside.  Pour 1/2 cup of the cold water into the bowl of a stand mixer with a whisk attachment.  Sprinkle the gelatin over the water and let it sit while you prepare the sugar syrup.


In a medium saucepan over medium-high heat, bring sugar, honey, corn syrup, salt, and the remaining cold water to a boil, stirring to dissolve the sugar.  Continue to boil the syrup until it reaches 240F on a candy or instant read thermometer.  When the sugar syrup reaches 240F, turn the mixer to low speed and carefully stream the sugar syrup down the side of the bowl into the gelatin mixture (while the mixer is running).  Once you have added all of the sugar syrup, increase the mixer speed to high and beat for 8 minutes.  The mixture will be thick, white, and fluffy.  Add the vanilla extract and vanilla bean paste, and continue beating for 2 more minutes.


Spread the marshmallow  mixture into the prepared pan, and spread evenly with a clean wet (or lightly greased) spatula.  Sprinkle more of the cornstarch mixture over entire surface of the marshmallow and let sit at room temperature for at least 4 hours, or overnight.  When the marshmallow is set, turn it out onto a large cutting board.  Using a pizza cutter, slice the marshmallows into cubes, and toss the cubes in the cornstarch mixture.  Store the marshmallows in an airtight container for up to a week, or you may freeze the marshmallows for a slightly longer shelf life (if they last that long).


Enjoy!  -Cardamommy

Monday, November 22, 2010

Lemon Poppy Seed Cake with Vanilla Bean Cream Cheese Frosting


Today is my older sister's birthday. I would have loved for this to be her birthday cake, but she lives a thousand miles away. So I have no choice but to send her a birthday cake, after a fashion. Happy Birthday, Sister!

This cake was so nice and refreshing. It was nice and light with a clear lemon flavor, and the frosting was soft and not too sweet. The cake and the frosting balanced each other very well. I will definitely be making this cake again. I adapted this recipe from the one found here.

Lemon Poppy Seed Cake with Vanilla Bean Cream Cheese Frosting

Cake:
2 cups cake flour
1 1/4 cups granulated sugar
3 teaspoons baking powder
1/2 teaspoon salt, scant
2 Tablespoons poppy seeds
2/3 cup butter, room temperature
Grated zest of 1 large lemon
3/4 cup + 2 Tablespoons buttermilk
2 egg whites + 1 whole egg

Lemon Syrup:
4 Tablespoons sugar
Juice of 1 large lemon
1/4 cup water

Vanilla Bean Cream Cheese Frosting:
1 vanilla bean
2 1/2 cups confectioner's sugar
1 8 ounce package cream cheese, room temperature
1/2 cup (1 stick) butter, room temperature
1 1/2 teaspoons vanilla extract

Preheat the oven to 350F. Grease two 9 inch round cake pans and line the bottoms with a round of parchment paper. Grease the parchment paper.

In the bowl of a stand mixer, combine the flour, sugar, baking powder, salt, an poppy seeds. Beat on low speed to gently blend the ingredients. Add the buter, lemon zest, and buttermilk to the flour mixture (in that order), beating on low to combine. Once blended, increase the speed to medium and beat one to two minutes. In a small bowl, gently beat egg and egg whites, then add to batter and beat only enough to incorporate, scraping down the sides as needed. Pour the batter evenly into cake pans. Bake cakes for about 20 to 25 minutes or until a toothpic inserted in the center comes out clean. Let the cakes cool in the pans for about 10 mintues while you make the lemon syrup.

For the lemon syrup: Combine the sugar, lemon juice, and water in a small non-reactive saucepan. Bring to a boil and stir until the sugar has dissolved. Set aside. Turn the cake layers out onto cooling racks and generously brush the warm cakes with the hot lemon syrup. Let cool completely.

For the frosting: In the bowl of a stand mixer, add cream cheese and butter. Split the vanilla bean lengthwise and scrape out the seeds gently with the point of a knife. Add the seed paste to the cream cheese and butter, and beat on medium speed until light and fluffy. Add the powdered sugar, 1/2 to 1 cup at a time, beating well after each addition and scraping down the sides. Continue to beat until very fluffy, add the vanilla extract and beat well.
To assemble: Place one cake layer upside down on a serving plate. Spread some frosting over the layer, and top with the second cake layer. Cover top and sides of cake with remaining frosting. Makes 10 to 12 servings.
Enjoy! -Cardamommy
Related Posts Plugin for WordPress, Blogger...