Showing posts with label Mint. Show all posts
Friday, July 15, 2016
Coconut Mint Macaroon Brownies
I saw this idea in a King Arthur Flour catalog a while back, and I totally wanted to create it on my own from scratch. I put it on my to do list and was so excited to make it! And then things got totally nuts. And all baking motivation completely left me. And so I kind of ended up having to force myself to make these brownies. Which led me to cheat a little bit. I used a boxed brownie mix. And you should too if you want to/need to. Or you can use your favorite brownie recipe and make them from scratch. Either way, you win, because these bars will be on your plate. Also, do you remember these Chocolate Dipped Mint Coconut Macaroons? I do. In fact, I think of them often and how amazing they were. I get it. Coconut and mint and chocolate do not sound like a match made in heaven. But they totally work. I swear. Try it.
Coconut Mint Macaroon Brownies
Brownies:
18 ounce Brownie Mix (or use your favorite homemade recipe!!)
Ingredients called for on the box
Macaroon:
2 eggs
3/4 cup granulated sugar
1 teaspoon vanilla extract
1/2 teaspoon mint extract
3 cups shredded coconut
1/2 cup all purpose flour
Preheat the oven to 350F. Line a 9x9 inch square pan with foil and grease the foil.
Prepare the brownies according to the package directions.
While the brownies are baking, in a large bowl stir together the eggs, sugar, vanilla, and mint extract until smooth. Add the coconut and flour and stir until well combined.
When the brownies are almost done (the edges should be pulling away from the sides, but a toothpick inserted in the center will have a bit of batter), remove them from the oven and spoon the coconut macaroon mixture evenly over the top. Return the pan to the oven and continue baking for 25 to 30 minutes, or utnil a toothpick inserted in the center comes out clean. Let brownies cool completely in the pan. Use the foil to lift the cooled brownies out of the pan and cut into bars. Makes 16 bars.
Enjoy! -Cardamommy
Friday, April 24, 2015
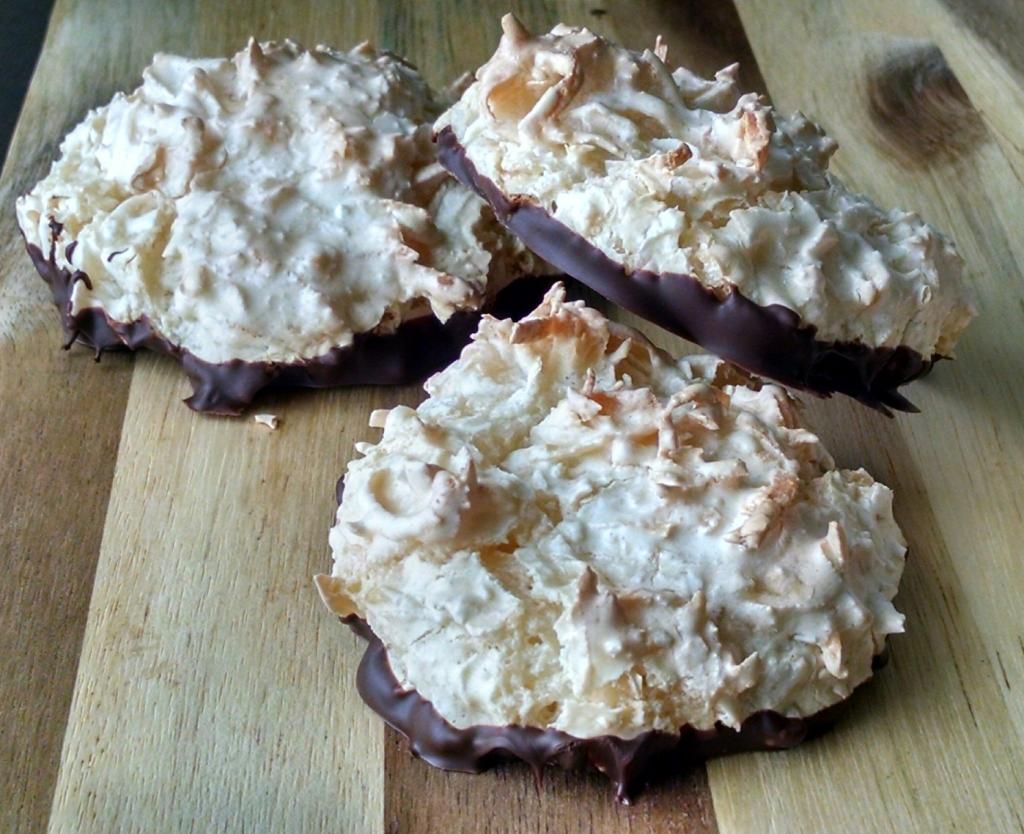
Chocolate Dipped Mint Coconut Macaroons
I have been wanting to make some sort of dessert with a coconut/mint flavor combination for a really long time. First, it took me forever to figure out what I should make. Then it took me forever to actually make it! I found the original recipe for these macaroons in The Founding Farmer's Cookbook. Founding Farmers is a restaurant in Washington D.C. that is part of the farm-to-table movement and is directly linked to the North Dakota Farmers Union. The recipe for these macaroons originally made 4 dozen, so I scaled that back just a little. I also threw in some mint extract and chocolate. These cookies are amazing. The mint and coconut together are delicious, and the chocolate doesn't overpower. If you'd rather have regular coconut macaroons, just swap 1 teaspoon of vanilla extract for the mint and leave out the chocolate.
Chocolate Dipped Mint Coconut Macaroons
3 egg whites
1 cup granulated sugar
1 Tablespoon honey
1/2 - 3/4 teaspoon mint extract
8 ounces shredded sweetened coconut (about 2 cups, but go by weight if possible)
6 Tablespoons cake flour
1 cup semi sweet chocolate chips
Preheat the oven to 300F. Line a baking sheet with parchment paper.
In a stainless steel bowl over a pot of boiling water (don't let the bottom of the bowl touch the water), whisk together the egg whites, sugar, honey, and mint extract until the mixture is warm and the sugar has dissolved. Transfer the egg white mixture to the bowl of a stand mixer and beat with the whisk attachment until soft peaks form (this will take several minutes). Use a spatula to fold in the coconut and flour.
Scoop large spoonfuls of the dough (about 2 1/2 tablespoons) and drop onto the prepared baking sheet. Bake for 14 to 18 minutes, or until golden brown. Transfer the cookies to a cooling rack to cool completely.
When the cookies are cool, place the chocolate chips in a microwave safe bowl and heat in the microwave in 30 second intervals, stirring after each, until melted and smooth. Drop the cookies into the melted chocolate to coat the bottom of the cookie, then using two forks, lift the cookies out and place on a piece of waxed paper. Let the chocolate set up before serving. Makes 12 cookies.
Enjoy! -Cardamommy
Monday, March 16, 2015
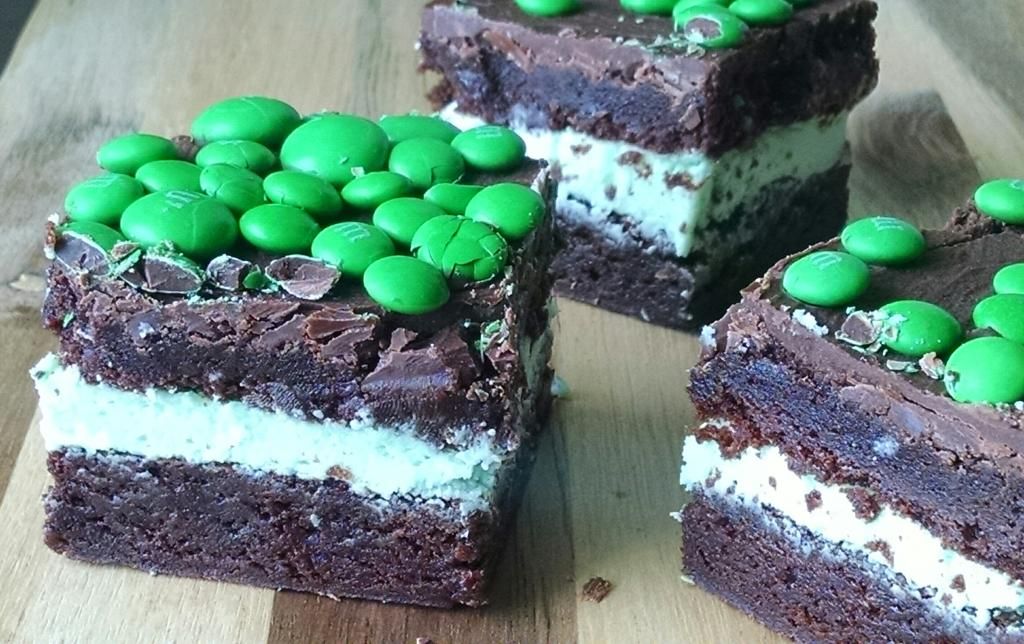
Mint Brownie Sandwich Bars
These brownies were definitely a stroke of genius. I started with an easy one bowl brownie baked into two layers, then sandwiched some fluffy mint frosting between the layers. Topped with a thin layer of chocolate and finished off with M&Ms, these brownies are soft, chewy, crunchy, chocolatey and minty all at the same time! They are unstoppable and easily a new favorite.
Mint Brownie Sandwich Bars
Brownies:
1 cup (4
½ ounces) All-Purpose Flour
3/4 cup
(2 ¼ ounces) cocoa powder
2 cups
(14 ounces) sugar
1/4
teaspoon salt
1/4
teaspoon baking powder
3 large
eggs
1/2 cup
(8 tablespoons) butter, melted
1/4 cup
vegetable oil
1 teaspoons vanilla extract
3/4 teaspoon mint extract
Mint Frosting:
1/4 cup butter
1/4 cup shortening
1 teaspoon mint extract
Several drops of green food coloring
2 cups powdered sugar
1 Tablespoon milk
Chocolate Glaze:
4 ounces milk chocolate chips
1 Tablespoon butter
Green M&Ms
Preheat the oven to 350F. Grease 2 9x9 inch square baking pans and line the bottoms with parchment paper, letting the ends of the parchment hang over the sides of the pan like handles.
Place all of the brownie ingredients in a large bowl and stir together until well blended and smooth. Divide the batter evenly between the two prepared pans and smooth the tops. Bake in the preheated oven for 17 to 20 minutes, or until a toothpick inserted in the center comes out with moist crumbs. Remove brownies from the oven and let cool completely.
For the frosting, cream together the butter, shortening, mint extract, and food coloring. Beat in the powdered sugar, one cup at a time, until combined. Add the milk and beat until smooth.
When the brownies are cool, run a knife around the sides of the brownies to loosen from the pan. Using the parchment as handles, lift one the brownie layers out of the pan. Spread the frosting evenly over the brownie still in the pan. Remove the parchment from the second brownie layer, and place the brownie layer over the frosting.
In a small microwave safe bowl, place the chocolate chips and butter. Microwave in 15 second intervals, stirring after each, until melted and smooth. Spread the chocolate over the top of the brownie. Sprinkle green M&Ms on top. Cut into squares. Makes 16 servings.
Enjoy! -Cardamommy
Friday, November 28, 2014
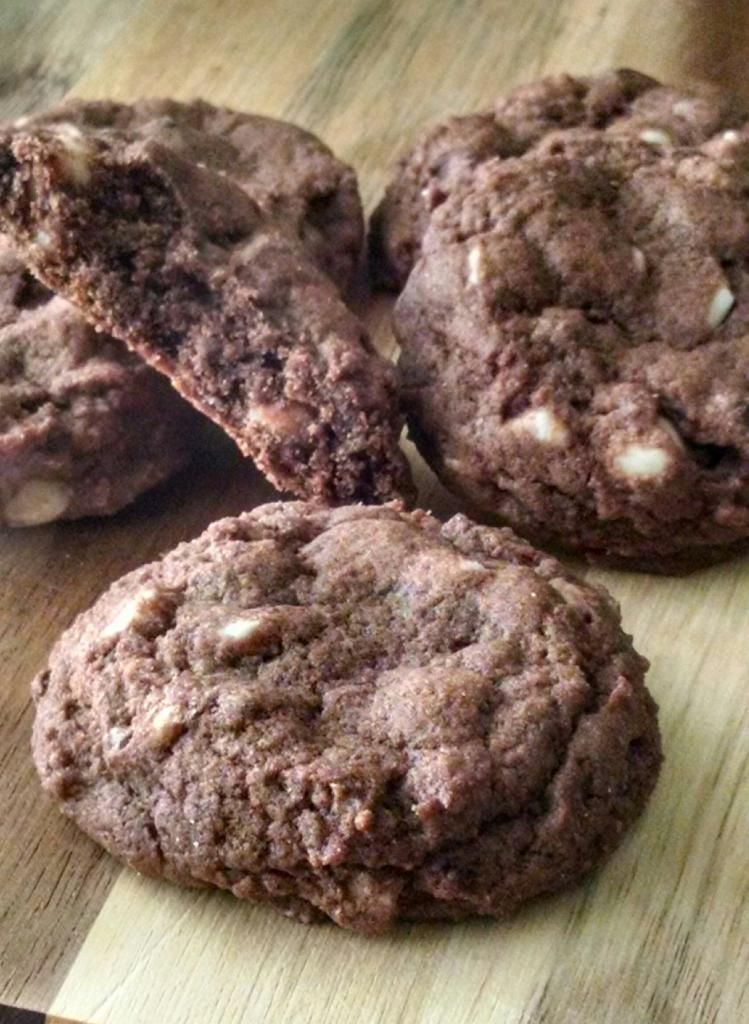
Mint Chocolate Double Chip Cookies
I good friend of mine moved out of town recently, and I asked her if there was anything I could do to help her out (thinking of packing or cleaning, or watching her kids, etc...). She said that there was something that I could do for her, could I please bring over a batch of cookies? Any kind would be fine. Of course I would absolutely love to bring cookies over! I made these cookies using the dough recipe from these Triple Chocolate Peppermint Patty Cookies (which now makes me want to go buy some peppermint patties and make them again for real!). This fudgy chocolate cookie has just a touch of mint flavor that doesn't overpower the whole cookie, and the chocolate and white chocolate chips are the perfect addition.
Mint Chocolate Double Chip Cookies
2 3/4
sticks butter, grated and cold
3/4 cup
granulated sugar
3/4 cup
packed brown sugar
2 large
eggs
2
Tablespoons half and half or cream
1 1/2
teaspoons vanilla extract
1 teaspoon peppermint extract
3 cups all-purpose
flour
1/2 cup
plus 2 Tablespoons cocoa powder
3/4
teaspoon salt
1 1/2
teaspoon baking powder
1/2
teaspoon baking soda
1 1/2 cups chocolate chips (semi-sweet or milk)
1 1/2 cups white chocolate chips
Preheat the oven to 375F. Line a baking sheet with parchment paper.
In a
large mixing bowl, beat cold grated butter with granulated sugar and brown
sugar just until creamy. Don't
overbeat. Add the eggs, vanilla, peppermint extract, and
half and half, and beat until just incorporated.
Combine
the flour, cocoa powder, baking soda, baking powder, and salt. Add flour mixture to the creamed mixture and
carefully stir until well blended. When
the dough is thoroughly mixed, stir in the chocolate chips.
Scoop the dough into 2 tablespoon size balls and place on the prepared baking sheet. bake in the preheated oven for 8 to 9 minutes, or until just set in the center. You don't want to overbake these. We want them to stay moist and fudgy inside. Remove the cookies from the oven and let cool on the pan for several minutes. Transfer cookies to a cooling rack to cool completely. Makes about 36 cookies.
Enjoy! -Cardamommy
Labels:
Chocolate
,
Chocolate chip cookies
,
Chocolate Chips
,
Cocoa
,
Mint
,
Peppermint
,
White Chocolate
Monday, February 17, 2014
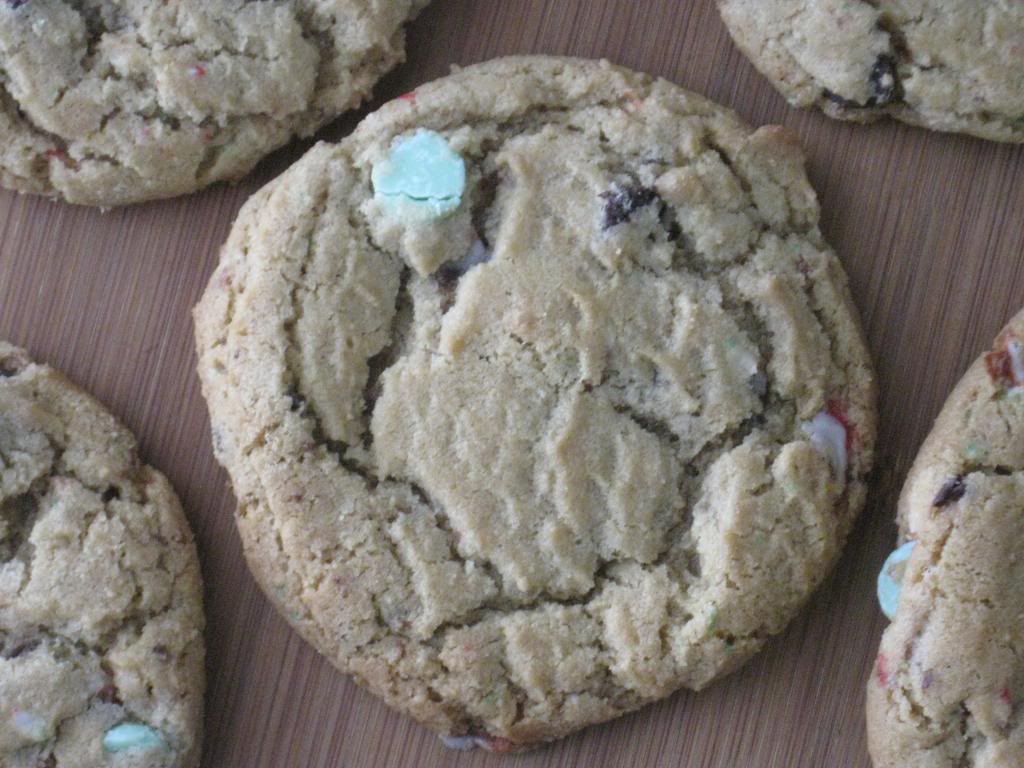
Candy Cane Crunch Mint Chocolate Chip Cookies
So why, you may ask, am I posting a minty candy caney recipe in February? Because I, without fail, have some sort of Christmas candy leftovers (usually in the form of candy canes) that I can no longer stand to have staring me down from the cabinet every time I open it. This year, I had leftover mint chocolate chips and mint chocolate candy canes. What a perfect way to use both (I'm lucky the flavors matched...)! These cookies are deliciously minty with the perfect touch of chocolate and crunch from the candy canes.
Candy Cane Crunch Mint Chocolate Chip Cookies
2/3 cup (10 2/3 Tablespoons) butter, room temperature
2/3 cup (10 2/3 Tablespoons) shortening
1 cup granulated sugar
1 cup packed brown sugar
2 eggs
2 teaspoons vanilla extract
2 cups all purpose flour
1 cup bread flour1 teaspoon baking soda
1 teaspoon salt
2 cups mint chocolate chips
1/2 cup (about 6 full size candy canes) crushed chocolate mint candy canes
Preheat the oven to 375F. Line a baking sheet with parchment paper, set aside.
Cream together the butter, shortening, granulated sugar, and brown sugar until light and fluffy. Beat in the eggs and vanilla until combined, scraping down the sides of the bowl if necessary. Add the flour, bread flour, baking soda, and salt, and beat until just combined. Add the chocolate chips and crushed candy canes and beat on low until evenly distributed.
Using a 2 Tablespoon cookie scoop, scoop the dough into balls and place on the prepared baking sheet, about 2 inches apart. Bake in the preheated oven for 10 to 12 minutes, or until golden brown on the edges and just set in the center. Remove cookies from the oven and let cool on the pan for several minutes. Transfer cookies to a cooling rack to cool completely. Makes about 30 cookies.
Enjoy! -Cardamommy
Labels:
Candy
,
Candy Cane
,
Chocolate
,
Chocolate chip cookies
,
Chocolate Chips
,
Cookies
,
Dessert
,
Mint
Friday, December 6, 2013
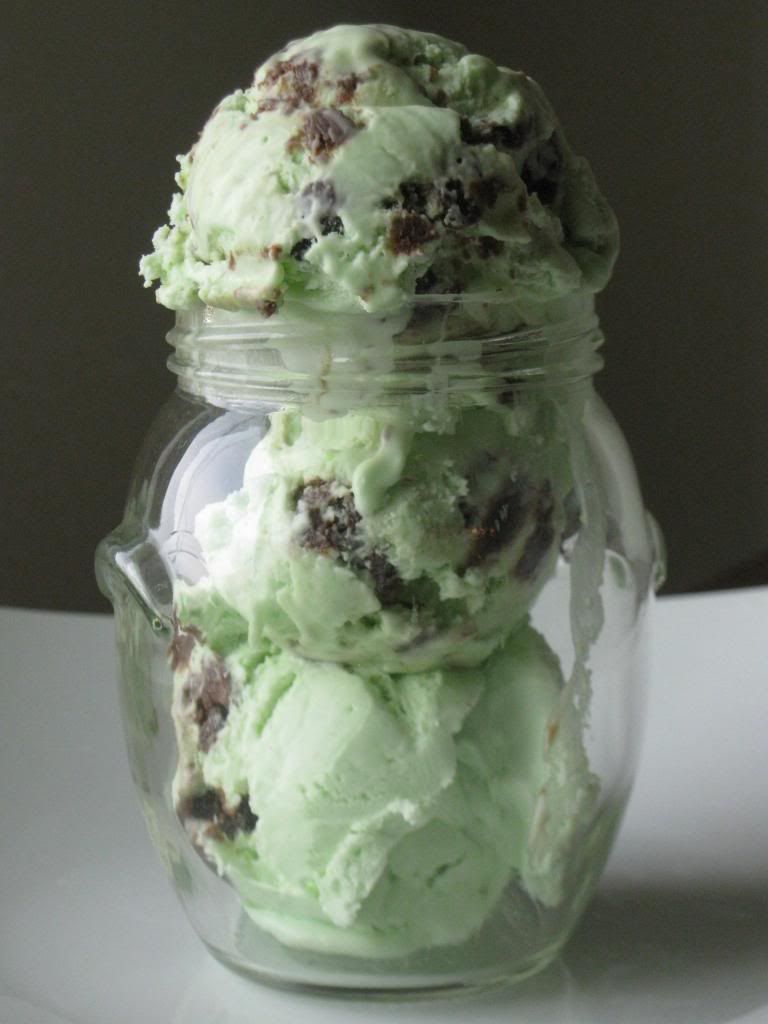
Mint Chocolate Cookie Dough Ice Cream
Chocolate Cookie Dough:
6 Tablespoons butter, melted
1/2 cup packed brown sugar
1/4 cup granulated sugar
1 teaspoon vanilla extract
3/4 cup all purpose flour
1/4 cup cocoa powder
1 Tablespoon milk
1/2 cup mini chocolate chips
Mint Ice Cream:
2 cups heavy whipping cream
2 teaspoons peppermint extract
green gel food coloring
3/4 cup sweetened condensed milk (about 1/2 of a 14 ounce can)
3/4 cup marshmallow cream (about 1/2 of a 7 ounce container)
To make the cookie dough, stir together the butter, brown sugar, granulated sugar, vanilla, and salt. Add the flour and cocoa powder and stir until combined. Stir in the milk, then the chocolate chips. Roll the dough into little balls and freeze. You won't need all of the cookie dough, but use as much or as little as you like!
For the ice cream, whip the heavy whipping cream until stiff peaks form. Add the peppermint extract and food coloring, and whip until combined. Add the sweetened condensed milk and marshmallow cream, and beat until completely incorporated. Remove the cookie dough bites from the freezer and fold them into the ice cream. Place the ice cream in a freezer container and freeze until firm, about 4 hours or overnight. Makes about 1 1/2 quarts of ice cream.
Enjoy! -Cardamommy
Labels:
Chocolate
,
Chocolate Chips
,
Cookie Dough
,
Dessert
,
Ice Cream
,
Marshmallows
,
Mint
,
Peppermint
,
Whipped Cream
Monday, April 16, 2012
Mint Chocolate Cupcakes
These cupcakes will be sure to satisfy your mint chocolate craving. Moist chocolate cupcakes with a surprise peppermint patty tucked inside, topped with a smooth and minty frosting.
Mint Chocolate Cupcakes
Cupcakes:
1 box dark chocolate cake mix
1 (4 serving) box instant chocolate pudding (I used sugar free-fat free)
1 cup sour cream
1 cup canola oil
4 eggs, lightly beaten
1/2 cup milk
24 peppermint patties
Frosting:
1/2 cup shortening
1/2 cup (1 stick) butter, room temperature
1/2 teaspoon vanilla extract
1/2 teaspoon (or more to taste) mint extract
Green gel food coloring
4 cups powdered sugar
2 Tablespoons milk
For the cupcakes, preheat the oven to 350F. Line 24 cupcake cups with paper liners. In a large bowl, combine the cake mix, chocolate pudding, sour cream, oil, eggs, and milk. Beat together until well combined. Fill each cup about 1/4 full, then place a peppermint patty on top. Spoon the rest of the batter over the peppermint patties, distributing the batter evenly between the muffin cups. Bake for about 22 to 25 minutes, being careful not to overbake. Let cool in pans for about 5 to 10 minutes, then remove cupcakes from pans and cool completely on a cooling rack.
For the frosting, in a medium bowl, cream together the shortening, butter, vanilla extract, mint extract, and green coloring to reach desired shade. Beat in the powdered sugar. Add the milk and beat until smooth. Spread the frosting on top of the cooled cupcakes. Makes 24 cupcakes.
Enjoy! -Cardamommy
Friday, March 16, 2012
Mint Oreo Brownies
These brownies are a fudgy, gooey, minty, crunchy treat. And we love them. Not difficult to put together. Not difficult to devour. Start off with my favorite King Arthur Flour brownies with Mint Oreo chunks stirred in. Top that with a minty, marshmallowy, white chocolatey frosting. Then pat some more Mint Oreo chunks onto the top. Perfection.
Mint Oreo Brownies
Brownies:
1 cup (2 sticks) butter
2 1/4 cups (15 3/4 ounces) granulated sugar
1 1/4 cups (3 3/4 ounces) cocoa powder
1 teaspoon salt
1 teaspoon baking powder
1 Tablespoon vanilla extract
4 large eggs
1 1/2 cups (6 1/4 ounces) all purpose flour
12 Mint Oreo cookies, chopped
Frosting:
1/4 cup (48g) shortening
1/4 cup (1/2 stick) butter, softened
1/2 teaspoon vanilla
2 cups powdered sugar
1 Tablespoon milk
1 jar (7 ounces) marshmallow cream
1/4 teaspoon mint extract
Green gel food coloring
3/4 cups white chocolate chips, melted and cooled slightly
18 Mint Oreo cookies, chopped
Preheat the oven to 350F. Lightly grease a 9x13 inch baking dish.
In a large microwaveable bowl, or in a large saucepan over medium heat, melt the butter. Stir in the sugar. Add the cocoa powder, salt, baking powder, and vanilla extract, and stir until completely incorporated. Whisk in the eggs, stirring until smooth. Add the flour and stir just until combined. Fold in the chopped Oreo cookies. Pour the batter into the prepared pan and bake for about 28 minutes, or until a toothpick inserted in the center comes out with moist crumbs. Remove brownies from the oven and set on a cooling rack to cool completely.
For the frosting, in a medium bowl cream together the shortening, butter, and vanilla. Add the powdered sugar and beat until combined. Beat in the milk. Set aside.
In a small bowl, combine the marshmallow cream, mint extract, and green food coloring (to reach desired shade). Add the marshmallow mixture to the frosting and beat together. Add the melted white chocolate to the marshmallow frosting mixture and beat together until well combined.
Spread the frosting evenly over the cooled brownies. Sprinkle the chopped Oreos over the top of the frosting and lightly press into the frosting. Makes 24 brownies.
Enjoy! -Cardamommy
Labels:
Brownies
,
Chocolate
,
Cookies
,
Frosting
,
Marshmallows
,
Mint
,
Oreo
,
White Chocolate
Tuesday, February 15, 2011
Chocolate Dipped Mint Hearts
Since the vast majority of my life is spent using the computer/internet--homework, research, homework, studying, homework, homework, etc--I sometimes forget that real books, other than textbooks, exist. Luckily, I remembered that I recently bought Nordic Ware's The Great Cookie Book. As I was flipping through pages, I came across this recipe that piqued my interest. And, because it's Valentine's Day time, I thought it especially appropriate.
I doubled the recipe because I was certain they would be delicious. However, upon making the first half, I became very concerned because they were not quite as delicious as I was hoping. I kept in mind, though, that they were a little too thick, may have been slightly underdone, and they did not have any chocolate on them. So today I tried out the second half. I rolled them to about 1/8 inch (rather than the recommended 1/4), baked them the proper time, and completed them with chocolate. Delicious. The chocolate offsets the mint perfectly, making a splendid Valentine cookie to share with family and friends. And maybe your Valentine.
Dough:
3/4 C Sugar
1 C Butter, softened
1 3 oz pkg Cream Cheese, softened
1 Egg
1 tsp Peppermint Extract (I used mint, because that's what I had)
3 C All-Purpose Flour
Chocolate Glaze:
1 1/2 C Semi-Sweet Chocolate Chips
1/3 C Butter
Cookies:
In a large bowl, combine sugar, butter, ream cheese, egg and peppermint. Beat at medium speed until light and fluffy, scraping the sides of the bowl as necessary. Add flour and beat until mixed. Divide dough in half. Wrap in waxed paper or plastic wrap. Chill for at least 2 hours, or until firm.
Preheat oven to 375 F. Roll out dough on a floured work surface to 1/4 inch thickness (again, I found it worked better at 1/8 inch). Cut out hearts using floured cutter. Space 1 inch apart on ungreased baking sheet. Bake for 7-10 minutes, or until edges are very lightly browned. Transfer immediately, cool on wire racks.
Chocolate Glaze:
Melt chocolate morsels and butter in a small saucepan over low heat, stirring frequently. Dip half of each heart into melted chocolate. Place cookies on a waxed paper baking sheet. Refrigerate until chocolate sets. Store in an air tight container in the refrigerator.
Mahlzeit!
-Coriaunty
Monday, December 13, 2010
Mint Marshmallows
I have sort of a thing for marshmallows. I love to try out the seasonal varieties like gingerbread, chocolate, and french vanilla in the store when I find them. Nothing, however, beats a homemade marshmallow. After making (and eating) a batch of homemade marshmallows, I have a hard time going back to store bought. This is another perfect recipe for Christmas time. I use a basic marshmallow recipe from Alton Brown, and put my own spin on it. Don't be intimidated by the thought of homemade marshmallows. They are unbelievably easy, and well worth it.
The mint is interesting and a bit unexpected coming out of a marshmallow, and the red swirl gives this sweet confection a festive flair. In a giant mug of hot chocolate, these marshmallows just melt away into nothing, creating a rich minty flavor. Can it get better? I'll let you know.
Mint Marshmallows
3 packages unflavored gelatin
1 cup cold water, divided
12 ounces (about 1 1/2 cups) granulated sugar
1 cup light corn syrup
1/4 teaspoon kosher salt
3/4 teaspoon mint extract
red food coloring
1/4 cup powdered sugar
1/4 cup cornstarch
In the bowl of a stand mixer (using the whisk attachment), place the gelatin along with 1/2 cup of the water. In a small saucepan, combine the remaining 1/2 cup of water, granulated sugar, corn syrup, and salt. Bring to a boil over medium-high heat and let it continue to cook until it reaches 240F (use a candy thermometer, or monitor closely with an instant read thermometer). Once the mixture reaches 240F, remove from heat immediately.
Turn the mixer on low speed, and slowly pour the sugar syrup (while mixer is running) down the side of the mixer bowl into the gelatin. Once all of the syrup is added, increase the mixer speed to high. Continue to whip on high for 12 to 15 minutes, or until the mixture becomes very thick and is just warm. During the last minute of whipping, add the mint extract.
While the marshmallows are whipping, lightly spray a 9x13 inch pan with cooking spray. In a small bowl, combine powdered sugar and cornstarch. Dust the bottom and sides of the pan with the cornstarch mixture to cover completely, then return any extra mixture to the bowl. When the marshmallow is through whipping, pour into the prepared pan, using a lightly oiled spatula to spread it evenly. Place drops of red food coloring all over the top of the marshmallow (working quickly before the mixture sets up too much to swirl), then take a toothpick and run it through the marshmallow and food coloring to create a swirl effect. Dust the top of the marshmallow with enough of the remaining cornstarch mixture to lightly cover, saving the rest for later. Allow the marshmallows to sit, uncovered, for 4 hours or overnight.
After the marshmallows have set up, turn them out onto a large cutting board, and using a pizza cutter, cut into 1-inch squares. Once cut, roll the marshmallows in the remaining cornstarch mixture. Store in an airtight container for up to 3 weeks (I store mine in an airtight container in the freezer).
Note: You can use a hand mixer with a whisk attachment to make these marshmallows, but be prepared to hold the mixer for a long time, and it may stress your mixer quite a bit.
Enjoy! -Cardamommy
Sunday, December 12, 2010
Dark Chocolate Mint Chip Cookies
1 cup (2 sticks, 8 ounces) butter, room temperature
1 1/4 cup + 2 Tablespoons (10 ounces) granulated sugar
2 eggs
1/2 cup (2 ounces) dark cocoa powder
2 1/4 cups (10 ounces) all purpose flour
Large pinch of Kosher salt
1/4 teaspoon baking powder
1 1/2 cups Nestle Toll House Dark Chocolate & Mint Morsels
Preheat oven to 350F. Line a baking sheet with parchment paper. In a large bowl, cream together butter and sugar until fluffy. Add eggs, one at a time, and beat until well-incorporated. Carefully, with mixer on low speed, beat in cocoa powder. In a separate bowl, mix flour, salt, and baking powder, then add to creamed mixture and beat slowly until just combined. Gently stir in the baking chips.
For one dozen perfect sized (large) cookies, divide the dough into 12 equal portions and place on parchment lined baking sheet. Bake for 12 minutes, being careful not to overbake. For quite a few more smaller cookies, use a small cookie scoop to drop the dough on the baking sheets. Bake for 6 minutes, being careful not to overbake. Let cool on a cooling rack.
Enjoy! -Cardamommy
Subscribe to:
Posts
(
Atom
)