Showing posts with label Vanilla. Show all posts

Monday, May 23, 2016

Hot Chocolate Chip Pound Cake


I have been on some kind of a weird pound cake crave lately.  I think I have made pound cake only one other time in my life, but suddenly this week it was a necessary thing at my house.  I found this recipe and loved the addition of  hot chocolate powder instead of just plain cocoa, so I made a few adjustments and came up with this delicious confection.  

Hot Chocolate Chip Pound Cake


2 sticks (16 tablespoons) unsalted butter, room temperature
1 3/4 cups all-purpose flour
1/2 teaspoon fine salt
4 large eggs, at room temperature
2 tablespoons vanilla greek yogurt
1 teaspoon pure vanilla extract
1 1/4 cups sugar
1/2 cup hot chocolate powder (I used Swiss Miss)
½ cup milk chocolate chips 
1/2 cup marshmallow bits

Preheat the oven to 350F.  Line a 9x5 inch loaf pan with foil and grease the foil.

Place the flour and salt into a medium bowl. In a small bowl, whisk together the eggs, yogurt, and vanilla.


In a large bowl, cream together the butter and sugar until light and fluffy, several minutes.  On low speed, gradually beat in the flour, a little at a time, until just incorporated. Beat in the egg mixture, a little at a time, until just incorporated.  Remove about 1/3 of the batter and transfer to a separate bowl.  Stir in the hot chocolate powder and the marshmallow bits.  Stir the chocolate chips into the vanilla batter.


Spoon half of the vanilla batter into the preapared pan, and smooth the top.  Drop half the of the chocolate batter in spoonfuls over the vanilla batter in the pan.  Pour the remaining vanilla batter over the chocolate, then drop spoonfuls of the remaining chocolate batter on top.  Using a long skewer or knife, run it through the batter in a swirling pattern.  Tap the pan on the counter to level the batter just a bit.

Bake in the preheated oven for 60 to 80 minutes, or until a toothpick inserted in the center comes out clean.  Using the foil as handles, lift the cake out of the pan and let cool on a cooling rack for several minutes.  Carefully peel off the foil, and let the cake cool completely.  Makes about 12 servings.

Enjoy!  -Cardamommy

Friday, May 13, 2016

Neapolitan Checkerboard Cake


So this cake. It's my youngest Hungry Puppy's Birthday Cake!!  I told her that I would make it, then I realized what I had committed to and wondered if I had made a mistake.  Needless to say, I am extremely pleased that it turned out. And relieved.  I had visions of making a super simple last minute night before the party birthday cake.  Thankfully I didn't have to.  This cake maybe looks a little complex, but it was really quite easy.  A couple of notes: If you only want to do two colors, just eliminate the third and alternate dark and light, and make it a two layer cake.  You can use a cake mix (I did cake mixes this time), or use your favorite cake recipes.  You will want a somewhat sturdier cake, as you will be cutting and moving it around, so a softer crumbly cake may fall apart.  For the frosting, again, make your own (I made my own to counter the cake mix!) or use store bought.  Lastly, you will need one cake layer of each color you use, so if you use a cake mix you will have an extra layer for each color that won't be used.  I turned my extra batter into cupcakes (for a separate birthday treat), or you could tightly wrap and freeze the extra cake for another occasion.

Neapolitan Checkerboard Cake

1 9-inch Chocolate cake layer
1 9-inch Strawberry cake layer
1 9-inch Vanilla cake layer
2 cups Chocolate Frosting
2 cups Strawberry Frosting
2 cups Vanilla Frosting

For each cake layer, use a 5.5 inch round cookie cutter (or find a 5.5 inch round template and cut the cake with a knife), and cut out one ring (repeat for all three cakes).  Next, use a 2.5 inch round cookie cutter and cut out a ring inside the 5.5 inch ring (repeat for all three cakes). For each cake layer you should now have 2 rings and a center circle.

For the first layer, place the largest vanilla ring on a cake plate.  Place the second largest chocolate ring inside the vanilla ring.  Place the strawberry circle in the center.  Spread a layer of strawberry frosting on top.  For the second layer, place the largest strawberry ring on top of the first frosted layer. Place the second largest vanilla ring inside the strawberry ring.  Place the chocolate circle in the center.  Spread a layer of strawberry frosting on top.  For the top layer, place the largest chocolate ring on top of the frosting.  Place the second largest strawberry ring inside the chocolate ring.  Place the vanilla circle in the center.  

Frost the top of the cake with vanilla frosting, and frost the sides with the chocolate frosting.  Sprinkle chocolate sprinkles over the top, if desired.  Makes 16 to 20 servings.

Enjoy!  -Cardamommy
Monday, March 21, 2016

Rice Krispie Treat Cookies


Ages and ages and ages ago, I made a cookie recipe that had oatmeal and rice krispies in it, and they were totally a hit.  I would use cocoa rice krispies or fruity rice krispies, and they were super fun and yummy!  I few weeks ago I had a total baking revelation.  What if I made those cookies again, but turned them into rice krispies treat cookies?!?!?  Why oh why did it take me ages and ages and ages to come up with that idea?? No clue.  But we're here now and totally loving these cookies.  The oatmeal gives these cookies a slightly nutty flavor, and the rice krispie treat cereal and double marshmallows brings that rice krispie treat flavor.  I saw a tip somewhere that said if you want to put marshmallows in cookies, leave them out on the counter overnight to dry out and get a little stale.  They will hold up much better in the heat of the oven.


Rice Krispie Treat Cookies

1 cup (2 sticks) butter, room temperature
1/2 cup granulated sugar
1/2 cup packed brown sugar
2 eggs
2 teaspoons vanilla extract
2 cups all purpose flour
1 teaspoon baking soda
1/2 teaspoon baking powder
1/4 teaspoon salt
3 cups Rice Krispies Treats cereal
1 cup old fashioned oats
1 cup day old marshmallows (left on the counter overnight to dry out a bit)
1/2 cup marshmallow bits

Preheat the oven to 350F.  Line a baking sheet with parchment paper.

Cream together the butter, granulated sugar, and brown sugar until light and fluffy.  Beat in the eggs and vanilla until blended and smooth.  Add the flour, baking soda, baking powder, and salt and beat until just combined. Stir in the cereal and oats until incorporated.  Stir in the marshmallows and marshmallow bits until evenly distributed.

Scoop the dough into 2 tablespoon size balls, and place on the prepared baking sheet, leaving some room between them to spread.  Bake in the preheated oven for 10 to 12 minutes, or until light golden brown.  Remove cookies from the oven and let cool for several minutes on the pan.  Transfer to a cooling rack to cool completely.  Makes about 24 to 28 cookies.

Enjoy!  -Cardamommy

Friday, February 19, 2016

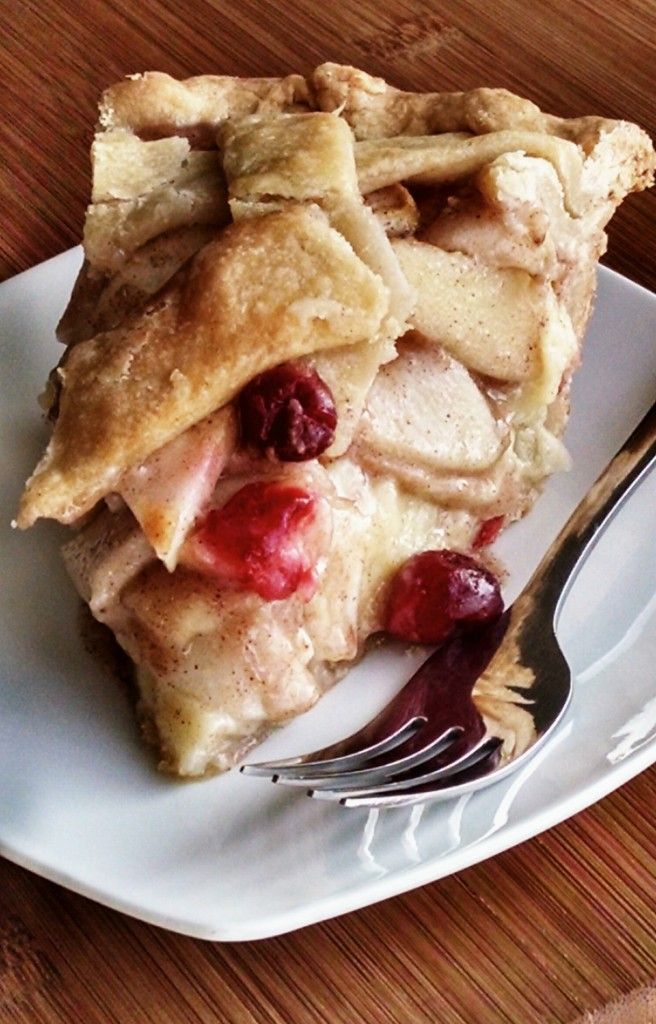
Apple Cranberry Pastry Cream Pie


I found this recipe ages ago from Better Homes and Gardens, and am just finally getting around to making it.  I feel like this is a theme in my kitchen lately.  "I can't wait to make this recipe" quickly turns into "I'll get around to it eventually". If I had my way, I'd bake and create all the time!  But then I'd also have a refrigerator full of sweets and treats.  Which sounds amazing, but my jeans wouldn't thank me.  This pie, though!  I made only a few changes from the original pie.  I used my own favorite crust recipe, and I made a lattice top.  The pastry cream at the bottom of the pie gives an interesting flavor contrast to the classic apples and tart cranberries.  Initially I was going to add more cranberries, but decided to stick with the recipe.  The cranberries, as a result don't overpower the pie, but are a nice tart colorful addition.

Apple Cranberry Pastry Cream Pie

2 layer 9-inch pie crust

Pastry Cream:
1 cup milk
1/4 cup granulated sugar
2 egg yolks
3 Tablespoons granulated sugar
3 Tablespoons cornstarch
1/4 teaspoon salt
2 Tablespoons butter
1/2 teaspoon vanilla

Apple Cranberry Filling:
6 Granny Smith apples, peeled, cored and sliced
1/2 cup cranberries
2 Tablespoons lemon juice
1 1/4 cups granulated sugar
1/4 cup all-purpose flour
1 1/2 teaspoons ground cinnamon
1/4 teaspoon ground allspice
1/8 teaspoon salt

For the pastry cream, place the milk and 1/4 cup sugar in a small saucepan and heat until nearly at a boil.  In a medium bowl, whisk together the egg yolks, sugar, cornstarch, and salt until combined.  The mixture will be very thick.  Slowly whisk about 1/2 of the milk mixture into the egg yolk mixture, then return the mixture to the pan.  Continue to cook over medium heat, whisking constantly, until the mixture is thick and bubbly.  Remove from heat and stir in the butter and vanilla.  Transfer to a bowl and cover with plastic wrap. Place in the refrigerator until you are ready to assemble the pie.

For the apple cranberry filling, place the sliced apples and cranberries in a large mixing bowl. Add the lemon juice, sugar, flour, cinnamon, allspice, and salt, and toss together until the apples are evenly coated.

Preheat the oven to 375F.

Fit the bottom crust into a 9-inch pie plate.  Spread the pastry cream over the bottom of the crust.  Spoon the apple cranberry filling over the pastry cream.  Use the top crust to make a lattice, or simply place the top crust over the pie.  Seal and crimp the edges.  If not making a lattice, cut several slits into the top of the pie to let steam escape during baking.  Place the pie in the oven and bake for 80 to 90 minutes, or until the filling is bubbly in the center.  Cover the pie loosely with foil if the crust starts to get too brown.  Remove the pie from the oven and let cool before slicing and serving.  Makes 8-10 servings.

Enjoy!  -Cardamommy


Friday, January 29, 2016

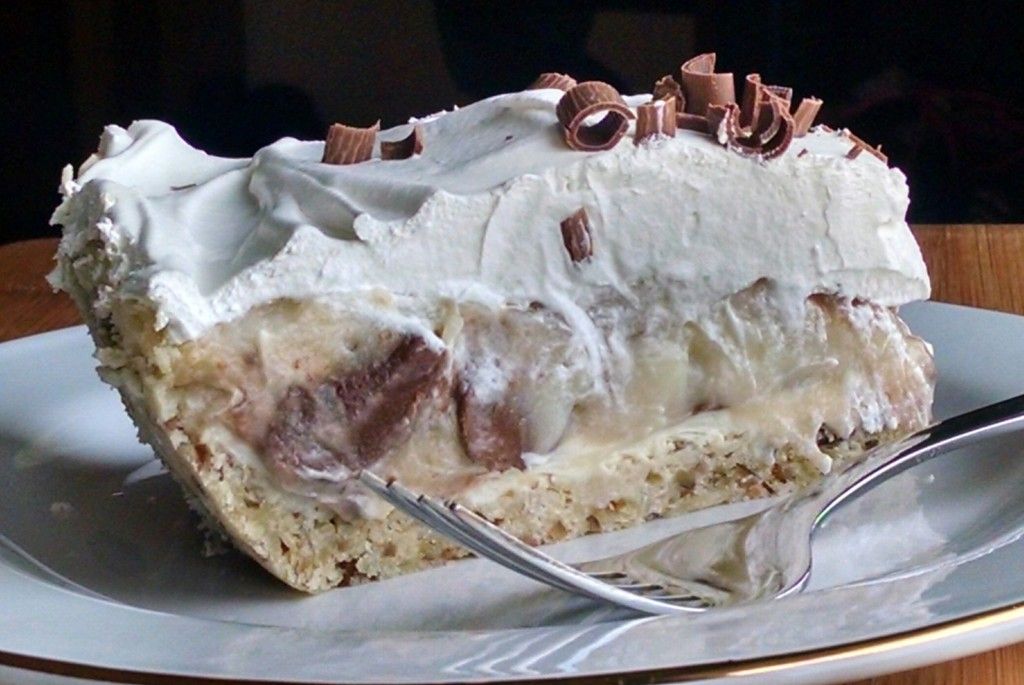
Bayou Goo Pie


When we were in Houston last Summer, my sister really really wanted to get a Bayou Goo Pie from House of Pies.  We purchased several other pies there, but unfortunately didn't get around to the Bayou Goo.  So many pies...too little time... So, my sister asked me to make one instead.  I figured out all of the components to the original Bayou Goo: Pecan crust, sweetened cream cheese, vanilla custard with chocolate chunks, and whipped cream with chocolate shavings, and put it together.  Unfortunately, I never tried the Bayou Goo pie from House of the Pies, so I don't actually know how close this pie is (bummer), but it is completely delicious.   


Bayou Goo Pie


Pecan Crust:
1 cup all-purpose flour
2 Tablespoons sugar
1/2 teaspoon salt
1/2 cup (1 stick) cold butter
½ cup finely chopped pecans

Sweetened Cream Cheese:
8 ounces cream cheese
½ cup powdered sugar
½ teaspoon vanilla extract

Vanilla Custard:
3/4 cup sugar
1/4 teaspoon salt
3 1/2 Tablespoons cornstarch
2 1/2 cups milk (I used skim)
2 eggs
2 Tablespoons butter, cut into 4 pieces
2 teaspoons vanilla
3 large Hershey Bars, chopped
8 ounces Cool Whip (or use fresh whipped cream)
Chocolate shavings (optional)

Preheat the oven to 350F.  

In a medium bowl, whisk together the flour, sugar, and salt.  Cut in the butter using a pastry blender until the mixture is crumbly.  Stir in the chopped pecans.  Press the mixture onto the bottom and up the sides of a 9 inch pie plate.  Bake in the preheated oven for 15 minutes, or until light golden brown.  Remove from oven and cool completely.

For the sweetened cream cheese, beat together the cream cheese, powdered sugar, and vanilla extract until smooth.  Spread evenly over the bottom of the cooled pecan crust. Place in the refrigerator while you prepare the pudding.

For the pudding, in a medium saucepan, whisk together the sugar, salt, and cornstarch.  Whisk in the milk and eggs until smooth.  Cook the mixture over medium heat, whisking constantly, until the mixture thickens and just starts to bubble (do not boil).  Immediately remove from heat and stir in the butter and vanilla.  Let the pudding cool for about 15 minutes, then quickly stir in the chopped Hershey bar (you want to have barely melted chunks in the pudding, not completely melted chocolate).  Immediately pour the pudding over the cream cheese layer in the crust and smooth the top.  Chill in the refrigerator until cold, at least four hours or overnight.  Spread the cool whip over the top and garnish with chocolate shavings.  Makes 8 servings.

Enjoy!  -Cardamommy
Friday, January 8, 2016

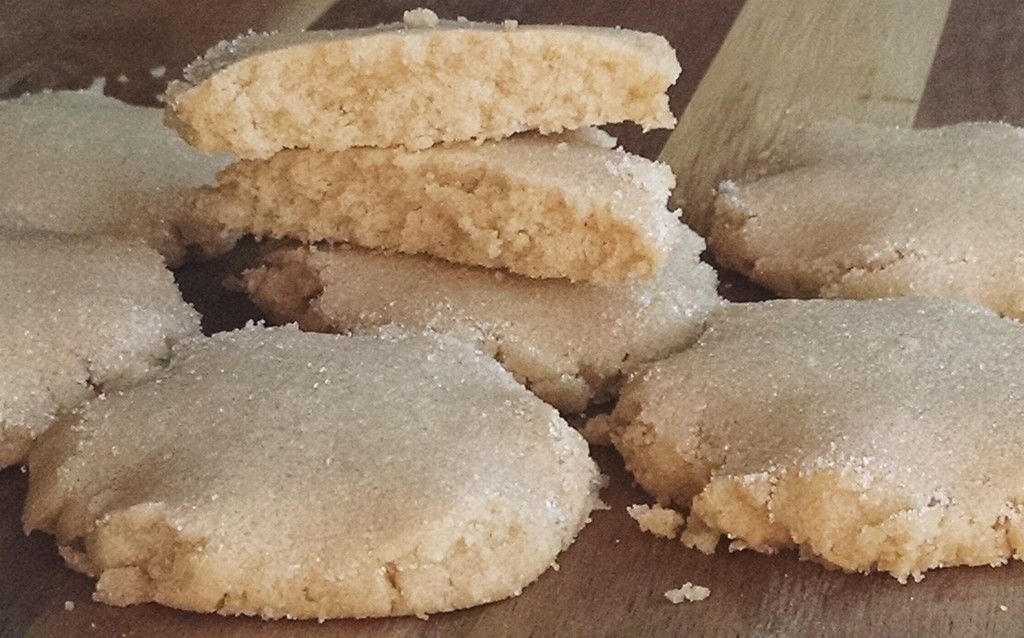
Desert Sand Cookies


Several years ago, I found the book Scandinavian Classic Baking by Pat Sinclair at the library.  Going through it, I bookmarked several recipes that I was interested in trying out.  This was one of them, and it has taken me this long to finally get around to making it!  Maybe it was their simplicity that caused me to keep putting them off.  I sorely regret that now.  These cookies are so amazingly simple and delicious!  They are tender and buttery and perfect!  The only change I made to the recipe was to press the cookies flat with the bottom of a glass instead of criss crossing with a fork.

Desert Sand Cookies


1 cup butter
2 cups all-purpose flour
½ teaspoon baking powder
1 cup sugar
½ teaspoon vanilla

Brown the butter by melting in a medium saucepan over medium heat.  Stir occasionally.  When the butter begins to foam, stir constantly until it turns a deep golden brown.  Watch carefully because at this point the color changes quickly.  It takes about 7 minutes to brown the butter.  Cool to room temperature, about 1 hour.


Heat the oven to 350F.  Mix the flour and baking powder together.  Add the cooled butter and vanilla to the sugar in a medium bowl and stir until evenly mixed.  Add the flour and mix to form a dough.  Shape the dough into balls using rounded teaspoons of dough.  Place on baking sheets and press a crisscross pattern with a fork.  Dip the tines of the fork in flour if necessary(I used the bottom of a drinking glass dipped in granulated sugar).  Bake 10 to 12 minutes.  These cookies do not brown much.  Cool the cookies on the baking sheet for 2 minutes before removing to a cooling rack.  Cool completely. Makes 3 dozen cookies


Thursday, December 24, 2015

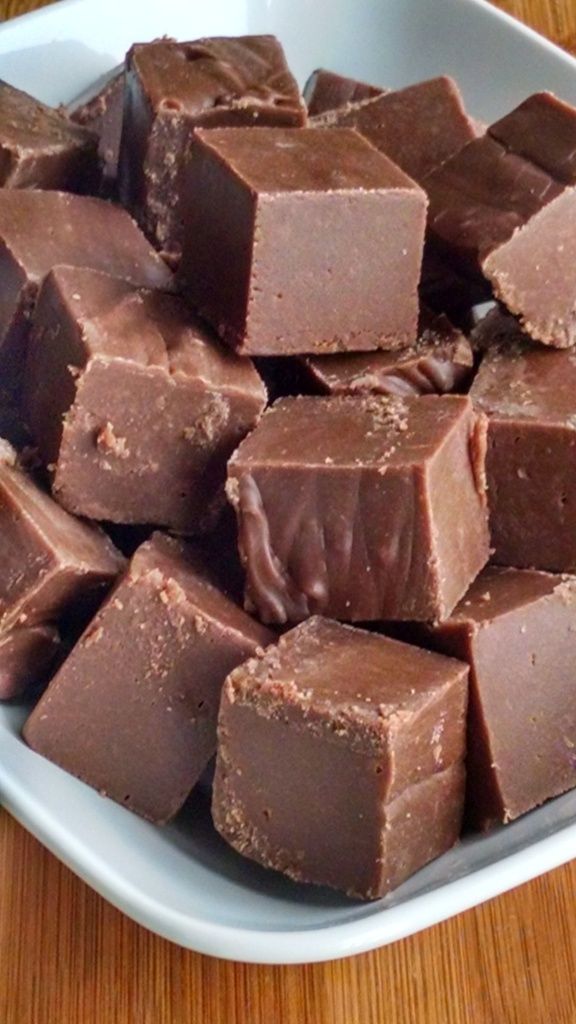
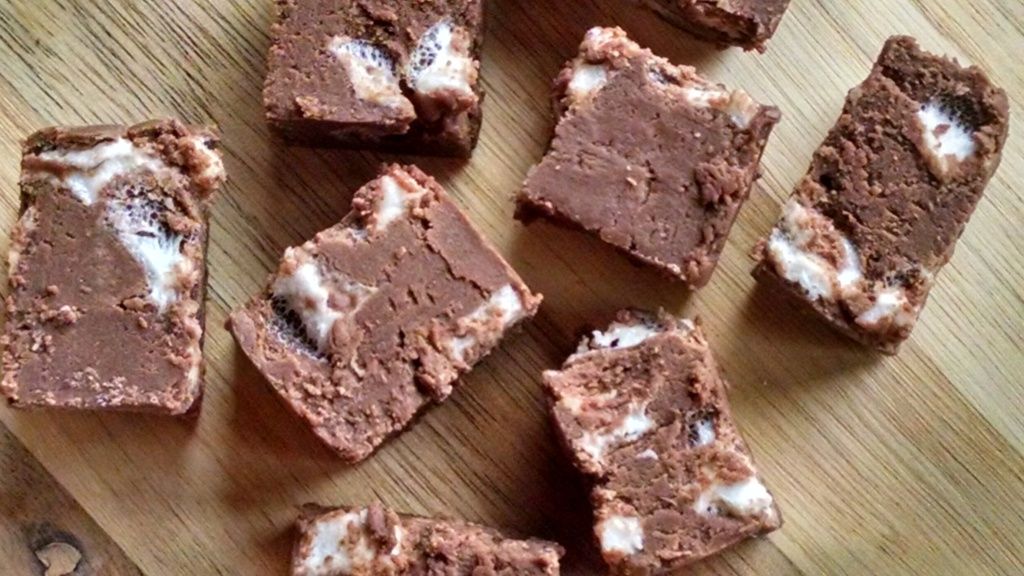
Coconut Milk Marshmallow Fudge


I swear I was only going to make one batch of fudge for Christmas.  Honest.  But then I had leftover coconut milk from these Pani Popo, and I knew I had to do it.  Coconut milk fudge.  How could I not?!  I used a basic marshmallow fudge recipe, and made a few minor tweaks and changes, and the result is kind of amazing.  This fudge is super simple, but so just crazy delicious!  Smooth, chocolatey, fudgy, and just coconutty enough to make you grab another piece!

Coconut Milk Marshmallow Fudge

2 cups granulated sugar
1/2 cup coconut milk
1/2 cup butter
12 large marshmallows
6 ounces (1 cup) milk chocolate chips
6 ounces (1 cup) semi sweet chocolate chips
1/2 teaspoon vanilla extract
1/2 teaspoon coffee extract
1/2 teaspoon coconut extract

Line a 9x9 inch square pan with foil, then grease the foil with cooking spray.

In a large saucepan, stir together the granulated sugar, coconut milk, and butter.  Bring to a boil, stirring constantly.  Once the mixture reaches a full boil, continue to boil for 2 minutes, still stirring constantly.  

Remove saucepan from the heat and immediately stir in the marshmallows, milk chocolate chips, semi sweet chocolate chips, vanilla extract, coffee extract, and coconut extract.  Continue to stir until the chocolate and marshmallows are completely melted and smooth.

Pour the the fudge into the prepared pan and chill until firm, about 4 hours.  Using the foil as handles, lift the fudge out of the pan and place on a cutting board.  Cut into squares.  Makes 64 pieces.

Enjoy!  -Cardamommy

Monday, December 21, 2015

Hot Chocolate Marshmallow Cream Fudge


This original fudge recipe comes from David Lebovitz, and was exactly what I was looking for!  His recipe called for peanuts, and since we all know I don't really go for peanuts, we switched to marshmallows and gave made a few changes to help it taste a little bit more hot chocolatey.  I think it is a total win!  My fudge turned out a bit taller than I expected, and I realized that it was because of the loads of marshmallows that I added.  You can use fewer marshmallows, or leave them out all together, but I think they add a perfect touch to this decadent fudge!

Hot Chocolate Marshmallow Cream Fudge

2/3 cup evaporated milk
6 ounces (3/4 cup,1 1/2 sticks) butter, cubed
3 cups granulated sugar
1 Tablespoon dark cocoa powder
8 ounces milk chocolate chips
4 ounces semi sweet chocolate chips
7 ounce jar marshmallow cream
1 teaspoon vanilla extract
2 cups mini marshmallows

Line an 8 inch square baking pan with foil.  Grease the foil with cooking spray.

In a 4 quart saucepan, stir together the evaporated milk, butter, sugar, and cocoa powder.  Cook, stirring constantly, until mixture reaches 234F using a candy or instant read thermometer.

Remove the pan from the heat and stir in the milk chocolate chips, semi sweet chocolate chips, marshmallow cream, and vanilla extract until completely melted and smooth.  Let the fudge cool for about 5 minutes, then quickly stir in the mini marshmallows.  Pour the fudge into the prepared pan and let cool completely.  Cut into squares.  Makes 64 pieces.

Enjoy!  -Cardamommy

Friday, September 4, 2015

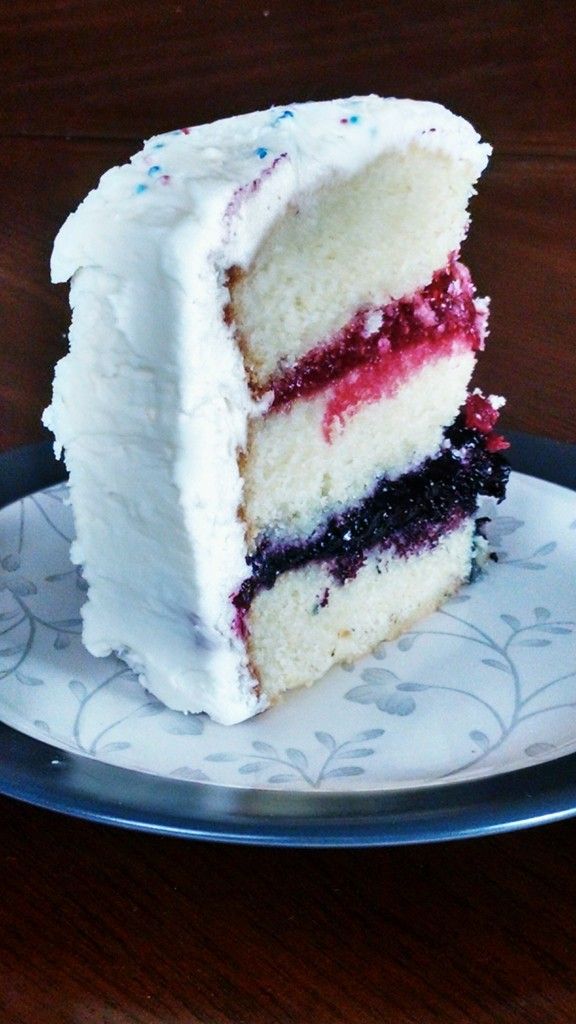
Blueberry and Raspberry Filled White Layer Cake


I've had my eye on this ice cream cake for a while now, but I wanted to turn it into a regular cake, no ice cream.  Is that weird?  Maybe, but I am a sucker for a fantastic layer cake, and this one looked like it would fit the bill.  Lovely white cake layers filled with home made blueberry and raspberry filling and covered with my favorite ever white frosting!  What's not to love here?  I may have to go into hiding with this cake so I don't have to share!

Blueberry and Raspberry Filled White Layer Cake

Blueberry Filling:
12 ounces fresh blueberries
1/3 cup granulated sugar
2 Tablespoons light corn syrup
1 teaspoon fresh lemon juice
2 teaspoons cornstarch
2 teaspoons water

Raspberry Filling:
12 ounces fresh raspberries
1/3 cup granulated sugar
2 Tablespoons light corn syrup
1 teaspoon fresh lemon juice
1 Tablespoon cornstarch
1 Tablespoon water

Vanilla Almond Cake:
3 cups all purpose flour
2 3/4 teaspoon baking powder
1/2 teaspoon salt
1/4 teaspoon baking soda
1 1/2 cups butter, room temperature
2 1/4 cups granulated sugar
2 eggs
2 teaspoons vanilla extract
1 teaspoon almond extract
1 1/2 cups milk

Buttercream Frosting:
1/2 pound (2 sticks) butter
1 cups vegetable shortening 
1/4 teaspoon salt
1 teaspoon vanilla extract
1 teaspoon butter flavoring
1/4 teaspoon almond extract
1 tablespoon meringue powder
2 pounds confectioners’ sugar, sifted
4 tablespoon milk (if needed)


For the blueberry filling, combine the blueberries, sugar, corn syrup, and lemon juice in a saucepan and bring to a boil, stirring constantly.  Reduce heat and simmer, stirring frequently, for 10 to 12 minutes,  or until thickened slightly.  In a small bowl, stir together the cornstarch and water until smooth.  Pour into the blueberry filling mixture, continuing to cook and stir for another minute, or until thick and bubbly.  Transfer the filling to a bowl, and refrigerate, uncovered until cold. (If making ahead, once the filling is cold, cover with a lid or plastic wrap until ready to use.)

For the raspberry filling, combine the raspberries, sugar, corn syrup, and lemon juice in a saucepan and bring to a boil, stirring constantly.  Reduce heat and simmer, stirring frequently, for 10 to 12 minutes,  or until thickened slightly.  In a small bowl, stir together the cornstarch and water until smooth.  Pour into the raspberry filling mixture, continuing to cook and stir for another minute, or until thick and bubbly.  Transfer the filling to a bowl, and refrigerate, uncovered until cold. (If making ahead, once the filling is cold, cover with a lid or plastic wrap until ready to use.)

Preheat the oven to 350F.  Grease 3 8-inch cake pans, and line the bottom with parchment paper, and lightly grease the parchment.

For the cake, in a small bowl, combine the flour, baking powder, salt, and baking soda.  In a large bowl, cream together the butter and sugar until light and fluffy.  Beat in the eggs, vanilla extract, and almond extract until incorporated.  Beat in 1/3 of the flour mixture until incorporated.  Add half of the milk and beat until blended.  Beat in half of the remaining flour, followed by the remaining milk, and end by beating in the rest of the flour, just until no streaks of flour remain.  

Divide the batter evenly among the three prepared pans, and bake in the preheated oven for 25 to 27 minutes, or until a toothpick inserted in the centers comes out clean.  Remove cakes from the oven and let cool in the pans for about 10 minutes.  Carefully turn the cakes out of the pans and place on a cooling rack to cool completely before assembling the cake.

For the frosting, combine the butter, shortening, and salt in a large bowl and beat on low speed for 5 minutes. Add the vanilla, butter flavor, and almond extract and beat until well blended. Turn off the mixer and add the meringue powder and half of the confectioners’ sugar. Mix on the slowest speed the mixer has. Mix in the remaining sugar 1/2 cup at a time, until all the sugar is mixed in. Turn the mixer up to medium and beat until smooth and creamy. This should take about 5 minutes. If the icing seems too thick to spread, beat in enough milk until the desired consistency is reached.

To assemble the cake, level the cakes if necessary.  Place one cake layer on a serving plate.  Spread evenly with the blueberry filling.  Place the second cake layer on top of the blueberry filling.  Spread the raspberry filling evenly over the second cake layer.  Place the last cake layer on top of the raspberry filling.  Spread the frosting over the top and sides of the cake (you may have frosting leftover).  Pipe decorations, if desired, or garnish with sprinkles.  Makes 1 3-layer cake.

Enjoy!  -Cardamommy

Friday, July 17, 2015

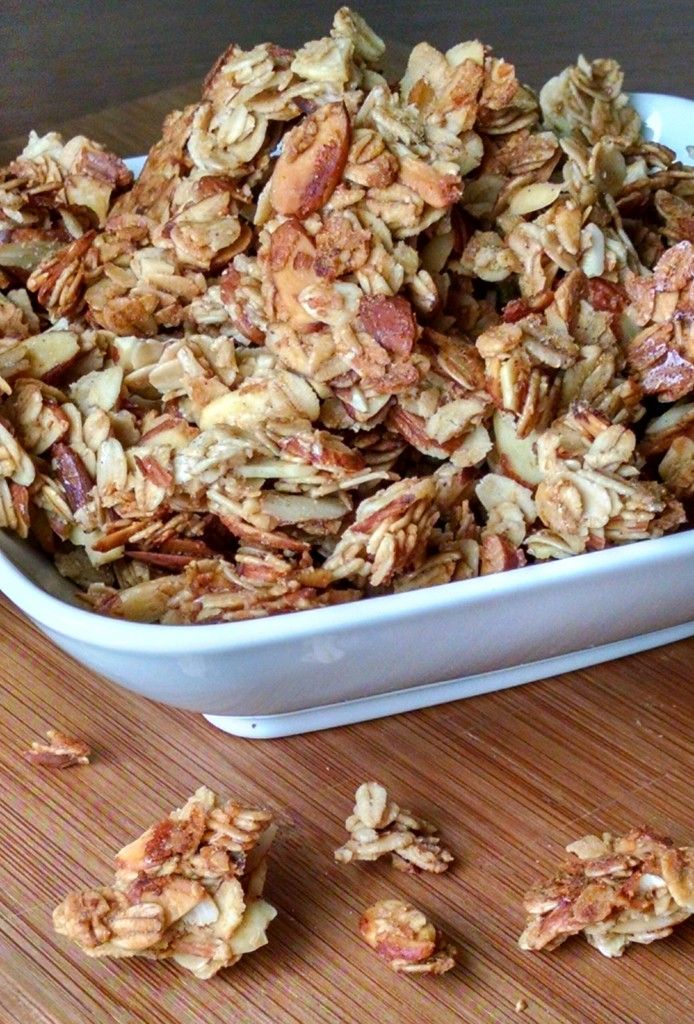
Honey Vanilla Almond Granola


I don't make granola very often, but when I do it disappears so fast! A nibble here, a bowl there, breakfast, snacks, toppings, and it's gone! This time I wanted to make it for a recipe I'm going to try out. I put granola on my grocery list, but then thought, why can't I just make it myself? So. I used this recipe as a basic outline, then added and tweaked to fit what I wanted it to be. It turned out so great, it might be our favorite so far! Note: I made a second batch of this granola using quick oats instead of old fashioned oats just to experiment with the consistency. The quick oat batch had a consistency more like what you get from store bought granola. Make it how you love it best!

Honey Vanilla Almond Granola

5 cups old fashioned oats
2 1/2 cups sliced almonds
1/2 cup coconut oil
1/3 cup honey
1/4 cup brown sugar
1/2 teaspoon cinnamon
1 Tablespoon vanilla extract
1/2 teaspoon almond extract
2 egg whites

Preheat the oven to 300F.  Lightly grease a half sheet pan.  Set aside.

In a large bowl, combine the oats and almonds. Set aside.

In a smaller bowl, stir together the coconut oil, honey, brown Sugar, and cinnamon. Place in the microwave and heat in 30 second intervals, stirring after each until bubbly. Be careful that it doesn't boil over in the microwave.  Stir in the vanilla and almond extract.  The mixture will bubble up a bit. Pour the honey mixture over the oats and stir until evenly moistened.

Place the egg whites in a bowl and beat until white and foamy. You don't need peaks here, just foam.  Stir the foamy egg whites into the oat mixture. Pour the granola onto the prepared pan and press firmly into an even layer.

Bake the granola for 30 to 40 minutes, or until golden brown. Do not stir. This plus the egg whites will keep the granola in those lovely clumps.  Remove granola from the oven and let cool completely. Break the granola into pieces and store in an airtight container.  Makes about 12 cups.

Enjoy!  -Cardamommy

Friday, July 10, 2015

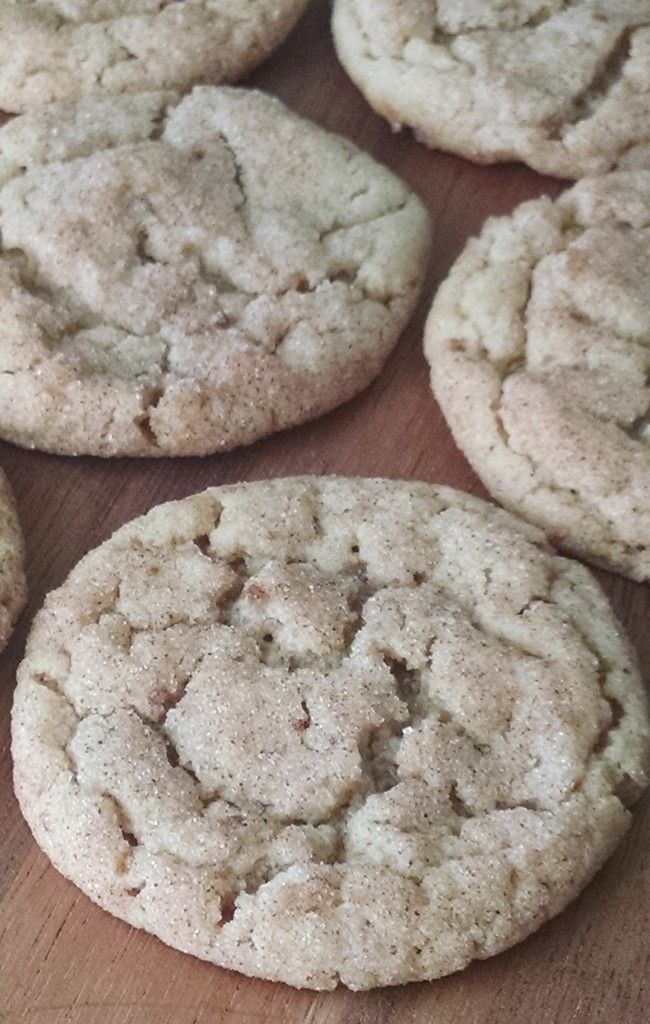
Peanut Butter Snickerdoodles


Every Sunday I make cookies for church.  There are some people who go early to have meetings before church actually starts, so I make cookies for them.  I've been doing this for a while now, and new inspiration is always welcome, so I've been letting people know that I take requests.  My first request came in last week for peanut butter snickerdoodles, and I was so excited!  I searched for a recipe, but came up empty on what I was specifically looking for.  I found this recipe, and modified it to suit my needs.  What a brilliant cookie idea!  These soft and chewy peanut butter cookies are lightly spiced with cinnamon, and rolled in a mixture of sugar and Vietnamese cinnamon for an extra spicy cinnamon bite! 

Peanut Butter Snickerdoodles


Cookies:
1/2 cup butter, room temperature
1/2 cup shortening
3/4 cup peanut butter 
3/4 cup granulated sugar
3/4 cup packed brown sugar
2 teaspoons vanilla extract
2 eggs
2 3/4 cups all purpose flour 
2 teaspoons cream of tartar
1 teaspoon baking soda
1/2 teaspoon salt
1 teaspoon cinnamon 

Cinnamon Sugar:
1/2 cup granulated sugar
2 teaspoons Vietnamese cinnamon (you can substitute regular cinnamon)

In a large bowl, cream together the butter, shortening, peanut butter, granulated sugar, and brown sugar until light and fluffy.  Beat in the vanilla extract and eggs, one at a time, until incorporated.  Add the flour, cream of tartar, baking soda, salt, and cinnamon, and beat on low just until incorporated.  Cover the dough and chill for about 1 hour.

Preheat the oven to 375F.  Line a baking sheet with parchment paper. 

For the cinnamon sugar, combine the sugar and Vietnamese cinnamon in a small bowl.  Scoop the dough into tablespoon size balls and roll in the cinnamon sugar mixture.  Place dough on the prepared baking sheet with enough room in between for the cookies to spread.  Bake the cookies for 8 to 10 minutes, or until slightly puffed and cracked on the top.  Remove cookies from the oven and let cool for several minutes before transferring to a cooling rack to cool completely.  Makes about 48 cookies.

Enjoy!  -Cardamommy


Friday, May 8, 2015

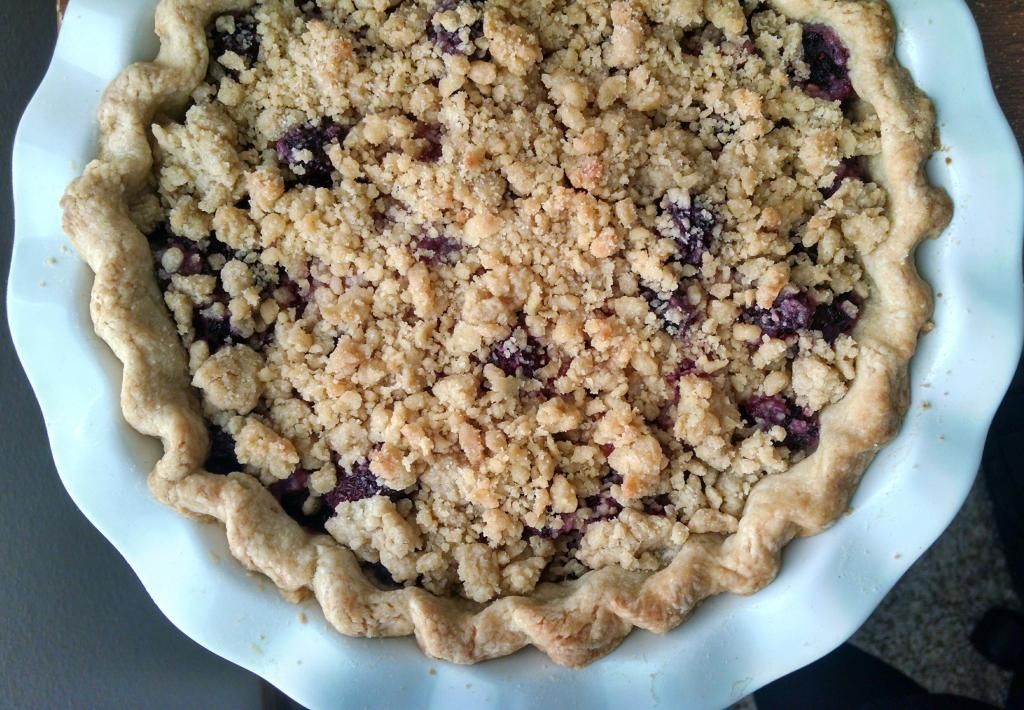
Blackberry Pie with Vanilla Crumble


I picked up some blackberries the other day and decided to make a pie with them.  Initially, I thought I would do blackberry and apple together, but I chose to do just blackberries so they would really stand out.  I didn't add a lot of sugar because I think that the berries are just sweet enough, and I left out any spices as well.  This pie is simple and quick to throw together, and is the perfect berry dessert!  

Blackberry Pie with Vanilla Crumble

Blackberry Filling:
1 layer 9-inch pie crust
5 cups fresh blackberries
1/2 cup granulated sugar
1/4 cup all purpose flour
2 teaspoons lemon juice

Crumble:
1 cup all purpose flour
1/4 cup granulated sugar
1/2 cup (1 stick) butter, melted
1/2 teaspoon vanilla extract

Preheat the oven to 350F.  Roll out the pie crust to fit a 9 inch pie plate.  Place the crust in the pie plate and crimp the edges.  Set aside.

In a large bowl, combine the blackberries, sugar, flour, and lemon juice.  Stir until blended.  Set aside.

For the crumble topping, stir together the flour and sugar.  Stir the vanilla into the melted butter.  Pour the melted butter over the flour mixture and toss with a fork until crumbly. 

Pour the blackberry mixture into the prepared pie crust, then sprinkle the crumble topping evenly over the top.  Bake in the preheated oven for about 45 minutes, or until the filling is bubbly and the crust and topping are golden brown.  Let cool before serving.  Makes 8 servings.

Enjoy!  -Cardamommy

Monday, May 4, 2015

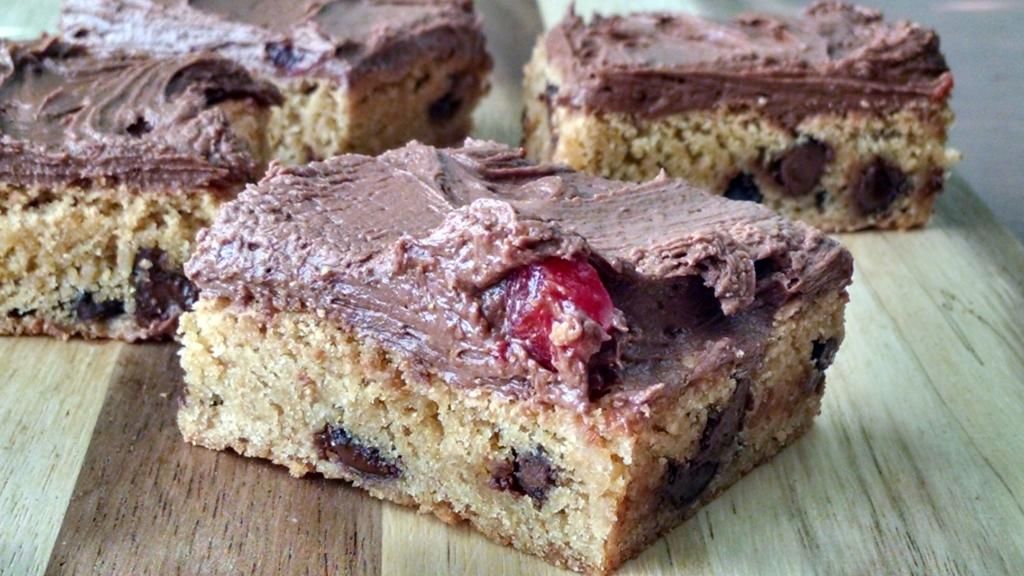
Chocolate Chip Blondies with Cherry Chocolate Frosting


I decided the other day that I needed to make chocolate cherry frosting.  As soon as possible.  With that decided, I needed to figure out what to put the frosting on (besides a spoon).  I decided on blondies. I adapted this recipe from King Arthur Flour, and it turned out perfectly!  They are thick and dense and soft and chewy and are perfect topped with chocolate cherry frosting!

Chocolate Chip Blondies with Chocolate Cherry Frosting

Blondies:
1/2 cup butter
1 1/2 cups packed brown sugar
2 eggs
2 teaspoons vanilla extract
1 3/4 cup all purpose flour
2 teaspoons baking powder
1/2 teaspoon salt
1 1/2 cups chocolate chips

Frosting:
1/2 cup butter, room temperature
1/2 cup shortening
1/4 teaspoon salt
1/2 cup cocoa powder
4 cups powdered sugar
4 to 6 Tablespoons maraschino cherry juice
maraschino cherries, chopped (optional)

Preheat the oven to 350F.  Grease a 9x13 inch baking dish.

In a large microwaveable bowl, place the butter and brown sugar.  Microwave in 30 second intervals, stirring after each, until the butter is melted.  Stir until smooth.  Stir in the eggs and vanilla until well blended.  Add the flour, baking powder, and salt and stir until incorporated.  Stir in the chocolate chips.  

Pour the batter into the prepared pan and spread evenly.  Bake in the preheated oven for about 25 minutes, or until the edges and top are golden and a toothpick inserted in the center comes out clean.  Remove blondies from the oven and let cool completely.

For the frosting, cream together the butter, shortening, and salt until smooth.  Add the cocoa powder and carefully beat on low until completely incorporated (you don't want the cocoa to fly everywhere!).  Beat in the powdered sugar, 1 cup at a time, until blended.  The mixture will be dry.  Beat in 4 tablespoons of the cherry juice and beat until the frosting is smooth and fluffy, adding additional cherry juice as necessary.  Stir in the chopped cherries (if using).  Spread the frosting on top of the cooled blondies. Makes 24 blondies.

Enjoy!  -Cardamommy

Friday, May 1, 2015

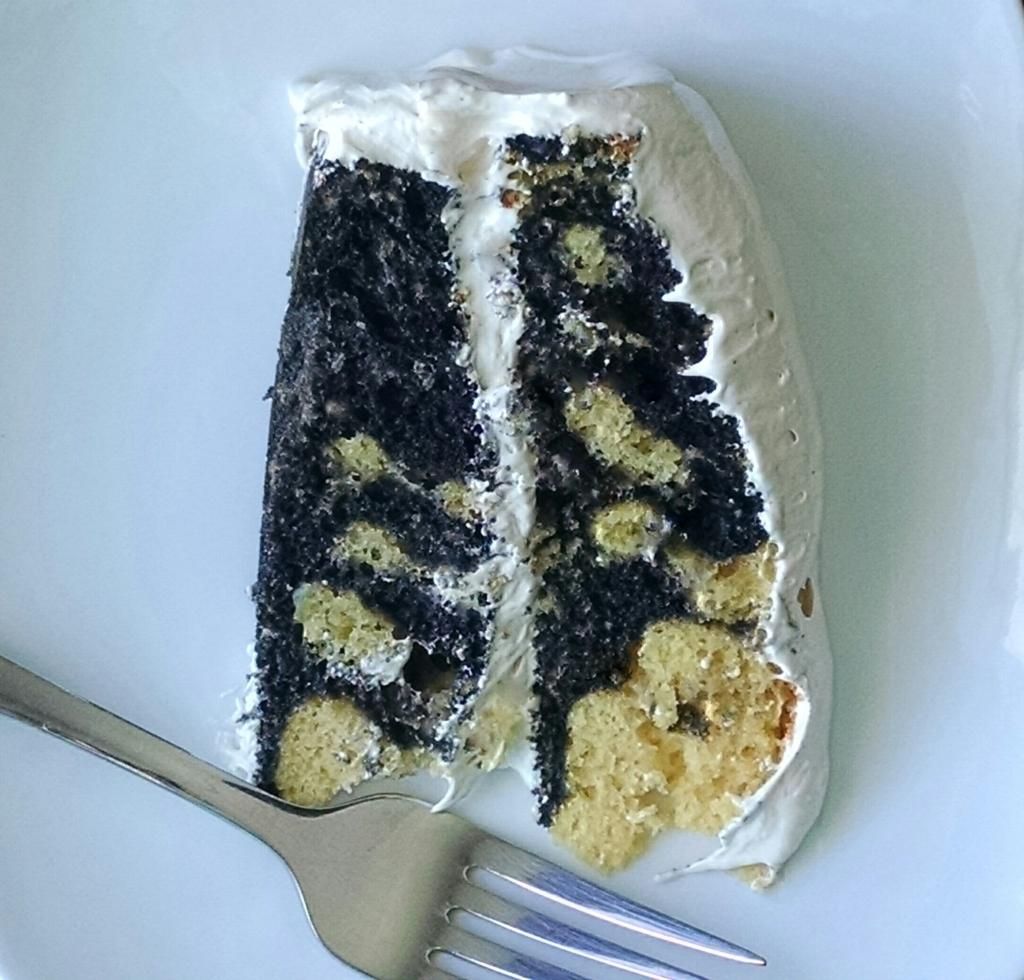
Zebra Cake with Fluffernutter Frosting


Ages and ages and ages ago, I made a zebra cake for my Hungry Puppies.  It was an epic fail.  I'm not sure what exactly happened, but there was definitely no zebra happening. I thought I'd give it another shot, and this time it worked out beautifully.  My Hungry Puppies weren't exactly sure what a zebra cake was, and were fairly unimpressed until I showed them the end result.  At which point I was declared amazing (they thought the cake was pretty cool too).  The frosting for this cake is my second attempt.  The first attempt turned out to be a peanut butter marshmallow sauce. Oh well, this is how we learn, right? The frosting is incredible!  It is a fluffy marshmallow flavored with peanut butter.  And on top of that zebra cake?  Perfect.

Zebra Cake with Fluffernutter Frosting

Cake:
1 box fudge marble cake mix
4 eggs
1 cup water
1/3 cup oil
Black gel food coloring (optional)

Fluffernutter Frosting:
1 cup granulated sugar
1/2 cup light corn syrup
1/4 cup water
4 egg whites
1 teaspoon vanilla extract
1/2 cup creamy peanut butter, warmed slightly, but not hot!

Preheat the oven to 350F.  Grease 2 9-inch round cake pans.  Set aside.

In a large bowl, combine the cake mix (reserving the chocolate packet for later), eggs, water, and oil, and stir until well blended.  Place half of the cake batter in a separate bowl, and stir in the chocolate packet and a couple of drops of the black food coloring.  Stir until completely incorporated.  You will now have one bowl of white batter and one bowl of black.

Using a large cookie scoop or a measuring cup, pour about 2 tablespoons of the white batter into each pan.  Pour 2 tablespoons of black batter directly in the  middle of the white batter in the pan.  Continue to do this, alternating the white and black batter until all of the batter has been used.  Place the cakes in the oven and bake for 20-25 minutes, or until a toothpick inserted in the center comes out clean.  Remove cakes from the oven and let cool in the pans for about 10 minutes.  Turn the cakes out of the pans and let cool completely.

For the fluffernutter frosting, in a small saucepan, stir together the sugar, corn syrup, and water.  Bring the mixture to a boil, and continue cooking until it reaches 240F.  While the sugar syrup is cooking, place the egg whites in the bowl of a stand mixer fitted with the whisk attachment and beat until stiff peaks form.  

When the sugar syrup reaches 240F, slowly pour the hot sugar mixture into the stiff egg whites with the mixer running on medium speed (be sure to pour the hot syrup down the inside edge of the bowl to prevent splattering).  Increase the speed to high and beat the frosting until very stiff peaks form (adding the peanut butter will loosen it up just a bit).  Beat in the vanilla.  Gently fold in the peanut butter until incorporated.

To assemble the cake, place one cake layer on a serving plate.  Spread with a thick layer of frosting.  Top with the second cake layer.  Frost the top and sides with remaining frosting.  Makes about 12 to 16 servings.

Enjoy!  -Cardamommy
Friday, March 20, 2015

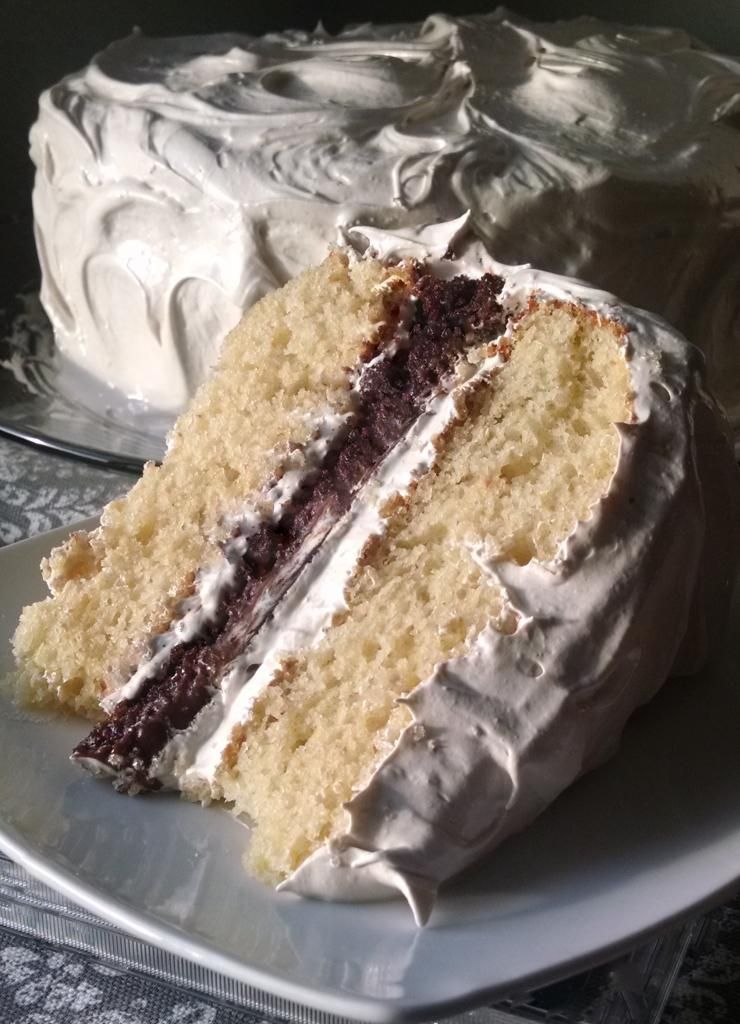
Fudge Brownie Filled Buttermilk Cake with Brown Sugar Marshmallow Frosting


I saw a recipe a few weeks ago for a Vintage Cake.  It looked super amazing, and I wanted to try it out, but with a few changes. First, I really wanted my brownie layer to be in the middle of the cake, sort of replacing the filling.  Second, I wanted to use a slightly lighter frosting, something not too heavy and dense, so I settled on a brown sugar marshmallow frosting (which my entire family loves!).  The buttermilk cake layers are moist, flavorful, and delicious while the fudge brownie filling is a rich and dense chocolate layer.  The marshmallow frosting is smooth and fluffy and just the right touch to finish it off!  Note:  The brownies will need time to cool completely and chill in the refrigerator, so plan ahead!

Fudge Brownie Filled Buttermilk Cake with Brown Sugar Marshmallow Frosting

Fudge Brownie Layer:
1/2 cup canola oil
1 cup granulated sugar
1 teaspoon vanilla extract
2 eggs
1/2 cup all purpose flour
1/4 cup +2 Tablespoons cocoa powder
1/4 teaspoon baking powder
1/8 teaspoon salt
7 ounces (1/2 of a 14 ounce can) sweetened condensed milk
2 ounces (1/3 cup) semi sweet chocolate chips

Buttermilk Cake:

2 1/3 cups cake flour (Or sub 2 cups +3 Tbsp all-purpose flour and 2 Tbsp cornstarch)
1 1/2 teaspoons baking powder
1/2 teaspoon baking soda
1/4 teaspoon salt
12 Tablespoons (1 1/2 sticks) butter, room temperature
1 1/3 cups granulated sugar
3 eggs
1 1/2 teaspoons vanilla
1 cup buttermilk
Brown Sugar Marshmallow Frosting:

1 cup brown sugar (packed)
1/4 cup water
1/2 cup corn syrup
4 egg whites
2 tsp vanilla

Preheat the oven to 350F.  Spray a 9 inch round cake pan with cooking spray, then line the bottom with parchment paper and spray the parchment.  Set aside.

In a large bowl, whisk together the oil, sugar, vanilla, and eggs until well blended and smooth.  Add the flour, cocoa powder, baking powder, and salt, and stir until combined and no streaks of flour remain.  Pour the batter into the prepared pan and smooth the top.  Bake for 18 to 20 minutes, or until a toothpick inserted in the center comes out clean.  Do not overbake, or the brownies will be too hard to cut through in the cake. 

While the brownies are baking, place the condensed milk and chocolate chips in a microwaveable bowl and heat in 30 second intervals, stirring after each, until melted and smooth.  When the brownies are done, remove from the oven and immediately pour the condensed milk mixture over the top of the brownies, spreading all the way to the edges.  Let cool completely, then chill until cold.  When the brownies are cold, run a knife around the edge of the pan and carefully lift the brownie layer out of the pan.  Set on a plate, cover with plastic wrap, and set aside while you make the cake layers.

For the cake, preheat the oven to 350F.  Spray 2 9-inch round cake pans with cooking spray. Set aside.


In a medium bowl, whisk together the cake flour, baking powder, baking soda, and salt.  
In a large bowl, cream together the butter and sugar until well blended and smooth.  Add the eggs and vanilla, and beat for 2 to 3 minutes, or until fluffy.  Beat in 1/3 of the flour mixture until just combined, followed by half of the buttermilk.  Add another 1/3 of the flour mixture, followed by the remaining buttermilk.  Beat in the remaining flour until just combine.  

Pour the batter evenly into the two prepared pans and smooth the tops.  Place in the preheated oven and bake for 20 to 22 minutes, or until a toothpick inserted in the center comes out clean.  Remove cakes from the oven and let cool in the pans for 10 to 15 minutes.  Carefully turn the cakes out of the pans and let cool completely on a cooling rack.  


For the brown sugar marshmallow frosting, mix brown sugar, water and corn syrup in a medium saucepan. Bring to a full rolling boil. (Be careful, as it will rise, so make sure the sides of your pan are taller). Let it boil at medium to medium high until the syrup reaches 240F. Meanwhile in a stand mixer, beat egg whites until stiff.

Slowly pour the hot syrup in a thin stream into egg whites, beating constantly. Beat until icing holds peaks, then blend in vanilla.

To assemble the cake, place a buttermilk cake layer on a serving plate.  Spread with a thin layer of the frosting.  Place the brownie layer on top.  Spread with another thin layer of frosting.  Place the second cake layer on top and frost the top and sides with the remaining marshmallow frosting.  Makes 16 servings.  

Enjoy!  -Cardamommy
Friday, February 13, 2015

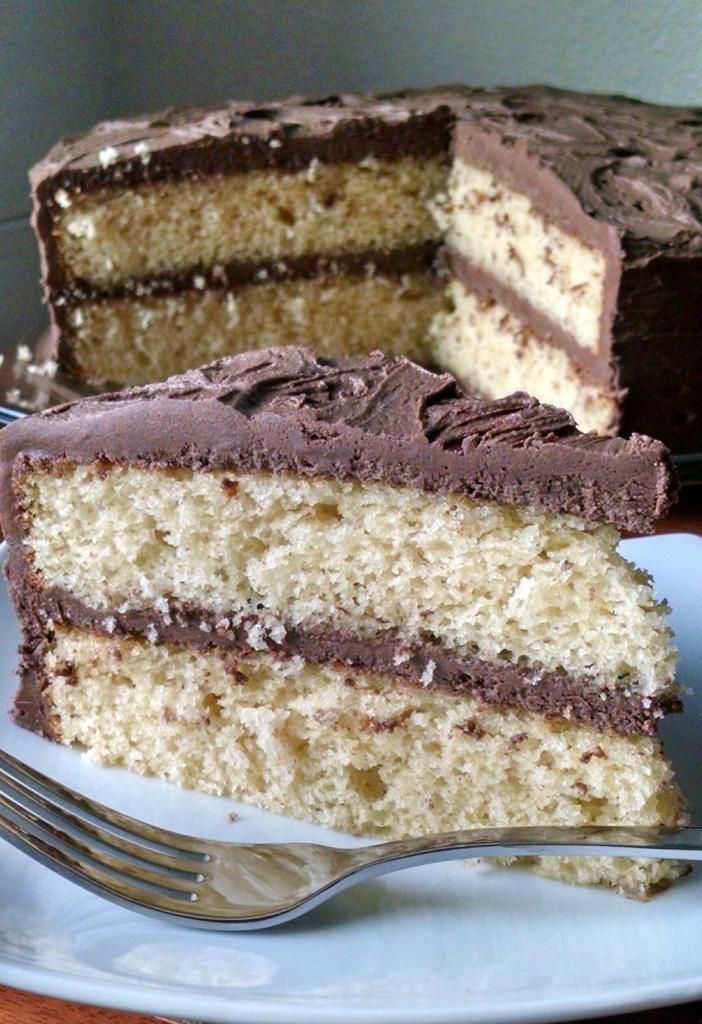
Buttermilk Layer Cake


I was searching for a buttermilk layer cake and stumbled across this one from the NY Times, and I love it!  Love it.  This cake is definitely going to be my brand new go to favorite vanilla layer cake recipe.  It is nice and light, and tender, and flavorful, and pretty much just amazing!  I frosted mine with this browned butter chocolate frosting, but you can use whatever frosting you want!  

Buttermilk Layer Cake

2 1/3 cups cake flour (Or sub 2 cups +3 Tbsp all purpose flour and 2 Tbsp cornstarch)
1 1/2 teaspoons baking powder
1/2 teaspoon baking soda
1/4 teaspoon salt
12 Tablespoons (1 1/2 sticks) butter, room temperature
1 1/3 cups granulated sugar
3 eggs
1 1/2 teaspoons vanilla
1 cup buttermilk

Preheat the oven to 350F.  Spray 2 9-inch round cake pans with cooking spray. Set aside.

In a medium bowl, whisk together the cake flour, baking powder, baking soda, and salt.  

In a large bowl, cream together the butter and sugar until well blended and smooth.  Add the eggs and vanilla, and beat for 2 to 3 minutes, or until fluffy.  Beat in 1/3 of the flour mixture until just combined, followed by half of the buttermilk.  Add another 1/3 of the flour mixture, followed by the remaining buttermilk.  Beat in the remaining flour until just combine.  

Pour the batter evenly into the two prepared pans and smooth the tops.  Place in the preheated oven and bake for 20 to 22 minutes, or until a toothpick inserted in the center comes out clean.  Remove cakes from the oven and let cool in the pans for 10 to 15 minutes.  Carefully turn the cakes out of the pans and let cool completely on a cooling rack.  Frost with your favorite frosting.  Makes 12 to 16 servings.

Enjoy!  -Cardamommy

Friday, January 23, 2015

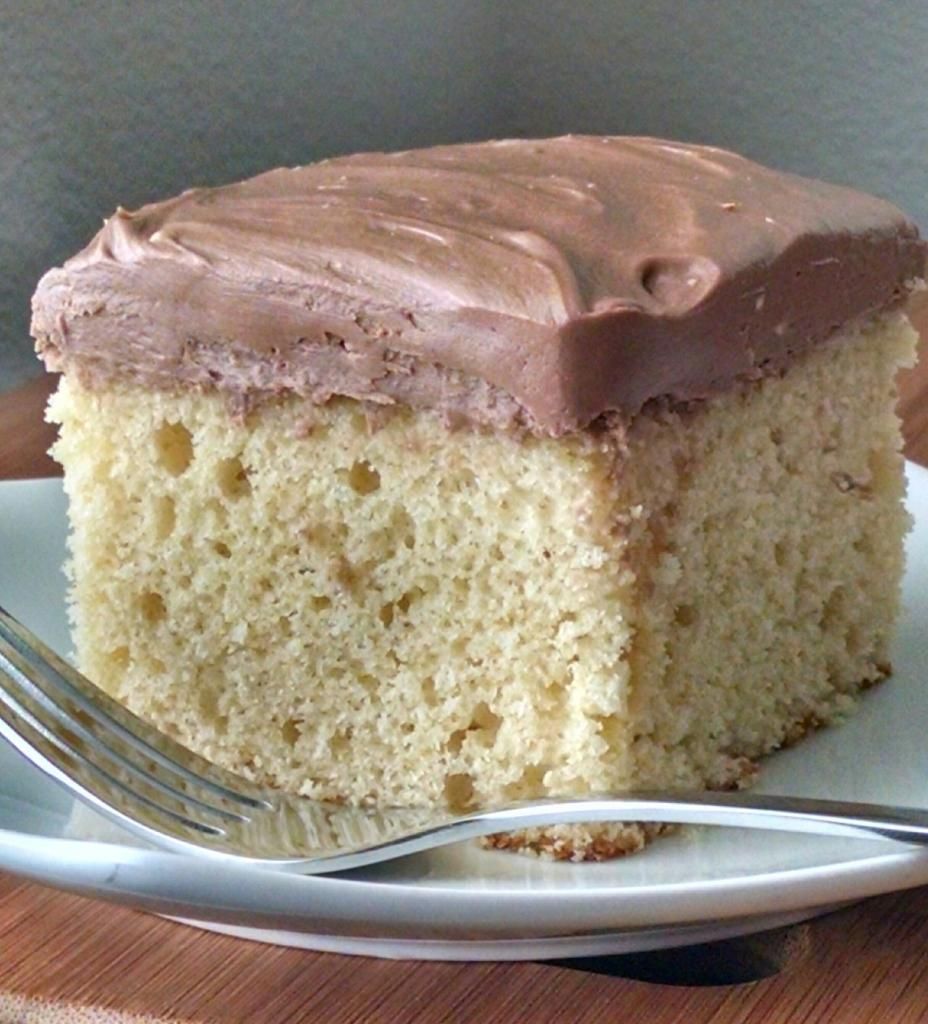
One Bowl Malted Vanilla Cake with Malted Chocolate Mascarpone Frosting


I found this frosting recipe a while ago and have been searching and searching for a malted white cake to put it on.  I wanted a simple recipe that didn't use a cake mix.  I couldn't find one that fit what I needed.  Anywhere!  There are hardly any options at all!  So I made up my own.  This is a super easy one bowl cake with a delicious malted flavor.  I have a bit of a weakness for mascarpone cheese, and it is amazing in this frosting.  It's so light and chocolatey, but the mascarpone shines through nicely!  This cake makes a one 9 inch layer, but you can easily double the cake and the frosting to make a 9x13 cake.

One Bowl Malted Vanilla Cake with Malted Chocolate Mascarpone Frosting

Malted Vanilla Cake:
1 1/3 cups all purpose flour
1/3 cup granulated sugar
1/3 cup malted milk powder
2 teaspoons baking powder
1/2 teaspoon salt
2/3 cup milk
1/4 cup butter, softened
1 egg
1 teaspoon vanilla extract

Malted Chocolate Mascarpone Frosting:
6 Tablespoons whipping cream
1/2 cup chocolate malted milk powder
2 teaspoons cocoa powder
8 ounce conatiner mascarpone cheese

Preheat the oven to 350F.  Grease a 9 inch square baking pan.  Set aside.

In a large bowl, whisk together the flour, sugar, malted milk powder, baking powder, and salt.  Add the milk, butter, egg, and vanilla and whisk until combined.  Continue to whisk until the batter is smooth.  Pour the batter into the prepared pan.

Bake the cake in the preheated oven for about 20 to 25 minutes, or until a toothpick inserted in the center comes out clean.  Remove the cake from the oven and let cool completely before frosting.

While the cake is cooling, make the frosting.  Place the whipping cream, malted milk powder, and cocoa powder in a bowl.  Beat on low speed until blended.  Add the mascarpone and beat until smooth.  Increase the speed and beat the frosting until thick and fluffy.  Spread the frosting on the cooled cake.  Makes 9 servings.  

Enjoy!  -Cardamommy
Monday, August 18, 2014

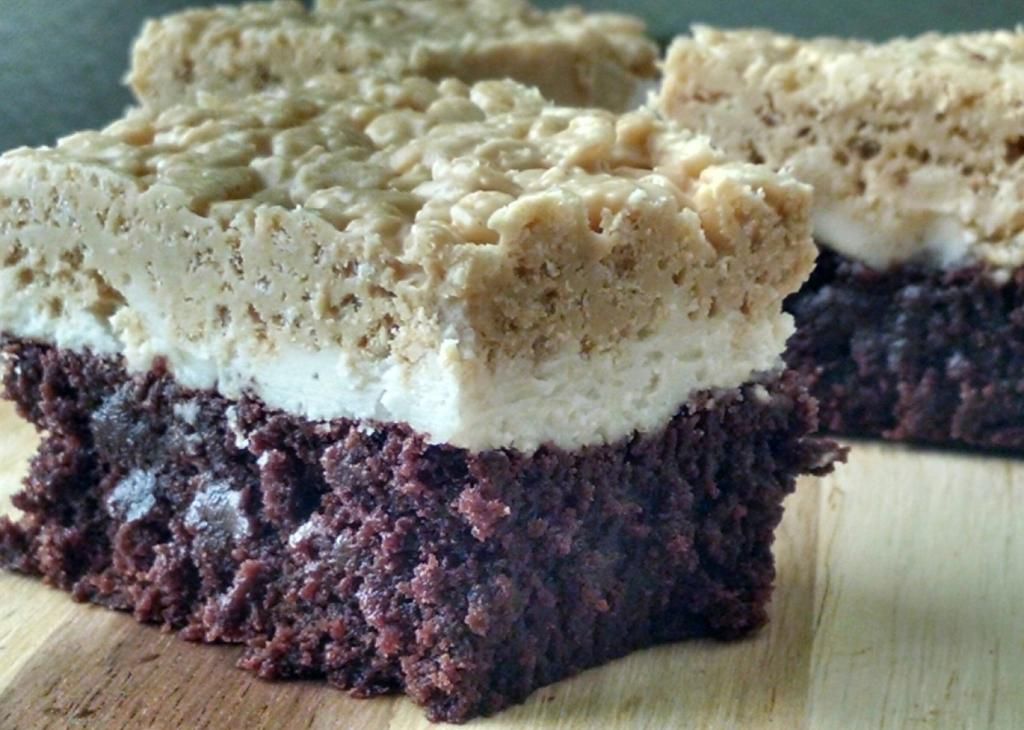
Peanut Butter White Chocolate Rice Krispies Brownies


These brownies are the reworked smashingly successful version of the not so successful vacation brownies that I made in Wyoming.  We start with a deliciously easy fudgy brownie (recipe slightly adapted from King Arthur Flour), topped with an incredible vanilla frosting, and finished off with a layer of peanut butter white chocolate rice krispies.  These brownies have a variety of flavors and textures, and are perfectly addicting.


Peanut Butter White Chocolate Rice Krispies Brownies


Brownie Layer:
1 cup all purpose flour
3/4 cup cocoa powder
2 cups granulated sugar
1/4 teaspoon salt
1/4 teaspoon baking powder
3 large eggs
1/2 cup (1 stick) butter, melted
1/4 cup canola oil
2 teaspoons vanilla extract

Frosting Layer:
2 Tablespoons butter, room temperature
2 Tablespoons coconut oil
1/4 teaspoon vanilla extract
1/8 teaspoon butter flavoring (optional)
1 cup powdered sugar
1 to 2 teaspoons milk

Rice Krispies Layer:
1 1/4 cups white chocolate chips
2/3 cups creamy peanut butter
3 cups rice krispies cereal

Preheat the oven to 375F.  Lightly spray an 8x11 inch baking dish with cooking spray.

In a large bowl, stir together the flour, cocoa powder, sugar, salt, and baking powder.  Add the eggs, melted butter, oil, and vanilla, and stir together until completely blended and smooth.  Pour the batter into the prepared baking dish and smooth the top.  Bake in the preheated oven for 22 to 25 minutes, or until a toothpick inserted in the center comes out with moist crumbs.  Remove brownies from the oven and let cool completely before frosting.

For the frosting, beat together the butter, coconut oil, vanilla, and butter flavoring (if using).  Beat in the powdered sugar, a little at a time until completely combined.  Beat in the milk, starting with 1 teaspoon and adding more if necessary to reach the desired consistency.  Beat until smooth.  Spread frosting evenly over the completely cooled brownies.

For the the rice krispies layer, place the rice krispies in a medium bowl.  Place the white chocolate chips and peanut butter in a plastic microwaveable bowl (I have never had white chocolate seize when I melt it in a plastic bowl!).  Microwave in 15 second intervals, stirring after each interval until the mixture is melted and smooth.  Pour the peanut butter white chocolate mixture over the rice krispies and stir together until combined.  Spread the rice krispies mixture evenly over the frosting brownies, pressing down lightly.  Let cool completely or chill for an hour or two before cutting.  Makes 20 brownies.

Enjoy!  -Cardamommy

Related Posts Plugin for WordPress, Blogger...