skip to main
|
skip to sidebar
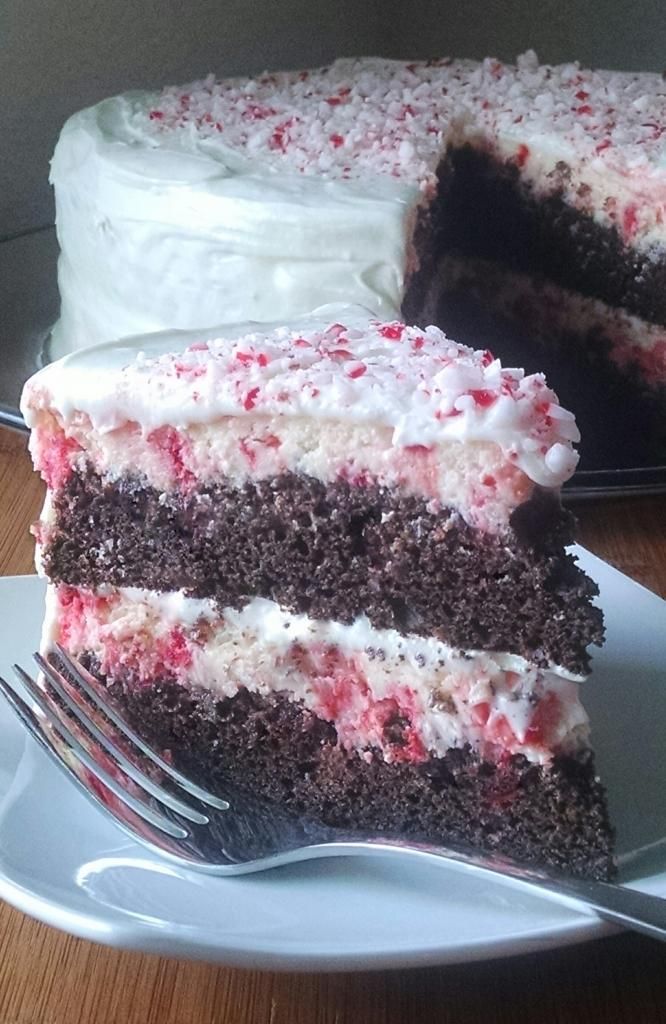
This cake. This made me happy. Partly because it was moist chocolate cake. Partly because it was peppermint cheesecake. Partly because it had peppermint cream cheese marshmallow frosting on it. Partly because I seriously tweaked the recipe and it turned out amazing! I'm going to be honest and tell you that I wasn't sure it would come together, but it totally did, and it was perfecty! The flavors and textures together are awesome, but it also just looks pretty, and so easy! Believe it or not, it wasn't that difficult to put together. Totally worth it! Recipe adapted from here.
Chocolate Peppermint Cheesecake Layer Cake
Chocolate Cake:
1 box chocolate cake mix
1 cup water
1/2 cup sour cream
1/3 cup canola oil
3 eggs
1 box (4 serving size) instant chocolate pudding
Peppermint Cheesecake:
24 ounces (3 8-ounce packages) cream cheese, room temperature
3/4 cup granulated sugar
1 teaspoon vanilla
3/4 cup sour cream
3 eggs
1 bag (10 ounces) peppermint baking chips
Peppermint Cream Cheese Marshmallow Frosting:
4 ounces cream cheese, room temperature
1/4 cup butter (1/2 stick), room temperature
12 ounces (about 3 cups) powdered sugar
1 teaspoon peppermint extract
7 ounce jar marshmallow cream
Preheat the oven to 350F. Place 2 strips of foil (about 3 to 4 inches wide) inside two 9 inch round cake pans (2 strips per pan) in the form of an X, with the ends hanging over the sides. Spray the pan and foil with cooking spray. Set aside.
For the chocolate cake, in a large bowl whisk together the chocolate cake mix, water, sour cream, oil, and eggs until well blended. Add the chocolate pudding mix and whisk until combined. Batter will be thick. Spread the batter evenly into the prepared pans and smooth the top. Bake the cakes for 20 to 25 minutes, or until a toothpick inserted in the center comes out clean. Remove the cakes from the oven and carefully flatten the top of the cakes by pressing down gently with the back of a spatula.
While the cakes are baking, make the peppermint cheesecake. In a large bowl, beat together the cream cheese, sugar, and vanilla until smooth. Beat in the sour cream. Beat in the eggs, one at a time, and beat until well blended and smooth. Stir in t he peppermint baking chips. Pour the cheesecake batter evenly over the two flattened cakes (still in the pans) and smooth the tops. Bake for 25 to 30 minutes, or until the center of the cheesecakes slightly wobbly. Remove the cakes from the oven and run a knife around the edges to loosen the cakes from the pans. Let the cakes cool, then chill for 2 to 4 hours, until completely cold.
When you are ready to assemble the cake, make the frosting. Beat together the cream cheese and butter until smooth. Beat in the powdered sugar, 1 cup at a time, until blended. Beat in the peppermint extract and marshmallow cream until smooth.
Remove the cakes from the refrigerator, and using the foil as handles, carefully lift the cakes out of the pans. Place one cake layer on a serving plate and spread about 1/2 cup of frosting over the top, just enough for a very thin layer to cover the cheesecake. Place the second cake on top of the first and use the remaining frosting to frost the top and sides of the cake. Garnish with crushed peppermints, if desired. Makes 16 to 20 servings.
Enjoy! -Cardamommy
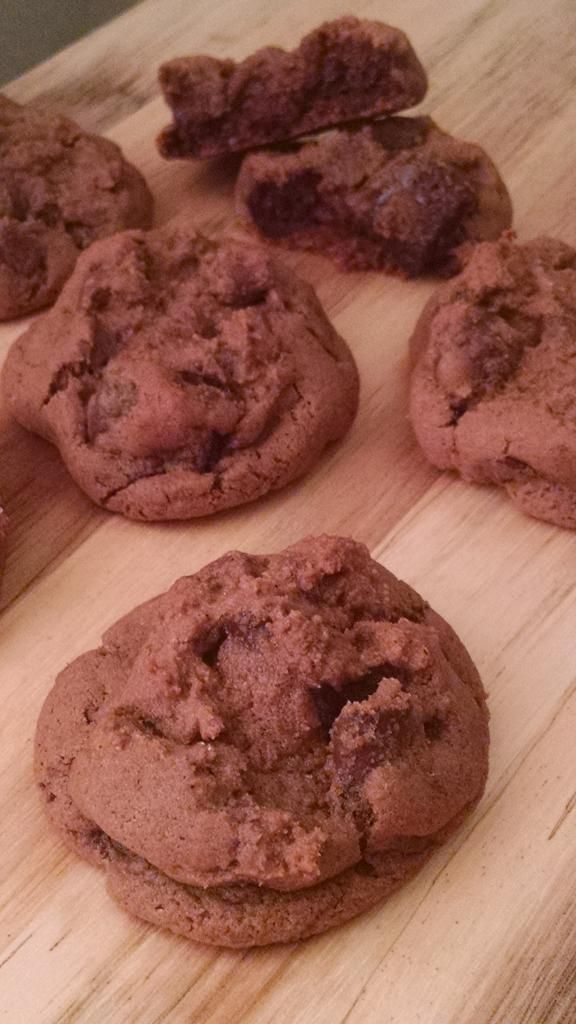
My oldest Hungry Puppy has been learning about persuasive writing in school. The assignment was to write a persuasive letter to Santa. Well, she brought it home on Friday and I had a chance to read it, and I think that she's getting the art of persuasion down pretty well! I definitely think that Santa may have a change of heart after reading that persuasive letter. Anyhow, she told Santa that she was planning on leaving out chocolate gingerbread cookies and chocolate milk for his snack. This was the first time I had heard anything about chocolate gingerbread cookies from either of my Hungry Puppies, but I obviously had to make some so Santa wouldn't be disappointed. I used this recipe as an outline, and changed it to fit what my Hungry Puppy had envisioned, a chocolate gingerbread cookie with 2 kinds of chocolate chips. The cookies turned out delicious! We've never had chocolate and gingerbread together before, but it was definitely a hit!
Triple Chocolate Gingerbread Cookies
2 1/2 cups all purpose flour
2 Tablespoons cocoa powder
2 teaspoons cornstarch
1 teaspoon baking soda
1/2 teaspoon salt
1/4 teaspoon baking powder
2 teaspoons ground ginger
1 teaspoon cinnamon
1/2 teaspoon nutmeg
1/4 teaspoon cloves
1/4 teaspoon allspice
3/4 cup (1 1/2 sticks) butter, room temperature
1 cup packed dark brown sugar
1/4 cup granulated sugar
2 Tablespoons molasses
1 egg
2 teaspoons vanilla extract
1 cup semi sweet chocolate chips
1 cup milk chocolate chips
Preheat the oven to 350F. Line a baking sheet with parchment paper.
In a medium bowl, whisk together the flour, cocoa powder, cornstarch, baking soda, salt, baking powder, ginger, cinnamon, nutmeg, cloves, and allspice. Set aside.
In a large bowl, cream together the butter, brown sugar, and granulated sugar until smooth. Add the molasses, egg, and vanilla extract, and beat until fluffy. Beat in the flour mixture until just barely combined. Beat in the semi sweet and milk chocolate chips until evenly distributed.
Scoop the dough into tablespoon size balls and place on the prepared baking sheet. Bake in the preheated oven for about 9 minutes, or until the tops are just set. Remove the cookies from the oven and let cool on the pan for a couple of minutes, then transfer the cookies to a cooling rack to cool completely. Makes about 4 dozen cookies.
Enjoy! -Cardamommy
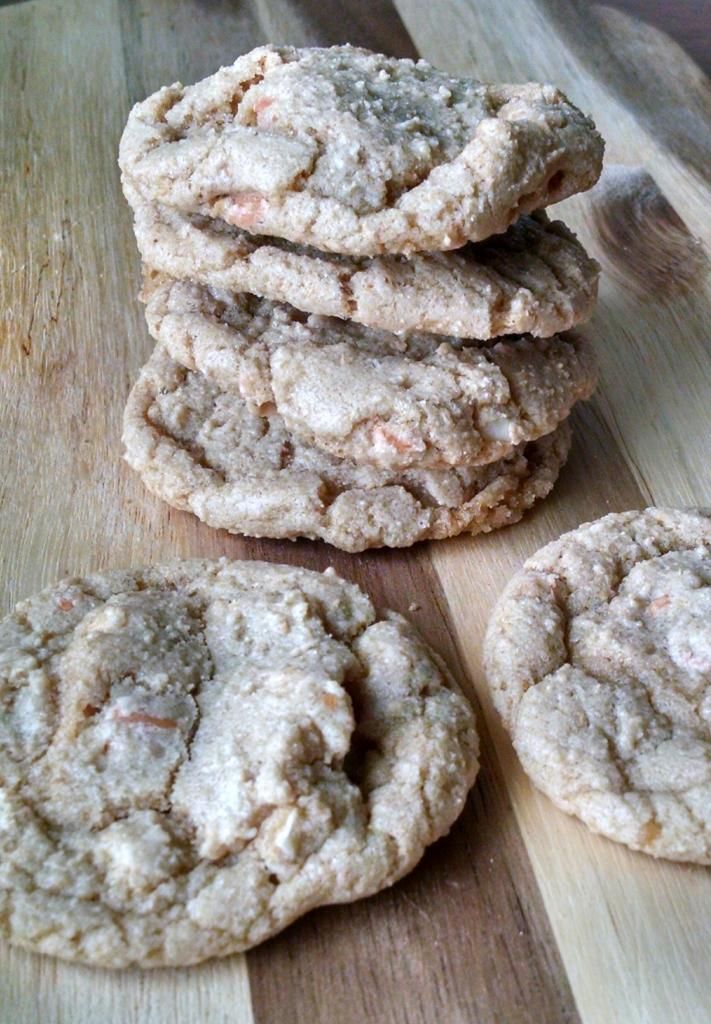
I realized recently that it has been a long time since I have made anything with cashews. I love cashews...they are one of the few types of nuts that I like. These crunchy and chewy cookies contain butterscotch chips and cashews, and are quite a delicious little treat. Original recipe found here.
Cashew Butterscotch Chip Cookies
1/2 cup butter, room temperature
1 cup granulated sugar
1 cup packed brown sugar
1/2 teaspoon baking powder
1/2 teaspoon baking soda
1 teaspoon salt
2 eggs
2 teaspoons vanilla
1 cup white whole wheat flour
1 cup all purpose flour
3/4 cups salted roasted cashew halves or pieces
3/4 cup butterscotch chips
Preheat the oven to 375F. Line a baking sheet with parchment paper.
In a large bowl, cream together the butter, sugar, brown sugar, baking powder, baking soda, and salt. Beat in the eggs, one at a time, followed by the vanilla. Beat until incorporated. Add the white whole wheat flour, and all purpose flour, and beat until combined. Stir in the cashews and butterscotch chips.
Shape the dough into tablespoon size balls and place on the prepared baking sheet. Bake in the preheated oven for 8 to 9 minutes, or until the edges are just golden brown and the center is set. Remove cookies from the oven and let cool on the pan for several minutes. Transfer cookies to a cooling rack to cool completely. Makes about 3 dozen cookies.
Enjoy! -Cardamommy
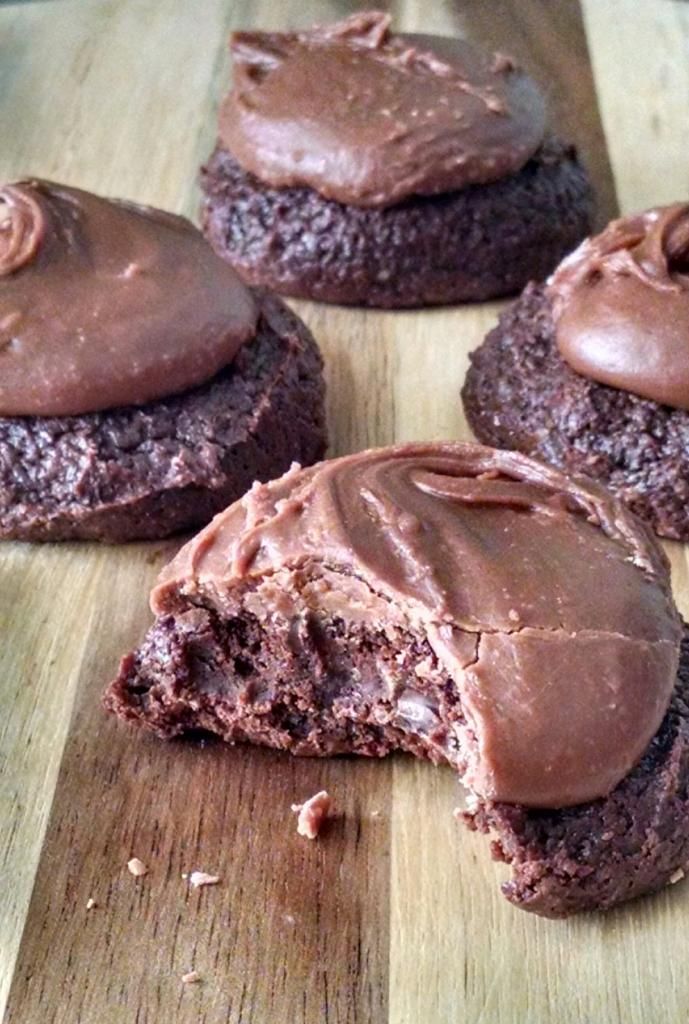
These cookies totally surprised me. I came across this Betty Crocker recipe and decided to give it a shot, not really thinking that it would be that amazing. Holy cow, though, it was that amazing. These cookies are so fast and simple to make, thanks to the prepared baking mix! They fudgy and chocolatey, and the chocolate chips inside are just perfect! The chocolate frosting on top caps them off perfectly.
Fudgy Brownie Bisquick Cookies
Cookies:
1 cup Bisquick
3/4 cup granulated sugar
1/2 cup cocoa powder
1/2 cup milk chocolate chips
1/2 cup sour cream
1 teaspoon vanilla extract
1 egg
Chocolate Frosting:
2 ounces semi sweet chocolate, chopped
2 Tablespoons butter
2 cups powdered sugar
3 to 4 Tablespoons water
Preheat the oven to 350F. Line a baking sheet with parchment paper.
In a large bowl, combine all of the cookie ingredients and mix by hand or beat with an electric mixer until all ingredients are well blended.
Scoop the dough into tablespoon size balls and place on the prepared baking sheet. Bake for about 8 minutes, or until the tops are just set. Remove cookies from the oven and transfer to a cooling rack to cool before frosting.
While the cookies are cooling, make the frosting. In a medium saucepan over low heat, melt the butter and chocolate, stirring until smooth. Stir in the powdered sugar and 3 tablespoons of the water until the frosting is smooth. Add additional water, 1 teaspoon at a time if the frosting is too thick. Spread the warm frosting over the cooled cookies. Makes about 24 cookies.
Enjoy! -Cardamommy
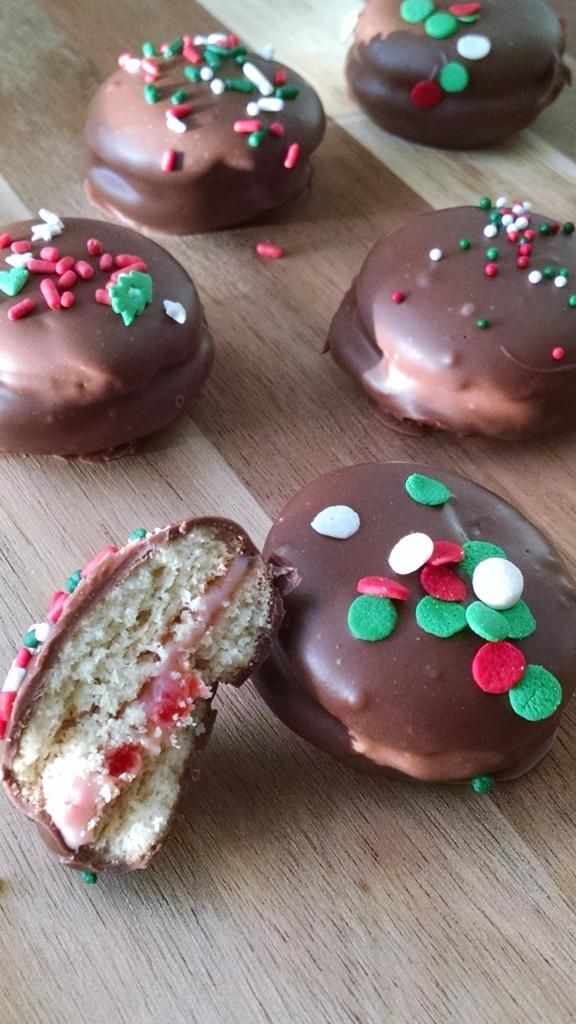
This Christmas, my Hungry Puppies and I decided to make a couple of no bake treats that we haven't done before. We found this recipe at bhg.com, and decided to give it a whirl. It was simple, fast, and fun, which was perfect for a kitchen project with my girls! They also turned out really well, and are yummy too! The cream cheese cherry filling definitely comes through for a quick and easy Christmas baking project!
Chocolate Dipped Cherry Bites
4 ounces (1/2 of an 8 ounce package) cream cheese, room temperature
1/2 cup powdered sugar
1/2 cup finely chopped maraschino cherries, well drained
1/4 teaspoon almond extract
80 vanilla wafers
12 ounces chocolate candy coating, chopped (or use chocolate chips)
2 teaspoons shortening
Christmas sprinkles, if desired
In a medium bowl, stir together the cream cheese and powdered sugar until smooth. Add the chopped cherries and almond extract and stir until well blended. Place about 1 teaspoon (level or slightly less) of the cream cheese mixture on the bottom of half of the vanilla wafers. Gently press the remaining vanilla wafers on top of the filling to create little cookie sandwiches. Refrigerate for about 30 minutes.
After the cookies have chilled, melt the candy coating and shortening in a double boiler or microwave (heating in 15 second intervals and stirring after each until melted and smooth). Dip each cookie in the candy coating, making sure to coat each cookie completely. Use a fork to lift the cookie out of the candy coating and tap off any excess candy coating. Place the cookie on a piece of waxed paper, and sprinkle with sprinkles, if desired. Let stand until set. Makes 40 cookies.
Enjoy! -Cardamommy
I found this recipe while I was with my Hungry Puppies in Target recently. We all decided it would be a fabulous recipe to make for Christmas. I was feeling incredibly ambitious and decided that it would be a simple thing to convert the recipe and make it from scratch instead of using mixes. Then life happened, and I totally changed my mind. I am totally feeling the semi home made-ness of this recipe. My youngest Hungry Puppy threw these bars together super fast, and they are incredibly delicious. The recipe made a 9x13 pan, but I really only needed an 8x8 so I adjusted the recipe to account for that. It only uses half of the sugar cookie dough, so use the rest to make cookies, or double the recipe to make a 9x13 pan.
Black and White Peppermint Brownies
1 (1 pound size) sugar cookie mix
1 (8x8 pan size) brownie mix
1/2 teaspoon mint extract
1/2 cup semi sweet chocolate chips
1/2 white chocolate chips
1/2 bag white chocolate peppermint M&Ms (or use chocolate mint M&Ms)
Holiday sprinkles
Preheat the oven to 350F. Spray an 8x8 inch square baking pan with cooking spray, set aside.
Prepare the sugar cookie mix according to package directions. Press HALF of the cookie dough evenly into the bottom of the prepared pan (use the remaining dough for another use).
Prepare the brownie mix according to package directions and stir in the mint extract. Pour the brownie batter over the sugar cookie dough layer. Sprinkle the chocolate chips evenly over the top. Bake the brownies for 25 to 28 minutes, or until a toothpick inserted in the center comes out clean. Remove brownies from the oven.
Place the white chocolate chips in a small microwaveable bowl. Heat the chips in the microwave in 15 second intervals, stirring after each, until melted and smooth. Drizzle the melted white chocolate over the brownies. Immediately sprinkle the M&Ms and sprinkles evenly over the brownies. Let cool completely before cutting. Makes 16 brownies.
Enjoy! -Cardamommy
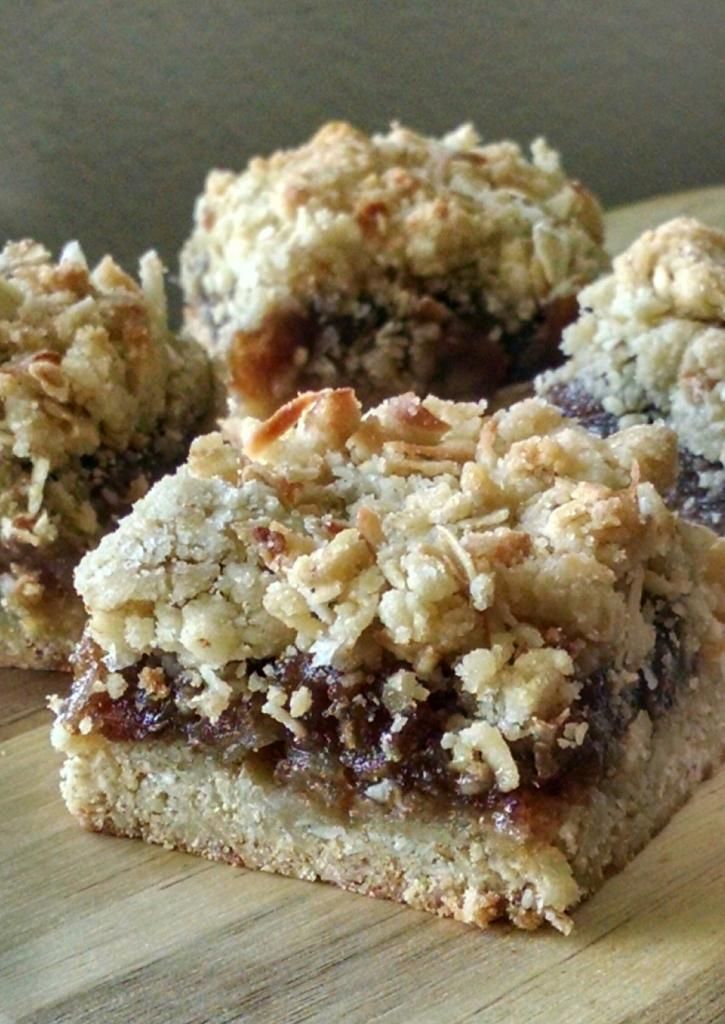
I love dates. I mean, I really love dates! I don't often think of things to make with dates, though. I stumbled across this recipe though, and thought it would be perfect! These bars are so simple and delicious, and perfect for those extra dates you've been wanting to do something with! Original recipe found here.
Coconut Maple Date Bars
Maple Date Filling:
12 ounces chopped, pitted dates
3/4 cups water
1/3 cup maple syrup
Crust:
1/2 cup butter, room temperature
2/3 cup granulated sugar
1 cup all purpose flour
1 cup old fashioned oatmeal
1 cup shredded coconut
1/4 teaspoon baking soda
1/4 teaspoon salt
For the maple date filling, place the dates, water, and syrup in a small saucepan. Bring to a boil over medium heat, stirring occasionally. Reduce heat to low and continue to simmer, stirring frequently, until the mixture is very thick, about 10 minutes. Remove from the heat and let cool.
Preheat the oven to 400F. Lightly grease a 9x9 inch square baking pan. Set aside.
For the crust, cream together the butter and sugar until light and fluffy. Add the flour, oatmeal, coconut, baking soda, and salt, and beat until well blended and crumbly. Place 2 cups of the crust mixture into the prepared pan and press evenly onto the bottom of the pan. Spread the cooled date mixture evenly over the top of the crust. Sprinkle the remaining crumbs on top of the date filling.
Place the bars in the preheated oven and bake for about 18 to 20 minutes, or until the top is lightly browned. Remove from the oven and let cool completely before cutting. Makes 16 servings.
Enjoy! -Cardamommy
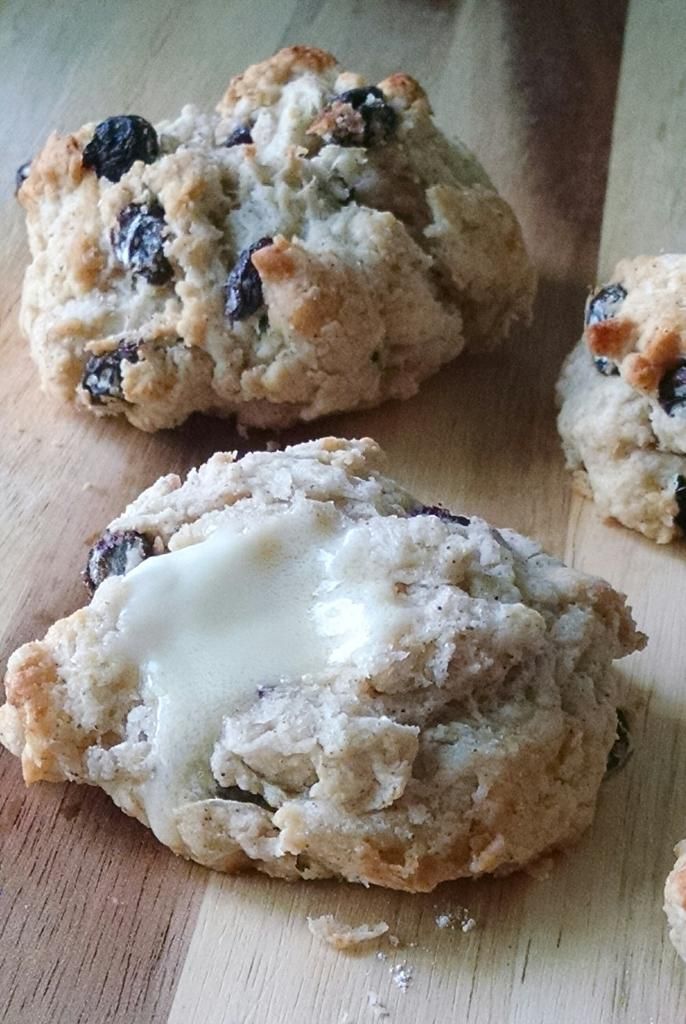
This is my absolute favorite biscuit recipe ever. It's in the America's Test Kitchen cookbook, and it is my tried and true best loved ever. This time though, I decided to add cinnamon and raisins to the dough to change things up a bit. These biscuits blew me away! My Hungry Puppies were in heaven! Crunchy on the outside and tender on the inside and bursting with cinnamon and raisins, I didn't want to stop eating them!
Cinnamon Raisin Buttermilk Biscuits
1 cup all purpose flour
1 cup cake flour
2 teaspoons baking powder
1 teaspoon granulated sugar
1 teaspoon cinnamon
1/2 teaspoon baking soda
1/2 teaspoon salt
1/2 cup (1 stick) cold butter
3/4 cup raisins
3/4 cup cold buttermilk
Preheat the oven to 450F. Line a baking sheet with parchment paper.
In a large bowl, stir together the all purpose flour, cake flour, baking powder, sugar, cinnamon, baking soda, and salt. Cut in the butter using a pastry blender until coarse crumbs form. Stir in the raisins. Add the buttermilk and stir together until evenly moistened. Scoop out pieces of the dough and drop onto the prepared baking sheet.
Place the biscuits in the preheated oven and bake for about 10 to 12 minutes, or until the tops are lightly browned. Remove from the oven and transfer to a cooling rack. Makes 12 biscuits.
Enjoy! -Cardamommy