Showing posts with label Honey. Show all posts
Monday, July 25, 2016
S'mores Granola
I found a recipe on Food Network for s'mores granola, and it was a no brainer that it would be coming out my kitchen. I love granola, and I totally love s'mores. I think that I mostly love the marshmallow and chocolate together. In fact, I confess that last time we had real roast your marshmallow s'mores, I sandwiched my warm gooey toasty marshmallow between two chocolate squares. I don't regret it. And I would totally do it again. For this recipe, I used marshmallow bits so I didn't have to worry about stale marshmallows, because no. Also, I drizzle the chocolate over the top of the granola/marshmallow bit mixture to get a more even distribution of the chocolate flavor. Oatmeal and Golden Grahams are sweetened and baked with honey and brown sugar, then tossed with marshmallow bits and drizzled with melted chocolate. Breakfast anyone?
S'mores Granola
4 Tablespoons butter, melted
3 Tablespoons packed brown sugar
3 Tablespoons honey
1 teaspoon vanilla extract
1/4 teaspoon salt
1 cup quick oats
3/4 cup old fashioned oats
1 1/2 cups Golden Grahams cereal
3/4 cup marshmallow bits
1/2 cup semi sweet chocolate chips, melted
Preheat the oven to 350F. Lightly grease a rimmed baking sheet.
In a large bowl, stir together the butter, brown sugar, honey, vanilla, and salt until combined. Add the quick oats, old fashioned oats, and cereal and stir until the mixture is evenly coated.
Spread the oat mixture on the prepared baking sheet and bake in the preheated oven for 20 to 25 minutes, stirring once halfway through baking, or until golden. Remove the granola from the oven and let cool. Sprinkle the marshmallow bits into the granola, then drizzle the melted chocolate over the top. Let the chocolate set completely before storing. Makes about 6 cups.
Enjoy! -Cardamommy
Friday, July 17, 2015
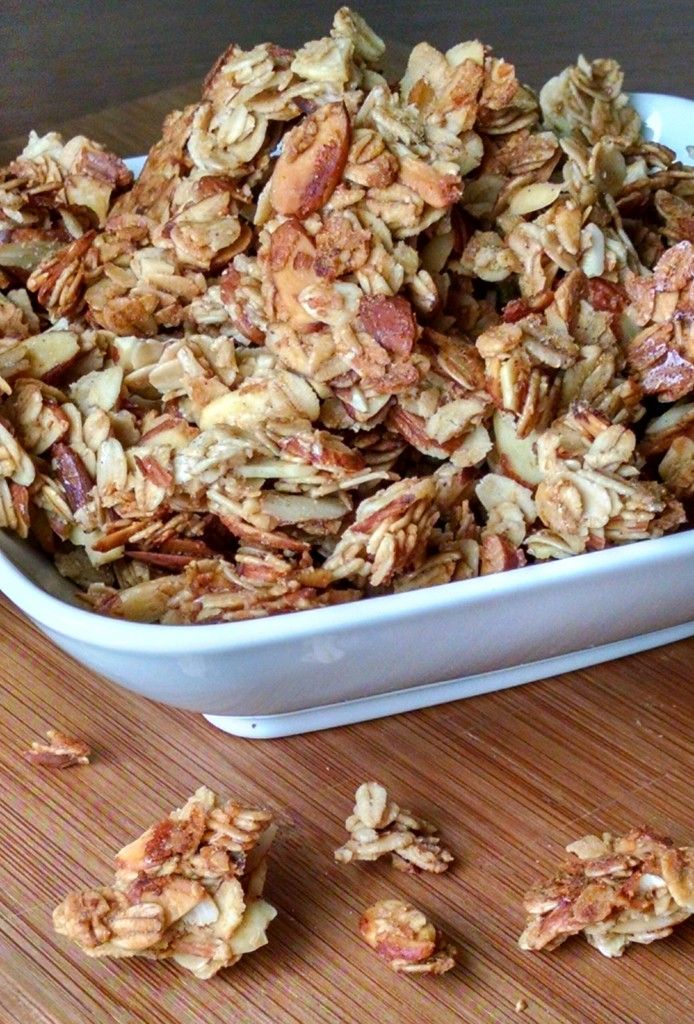
Honey Vanilla Almond Granola
I don't make granola very often, but when I do it disappears so fast! A nibble here, a bowl there, breakfast, snacks, toppings, and it's gone! This time I wanted to make it for a recipe I'm going to try out. I put granola on my grocery list, but then thought, why can't I just make it myself? So. I used this recipe as a basic outline, then added and tweaked to fit what I wanted it to be. It turned out so great, it might be our favorite so far! Note: I made a second batch of this granola using quick oats instead of old fashioned oats just to experiment with the consistency. The quick oat batch had a consistency more like what you get from store bought granola. Make it how you love it best!
Honey Vanilla Almond Granola
5 cups old fashioned oats
2 1/2 cups sliced almonds
1/2 cup coconut oil
1/3 cup honey
1/4 cup brown sugar
1/2 teaspoon cinnamon
1 Tablespoon vanilla extract
1/2 teaspoon almond extract
2 egg whites
Preheat the oven to 300F. Lightly grease a half sheet pan. Set aside.
In a large bowl, combine the oats and almonds. Set aside.
In a smaller bowl, stir together the coconut oil, honey, brown Sugar, and cinnamon. Place in the microwave and heat in 30 second intervals, stirring after each until bubbly. Be careful that it doesn't boil over in the microwave. Stir in the vanilla and almond extract. The mixture will bubble up a bit. Pour the honey mixture over the oats and stir until evenly moistened.
Place the egg whites in a bowl and beat until white and foamy. You don't need peaks here, just foam. Stir the foamy egg whites into the oat mixture. Pour the granola onto the prepared pan and press firmly into an even layer.
Bake the granola for 30 to 40 minutes, or until golden brown. Do not stir. This plus the egg whites will keep the granola in those lovely clumps. Remove granola from the oven and let cool completely. Break the granola into pieces and store in an airtight container. Makes about 12 cups.
Enjoy! -Cardamommy
Friday, February 20, 2015
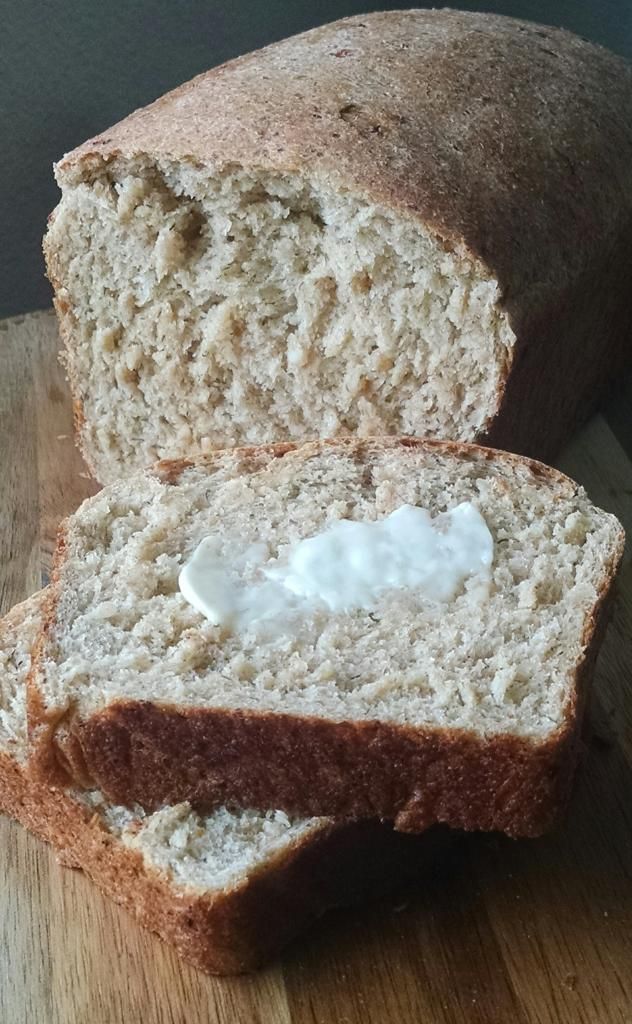
Dill Cottage Cheese Wheat Bread
I think I'm kind of stuck in a rut when it comes to bread baking at my house. I usually make my same go to recipe for sandwich bread. Which is amazing, because we love that bread! But, it is also nice to break away and do something different. Like this! I got this recipe from an old Kitchenaid cookbook, and it was wonderful. So moist and flavorful, just delicious! Dill Cottage Cheese Wheat Bread
1/4 cup warm water
4 1/2 teaspoons active dry yeast
2 cups cottage cheese
1/4 cup honey
1/4 cup butter, melted
2 eggs
2 Tablespoons dried dill weed
3 teaspoons salt
1/2 teaspoon baking soda
4 1/2 cups whole wheat flour, divided
In a large bowl, combine the warm water and yeast and let sit for about 5 minutes. Add the cottage cheese, honey, butter, eggs, dill weed, salt, baking soda, and 4 cups of the flour. Stir together with a large spoon until the dough comes together. Turn the dough out onto a floured surface and knead the dough until smooth and elastic, working in the remaining 1/2 cup of flour as needed. Place the dough in a greased bowl, grease the top of the dough, then cover with plastic wrap and let rise for about 1 hour.
Grease 2 8x4 inch loaf pans. Divide the dough in half and form each half into a loaf. Place the shaped dough in the prepared pans. Cover and let rise for about 45 minutes. While the dough is rising, preheat the oven to 350F.
Bake the bread for 30 to 40 minutes, or until golden brown (you want to make sure it is done in the center!). Remove the bread from the oven and turn out of the pans. Let bread cool completely on a cooling rack before slicing. Makes 2 loaves.
Enjoy! -Cardamommy
Friday, January 16, 2015
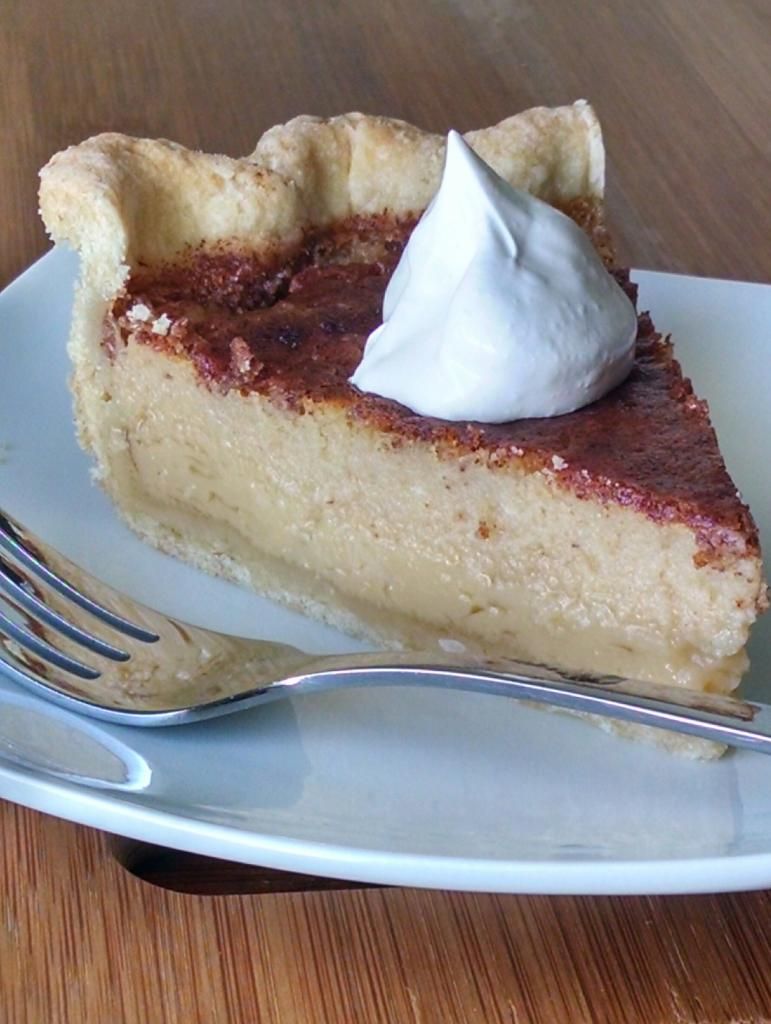
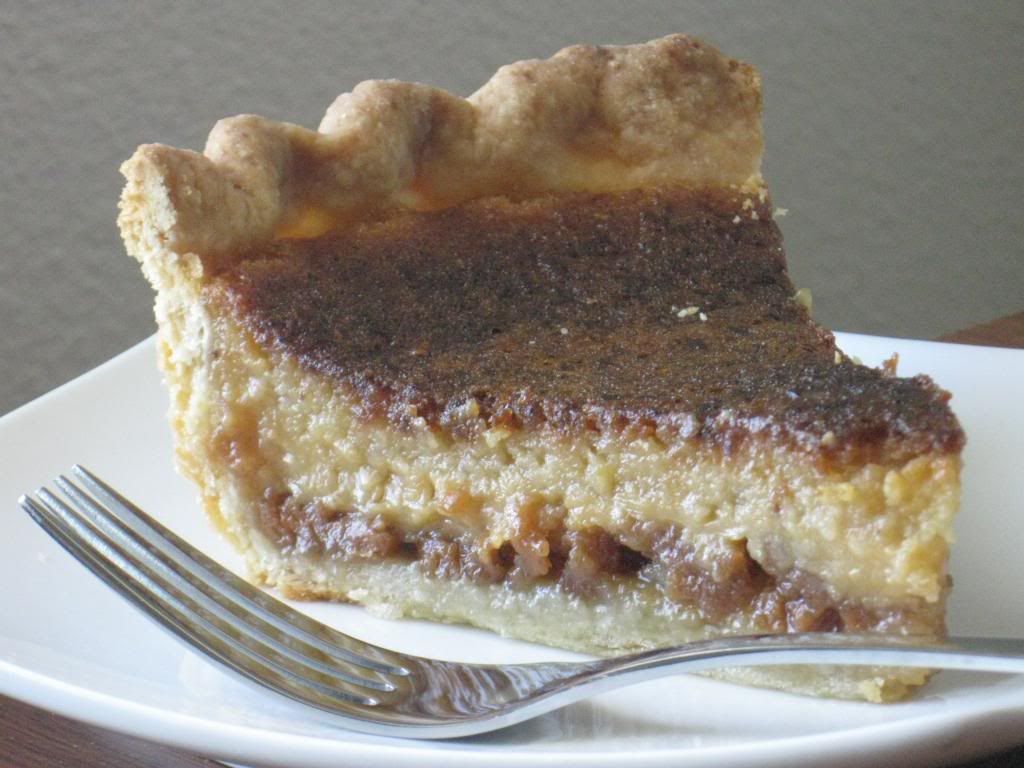
Cinnamon Honey Buttermilk Pie
I don't think that I have ever made a buttermilk pie. Mostly, I think, because I was a tiny bit afraid that it would taste like buttermilk. In a pie. Now, don't get me wrong, I like buttermilk. Just not in pie form, I don't think. I once made a buttermilk chocolate pudding and I really wasn't a fan because I could really taste the buttermilk tang through the chocolate. This pie is so amazing! It doesn't taste like tangy buttermilk, but has a wonderful custard flavor and the honey comes through very nicely. Just lightly spiced with cinnamon, this pie is just perfect!
Cinnamon Honey Buttermilk Pie
9 inch unbaked pie crust
1/2 cup butter, melted
2/3 cup granulated sugar
1/2 cup honey
1/2 teaspoon salt
3 Tablespoons all purpose flour
3 eggs, lightly beaten
2 teaspoons vanilla extract
1 cup buttermilk
1 teaspoon cinnamon
Preheat the oven to 350F.
Stir together the melted butter, sugar, and honey until smooth. Add then salt and flour, and stir until combined. Stir in the eggs and vanilla. Add the buttermilk and cinnamon and stir until completely incorporated.
Pour the mixture into the unbaked pie crust and bake in the preheated oven for 15 minutes. Reduce the oven temperature to 325F, and continue to bake the pie for 40 to 45 more minutes, or until the filling jiggles slightly. Remove the pie from the oven and let cool completely (and chill if desired) before serving. Makes about 8 servings.
Enjoy! -Cardamommy
Monday, May 26, 2014
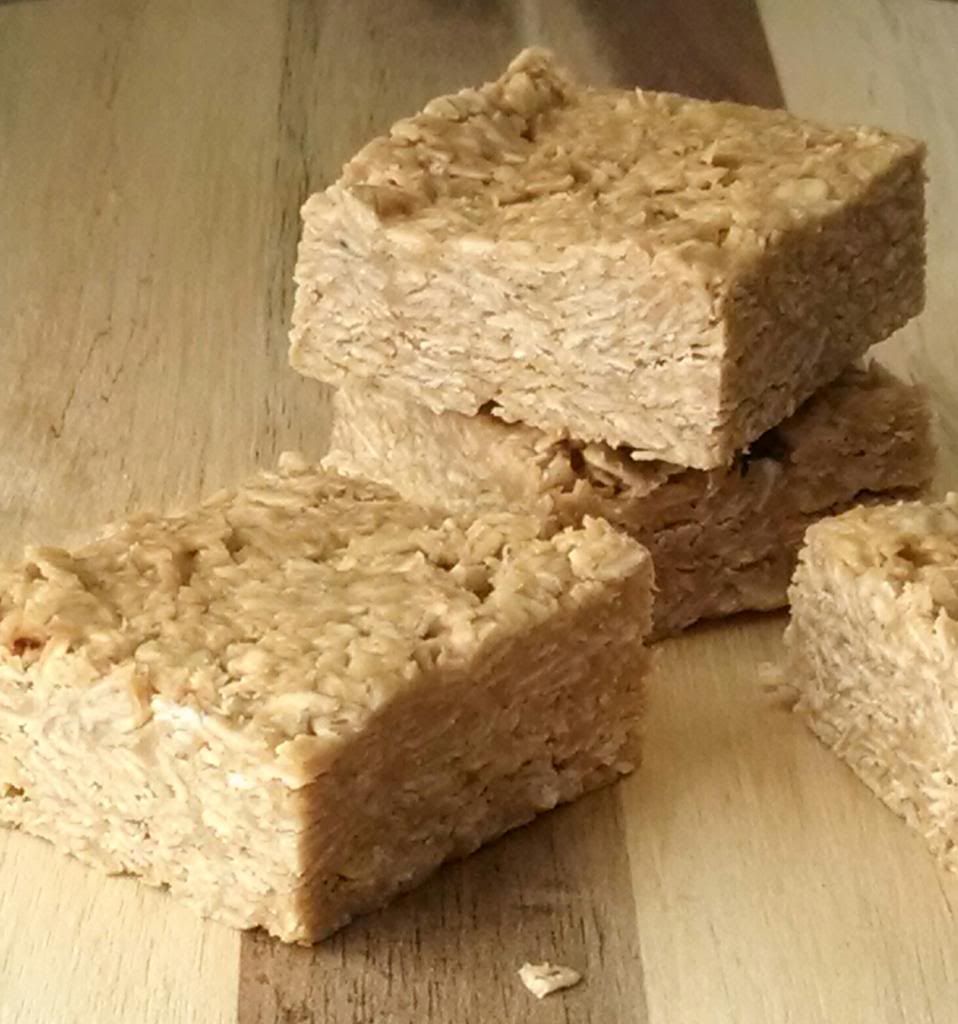
Peanut Butter and Honey Oat Bars
I saw these amazing bars the other day and absolutely knew that I had to make them. First, because my family loves anything peanut butter. Second, I love anything peanut butter and honey. Third? Oatmeal, no bake, 3 ingredient? Where can you go wrong? I love the strong honey flavor in these bars, and the deliciously nutty flavor and chewy texture of the raw oats is perfect.
Peanut Butter and Honey Oat Bars
1 cup creamy peanut butter
1/2 cup honey
2 cups old fashioned oatmeal
1 cup quick oats
Line an 8 inch square baking pan with tin foil, and lightly spray with cooking spray.
In a large bowl, combine the peanut butter and the honey. Microwave for about 30 to 45 seconds until the peanut butter is soft and melty, stir until smooth. Add the old fashioned oats and quick oats and stir until the oats are evenly coated in the peanut butter and honey mixture. Scrape the oat mixture into the prepared pan, pressing down lightly and smoothing the top. Chill until firm. Cut into squares and serve. Makes 16 servings.
Enjoy! -Cardamommy
Friday, February 7, 2014
Peanut Butter and Honey Pie
I found this recipe the other day and was immediately intrigued. I knew that I had to make this pie, but it had to have peanut butter in it too. I'm not a huge peanut butter fan. Kind of a take or leave it type thing, and only creamy peanut butter. That being said, I do have a sort of special weakness for peanut butter and honey together. I made some peanut butter and honey cookies one time, and absolutely fell in love with the cookie dough (unfortunately they weren't as good when I baked them...). So, I made the pie with a few changes, and I am loving it!
Peanut Butter and Honey Pie
Pie Dough:
1 1/4 cups all purpose flour
1 Tablespoon granulated sugar
1/2 teaspoon salt
3 Tablespoons vegetable shortening
4 Tablespoons cold butter
4 to 6 Tablespoons ice cold water
Peanut Butter and Honey Filling:
1/2 cup peanut butter, melted
1/2 cup butter, melted
3/4 cup granulated sugar
2 Tablespoons white cornmeal (if you don't have white, you can use yellow)
1/4 teaspoon salt
3/4 cup good quality honey (I use a delicious raw local honey)
3 eggs
1/2 cup milk
2 teaspoons apple cider vinegar
1 teaspoon vanilla extract
Preheat the oven to 350F.
For the pie dough, mix together the flour, sugar, and salt. Cut in the shortening and butter with a fork or pastry blender until pea size crumbs form. Add the cold water, one tablespoon at a time, tossing the mixture together after each addition, until the dough starts to come together. Form the dough into a disk, and chill for about 1 hour. After the dough has chilled, place it on a floured surface and roll it out large enough to fit a 9 inch pie plate. Transfer dough to the pie plate.
Four the Peanut Butter and Honey filling, pour the melted peanut butter into the prepared pie crust, and smooth evenly along the bottom of the crust. Place in the refrigerator so the peanut butter can set up while you make the honey filling.
In a large bowl, whisk together the melted butter, sugar, cornmeal, and salt until blended. Whisk in the honey, then the eggs, one at a time. Add the milk, vinegar, and vanilla extract, and whisk until completely incorporated. Remove the prepared pie crust from the refrigerator, and gently and slowly pour the honey filling over the peanut butter.
Place the pie in the oven and bake for 50 to 60 minutes, or until the filling is golden brown and the middle is set, but still has a slight wobble. Remove pie from the oven and let cool completely on a cooling rack. Chill until ready to serve. Makes 8 to 12 servings.
Enjoy! -Cardamommy
Friday, September 27, 2013
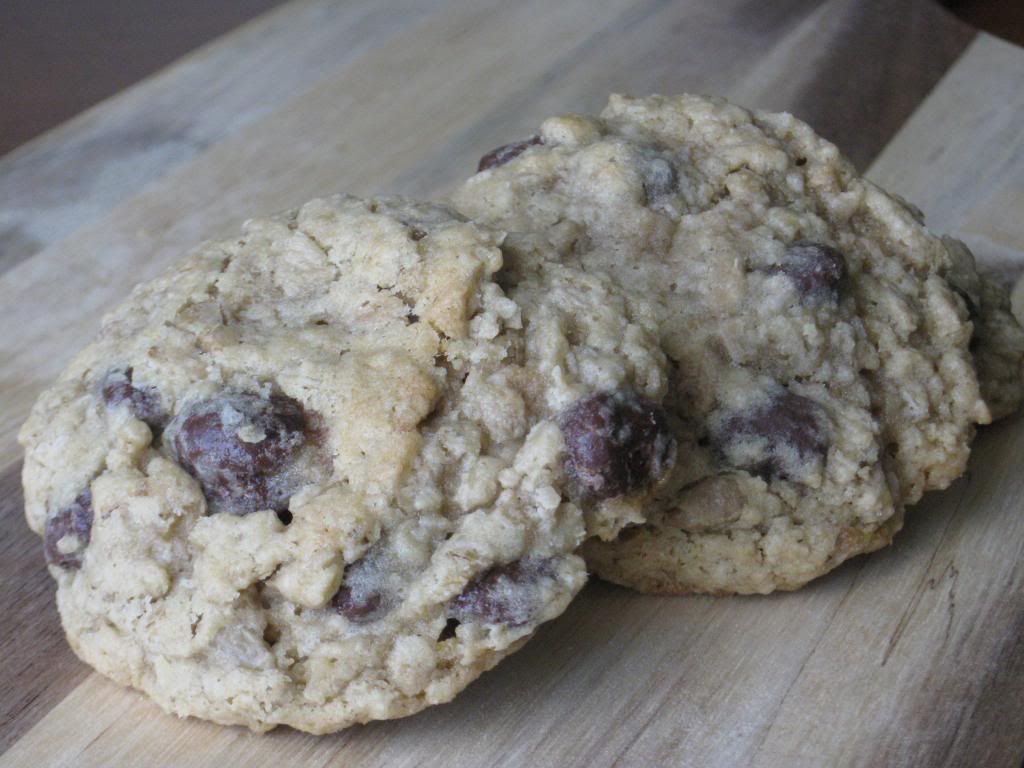
Chocolate Raisin Sunflower Seed Oatmeal Cookies
I really like oatmeal cookies, and I finally found a favorite. These Triple Berry Oatmeal Cookies start with my favorite oatmeal cookie base ever, so I made the same cookies, but just switched out the add ins. I added chocolate covered raisins and sunflower seeds, and wow did they go incredibly well together. The chocolate covered raisins were a perfect balance of chocolate and raisins, and the sunflower seeds brought a deliciously nutty flavor to the the entire cookie. Since the seeds are so small, you got some in every bite! Absolutely delicious.
Chocolate Covered Raisin and Sunflower Seed Oatmeal Cookies
1 cup butter, room temperature
1 cup packed brown sugar
1/2 cup granulated sugar
2 eggs
1 Tablespoon honey
2 teaspoons vanilla extract
2 1/2 cups quick oats
1 1/2 cups all purpose flour
1 teaspoon baking soda
1/2 teaspoon salt
1 1/2 cups chocolate covered raisins
1 cup shelled sunflower seeds
Preheat the oven to 350F. Line a baking sheet with parchment paper.
Cream together the butter, brown sugar, and granulated sugar until light and fluffy. Beat in the eggs, honey, and vanilla until well blended. Add the quick oats, flour, baking soda, and salt, and beat until just combined. Stir in the chocolate covered raisins and sunflower seeds until evenly distributed.
Using a cookie scoop, scoop the dough and drop about 2 inches apart onto the prepared baking sheet. Bake for about 10 to 12 minutes, or until the cookies are browned on the edges and just set in the center. Let cookies cool on the pan for 3 to 4 minutes, then transfer to a cooling rack to cool completely. Makes 2 1/2 dozen cookies.
Enjoy! -Cardamommy
Monday, September 23, 2013
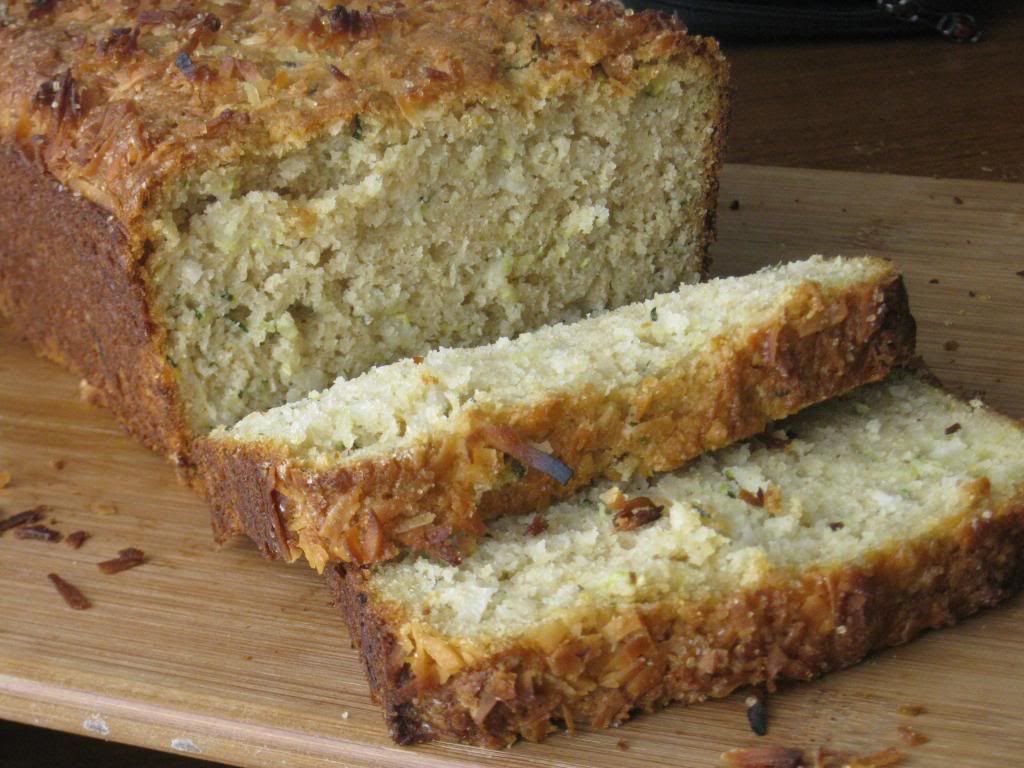
Coconut Lime Zucchini Bread
I am back with more zucchini bread for you! The last loaf of honey zucchini bread was such a huge hit, I had to experiment with more zucchini bread (good thing I had 2 zucchini left). Not to mention the fact that my Hungry Puppies asked me to make more zucchini bread no less than 79 times. This bread is totally delicious! It is moist and the lime gives it a fresh taste. The coconut is a wonderful addition, and the toasted coconut on the top is the perfect topping!
Coconut Lime Zucchini Bread
1 cup white whole wheat flour
1 cup all purpose flour
1/2 cup granulated sugar
1 1/2 teaspoons baking powder
1/2 teaspoon baking soda
1/2 teaspoon salt
2 eggs
1/2 cup honey
1/2 cup oil
1/2 cup buttermilk
1 teaspoon vanilla
Juice of 1 lime (about 2 tablespoons)
Zest of 1 lime (about 2 teaspoons)
1 1/2 cups shredded zucchini (about 1 medium zucchini)
1 cup shredded coconut, divided
Preheat the oven to 350F. Grease a 9x5 inch loaf pan. Set aside.
In a large bowl combine the whole wheat flour, all purpose flour, sugar, baking powder, baking soda, and salt. Set aside. In a medium bowl, whisk together the eggs, honey, oil, buttermilk, vanilla, lime juice, and lime zest.
Pour the egg mixture into the flour mixture and stir until just combined. Stir in the shredded zucchini and 1/2 cup of the shredded coconut. Pour the batter into the prepared loaf pan and smooth the top. Sprinkle the remaining 1/2 cup coconut over the top of the batter.
Bake in the preheated oven for 50 to 60 minutes, or until a toothpick inserted in the center comes out clean. Remove bread from the oven and let cool in the pan for about 10 to 15 minutes. Carefully run a knife around the edges of the pan to loosen the bread, then turn the bread out onto a cooling rack to finish cooling. Makes 1 loaf.
Enjoy! -Cardamommy
Labels:
bread
,
Buttermilk
,
Coconut
,
Honey
,
Lime
,
Quick Bread
,
Whole Wheat
,
Zucchini
Friday, September 20, 2013
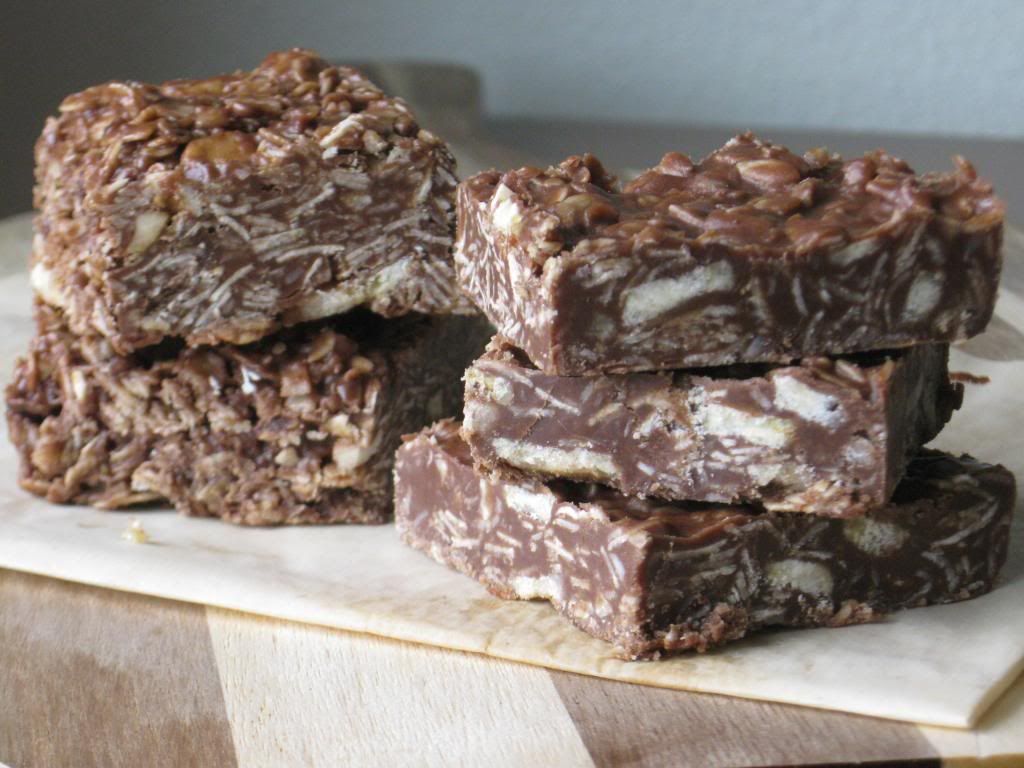
No Bake Cookie Bars with Honey and Coconut Oil
A friend of mine gave me a plate of these delicious no bake cookie bars a couple weeks ago, and they were an instant hit at my house. Thankfully she gave me the recipe because I think that this is our all time favorite no bake cookie recipe ever. These bars are fudgy and dense and oatmeally and delicious. You can easily double this recipe. In fact, I halved the original recipe but forgot to halve the oats in my first batch! They were still delicious, so if you like an oatier cookie bar, you can add up to double the amount that the recipe calls for and they will turn out just fine. My second batch had the correct amount of all ingredients, but I can't decide if I like the extra oat or the regular oat version better. In the picture, the bars on the left have double the oatmeal, and the bars on the right have the normal amount called for in the recipe. Also, if you're like me and don't like banana chips, you can add chopped walnuts, pecans, peanuts or cranberries instead.
No Bake Cookie Bars with Honey and Coconut Oil
1/2 cup peanut butter
1/4 cup coconut oil
1/4 cup honey
1/2 cup chocolate chips
1/2 cup quick oats
1/2 cup old fashioned oats
1/4 cup shredded coconut
1/2 cup banana chips, coarsely broken
Lightly spray a 9x9 inch square pan with cooking spray.
Place the peanut butter, coconut oil, and honey in a medium saucepan. Heat the mixture over medium heat, stirring frequently, until melted and smooth. Add the chocolate chips and stir until melted. Remove mixture from the heat and add quick oats, old fashioned oats, coconut, and banana chips, stirring until well combined. Pour the mixture into the prepared pan and refrigerate until firm. Makes 16 bars.
Enjoy! -Cardamommy
Labels:
Banana
,
Bars
,
Chocolate
,
Chocolate Chips
,
Coconut
,
Coconut Oil
,
Cookies
,
Honey
,
No Bake
,
Oatmeal
,
Peanut Butter
Friday, September 13, 2013
Zucchini Honey Bread
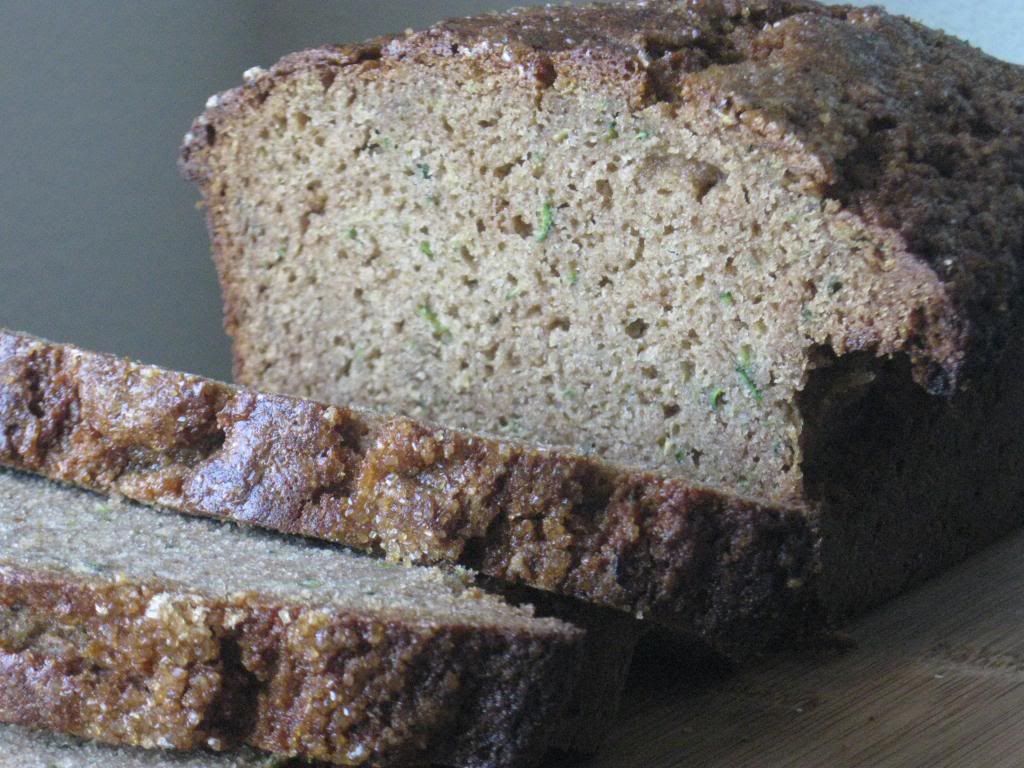
I am not a fan of zucchini. Not at all. I detested it when I was a kid and my Mom made me eat it. I still detest it now, however, since I am the mom now, I just don't buy it. Unless it comes in my bountiful basket, in which case I make this fabulous zucchini honey bread. It is so tender and moist and delicious. It is my most favorite zucchini bread recipe ever! My Hungry Puppies love it too! They just can't get enough. My youngest Hungry Puppy said "Mom! It's not disgusting like I thought it would be!". I guess the sight of all that green vegetable going in was a little disconcerting.
Zucchini Honey Bread
2 cups whole wheat flour
1 cup all purpose flour
1 cup granulated sugar
1 teaspoon baking powder
1 teaspoon baking soda
1 teaspoon salt
1 Tablespoon cinnamon
1/2 cup canola oil
1/2 cup butter, melted
3/4 cup honey
2 eggs
2 teaspoons vanilla extract
2 cups grated zucchini
Preheat the oven to 350F. Grease and flour 2 8x4 inch loaf pans. Set aside.
In a large bowl, combine the whole wheat flour, all purpose flour, sugar, baking powder, baking soda, salt, and cinnamon. In a separate medium sized bowl, whisk together the oil, melted butter, honey, eggs, and vanilla. Pour the wet ingredients into the dry ingredients and stir until just combined. Stir in the grated zucchini until evenly distributed.
Pour the batter into the prepared loaf pans, smoothing the tops. Bake in the preheated oven for about 40 minutes, or until a toothpick inserted in the center comes out clean. Remove bread from the oven and let cool in the pans for about 10 minutes. Run a knife around the edges of the pan to loosen the bread, then remove the bread from the pans and place on a cooling rack to cool. Makes 2 loaves.
Note: You can bake this bread in a 9x5 inch loaf pan. The pan will be quite full, and will take about 1 hour and 25 minutes to bake, so watch it and cover with bread loosely with foil after about 1 hour to prevent over browning.
Enjoy! -Cardamommy
Monday, August 26, 2013
Whipped Raspberry Butter
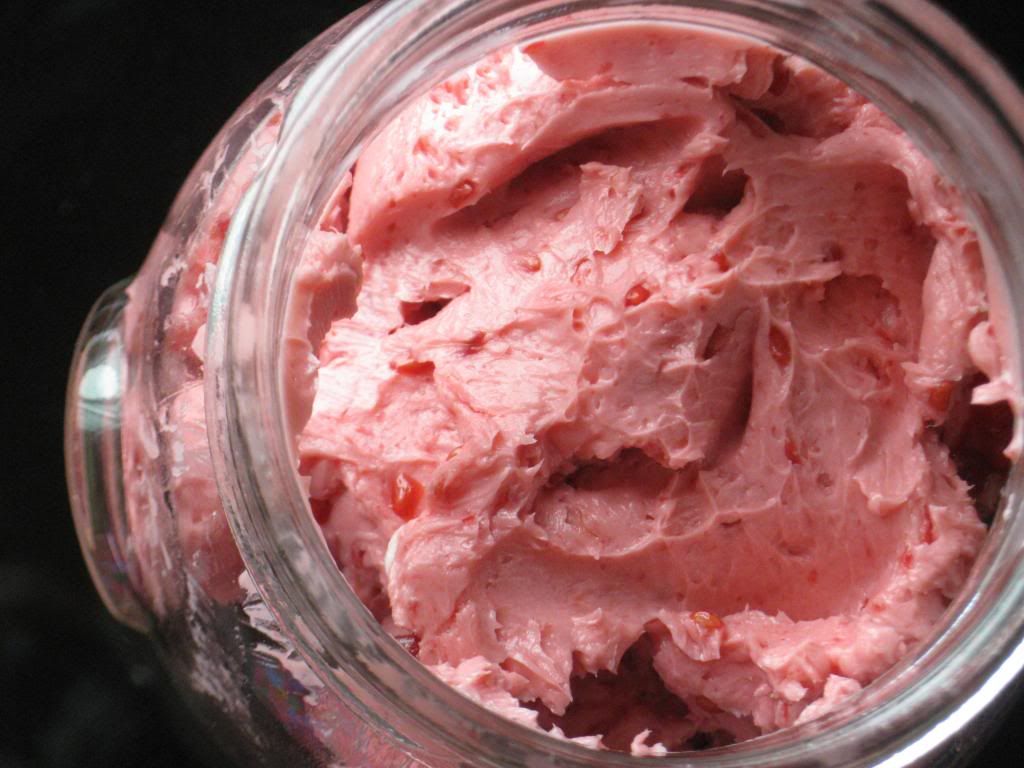
I came across this recipe for whipped raspberry butter and knew that I had to try it immediately. Which totally worked out perfectly because I happened to have quite a large quantity of fresh raspberries in my refrigerator. This recipe has put all sorts of wonderful ideas in my head of how/if I could cook with this butter...Mmmm raspberry chocolate chip cookies anyone? This recipe is easily doubled.
Whipped Raspberry Butter
1 Tablespoon honey
1/4 cup fresh red raspberries
1 stick (1/2 cup) butter, room temperature
Place the honey and raspberries in a microwave safe bowl (or in a small saucepan). Heat the mixture until it reaches a boil, stirring to break up the berries. Let the mixture cool completely. Place the honey/raspberry mixture and butter into a medium sized bowl, and beat with a hand mixer on low until combined. The butter will separate at first, just keep beating. Increase the mixer speed to high, and beat the butter for 2 to 3 minutes, or until light and fluffy. Transfer the butter to a jar and refrigerate, or freeze.
Enjoy! -Cardamommy
Whipped Raspberry Butter
1 Tablespoon honey
1/4 cup fresh red raspberries
1 stick (1/2 cup) butter, room temperature
Place the honey and raspberries in a microwave safe bowl (or in a small saucepan). Heat the mixture until it reaches a boil, stirring to break up the berries. Let the mixture cool completely. Place the honey/raspberry mixture and butter into a medium sized bowl, and beat with a hand mixer on low until combined. The butter will separate at first, just keep beating. Increase the mixer speed to high, and beat the butter for 2 to 3 minutes, or until light and fluffy. Transfer the butter to a jar and refrigerate, or freeze.
Enjoy! -Cardamommy
Monday, April 8, 2013
Triple Berry Oatmeal Cookies
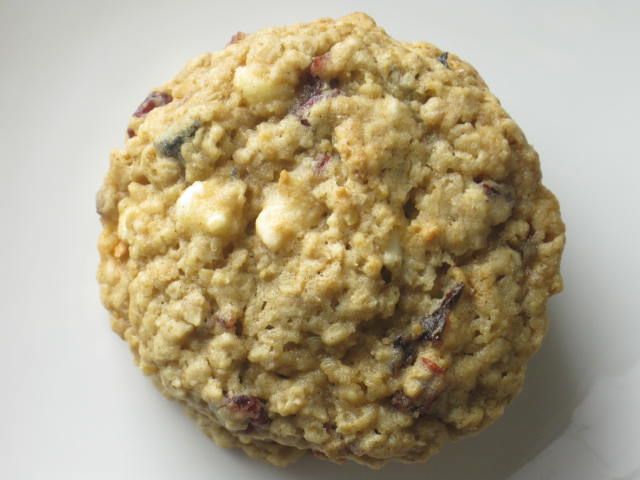
This recipe may be my newest very favorite oatmeal cookie recipe. I don't have very many tried and true oatmeal cookie recipes. I've just never had very much luck in that department. We have quite a few recipes here with oatmeal in them, but not so many truly oatmeal cookies. This one is totally a winner though. I may even repeat this one. The triple berry blend is a slightly different twist instead of using raisins. The white chocolate chips and macadamia nuts keep this cookie tasting a bit lighter, and let my secret ingredient really shine through. Chinese Five Spice. Yep, I am all over that spice right now. I am using it in everything. Can't get enough. And it tastes amazing in these fabulous cookies!
Triple Berry Oatmeal Cookies
1 cup butter, room temperature
1 cup packed brown sugar
1/2 cup granulated sugar
2 eggs
1 Tablespoon honey
2 teaspoons vanilla extract
2 1/2 cups quick oats
1 1/2 cups all purpose flour
1 teaspoon baking soda
1/2 teaspoon salt
1 teaspoon Chinese Five Spice
1 1/4 cup (5 ounces) dried mixed berries (cranberries, blueberries, cherries)
1 cup white chocolate chips
1/2 cup chopped macadamia nuts
Preheat the oven to 350F. Line a baking sheet with parchment paper.
Cream together the butter, brown sugar, and granulated sugar until light and fluffy. Beat in the eggs, honey, and vanilla until well blended. Add the quick oats, flour, baking soda, salt, and Chinese five spice, and beat until just combined. Stir in the mixed berries, white chocolate chips, and macadamia nuts until evenly distributed.
Using a cookie scoop, scoop the dough and drop about 2 inches apart onto the prepared baking sheet. Bake for about 12 minutes, or until the cookies are browned on the edges and just set in the center. Let cookies cool on the pan for 3 to 4 minutes, then transfer to a cooling rack to cool completely. Makes 2 1/2 dozen cookies.
Enjoy! -Cardamommy
Monday, November 19, 2012
Cranberry Orange Honey Butter
I am a huge fan of honey butter, but very infrequently do I make my own. Thanks to a Taste of Home magazine, I was inspired to throw some together. It isn't difficult, and the results are amazing. I have never heard of such a honey butter combination, but this will definitely make my repeater list.
Cranberry Orange Honey Butter
1 cup salted butter, room temperature
1/3 cup dried cranberries, chopped fine
1/4 cup honey (use a good quality honey)
Grated zest of one orange
Place all ingredients in a bowl and beat with an electric mixer until completely combined. Store in the refrigerator. Makes about 24 servings.
Enjoy! -Cardamommy
Friday, October 5, 2012
Honey Fudge Cupcakes
I came across this Chocolate Honey Ganache Layer Cake the other day on FineCooking.com, and was so excited to try it! I modified the recipe a bit by changing it from a layer cake to cupcakes, and I changed the frosting as well. The result is a moist and delicious cupcake where both the chocolate and honey flavors stand out quite well. The frosting is a rich fudge and honey frosting, where again, the chocolate and honey are prominent flavors.
Honey Fudge Cupcakes
Cupcakes:
1/2 cup + 2 Tablespoons unsweetened cocoa powder
1/2 cup honey
3/4 cup hot water
1 1/2 cups all purpose flour
3/4 teaspoon baking powder
3/4 teaspoon baking soda
1/2 teaspoon kosher salt
6 Tablespoons butter, room temperature
6 Tablespoons canola oil
1/2 cup brown sugar
1/2 cup granulated sugar
2 large eggs
6 Tablespoons sour cream
1 teaspoon vanilla extract
Honey Fudge Frosting:
1 1/4 sticks (10 Tablespoons) butter
2 ounces (heaping 1/2 cup) powdered sugar
6 Tablespoons unsweetened cocoa powder
Pinch of salt
6 Tablespoons honey
1 teaspoon vanilla extract
4 ounces (1/2 cup) milk chocolate chips, melted and cooled
Preheat the oven to 350F. Line 24 muffin cups with paper liners.
In a medium bowl, stir together the cocoa powder, honey, and hot water. Mix until smooth, set aside. In a separate bowl, stir together the flour, baking powder, baking soda, and salt. Set aside.
In a large bowl, cream together the butter, oil, brown sugar, and granulated sugar. Beat in the eggs, sour cream, and vanilla extract. Gradually add the chocolate mixture alternately with the flour mixture, starting and ending with the flour mixture. Mix until all ingredients are incorporated and no streaks of flour remain.
Fill the lined muffin cups about 2/3 full, then bake for 20 minutes, or until a toothpick inserted in the center of a cupcake comes out clean. Remove cupcakes from the oven and let cool in the pans for several minutes before transferring them to cooling rack to cool completely before frosting.
For the honey fudge frosting, place the butter, powdered sugar, cocoa powder, and salt in the bowl of a food processor and process until smooth, 15 to 30 seconds. Add the honey and vanilla and process again, just until combined, 10 to 15 seconds. Finally, add the melted and cooled chocolate and pulse until combined, another 10 to 15 seconds. Let the frosting sit for several minutes before spreading or piping on the cooled cupcakes. Makes 24 cupcakes.
Enjoy! -Cardamommy
Friday, March 9, 2012
Honey Whole Wheat Sunflower Seed Bread
This is such a hearty and delicious sandwich loaf. My family loves it. It is sturdy, yet soft and studded with sunflower seeds. It is so delicious that I am kicking myself for not making it more often!
Honey Whole Wheat Sunflower Seed Bread
1 1/2 cups warm water
1/3 cup canola oil
1/3 cup honey
1 1/2 teaspoons salt
3 1/2 to 4 1/2 cups whole wheat flour (start with the lesser amount, then add more if needed)
1/2 cup sunflower seed kernels (shelled sunflower seeds)
2 1/4 teaspoons active dry yeast
If using a bread machine, place all of the ingredients in the machine according to manufacturer's directions. Program the machine for a dough cycle. If mixing by hand, combine all of the ingredients to form a dough. It should be slightly tacky but not sticky . Knead until smooth. Place dough in a greased bowl and cover. Let rise for about 1 hour.
Preheat the oven to 350F. Grease 2 8x4 inch loaf pans. When the dough cycle is complete, and the dough has risen, punch the dough down and divide into 2 pieces. Shape into loaves and place in the prepared pans. Cover and let rise about 30 minutes, or until doubled. Bake in the preheated oven for 20 to 25 minutes or until golden brown. Remove from the oven and transfer bread to wire racks to cool completely. Makes 2 8x4 inch loaves.
Enjoy! -Cardamommy
Sunday, July 17, 2011
Honey Spiced Peaches
Chemist Cuisinier, PhD and I like to experiment. A lot. If it works, great! If not...well, we know what not to do next time. And we always have fun. The same holds true for our latest adventure: canning [and blanching] [and slicing] [and pitting] [not 100% completely ripe] peaches. I found this recipe from one of my favorite sites, allrecipes.com. It looked simple and sounded delicious. Soon the whole house smelled of peaches, honey and spice. I can hardly wait to reopen a jar and enjoy some honey spiced peaches.
8 lbs (ripe) Peaches
1 C Sugar
4 C Water
2 C Honey*
1 1/4 tsp Ground Allspice
1/4 plus 1/8 tsp Ground Cloves
3 Cinnamon Sticks
3 Ball or Kerr Quart (32 oz) Jars with lids and bands
Ball Fruit-Fresh Produce Protector
1. Prepare boiling water canner. Heat jars and lids in simmering water until ready to use. Do not boil. Set bands aside.
2. Wash, peel, and pit peaches. Leave peaches in halves or cut into slices. Treat fruit with produce protector to keep from browning.
3. Combine sugar, water, and honey. Cook over medium heat until sugar dissolves.
4. Pack peaches into hot jars, leaving 1/2 inch headspace. Add 1/4 tsp allspice, 1/8 tsp cloves, and a cinnamon stick to each jar.
5. Ladle hot syrup over peaches leaving 1/2 inch headspace. Remove air bubbles with a butter knife. Wipe rim and apply band, tightening until fingertip tight.
6. Process filled jars in a boiling water canner for 25 minutes, adjusting for altitude. Remove jars and cool. Check lids for seal after 24 hours. The lid should not flex up and down when center is pressed.
*You may use 1 1/4 C brown sugar plus 1/4 C water as a substitution for 1 C honey
Mahlzeit!
-Coriaunty
8 lbs (ripe) Peaches
1 C Sugar
4 C Water
2 C Honey*
1 1/4 tsp Ground Allspice
1/4 plus 1/8 tsp Ground Cloves
3 Cinnamon Sticks
3 Ball or Kerr Quart (32 oz) Jars with lids and bands
Ball Fruit-Fresh Produce Protector
1. Prepare boiling water canner. Heat jars and lids in simmering water until ready to use. Do not boil. Set bands aside.
2. Wash, peel, and pit peaches. Leave peaches in halves or cut into slices. Treat fruit with produce protector to keep from browning.
3. Combine sugar, water, and honey. Cook over medium heat until sugar dissolves.
4. Pack peaches into hot jars, leaving 1/2 inch headspace. Add 1/4 tsp allspice, 1/8 tsp cloves, and a cinnamon stick to each jar.
5. Ladle hot syrup over peaches leaving 1/2 inch headspace. Remove air bubbles with a butter knife. Wipe rim and apply band, tightening until fingertip tight.
6. Process filled jars in a boiling water canner for 25 minutes, adjusting for altitude. Remove jars and cool. Check lids for seal after 24 hours. The lid should not flex up and down when center is pressed.
*You may use 1 1/4 C brown sugar plus 1/4 C water as a substitution for 1 C honey
Mahlzeit!
-Coriaunty
Monday, May 23, 2011
Honey Butter
I received a new cookbook, Homestyle In A Hurry, for Mother's Day, and so far it is smashing success. It is a compilation of favorite recipes sent in by people from all over. I read through the cookbook (something that I always made fun of my mom for and swore that I would never do), and the recipes are very simple, yet look so delicious. The first recipe that jumped out at me was this one, for honey butter. By now, you all know that I love honey, and I suppose that butter isn't too far down the list either, so honey butter is something that I have a bit of a weakness for. This particular recipe intrigued me because it adds marshmallow cream. Sure enough, this honey butter is amazing. I might have to hide it from myself.
Honey Butter
1 cup butter, softened
1 cup honey
1 7ounce jar marshmallow cream
1/2 teaspoon vanilla extract
Combine all of the ingredients in a food processor and process until completely blended. Store in a covered bowl (I store it in a sealed Tupperware container in the refrigerator). Makes about 3 cups.
Enjoy! -Cardamommy
Wednesday, February 23, 2011
Honey Cranberry Cornmeal Quick Bread
This bread is first in a short line of quick breads that I will be making in the very near future. I like my quick breads to be dense, moist, and flavorful. And not banana. This bread fills 3 1/2 out of 4 of those requirements. This bread is dense, full of flavor, definitely not banana, and sort of moist. A bonus? There is honey in it! This is the second time that I have made this bread. The first time, I used dried cranberries and I felt that it was a little dry, so this time I used fresh cranberries to see if that made a difference. I think not so much. Notice how most of them floated up to the top? Yeah, not quite sure what happened there. Anyway, the moistness of the bread landed right in the mid to moderate range. The flavor of this bread is great. I think that I will use even more cranberries next time.
Honey Cranberry Cornmeal Quick Bread
1 cup all purpose flour
1 cup whole wheat flour
1 cup cornmeal
1/2 cup sugar
1 1/2 teaspoons salt
1 1/2 teaspoons baking powder
1/2 cup (1 stick) butter, melted
1/2 cup honey
1 1/4 cups buttermilk
2 eggs
1 teaspoon vanilla extract
1 1/2 cups fresh cranberries
Preheat the oven to 350F. Grease and flour a 9x5x3 inch loaf pan.
In a large bowl, whisk together the flours, cornmeal, sugar, salt and baking powder. In a smaller bowl, whisk together the butter, honey, eggs, buttermilk, and vanilla. Add the buttermilk mixture to the flour mixture and stir until just blended. Fold in the cranberries. Pour the batter into the prepared loaf pan and spread evenly. Bake for 60 to 70 minutes, or until a toothpick inserted into the center of the loaf comes out clean. Cool bread in the pan on a cooling rack for 15 to 20 minutes, then remove from pan. Serve warm.
Enjoy! -Cardamommy
Monday, January 17, 2011
Honey Vanilla Bean Marshmallows
I think that we have already established my love and devotion for homemade marshmallows, so we probably need not overdo it. The honey flavor comes through in these marshmallows, as does that luscious vanilla bean flavor. Toasting or melting these marshmallows before eating them would bring out those flavors even more (my hungry puppies gave them high marks). You can find the original recipe here. Just let me say that these are quite possibly my favorite marshmallows ever. So far. We'll have to see what the future holds.
Honey Vanilla Bean Marshmallows
1 cup cold water, divided
3 1/4-ounce packages unflavored gelatin
1 1/2 cups sugar
1/4 cup honey
2/3 cup light corn syrup
1/4 teaspoon salt
2 teaspoons vanilla extract
1 vanilla bean, seeds scraped out and reserved
1/4 cup cornstarch
1/4 cup powdered sugar
In a small bowl, whisk together the cornstarch and powdered sugar. Spray a 9x13 pan with cooking spray, and then coat with the cornstarch mixture. Set both aside. Pour 1/2 cup of the cold water into the bowl of a stand mixer with a whisk attachment. Sprinkle the gelatin over the water and let it sit while you prepare the sugar syrup.
In a medium saucepan over medium-high heat, bring sugar, honey, corn syrup, salt, and the remaining cold water to a boil, stirring to dissolve the sugar. Continue to boil the syrup until it reaches 240F on a candy or instant read thermometer. When the sugar syrup reaches 240F, turn the mixer to low speed and carefully stream the sugar syrup down the side of the bowl into the gelatin mixture (while the mixer is running). Once you have added all of the sugar syrup, increase the mixer speed to high and beat for 8 minutes. The mixture will be thick, white, and fluffy. Add the vanilla extract and vanilla bean paste, and continue beating for 2 more minutes.
Spread the marshmallow mixture into the prepared pan, and spread evenly with a clean wet (or lightly greased) spatula. Sprinkle more of the cornstarch mixture over entire surface of the marshmallow and let sit at room temperature for at least 4 hours, or overnight. When the marshmallow is set, turn it out onto a large cutting board. Using a pizza cutter, slice the marshmallows into cubes, and toss the cubes in the cornstarch mixture. Store the marshmallows in an airtight container for up to a week, or you may freeze the marshmallows for a slightly longer shelf life (if they last that long).
Enjoy! -Cardamommy
Friday, December 31, 2010
Cardamom Honey Cutout Cookies
3 cups (13 1/2 ounces) all purpose flour
1 teaspoon ground cardamom
1/2 teaspoon table salt
1/4 teaspoon baking soda
1 cup (8 ounces) unsalted butter, room temperature
3/4 cup granulated sugar
1/4 cup honey
1 large egg
1 teaspoon vanilla extract
Preheat oven to 350F, and line two baking sheets with parchment paper. In a medium mixing bowl, combine the flour, cardamom, salt, and baking soda, and whisk until blended.
In the bowl of a stand mixer with the paddle attachment, beat the butter and sugar on medium speed until well blended and fluffy, about 3 minutes. Scrape down the bowl and add the honey, egg, and vanilla. Continue mixing on medium speed until well blended. Add the flour mixture and beat on low speed until no streaks of flour remain, and dough comes together in moist clumps. Divide the dough in half, form into disc shapes, and wrap in plastic wrap. Refrigerate for 1 to 2 hours until chilled and firm.
Working with one disc of dough at a time, roll the dough on a floured surface to about 3/16 inch thick (a little more than 1/8, but less than 1/4). Cut dough with a 2 1/2 inch cookie cutter, and arrange the cookies about 1 inch apart on prepared baking sheets. Gently press the scraps together, re-roll and cut. Repeat with remaining disc of dough.
Bake one sheet at a time for 11 minutes or until the edge of the cookies have a 1/4 inch wide light brown rim. Let the cookies cool on the baking sheets for a couple of minutes, then transfer to a wire cooling rack to cool completely. Decorate with frosting or royal icing. The plastic-wrapped dough may be refrigerated for up to 3 days, or frozen for 1 month. Thaw overnight in the refrigerator before proceeding with the recipe. Makes about 2 dozen cookies.
Enjoy and Mahlzeit! -Cardamommy and Coriaunty
Subscribe to:
Posts
(
Atom
)