skip to main
|
skip to sidebar
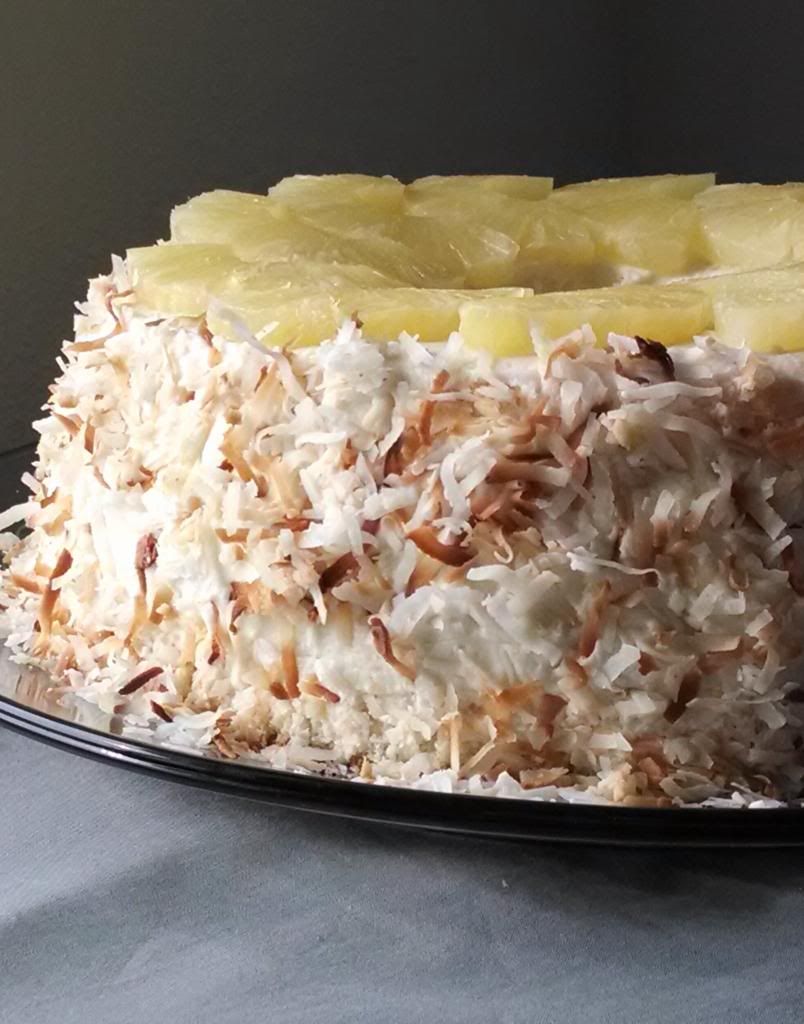
This cake is a little bit weird to me, but in a totally good way. I have never really had or experienced, or heard about frosted angel food cake. For me, angel food cake has always gone with whipped cream and fruit. I'm not a super angel food cake fan anyway, but this cake has a fun story. Seriously, about 9 or 10 years ago, either my mom or I made this cake and it was a disaster (so it was probably me...). Literally the only thing I remember about this cake was that it was a gloopy slippery slidey mess. The filling was spilling out and frosting was sliding off all over the place. So, me being me, I decided to try it again. Because it wasn't painful enough the first time? Probably. So, long story short, 2 batches of pineapple curd, just enough frosting to cover the cake, frosting it multiple times because the crumbly nature of angel food cake is not conducive to frosting staying on, and thank goodness for toasted coconut because oh the crumbs in the frosting (there's a reason no one frosts angel food cake, people!). So, I worked through the headaches so you don't have to! You're welcome. Did I mention this cake is really delicious?
Ambrosia Angel Food Cake
Pineapple Curd:
1/4 cup granulated sugar
1 Tablespoon cornstarch
2 eggs
1/4 cup pineapple juice (use juice from the sliced pineapple)
1 Tablespoon butter
Vanilla Frosting:
1/2 cup (1 stick) butter, room temperature
1/2 cup shortening
1 teaspoon vanilla extract
4 cups powdered sugar
1 to 2 Tablespoons milk
2 teaspoons orange zest
Assembly:
1 prepared angel food cake, cut horizontally in 4 even layers
2 15-ounce cans (or 3 11-ounce cans)mandarin oranges, well drained and halved lengthwise
1 can (20 ounces) pineapple slices, well drained, cut in half, juice reserved for curd
1 1/2 cups shredded coconut, toasted
For the pineapple curd, in a small saucepan whisk together the sugar, cornstarch, eggs, and pineapple juice until combined. Heat over medium heat, whisking constantly, until thickened and just starting to bubble. Remove from heat and stir in the butter until completely melted. Transfer pineapple curd to a bowl, cover with plastic wrap, and chill until cold.
For the frosting, cream together the butter, shortening, and vanilla extract. Beat in the powdered sugar, one cup at a time, until smooth. Beat in enough milk to reach the desired consistency. Place one cup of the frosting in a small bowl and stir in the orange zest.
To assemble the cake, place the bottom layer on a serving plate and spread with half of the orange frosting, and top with half of the orange slices (about 20 to 25). Place the next layer on top of the oranges and spread with the pineapple curd. Place the third layer on top of the pineapple curd and spread with the remaining orange frosting and orange slices (again, about 20 to 25). Place the top layer on top of the cake, and frost the top and sides of the cake with the vanilla frosting. This may be a little bit tricky since the outside of an angel food cake is so crumbly, the frosting won't want to stick at first. Just keep on smoothing it on, and it will come together (Also, don't mind the crumbs. I'm pretty sure they're inevitable, and will be covered up with coconut anyway). Press the toasted coconut into the sides of the cake, and arrange the pineapple slices on top. Makes 12 to 16 servings.
Enjoy! -Cardamommy
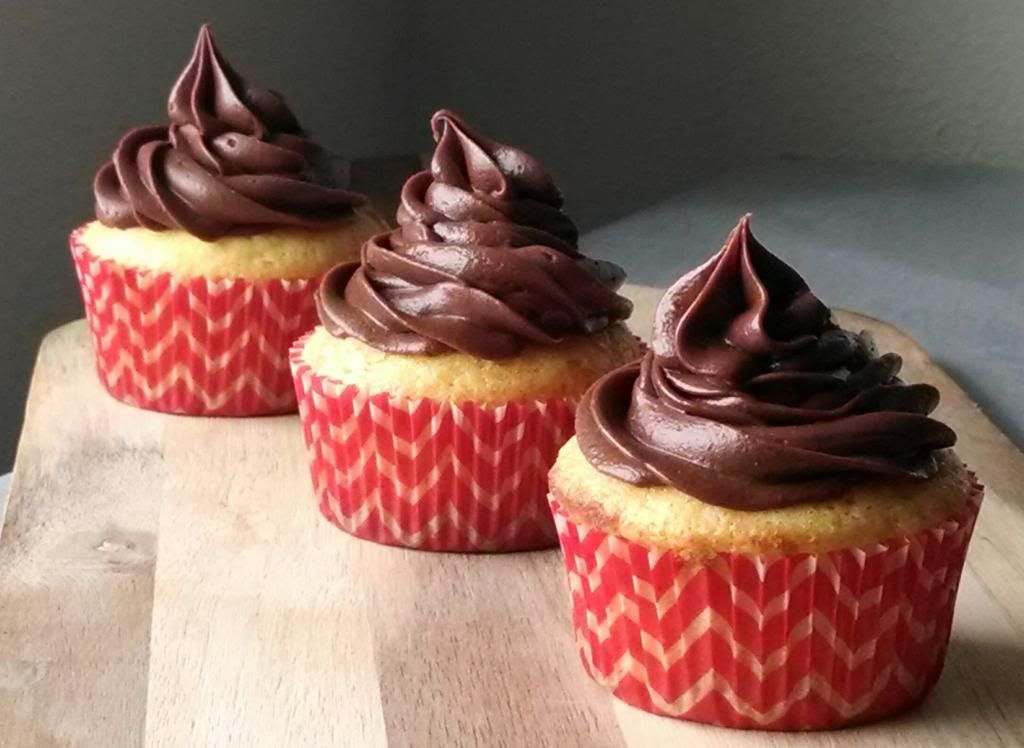
A couple of weeks ago, a girlfriend of mine sent a plate of cupcakes over, and I was totally thrown. They were confetti cupcakes, and they looked like a cake mix, but the texture and taste were not like a mix. So I had to ask what the deal was. Turns out that my friend used a set of "box to bakery" instructions that I hadn't come across before. I have an amazing doctored cake mix recipe that I use frequently, like for these, these, these, and this, but I had to try the new one. It has a different result, but it is really delicious! I will definitely be repeating this one! For the frosting, I found this recipe a while back and have been really excited to try it. I wanted to put it on a yellow cupcake so that the flavor would really come through. The frosting takes a little bit more time and effort, but not much and it is so worth it! You will have a lot of extra frosting, especially if you spread the frosting on the cupcakes instead of piping it. Just store it in the refrigerator in a covered container and use it for something else. Since when is extra frosting ever a bad thing?
Box to Bakery Cupcakes with Chocolate Caramel Frosting
Chocolate Caramel Frosting:
24 ounces milk chocolate, chopped
3 ounces semi sweet or bittersweet chocolate, chopped
1 1/2 cups granulated sugar
1/2 cup water
2 1/4 cups whipping cream
Box to Bakery Cupcakes:
1 box cake mix (I used a yellow cake mix for this recipe)
Eggs - Add one more than the box calls for ( if the box calls for 3 eggs, use 4 eggs)
Melted butter - use instead of oil and double the amount (1/3 cup oil or butter, use 2/3 cup melted butter)
Milk - substitute instead of water (if the box calls for 1 cup water, use 1 cup milk)
For the Chocolate Caramel Frosting, place the milk chocolate and semi sweet chocolate in a large metal bowl. In a medium saucepan over medium high heat, stir together the water and sugar until the sugar is dissolved. Continue to cook the mixture without stirring until it is dark amber in color, swirling the pan occasionally, about 6 to 10 minutes. Reduce the heat to low, and slowly and carefully stir in the whipping cream (the mixture will bubble and spit). Continue stirring over low heat until any caramel bits have dissolved and the mixture is smooth. Pour the hot caramel over the chopped chocolate. Let stand for 1 to 2 minutes, then stir until chocolate is completely melted and smooth. Refrigerate frosting until completely cool while you make the cupcakes. Let frosting come to room temperature before continuing. (This is extremely important if you make the frosting the day before. If it is too cold, it will not be spreadable).
For the cupcakes, preheat the oven to the temperature directed on the box mix. Line 24 muffin cups with cupcake papers. Set aside.
In a large bowl, combine the cake mix, directed amount of eggs, melted butter, and milk. Whisk together until combined. Spoon the batter into the prepared muffin cups. Bake according to the directions on the box mix (My cupcakes were done in less time than the box directed, so maybe check them a few minutes early), or until a toothpick inserted in the center of the cupcakes comes out with moist crumbs. Remove cupcakes from the oven and transfer to a cooling rack to cool completely before frosting.
Use an electric mixer or a stand mixer to beat the room temperature frosting, just until it is light and milky in color, just about a minute. If you overbeat the frosting, it will become stiff and unspreadable. If this happens, place the metal bowl of frosting over a pot of simmering water in ten second intervals, stirring after each, just until the frosting is smooth and spreadable (I had to do this and it worked like a charm). Immediately spread or pipe the frosting on the cooled cupcakes. Makes 24 cupcakes.
Enjoy! -Cardamommy
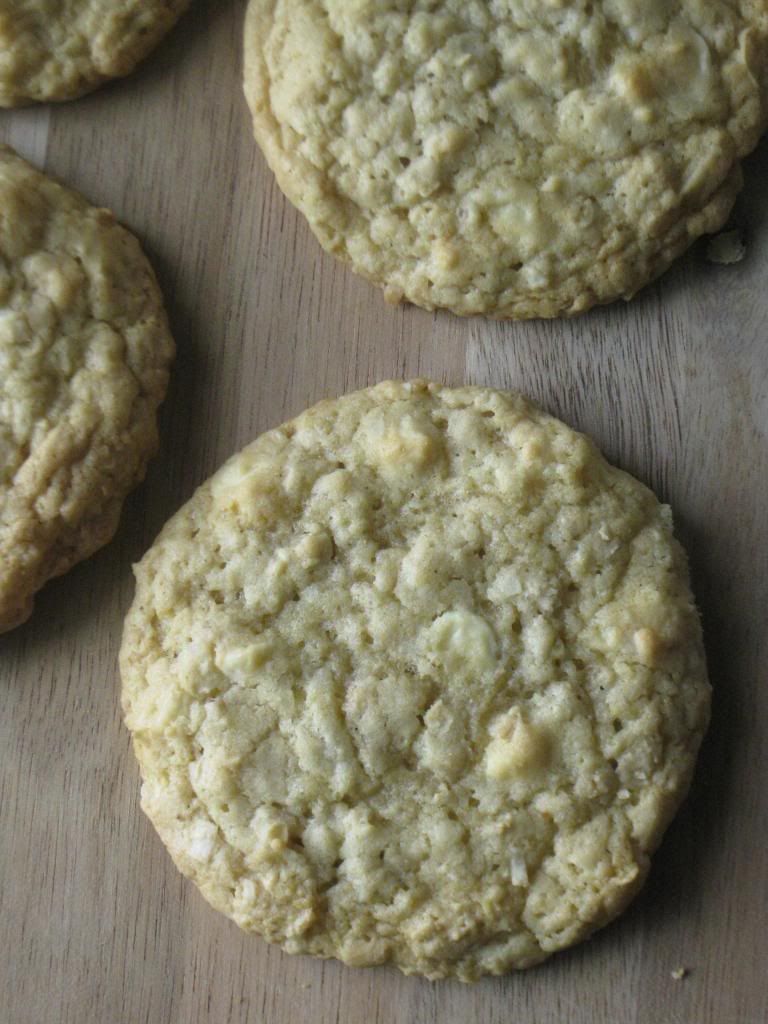
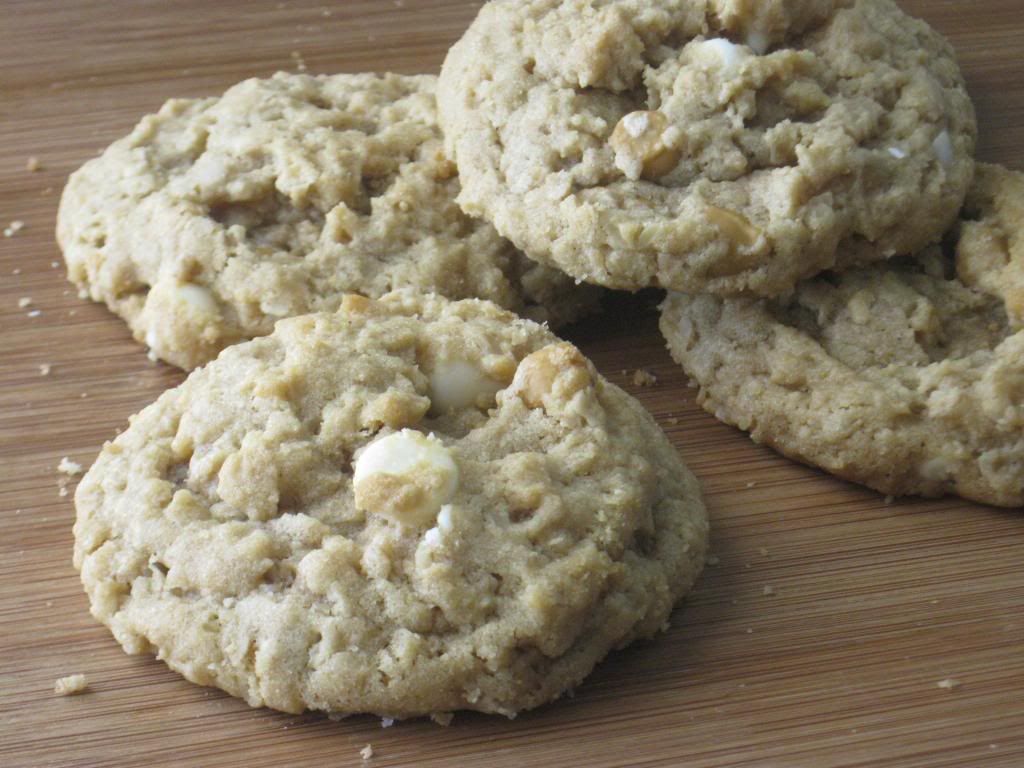
I've made white chocolate coconut cookies before several times, but never with oatmeal, which seems like kind of a no brainer. These Coconut White Chocolate Cinnamon Chip Cookies are amazing (and won me a place in the latest family reunion bake-off), and these White Chocolate Coconut Cookies are making me kind of drooly right now. We're here though, to talk about my latest coconut white chocolate cookie with oatmeal! These cookies are full of lighter flavors, so the individual flavors really stand out. The nuttiness from the oatmeal is really nice with little bursts of white chocolate and oatmeal.
Coconut Oatmeal White Chocolate Chip Cookies
1 cup (2 sticks) butter, room temperature
1 cup granulated sugar
1/2 cup packed brown sugar
2 eggs
1 teaspoon vanilla extract
2 cups all purpose flour
1 teaspoon baking soda
1 teaspoon salt
1/2 cup quick oatmeal
1/2 cup old fashioned oatmeal
1 cup shredded coconut
1 cup white chocolate chips
Preheat the oven to 350F. Line a baking sheet with parchment paper.
Cream together the butter, granulated sugar, and brown sugar until light and fluffy. Beat in the eggs and vanilla until smooth and well blended. Add the flour, baking soda, and salt, and beat on low until just combined. Beat in the quick oats, old fashioned oats, and coconut. Stir in the chocolate chips until evenly distributed.
Use a cookie scoop (2 tablespoon size) to drop the dough onto the prepared baking sheet. bake the cookies for 11 to 12 minutes, or until light golden brown. Remove cookies from the oven and let cool on the pan for several minutes. Transfer cookies to a cooling rack to cool completely. Makes about 30 cookies.
Enjoy! -Cardamommy
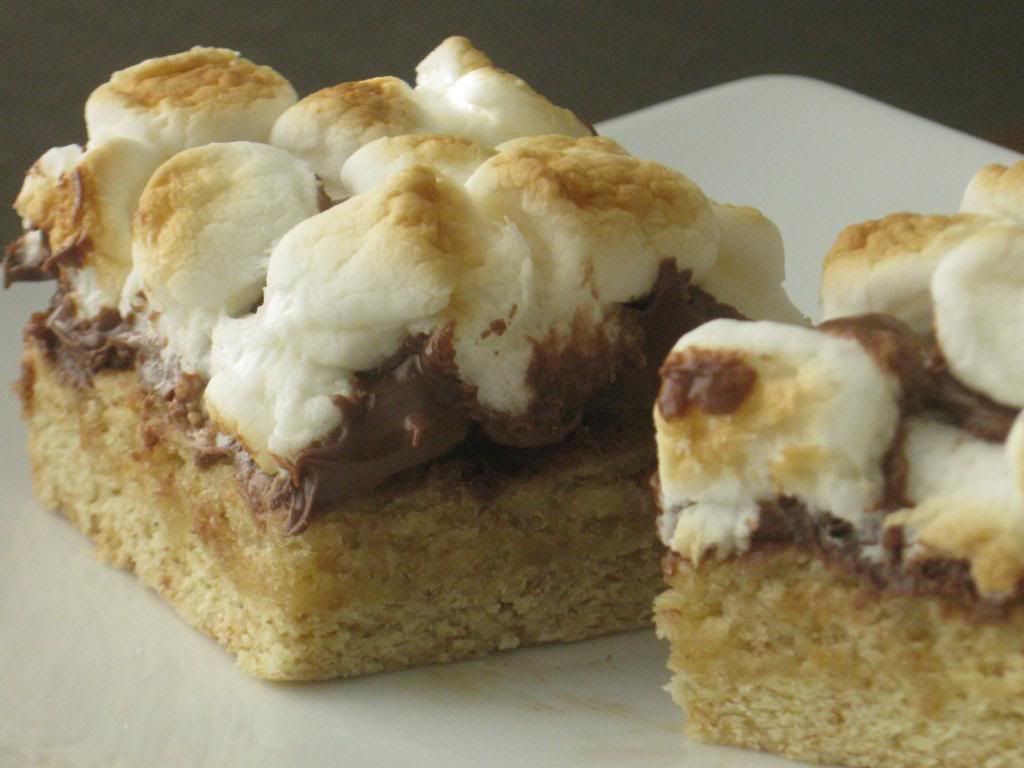
I needed to create something quick and easy, and these little bars more than fit the bill. Start with a sugar cookie graham crust covered with melty chocolate and topped with warm toasted marshmallows. What more could you want? These bars come together quickly and easily, and taste even better the next day!
Toasted Marshmallow S'mores Bars
1/4 cup (1/2 stick) butter, room temperature
1/2 cup granulated sugar
1 egg
1/2 teaspoon vanilla extract
1 1/4 cups all purpose flour
1/4 teaspoon baking soda
1/4 teaspoon salt
1/2 cup graham cracker crumbs (about 3 full graham cracker sheets)
1 1/2 cups milk chocolate chips
2 cups mini marshmallows
Preheat the oven to 350F. Line a 9x9 inch square baking dish with foil, letting the excess hang over the sides. Lightly grease the foil with cooking spray. Set aside.
Cream together the butter and sugar. Beat in the egg and vanilla until blended. Add the flour, baking soda, salt, and graham cracker crumbs and beat until just combined. Press the mixture evenly into the prepared pan. Bake for 10 minutes. Immediately pour the chocolate chips over the top of the crust and let sit for several minutes to soften. After the chocolate chips are soft, use the back of a spoon to spread the chocolate evenly. Sprinkle the marshmallows on top of the melted chocolate and place under the broiler for about 1 minute, or until the marshmallows are puffy and golden. Let the bars cool, then remove from the pan using the tin foil as handles. Cut into squares and serve. Makes 16 bars.
Enjoy! -Cardamommy
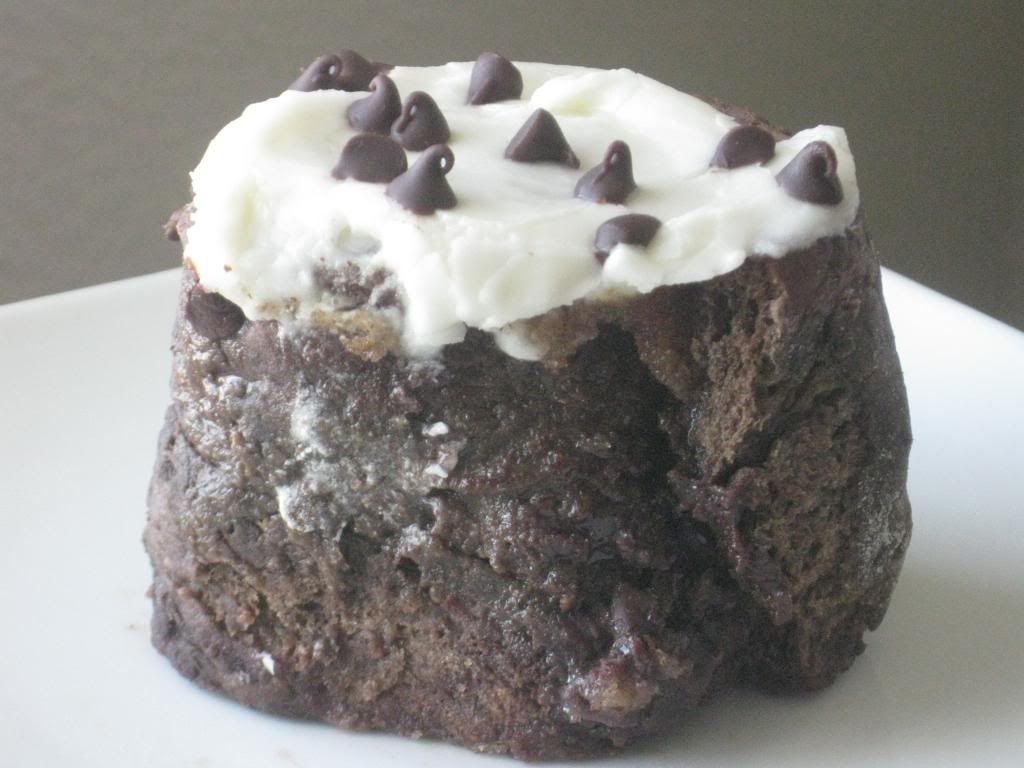
I was trying to come up with a last minute recipe to make my Hungry Puppies for dessert the other night, and I couldn't find anything to bake! Here's the big problem. The longer it takes me to find a recipe, the less time I have to make it, which narrows my recipe options. Enter these cinnamon rolls, which don't use yeast therefore have no rise time, therefore take less than an hour to make start to finish. I've made a similar variation of these cinnamon rolls for ages (actually I made them frequently ages ago, but haven't made them in ages, which means I need to do so and post them), and this is just a chocolate version. In fact, looking back, I definitely should have made a chocolate frosting instead of vanilla. Oh well, a reason to make them again soon. I'm not a fan of chocolate and cinnamon together, so chocolate cinnamon rolls tend to throw me for a loop. I almost left the cinnamon out of the filling, but my Hungry Puppies wanted it. I was very pleasantly surprised with how well it worked out. The cinnamon wasn't strong and I didn't get my usual chocolate vs. cinnamon clash. All in all, a total success. Now I'm thinking about butterfinger cinnamon rolls...Stay tuned!
No Yeast Chocolate Cinnamon Rolls
Chocolate Cinnamon Roll Dough:
2 1/2 cups all purpose flour
1/2 cup cocoa powder
2 Tablespoons granulated sugar
1 1/2 teaspoons baking powder
1/2 teaspoon baking soda
1/2 teaspoon salt
1 cup plus 2 Tablespoons buttermilk
1/4 cup melted butter
Cinnamon Sugar Filling:
3/4 cup brown sugar
1/4 cup granulated sugar
1 1/2 teaspoons cinnamon
1 Tablespoon butter, melted
2 Tablespoons butter, room temperature
1/4 cup mini chocolate chips
Vanilla Frosting:
2 Tablespoons butter, room temperature
1 cup powdered sugar
1/4 teaspoon vanilla extract
2 to 3 teaspoons milk
Mini chocolate chips, for topping (if desired)
Preheat the oven to 400F. Grease a 9 inch round or square baking pan with cooking spray. Set aside.
In a large bowl, combine the flour, cocoa powder, sugar, baking powder, baking soda, and salt. Stir in the buttermilk and melted butter until the dough just comes together, it may be a little craggy, that's okay. Do not overmix. Turn the dough out onto a floured surface and knead once or twice. On a floured surface, roll the dough out to about a 10x14 inch rectangle.
For the filling, stir together the brown sugar, granulated sugar, cinnamon, and melted butter until the mixture resembles wet sand. Spread the 2 tablespoons of softened evenly over the rolled out dough. Sprinkle the cinnamon sugar mixture evenly over the buttered dough. Sprinkle the mini chocolate chips over the top of the cinnamon sugar. Roll up the dough, starting on the longer side. Cut the dough log into 9 pieces and place cut side down in the prepared baking pan. Bake in the preheated oven for about 20 minutes. Remove from the oven and let cool slightly before frosting.
For the frosting, mix together the butter, powdered sugar, and vanilla until combined. Stir in enough of the milk to reach the desired consistency. Spread the frosting over the warm cinnamon rolls. Sprinkle mini chocolate chips over the frosting, if desired. Makes 9 cinnamon rolls.
Enjoy! -Cardamommy
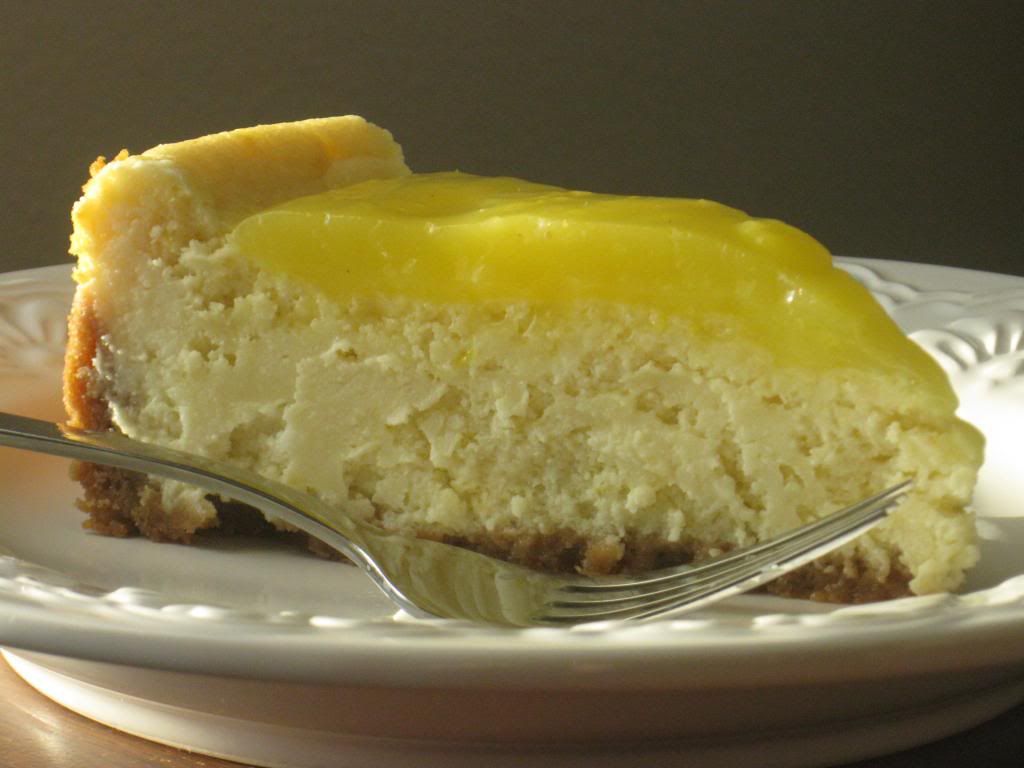
I've been in a lemon mood lately, and this cheesecake is next up. I rarely make cheesecake. I like it, but don't really crave it to the point where I need to have it a lot. My oldest Hungry Puppy decided that it was definitely time for me to make a cheesecake, and we definitely owe thanks to her for that request! This cheesecake is delicious. It has a very subtle lemon flavor on it's own, but with the lemon curd on top it is perfection. The lemon curd gives it that major wow factor. This cheesecake is a little time consuming, but all in all pretty simple. A lot of the time involved is chilling the baked cheesecake and the lemon curd. Do yourself a springtime favor, make this cheesecake! Original recipe from Fine Cooking.
Lemon Curd Cheesecake
For the crust:
8 ounces vanilla wafers or golden oreos (with the filling scraped out)
2 Tablespoons granulated sugar
7 Tablespoons butter, melted
Cheesecake Filling:
3 packages (8 ounces each) cream cheese, room temperature
1 cup ricotta cheese
2 Tablespoon all purpose flour
1/4 teaspoon salt
1 1/4 cups granulated sugar
2 Tablespoons fresh lemon zest
1 Tablespoon vanilla extract
4 eggs
Lemon Curd:
2 eggs
1/2 cup granulated sugar
1/2 cup fresh lemon juice (from about 2 or 3 lemons)
2 Tablespoons butter
1 Tablespoon lemon zest
Preheat the oven to 375F.
In a food processor, process the vanilla wafers or oreos until they are crumbs. Add the sugar and pulse until combined. Pour the cookie crumbs in a medium bowl and add the melted butter. Stir until the crumbs are evenly moistened. Pour the moistened crumbs into a 9 inch springform pan, and press evenly over the bottom of the pan and about 1 to 2 inches up the sides of the pan.
Bake the cookie crust in the preheated oven for 9 to 10 minutes, or until lightly browned. Remove crust from the oven and let cool completely while you make the cheesecake filling.
Reduce the oven temperature to 300F.
For the filling, beat together the cream cheese, ricotta cheese, flour, and salt until well combined, fluffy and smooth. Add the sugar, lemon zest, and vanilla and beat until blended and smooth. Beat in the eggs, one at a time, until just combined. Pour the filling into the prepared and cooled crust, and smooth the top.
Bake the cheesecake for about 55 minutes, or until the edges are slightly puffed and the center looks done, but wobbles when you move it. Remove the cheesecake from the oven and let cool completely on a cooling rack. Cover with plastic wrap and chill for about 8 hours, or overnight.
While the cheesecake is chilling, make the lemon curd. In a small saucepan, whisk together the eggs and sugar until combined. Whisk in the lemon juice. Over medium-high heat, cook the mixture, stirring constantly until the mixture is steaming and thickened and just barely starts to bubble. Remove from the heat and stir in the lemon zest and butter. Transfer the lemon curd to a medium bowl, cover and chill until cold.
When ready to serve, run a thin knife around the edge of the cheesecake to loosen it from the sides of the springform pan, then unclasp the edge of the pan and remove the sides. Spread the chilled lemon curd evenly over the top of the cheesecake. Cut into wedges and serve. Makes about 12 to 16 servings.
Enjoy! -Cardamommy
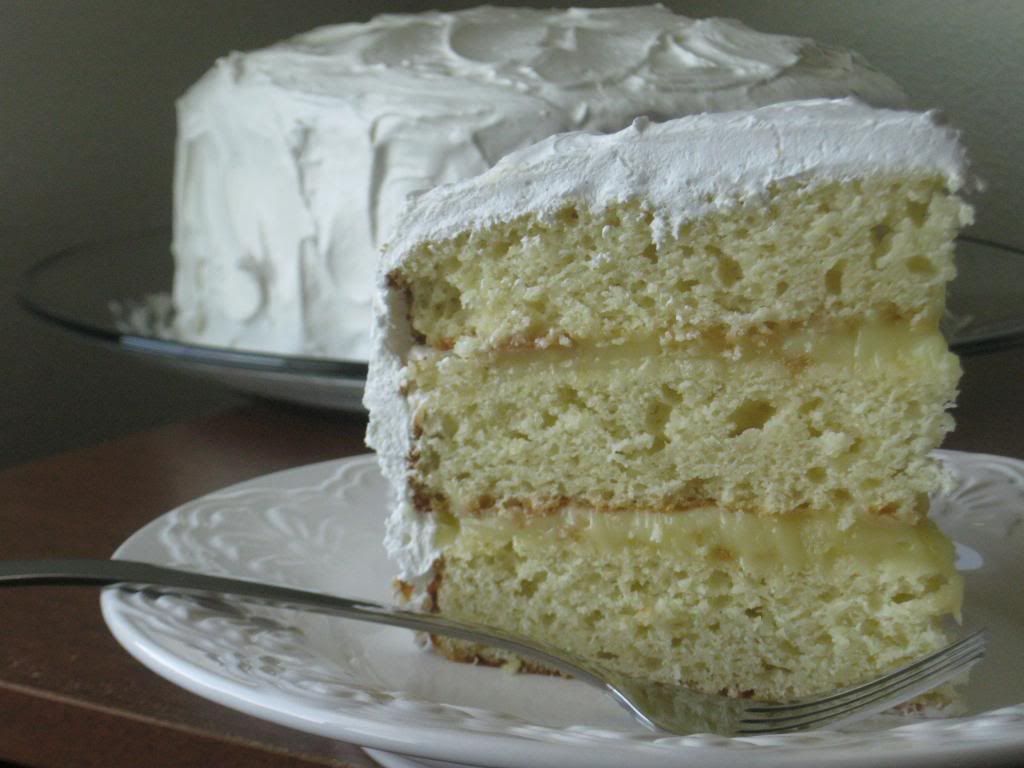
I am so in love with this lemon cake. I don't do lemon desserts too terribly often, which is odd because lemon is amazing! Looking back over the not very many lemon recipes we've posted, I really want to make some of them again! Like the Lemon Meringue Ice Cream Pie, Lemon White Chocolate Coconut Macadamia Cookies, Bread and Butterflies Lemon Pound Cake, and Lemon Poppyseed Cake with Vanilla Bean Cream Cheese Frosting. Yum. This cake starts with three layers of lemon cake and is filled with a luscious lemon curd. The whole thing is topped off with a light and fluffy Vanilla Bean 7 minute frosting. Delicious! Note: Assemble the cake before you make the frosting or the frosting may set up too much and you won't be able to spread it.
Lemon Layer Cake with Lemon Curd Filling and 7 Minute Frosting
Lemon Curd:
3/4 cup granulated sugar
1/4 cup cornstarch
1/4 cup water
1/2 cup fresh lemon juice
2 eggs
1 Tablespoon fresh lemon zest
1/4 cup (1/2 stick) butter, room temperature
Lemon Cake:
1 cup (2 sticks) butter, room temperature
2 cups granulated sugar
3 eggs
1 teaspoon vanilla extract
Zest of 1 lemon
3 1/2 cups all purpose flour
2 teaspoons baking powder
1/2 teaspoon baking soda
1/2 teaspoon salt
1 3/4 cups sour cream
1/4 cup fresh lemon juice
Vanilla Bean 7 Minute Frosting:
2 egg whites
1 1/2 cups granulated sugar
1/4 cup cold water
1 Tablespoon light corn syrup
1 teaspoon vanilla extract
Seeds of one vanilla bean
For the lemon curd, whisk together the sugar and cornstarch in a medium saucepan. Add the water and whisk until smooth. Whisk in the lemon juice and eggs, and cook over medium heat, stirring constantly, until the mixture is thick and bubbly. Remove the saucepan from the heat and whisk in the butter and lemon zest until the butter is melted and completely incorporated. Transfer the lemon curd to a bowl, cover with plastic wrap, and chill until completely cold.
For the lemon cake, preheat the oven to 350F. Grease 3 9-inch round cake pans and line the bottoms with parchment paper, then lightly grease the parchment paper.
In a large bowl, or the bowl of a stand mixer, cream together the butter and sugar until light and fluffy. Beat in the eggs, one at a time, then beat in the vanilla and lemon zest. Combine the flour, baking powder, baking soda, and salt in a small bowl. Add 1/3 of the flour mixture to the creamed mixture and beat on low until it starts to blend. Add half of the sour cream and lemon juice, and beat on low. Add another 1/3 of the flour mixture, followed by the remaining sour cream and lemon juice. On low speed, beat in the remaining flour mixture until just combined, scraping the sides as needed.
Divide the batter evenly among the three prepared pans and smooth the tops. Bake the cakes for about 25 minutes, or until a toothpick inserted in the center comes out clean and the edges are just slightly browned. Remove cakes from the oven and let cool for about five minutes. Run a knife around the edge of the pans, then carefully turn the cakes out of the pans. Remove the parchment paper from the bottom of the cakes (if necessary), and let cool completely on a cooling rack.
When you are ready to assemble the cake, remove the lemon curd from the fridge and stir to loosen it up so it is spreadable. Place one cake layer on a serving plate and spread half of the lemon curd over the top. Top with a second cake layer and spread the remaining lemon curd over the top. Place the third cake layer on top and set aside while you make the frosting.
For the vanilla bean 7 minute frosting, in a large metal bowl over a saucepan of simmering water, place the egg whites, sugar, water, and corn syrup. With an electric mixer, beat the mixture for 3 minutes on low speed. Increase the speed to high and continue to beat for another 3 minutes, until the frosting is shiny with soft peaks. Remove the bowl from over the simmering water and add the vanilla and vanilla bean seeds. Beat for 1 to 2 minutes or until the frosting is thick and stiff peaks form.
Immediately spread the frosting over the top and sides of the cake. Makes about 16 servings.
Enjoy! -Cardamommy
I've had some leftover butterscotch chips lying around for quite some time, and finally decided to use them up. I figured that peanut butter cookies would be a perfect fit. I'm not a super fan of peanut butter cookies (as you well know by now), and am really picky about them if I'm going to make them. I modified a King Arthur Flour recipe, and it turned out really well! These peanut buttery cookies are full of oatmeal and studded with white chocolate and butterscotch chips.
Peanut Butter Oatmeal Butterscotch and White Chip Cookies
1/4 cup (1/2 stick) butter, room temperature
1/4 cup shortening
2/3 cup creamy peanut butter
1/2 cup packed brown sugar
1/4 cup granulated sugar
1 egg
1 teaspoon vanilla extract
1 teaspoon baking soda
1/2 teaspoon salt
2/3 cup all purpose flour
1 cup quick oats
1 Tablespoon milk
1/2 cup white chocolate chips
1/2 cup butterscotch chips
Preheat the oven to 350F. Line a baking sheet with parchment paper.
Cream together the butter, shortening, peanut butter, brown sugar, and granulated sugar until light and fluffy. Beat in the egg, vanilla, baking soda, and salt, until well blended. Add the flour, oats, and milk, and beat until just combined. Stir in the white chocolate chips and butterscotch chips until evenly distributed.
Scoop the dough by 2 tablespoonfuls and place on the prepared baking sheet. Bake for 11 to 12 minutes, or until lightly browned and the center is just set. Remove cookies from the oven and let cool on the pan for several minutes. Transfer to a cooling rack and let cool completely. Makes about 18 cookies.
Enjoy! -Cardamommy

This is a recipe that I have been searching for for a long time. I mean a really long time, and I am super excited to have finally found the one! I really like the taste and texture of a good bakery cookie, but I've never been able to duplicate it at home, much to my disappointment. I found this recipe earlier this week, and I've already made them twice. The first time the didn't come out the way I wanted, and I actually tossed the recipe. But the flavor was amazing, and they got rave reviews from my husband's coworkers, so I dug up the recipe again and made another attempt. And they were totally a success and turned out much better than the first time. I think that the problem that I had was with the flour. You have to be very careful to measure the flour precisely, and not pack it down or the cookies will be too dry and dense, and will not spread. The dough should be very stiff, but not crumbly. These cookies are deliciously buttery and flavorful with a perfect amount of chocolate (which you can change up if you want to). The shortening gives these cookies a bit of a sandy crunchy texture (which I adore!). These cookies are on my top 3 chocolate chip cookies list for sure! Note: This recipe can be doubled.
Bakery Style Chocolate Chip Cookies
1/2 cup (1 stick) butter, room temperature
1/4 cup shortening
3/4 cup packed brown sugar
1/4 cup granulated sugar
1 egg
2 teaspoons vanilla extract
2 cups all purpose flour
1 Tablespoon cornstarch
1 teaspoon baking soda
1/2 teaspoon salt
1 cup mini chocolate chips
Preheat the oven to 350F. Line a baking sheet with parchment paper.
Cream together the butter, shortening, brown sugar, and granulated sugar until light and fluffy. Add the egg and vanilla, and beat until well blended. Add one cup of the flour, the cornstarch, baking soda, and salt, and beat until just combined. Add the second cup of flour and beat until incorporated. Add the chocolate chips and beat on low speed until evenly distributed.
Scoop the dough by 1/4 cupfuls and place on the prepared baking sheet, leaving several inches of space in between each dough ball. Flatten the tops of the dough balls very slightly (you don't want to spread the dough, just flatten the rounded top of the dough ball. I actually use a flat bottomed 1/4 cup measuring cup so when the dough comes out of the measuring cup it is in a perfect disk shape with a flat top). Place the cookies in the preheated oven and bake for 14 to 15 minutes, or until just golden brown on the edges and very top. Do not overbake, or the cookies will be more crunchy than chewy (which is a no go in my book). Remove the cookies from the oven and transfer to a cooling rack to cool. Makes about 12 large cookies.
Enjoy! -Cardamommy