Monday, December 30, 2013
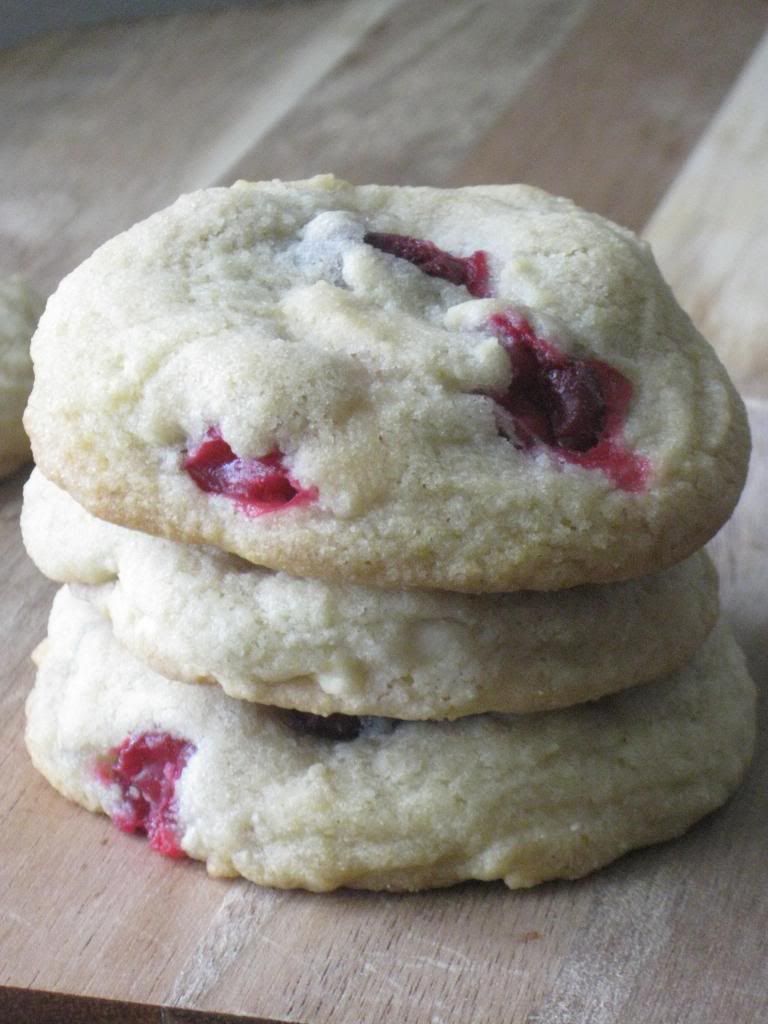
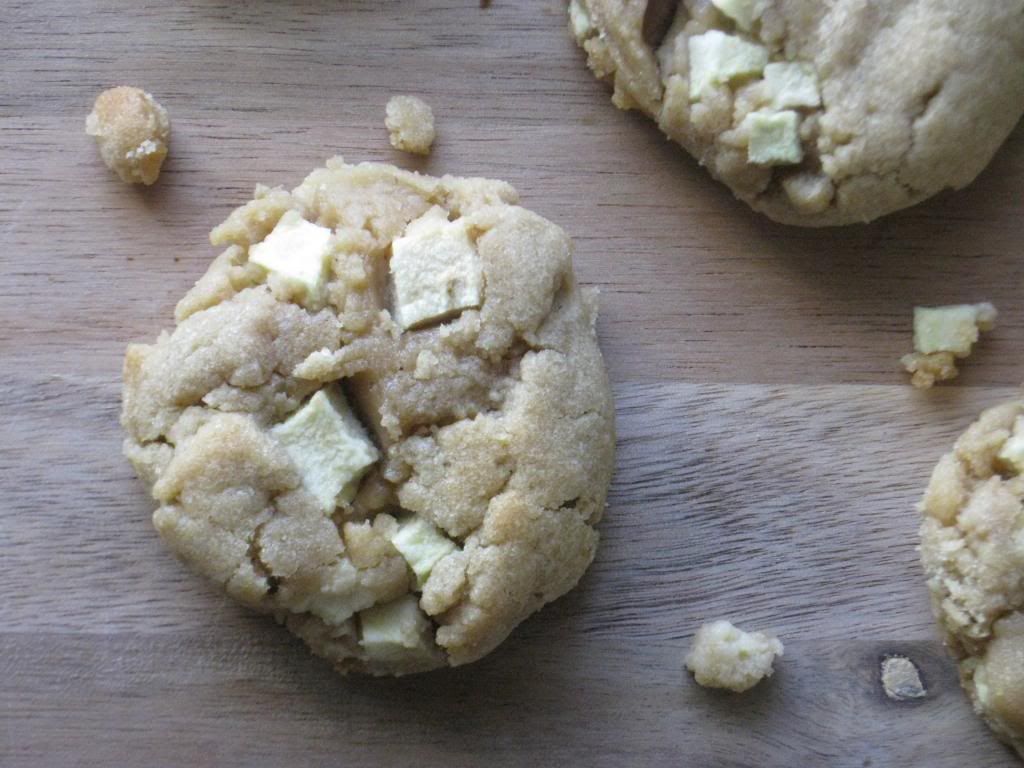
Fresh Cranberry White Chocolate Chip Cookies
I was tasked by my sister to make these cookies. She sent me a text a while ago that the cookie she was eating was amazing, and I had to figure it out. I was really excited because I'm not sure if I've ever really done a fresh berry in a cookie before. I was a bit worried that it wouldn't work out and that we'd have a cranberry lava flow in the oven, but it worked great! My Hungry Puppies seriously can't get enough of these cookies. The tartness of the cranberries is offset nicely by the sweetness of the cookie and white chocolate chips. Since my sister and I live about 1000 miles apart, I had to send her a box of cookies so she could try them. I suppose I could have just emailed her the recipe so she could make her own...but...maybe I'm just nice.
Blond Chocolate Chip Cookies
3/4 cup (1 1/2 sticks) butter, room temperature
1/4 cup shortening
1 1/2 cups granulated sugar
2 teaspoons vanilla extract
2 eggs
2 1/2 cups all purpose flour
1 teaspoon baking soda
1/2 teaspoon salt
2 cups fresh cranberries
1 cup white chocolate chips
Preheat the oven to 375F. Line a baking sheet with parchment paper.
Cream together the butter, shortening, sugar, syrup, and vanilla extract until light and smooth. Beat in the eggs. Add the flour, baking soda, and salt, and beat until combined. Stir in the fresh cranberries and white chocolate chips.
Using a cookie scoop, scoop the dough and place on the prepared baking sheet. Bake for 11 to 12 minutes, or until the cookies are just barely browned on the edges and top. Remove from the oven and let cool for several minutes on the pan. Transfer cookies to a cooling rack to cool completely. Makes about 36 cookies.
Enjoy! -Cardamommy
Labels:
Chocolate chip cookies
,
Chocolate Chips
,
Christmas
,
Cookies
,
Cranberry
,
Dessert
,
White Chocolate
Friday, December 27, 2013
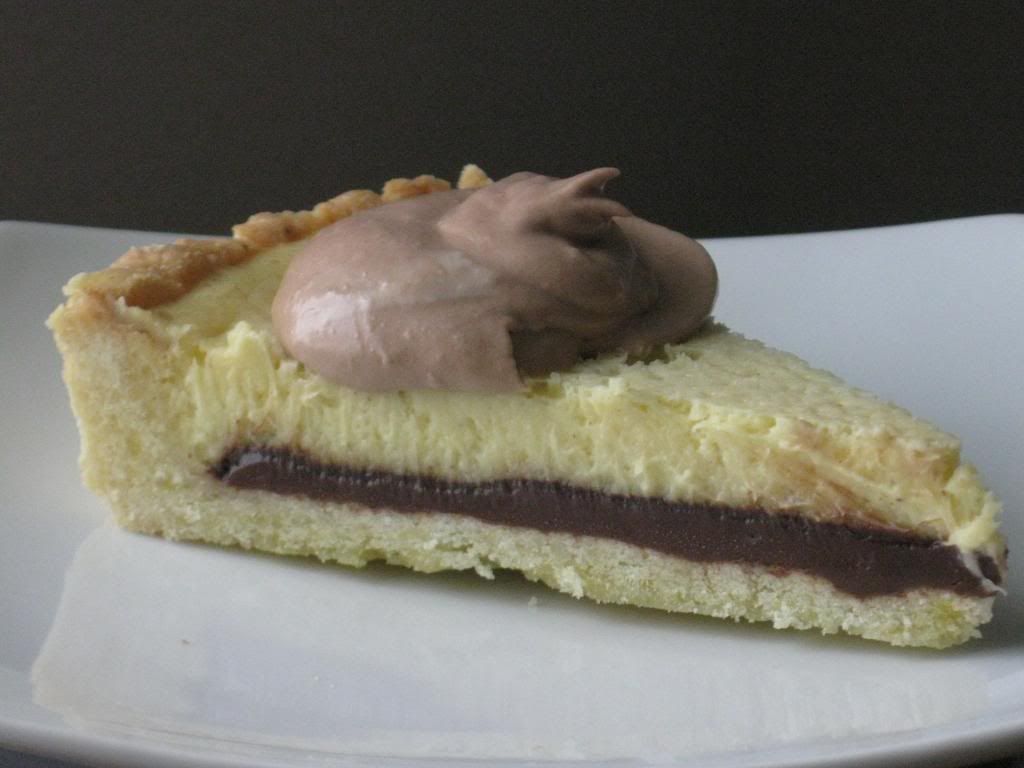
Nutella Eggnog Tart
I faced a difficult decision on what dessert to make for Christmas dinner this year. We wanted to do something a little different, but I had no idea where to go with it! We finally settled on some kind of eggnog dessert, but it was really tough to figure out what to make. I finally came across this recipe, and inspiration hit. I modified the recipe to incorporate the nutella, and it turned out amazing. The eggnog and nutella work really well together and don't overpower each other. The nutella whipped cream...well, what can you really say about that except for yum! Note: If you use a 9 inch tart pan, you may have a very small bit of the eggnog filling left over that doesn't fit in the tart shell. Just pour it into a lightly greased ramekin and bake it.
Nutella Eggnog Tart
Crust:
1 1/4 cups all purpose flour
1/4 cup granulated sugar
1/2 teaspoon salt
7 Tablespoons butter, room temperature
1 large egg
1/2 cup Nutella
Cream Cheese Eggnog Filling:
12 ounces Cream cheese, room temperature
1/2 cup granulated sugar
5 Tablespoons eggnog, divided
2 large eggs
2 large egg yolks
1 teaspoon vanilla extract
1/2 teaspoon rum extract
1/2 teaspoon ground nutmeg
1/4 teaspoon salt
Nutella Whipped Cream:
1 cup heavy whipping cream
2 Tablespoons powdered sugar
4 Tablespoons nutella
In a food processor, pulse together the flour, sugar, salt, butter and egg until a dough forms. Press the dough evenly onto the bottom and up the sides of a 9 or 10 inch tart pan with a removable bottom. Place the tart shell in the refrigerator and chill for about 30 minutes.
Preheat the oven to 350F. Remove the tart shell from the refrigerator and line with aluminum foil. Fill the foil lined shell with pie weights, or uncooked rice. Bake for 20 minutes. Remove pie from the oven, and carefully remove aluminum foil and pie weights. Return the tart to the oven and bake for 20 minutes, or until the tart shell is golden brown. Remove the tart shell from the oven and immediately spoon the nutella into the bottom of the shell, spreading it evenly to the edges. Let cool completely.
Reduce the oven temperature to 300F.
For the cream cheese eggnog filling, place the cream cheese, sugar, and 2 tablespoons of the eggnog into a food processor and blend until smooth. Scrape down the sides of the food processor bowl. Add the eggs, egg yolks, remaining 3 tablespoons of eggnog, vanilla extract, rum extract, nutmeg, and salt. Process until smooth. Gently pour the cream cheese filling over the nutella in the tart shell.
Bake the tart for about 35 minutes, or until the filling is set, but jiggles slightly in the center. Remove the tart from the oven and cool completely. Cover the tart and refrigerate until cold.
When ready to serve, make the nutella whipped cream. Beat the whipping cream and powdered sugar together until stiff peaks form. Add the nutella and beat gently until incorporated. Remove the sides of the tart pan, and cut the tart into wedges. Spoon the nutella whipped cream over the individual pieces. Makes 12 to 16 servings.
Enjoy! -Cardamommy
Labels:
Cheese Cake
,
Christmas
,
Cream Cheese
,
Dessert
,
Eggnog
,
Nutella
,
Pastry
,
Pie
,
Tart
Monday, December 23, 2013
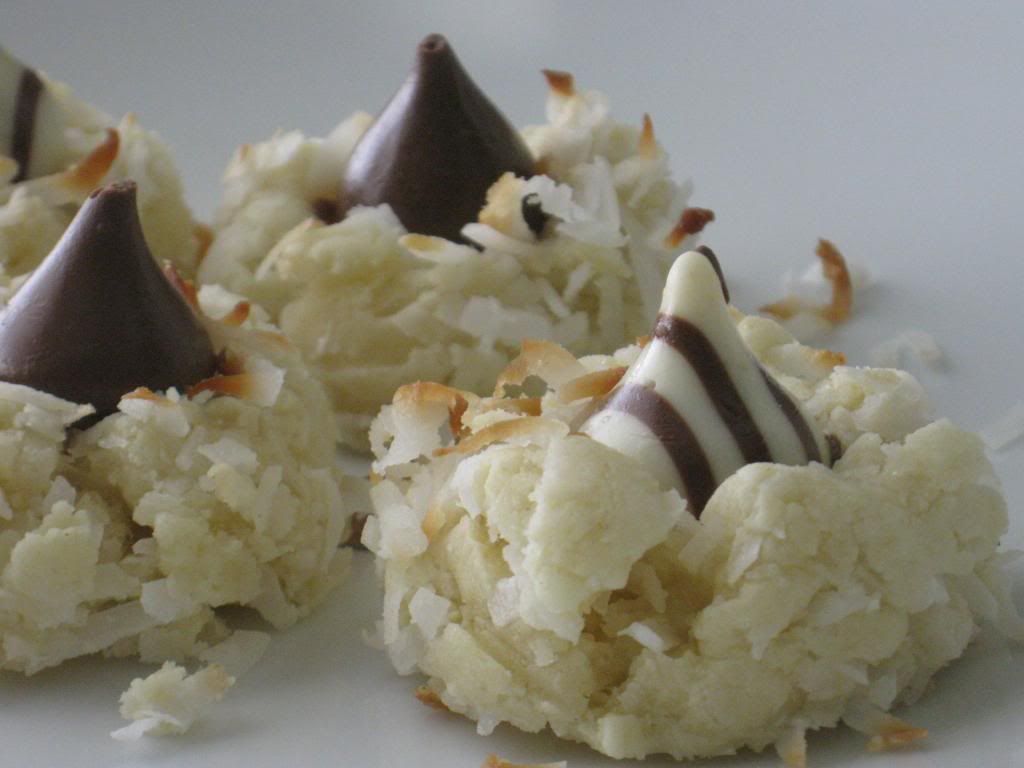
Coconut Blossoms
I first made these cookies exactly 4 years ago. I have been meaning to make them every Christmas since then, but it has never seemed to work out! This year, I decided to make them for a cookie drive for the Air Force Base here. These cookies are just like peanut butter blossoms, except they are a coconut and almond cookie instead of peanut butter. Absolutely delicious. You can use plain Hershey's Kisses or Hugs. I like the Hugs, as the chocolate and white chocolate swirl is a particularly nice touch. They are simple, really delicious, and so pretty!
Coconut Blossoms
1/3 cup butter, room temperature
3 ounces cream cheese, room temperature
3/4 cup granulated sugar
1 egg yolk
2 teaspoons almond extract
1 1/2 cups all purpose flour
2 teaspoons baking powder
1/2 teaspoon salt
3 cups shredded coconut
36 Hershey's Kisses, unwrapped
1 to 2 cups shredded coconut
Preheat the oven to 350F. Line a baking sheet with parchment paper.
Cream together the butter, cream cheese, and sugar until light and fluffy. Add the egg yolk and almond extract an beat until well blended. Add the flour, baking powder, and salt, and beat until just combined. Beat in the 3 cups coconut.
Scoop the dough into heaping tablespoon size balls, and roll in the extra shredded coconut. Place the cookie dough balls on the prepared baking sheet (about an inch apart, as they won't spread during baking), and place in the preheated oven. Bake for 10 minutes, or until lightly browned. Remove the cookies from the oven and immediately press a chocolate kiss into each hot cookie. After pressing the kisses into the cookies, let the cookies cool for several minutes on the pan before removing to a cooling rack to finish cooling. Makes about 36 cookies
Enjoy! -Cardamommy
Friday, December 20, 2013
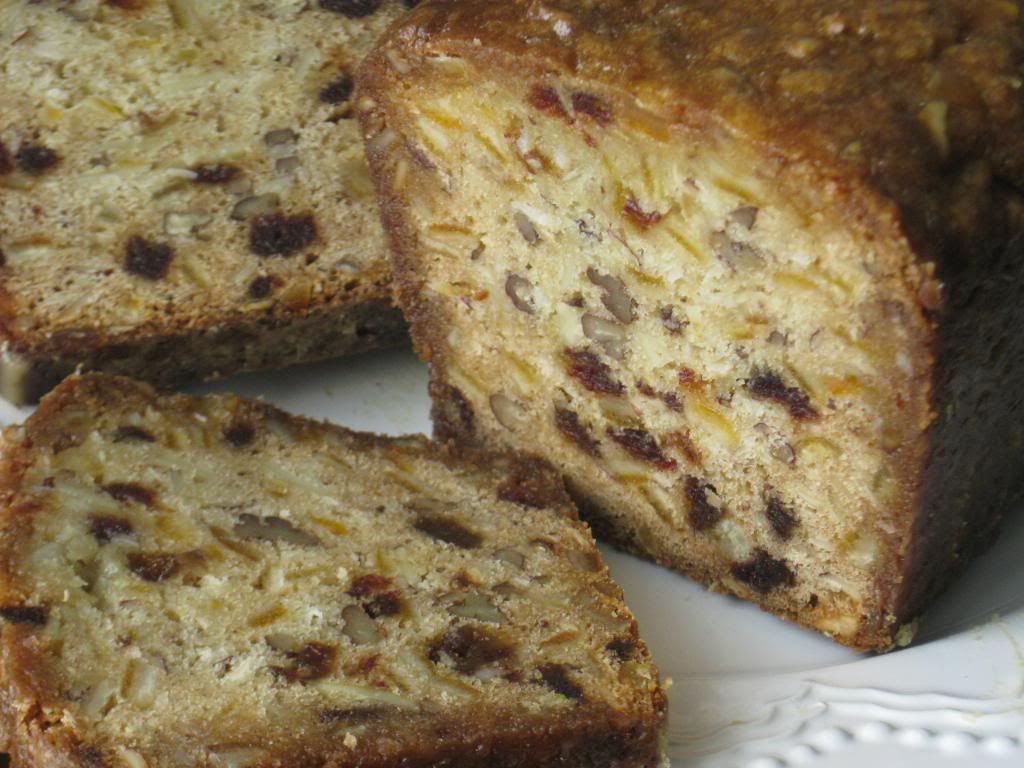
Orange Slice Fruitcake
I don't even know where to start with this fruitcake. I am so excited to share this with you, mostly because the only thing you ever hear about fruitcake is that it is awful! And how often do you come across a fruitcake recipe? Almost never (in my recipe wanderings anyway). So, I am here to introduce you to my most favorite fruitcake ever. Not that I have a lot of experience, but why look for better when the best is right here?! And yes, my Hungry Puppies have given this fruitcake their stamp of approval.
This is my Mom's fruitcake recipe, and I have always loved it. This is not a dark molasses-y fruitcake at all. In fact, there is no molasses in this fruitcake at all. It is full of candied orange peel, dates, pecans, almonds, and coconut, and is smothered in an orange glaze. The glaze soaks into the outside of the fruitcake and you get a wonderfully magnificent coating all around the outside. Please try this. This is not a storebought, thing of nightmares and Christmas spoofs fruitcake. This is not the fruitcake that has been regifted (ie: pawned off) multiple times over the last five years. This fruitcake is one that you will want to eat! A couple things to note: You can easily cut the recipe in half to make one 8x4 inch loaf. Also, it will look like you have an obscene amount of mix-ins (candied orange peel, dates, nuts, etc...) but don't worry, there is supposed to be that much!
Orange Slice Fruitcake
3 1/2 cups all purpose flour
1/2 teaspoon salt
1 pound candied orange peel
8 ounces chopped dates
1 cup sliced almonds
1 cup chopped pecans
1 cup shredded coconut
1/2 cup buttermilk
1 teaspoon baking soda
1 cup (2 sticks) butter, room temperature
2 cups granulated sugar
4 eggs
1 cup orange juice
2 cups powdered sugar
Preheat the oven to 300F. Grease and Flour two 9x5 inch loaf pans. Set aside.
In a medium size bowl, mix together the flour and salt, remove 1/2 cup of the flour mixture and set aside. In a separate large bowl, combine the the candied orange peel, dates, almonds, pecans, and coconut. Add the reserved 1/2 cup of the flour mixture to the fruit mixture and toss until all of the fruit is evenly coated. In a separate small bowl, mix together the buttermilk and the baking soda.
In a large bowl, cream together the butter and sugar until light and fluffy. Beat in the eggs, one at a time, until combined. Add half of the flour mixture to the creamed mixture, and beat until combined. Pour in the buttermilk/baking soda mixture and beat until blended. Beat in the remaining flour until just combined. Stir in the fruit/nut mixture. Divide the batter equally between the two prepared pans and smooth the tops. Place the fruitcake in the oven and bake for 1 hour and 45 minutes. Remove from the oven.
When the fruitcake has almost finished baking, whisk together the orange juice and powdered sugar. Pour the orange juice mixture carefully over the hot fruitcakes (you want the orange juice to run down the insides of the pan, not overflow to the outside and land on the counter). Let the fruitcakes cool to room temperature, then cover with plastic wrap and refrigerate overnight. Run a knife around the edges of the pans to loosen the cakes, then remove the fruitcakes from the pans, slice, and serve. Store fruitcake wrapped tightly in plastic wrap. Makes two 8x4 inch loaves of fruitcake.
Enjoy! -Cardamommy
Labels:
Almond
,
Buttermilk
,
Christmas
,
Citrus
,
Dessert
,
Fruit Cake
,
Nuts
,
Orange
,
Pecan
Monday, December 16, 2013
White Chocolate Cranberry Cake
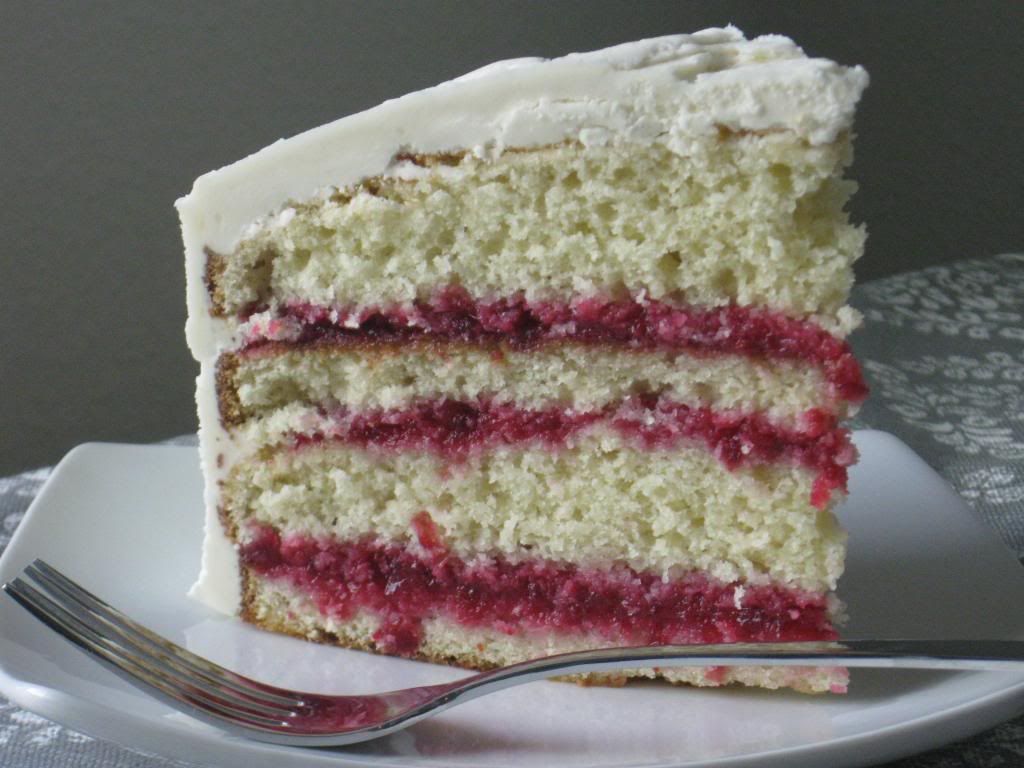
I just made this cake, and I think we're in love. My oldest Hungry Puppy inhaled her piece. Yes. Inhaled. I handed it to her, turned around to serve another piece and when I looked back, she had only a few bites left. I asked her if she liked it, and she vigorously nodded her head yes because her mouth was stuffed full of cake. That's the kind of positive response I like to get when I try a new recipe. I found this recipe on the Better Homes and Gardens website, which I love lately. It is a moist white chocolate cake with a perfectly spiced cranberry filling, covered with a white chocolate frosting. The tart cranberries are a perfect complement to the sweetness of the white chocolate. This one definitely will be going on the repeat list. And please don't mind the uneven layers...I'm not quite sure what happened, but I obviously need some work on that. One quick note: You want to make sure that all of your ingredients are room temperature. If they are too cold, when you add the white chocolate, it will harden up a bit and you may get not so lovely little chunks of white chocolate.
White Chocolate Cranberry Cake
Cranberry Filling:
1 12 ounce bag of fresh (or frozen) cranberries
1 1/4 cups granulated sugar
1/4 cup water
Zest of one orange
1 Tablespoon lemon juice
1/4 teaspoon cinnamon
1/8 teaspoon ground cloves
1/8 teaspoon ground ginger
White Chocolate Cake:
2 1/4 cups all purpose flour
2 1/4 teaspoons baking powder
1/4 teaspoon salt
10 Tablespoons butter, room temperature
1 1/3 cups granulated sugar
4 eggs
2 teaspoons vanilla extract
1 1/4 cups milk
8 ounce white chocolate, melted
White Chocolate Frosting:
1 cup (2 sticks) butter, room temperature
Pinch of salt
12 ounces white chocolate, melted
2 teaspoons vanilla extract
2 cups powdered sugar
For the cranberry filling, in a medium saucepan over medium-high heat, combine the cranberries, sugar, water, orange zest, lemon juice, cinnamon, cloves, and ginger. Cook and stir until mixture reaches a boil. Reduce heat and simmer the cranberry mixture for about 10 to 15 minutes, or until thickened. Transfer the cranberry mixture to a bowl, cover, and chill for at least 2 hours. When the cranberry mixture is chilled, transfer to a food processor and process until smooth. Set aside until ready to assemble the cake.
Preheat the oven to 350F. Grease 2 9-inch round cake pans and line the bottoms with parchment paper, then lightly grease the parchment. Set aside.
For the cake, in a medium bowl, combine the flour, baking powder, and salt. Set aside. With a stand mixer or hand mixer, cream together the butter and granulated sugar until light and fluffy. Beat in the eggs, one at a time, followed by the vanilla extract, until well blended, scraping down the sides of the bowl if necessary. Beat in 1/3 of the flour mixture, followed by 1/2 of the milk. Beat in another 1/3 of the flour mixture, followed by the remaining milk. Beat in the remaining 1/3 of the flour mixture until just combined. Beat in the melted white chocolate just until blended.
Divide the cake batter evenly between the prepared cake pans, smoothing the tops. Bake in the preheated oven for 25 to 30 minutes, or until a toothpick inserted in the center comes out clean. Remove cakes from the oven and let cool for about 10 minutes, then run a knife around the edges of the cake and carefully turn out onto a cooling rack to finish cooling completely.
For the white chocolate frosting, beat the butter and salt until smooth. Add the white chocolate and vanilla, and beat until blended. Gradually beat in the powdered sugar, then continue to beat until the frosting is smooth.
To assemble the cake, cut each cake layer in half horizontally (this will give you 4 cake layers). Place one layer on a serving plate, then spread 1/3 of the cranberry filling over the top. Place the next cake layer on top, then spread with 1/3 of the filling. Place the third cake layer on top, then spread with the remaining cranberry filling. Place the last cake layer on top, with the cut side down. Spread the white chocolate frosting over the top and sides of the cake. If the frosting gets too stiff, gently heat it in the microwave for about 5 seconds (you don't want to melt it!), stir, and finish spreading on the cake. Makes about 16 servings.
Enjoy! -Cardamommy
Friday, December 13, 2013
Chocolate Moose Cookies
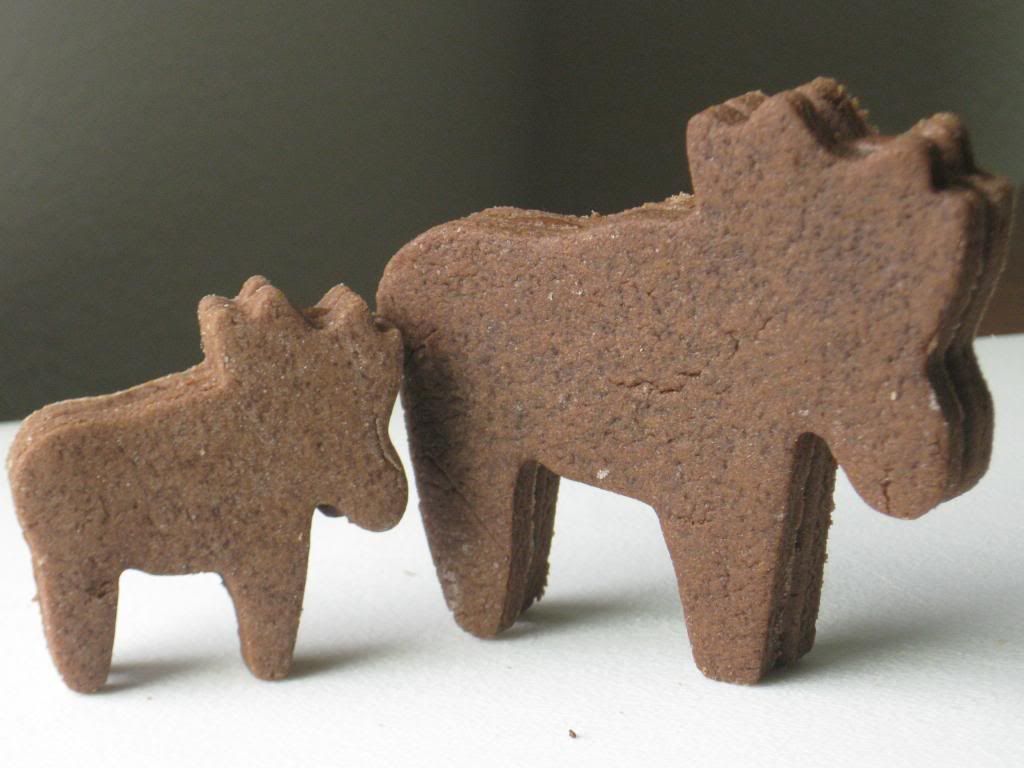
I found these cookie cutters in a Scandinavian store a couple of months ago, and I knew immediately that I had to buy them and make chocolate moose cookies with them. I totally love them! How cute are they?! Moving past the cute factor, we have a serious delicious factor going on here too. The cookies are chocolatey and delicious, and hold the cutout shape extremely well, and the frosting is amazing. It's the same filling that I used in this Chocolate Peanut Butter Layer Cake. If you don't have moose cookie cutters, just use whatever shapes you want.
Chocolate Moose Cookies
Chocolate Cutout Cookies:
1 cup butter, room temperature
1 cup granulated sugar
1 egg
1 teaspoon vanilla extract
2 1/2 cups all purpose flour
1/2 cup cocoa powder
1/2 teaspoon salt
Chocolate Marshmallow Filling:
1/2 cup cocoa powder
1 cup powdered sugar
pinch of salt
1/4 cup butter, room temperature
1/4 cup shortening
1 Tablespoon milk
1 cup (1/2 of a 7 ounce container) marshmallow cream
Preheat the oven to 350F. Line a baking sheet with parchment paper.
Cream together the butter and sugar until light and fluffy. Beat in the egg and vanilla until completely combined. Add the flour, cocoa powder, and salt, and beat on low until the dough comes together.
On a lightly floured surface, roll out the dough about 1/4 inch thick. Cut out cookies with a cookie cutter, then place cut outs on the prepared baking sheet. Bake in the preheated oven for about 6 minutes. Remove from oven and let cool for 1 minute on the pan. Carefully transfer cookies to a cooling rack to cool completely.
For the chocolate marshmallow filling, stir together the cocoa powder, powdered sugar, and salt. With the mixer on low speed, beat in the butter and shortening. Mixture will be crumbly. Beat in the milk until the mixture comes together. Add the marshmallow cream, increasing the speed to high, beat until the filling is light and fluffy.
To assemble the cookies, spread or pipe some of the chocolate filling on one cookie, then place another cookie on top of the frosting, gently pressing down to secure. Makes 18 to 36 sandwich cookies (depending on the size of the cutter).
Enjoy! -Cardamommy
Monday, December 9, 2013
Iced Cinnamon Bun Scones
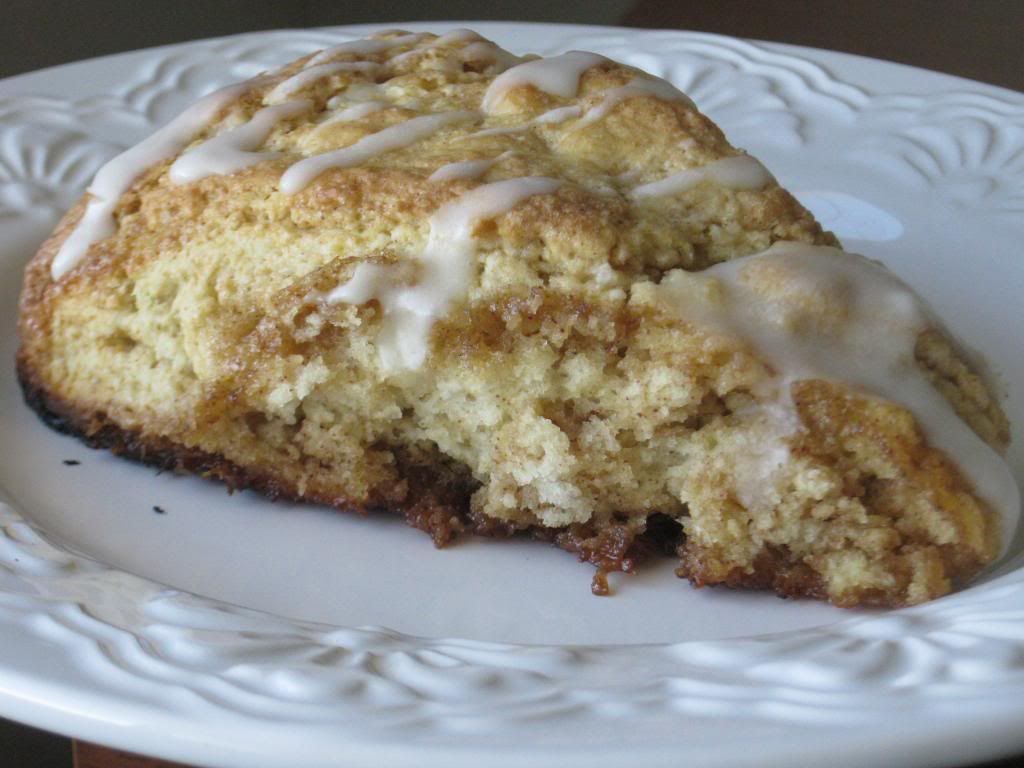
I'm not a breakfast person. I'm usually at the gym during breakfast time, so my husband makes and serves breakfast to my Hungry Puppies. Even on Saturdays, I get to sleep in (a blessed day) while he does breakfast duty. Sunday is out because we have really early church. Like at 8am. Which means that sometimes my youngest Hungry Puppy (who is also not a super breakfast person) will have a slice of cheese for breakfast. Very very very occasionally, I will drag myself out of bed on a Sunday when church is not so early, and make a special breakfast. These scones fit that bill. And they were devoured! They are tender and yummy, full of cinnamon brown sugar ribbons, and topped with a quick vanilla glaze. Delicious!
Iced Cinnamon Bun Scones
Cinnamon Brown Sugar Swirl:
2/3 cup packed brown sugar
1 teaspoon cinnamon
2 Tablespoons butter, room temperature
Scones:
3 cups all purpose flour
1/3 cup granulated sugar
1 Tablespoon baking powder
1/2 teaspoon salt
1/4 teaspoon cinnamon
1 stick (8 Tablespoons) cold butter, cut into 8 slices
1 cup heavy cream
1 large egg
1 teaspoon vanilla extract
Glaze:
2 Tablespoons butter, room temperature
1 cup powdered sugar
1 to 2 teaspoons milk (enough to reach desired consistency)
Preheat the oven to 425F. Line a baking sheet with parchment paper, Set aside.
For the Cinnamon Brown Sugar Swirl, in a food processor pulse the brown sugar, cinnamon, and butter until crumbly. Transfer to a small bowl and set aside.
For the scones, place the flour, sugar, baking powder, salt and cinnamon in the food processor and pulse several times to blend. Add the cold sliced butter and pulse until the butter is the size of peas. Transfer the flour mixture to a large bowl and add the cream, egg, and vanilla. Stir until a firm dough forms. Sprinkle the brown sugar mixture over the dough and knead several times to incorporate the swirl, making sure not to overknead it as you want to have streaks of the brown sugar mixture.
On a floured work surface, shape the dough into into an 8 inch circle, about 1 inch thick. Cut the circle into 8 wedges, and transfer to the prepared baking sheet, leaving about 1/4 inch of space between the wedges. Bake for about 15 to 20 minutes, until golden brown. Remove scones from the oven and let cool while you make the glaze.
For the glaze, combine the butter and powdered sugar in a small bowl and mix until it starts to blend together. Add the milk and stir until the glaze is smooth. Transfer the scones to a cooling rack, and drizzle the glaze over the top. Serve warm. Makes 8 large scones.
Enjoy! -Cardamommy
Labels:
Biscuits
,
Breakfast
,
Cinnamon
,
Cinnamon Rolls
,
Frosting
,
Quick Bread
,
Scones
Friday, December 6, 2013
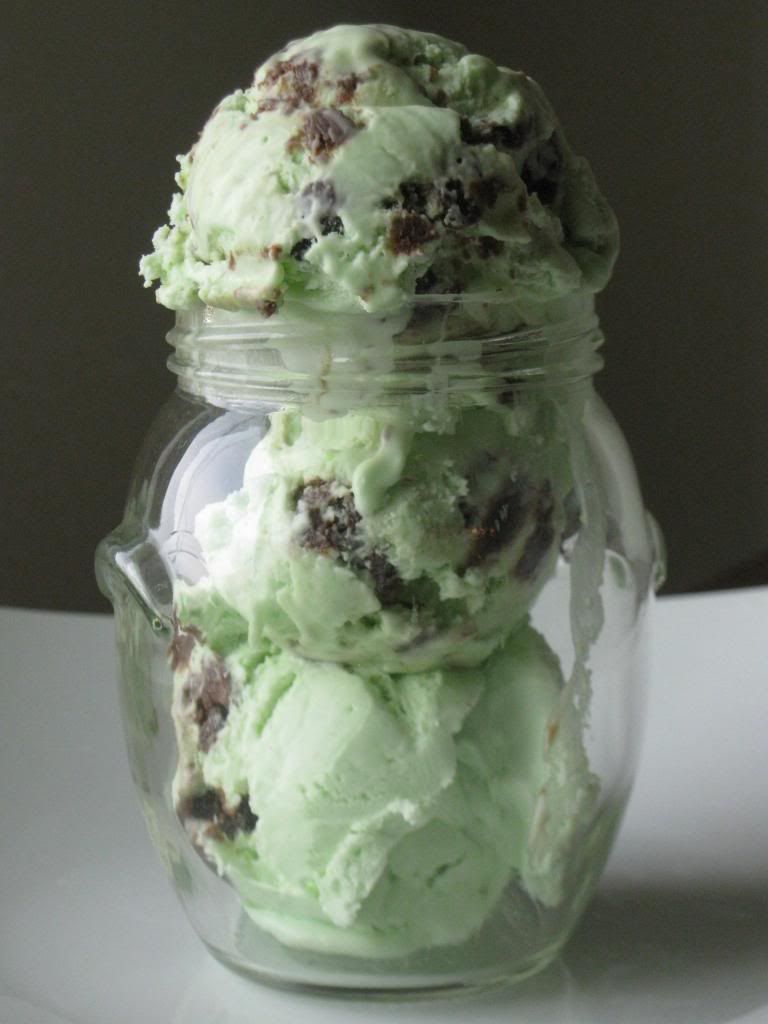
Mint Chocolate Cookie Dough Ice Cream
Mint Chocolate Cookie Dough Ice Cream
Chocolate Cookie Dough:
6 Tablespoons butter, melted
1/2 cup packed brown sugar
1/4 cup granulated sugar
1 teaspoon vanilla extract
3/4 cup all purpose flour
1/4 cup cocoa powder
1 Tablespoon milk
1/2 cup mini chocolate chips
Mint Ice Cream:
2 cups heavy whipping cream
2 teaspoons peppermint extract
green gel food coloring
3/4 cup sweetened condensed milk (about 1/2 of a 14 ounce can)
3/4 cup marshmallow cream (about 1/2 of a 7 ounce container)
To make the cookie dough, stir together the butter, brown sugar, granulated sugar, vanilla, and salt. Add the flour and cocoa powder and stir until combined. Stir in the milk, then the chocolate chips. Roll the dough into little balls and freeze. You won't need all of the cookie dough, but use as much or as little as you like!
For the ice cream, whip the heavy whipping cream until stiff peaks form. Add the peppermint extract and food coloring, and whip until combined. Add the sweetened condensed milk and marshmallow cream, and beat until completely incorporated. Remove the cookie dough bites from the freezer and fold them into the ice cream. Place the ice cream in a freezer container and freeze until firm, about 4 hours or overnight. Makes about 1 1/2 quarts of ice cream.
Enjoy! -Cardamommy
Labels:
Chocolate
,
Chocolate Chips
,
Cookie Dough
,
Dessert
,
Ice Cream
,
Marshmallows
,
Mint
,
Peppermint
,
Whipped Cream
Tuesday, December 3, 2013
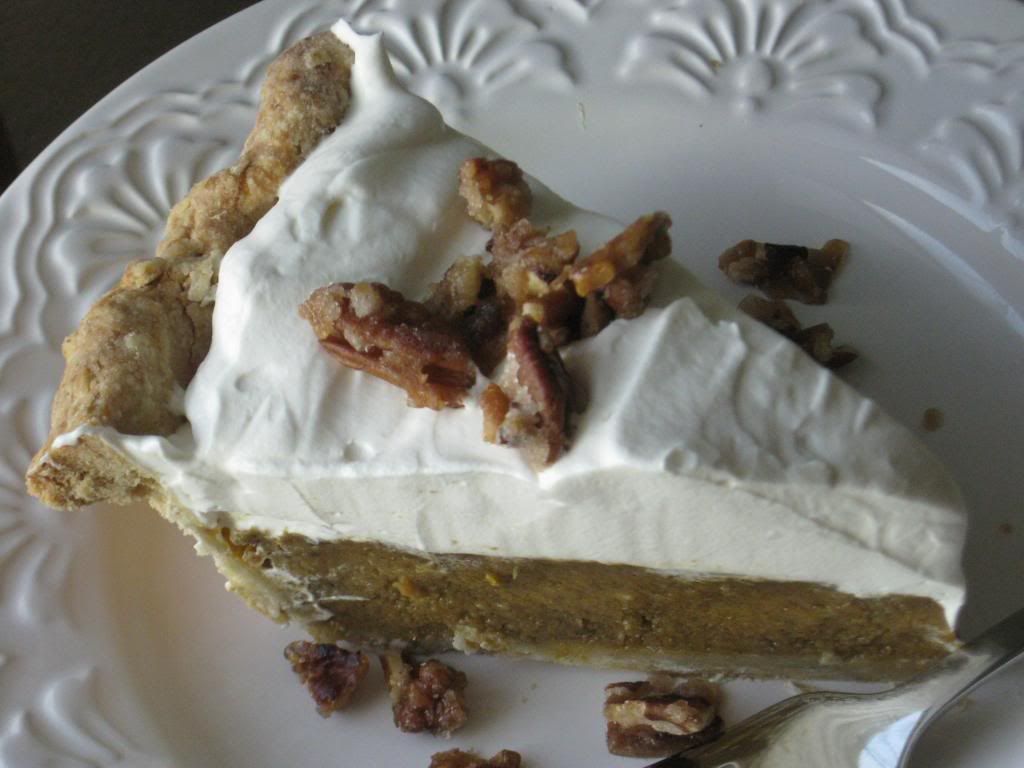
Pumpkin Mascarpone Pie with Candied Pecans and Oat Pastry Crust
I definitely have a repertoir of favorites when it comes to Holiday recipes, but I also like to be on the look out for new ones that might be amazing. This pie absolutely caught my eye in a really big way. Why? One word: mascarpone. This deliciously pumpkin pie is spiced with the classic pumpkin pie spices as well as with lemon and orange zest, baked inside an oat pastry crust then topped with lightly sweetened mascarpone whipped cream. Some candied pecans sprinkled on top provide a perfect finish.
Pumpkin Mascarpone Pie with Candied Pecans and Oat Pastry Crust
Oat Pastry Crust:
1 1/4 cups all purpose flour
1/2 cup quick oats
1 Tablespoon granulated sugar
1/2 teaspoon salt
3 Tablespoons vegetable shortening
4 Tablespoons (1/2 stick) cold butter
4 to 6 Tablespoons ice cold water
Pumpkin Filling:
1 can (15 ounces) pumpkin puree
3/4 cup packed brown sugar
3 eggs
1 teaspoon vanilla extract
1 teaspoon cinnamon
1/2 teaspoon ground ginger
1/2 teaspoon salt
1/4 teaspoon nutmeg
1/4 teaspoon ground cloves
Zest from 1/2 lemon
Zest from 1/2 small orange
Candied Pecans:
1/2 cup coarsely chopped pecans
1/4 cup granulated sugar
1 Tablespoon butter
Mascarpone Whipped Cream:
1 1/2 cups heavy whipping cream
1/2 cup mascarpone cheese
4 Tablespoons powdered sugar
1 teaspoon vanilla extract
Preheat the oven to 350F. For the crust, in a medium bowl, combine the flour, oats, sugar and salt. Using a pastry blender or a fork or your fingers, cut in the shortening and butter until the mixture resembles coarse crumbs. Add 4 tablespoons of the cold water and toss together until the crust comes together, adding the remaining water 1 tablespoon at a time if necessary. Form the dough into a ball, then on a floured surface, roll the dough into a circle large enough to fit a 9 inch pie plate. Transfer the crust into a pie plate and roll and crimp the edges. Set aside.
In a large bowl, combine the pumpkin puree, brown sugar, eggs, vanilla extract, cinnamon, ginger, salt, nutmeg, cloves, lemon zest and orange zest. Whisk until well blended. Pour the pumpkin filling into the prepared pie crust. Bake in the preheated oven for 1 hour, or until a knife inserted in the center of the pie comes out clean. If necessary, cover the edges of the crust with tin foil towards the end of baking to prevent over browning. Remove the pie from the oven and let cool to room temperature. Cover with plastic wrap and chill.
While the pie is chilling, make the candied pecans. Lightly grease a piece of tin foil and set aside. In a small skillet, combine the chopped pecans, sugar, and butter. Heat over high heat until the butter melts and the sugar starts to melt. Reduce heat to medium low and stir until the sugar turns golden. Spread candied pecans on the prepared tin foil and let cool. Once cool, break apart. Candied pecans can be stored in a sealed container at room temperature.
When ready to serve the pie, make the mascarpone whipped cream. Whip the whipping cream, mascarpone cheese, powdered sugar and vanilla extract with a stand mixer or a hand mixer until stiff peaks form. Spread the whipped cream mixture evenly over the pumpkin pie. Sprinkle the candied pecans on top. Serve. Makes 8 to 12 servings.
Enjoy! -Cardamommy
Labels:
Brown Sugar
,
Butter
,
Cinnamon
,
Dessert
,
Mascarpone
,
Oatmeal
,
Pastry
,
Pie
,
Pie Crust
,
Pumpkin
,
Whipped Cream
Friday, November 29, 2013
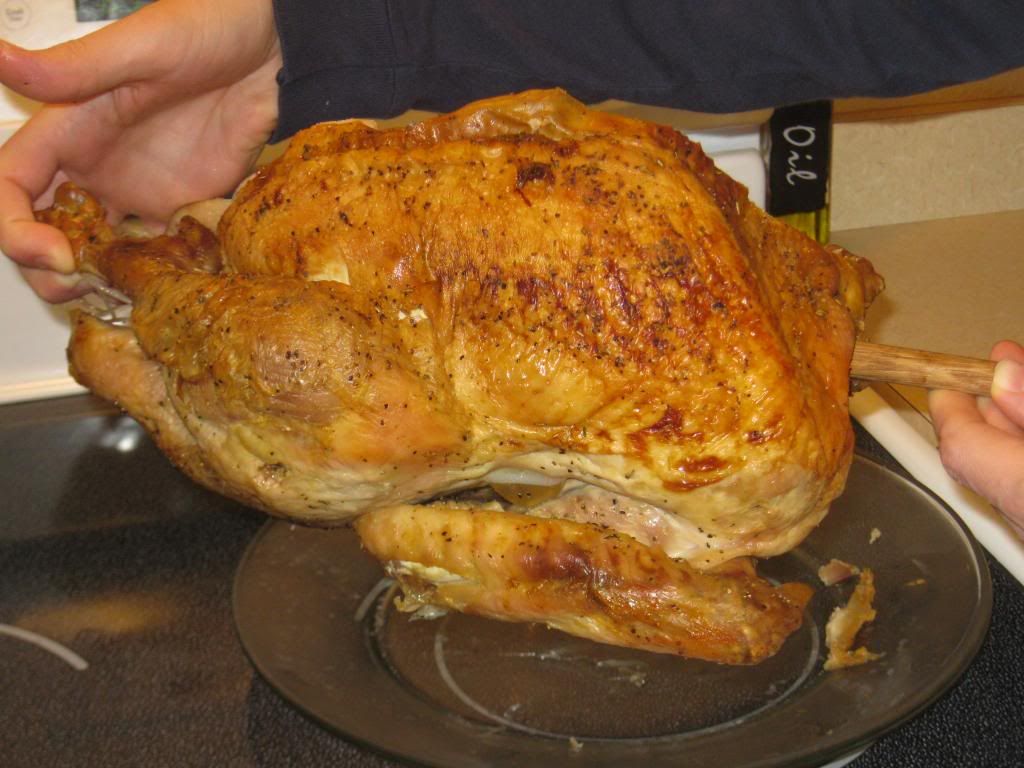
Flipping the Bird
I had a great idea for roasting our turkey this year. If you have to turn over your turkey midway through the roasting process, you've probably found that it can be exceedingly difficult, hot, awkward, and messy. I had my husband go to the hardware store and get a 1/2 inch in diameter wooden dowel. We cut it down so that it would be just long enough to fit in our roasting pan. Then, I stuck it through the large opening of the turkey cavity, and out the other side, giving you essentially a turkey on a stick. The stick makes it so much easier to flip the bird! When it's time, simply grab and lift the two protruding ends of the dowel, and spin the turkey 180 degrees and set back down in the roasting pan to finish roasting. Our turkey came out absolutely perfectly this year!
Enjoy! -Cardamommy
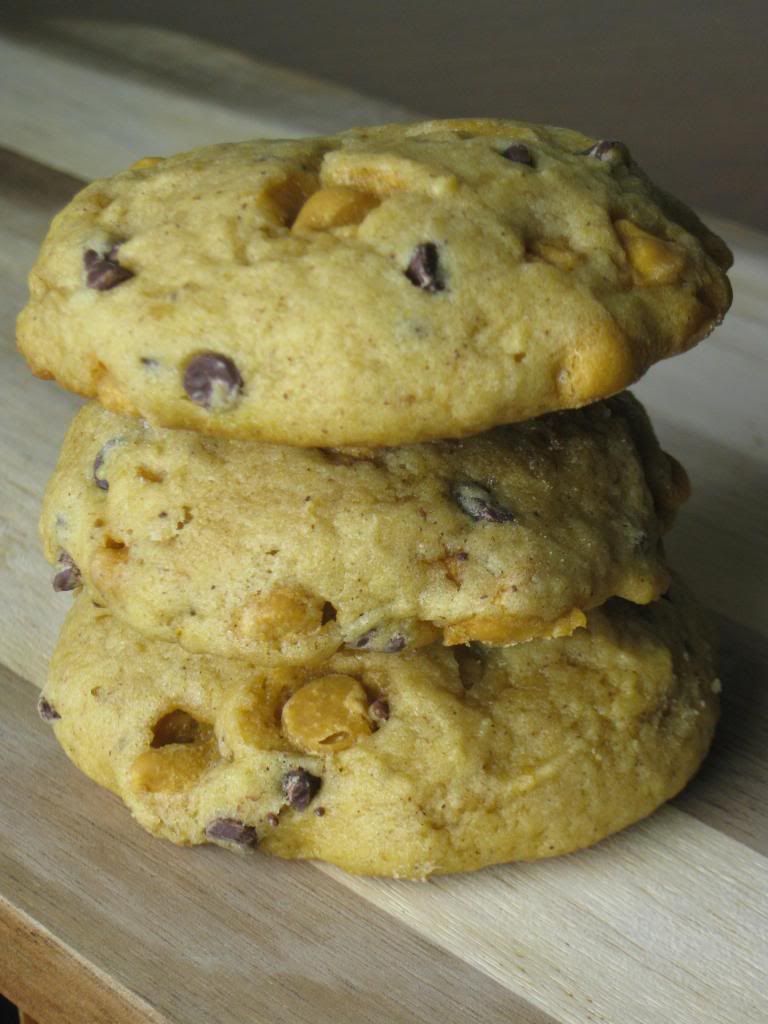
Pumpkin Butterscotch Chocolate Chip Cookies
My youngest Hungry Puppy really wanted to contribute something to our Thanksgiving dinner, and she chose pumpkin cookies. We decided on this recipe, and tweaked it so very slightly by using coconut oil and adding some semi sweet chocolate chips. I usually don't like a cakey cookie. At all. But these cookies were totally delicious! I had a hard time stopping eating them. I probably ate about 4 cookies too many! Oh well. Hitting the treadmill in the morning for sure.
Pumpkin Butterscotch Chocolate Chip Cookies
1 cup granulated sugar
2 eggs
1/2 cup coconut oil
1 cup pumpkin puree
1 teaspoon vanilla extract
2 cups all purpose flour
1 1/2 teaspoons baking powder
1 teaspoon baking soda
1 teaspoon cinnamon
1/2 teaspoon salt
1 cup butterscotch chips
1/2 cup mini semi sweet chocolate chips
Preheat the oven to 350F. Line a baking sheet with parchment paper.
Beat the sugar and eggs together until smooth and light colored. Beat in the coconut oil, pumpkin puree, and vanilla extract. Add the flour, baking powder, baking soda, cinnamon, and salt, and beat until just combined. Stir in the butterscotch chips and mini chocolate chips.
Scoop the dough with a 2 tablespoon size cookie scoop, and place about 2 inches apart on the prepared baking sheet. Bake for about 12 minutes, or until the cookies are done and look dry on the top. These cookies are very cakey, so if you underbake them they will be raw in the center. Remove cookies from the oven and let cool on the pan for 2 to 3 minutes. Transfer cookies to a cooling rack to cool completely. Makes about 30 cookies.
Enjoy! -Cardamommy
Labels:
Butterscotch
,
Chocolate
,
Chocolate chip cookies
,
Chocolate Chips
,
Cinnamon
,
Cookies
,
Dessert
,
Pumpkin
Monday, November 25, 2013
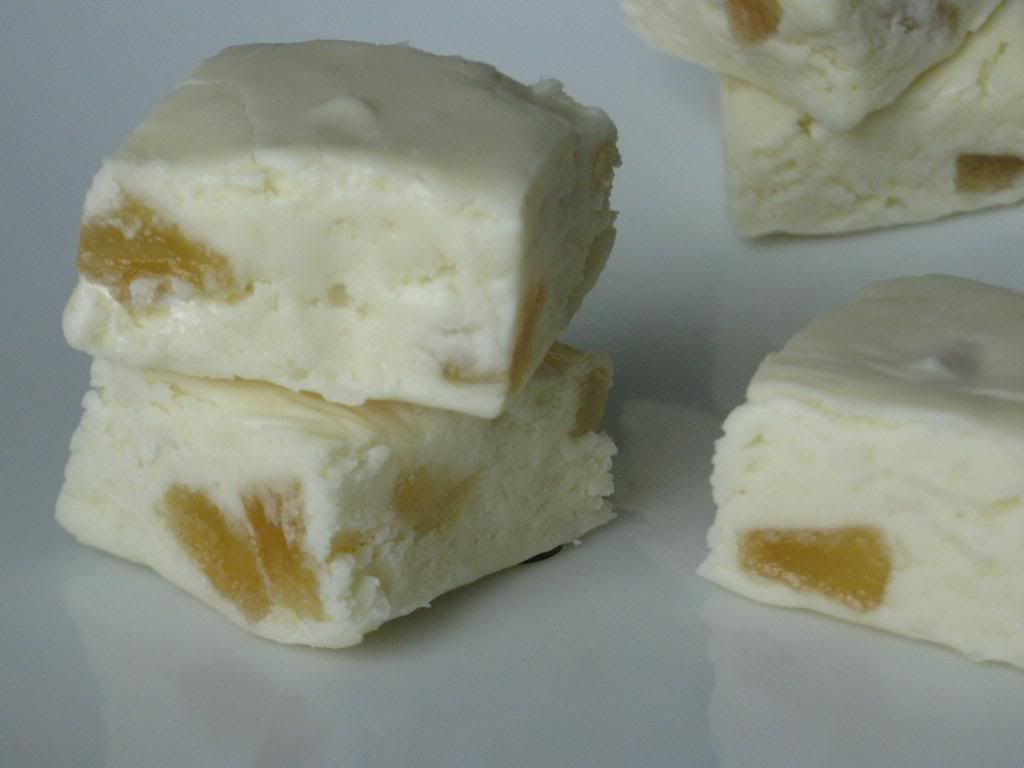
Pina Colada Fudge
Here we are again. With seized white chocolate x2 batches. Oh, the bane of my baking existence! I have the worst luck melting white chocolate, so I try to avoid it. However, when your Hungry Puppy wants to take white chocolate muddy buddies to school for her 8th birthday treat, you suck it up and ruin two batches and fudge on the third. Get it? Fudge? So, this recipe has been on my to do list, but the ruined white chocolate made it happen. I definitely took a risk, but that white chocolate smoothed out when combined with the rest of the ingredients and we have success! When you make this recipe, you DO NOT need to use seized white chocolate. Regular will do just fine. Just remember you can use your failed white chocolate if necessary.
Pina Colada Fudge
2 cups white chocolate chips
3/4 cup sweetened condensed milk (about half of a 14 ounce can)
1 cup shredded coconut
3/4 cup marshmallow cream (about half of a 7 ounce container)
pinch of salt
1/2 teaspoon coconut extract
1/4 teaspoon rum extract
1/2 cup dried pineapple, chopped
Line an 8x8 inch baking pan with foil and lightly grease the foil.
In a large microwave safe bowl, combine the white chocolate chips and sweetened condensed milk. Microwave in 20 second intervals, stirring after each until chocolate is melted and smooth. Add the remaining ingredients and stir until thoroughly combined. Pour the fudge into the prepared pan and smooth the top. Place in the refrigerator until firm, several hours. Remove fudge from the refrigerator and lift out of the pan using the foil as a handle. Cut the fudge into squares. Makes 24 to 36 servings.
Enjoy! -Cardamommy
Friday, November 22, 2013
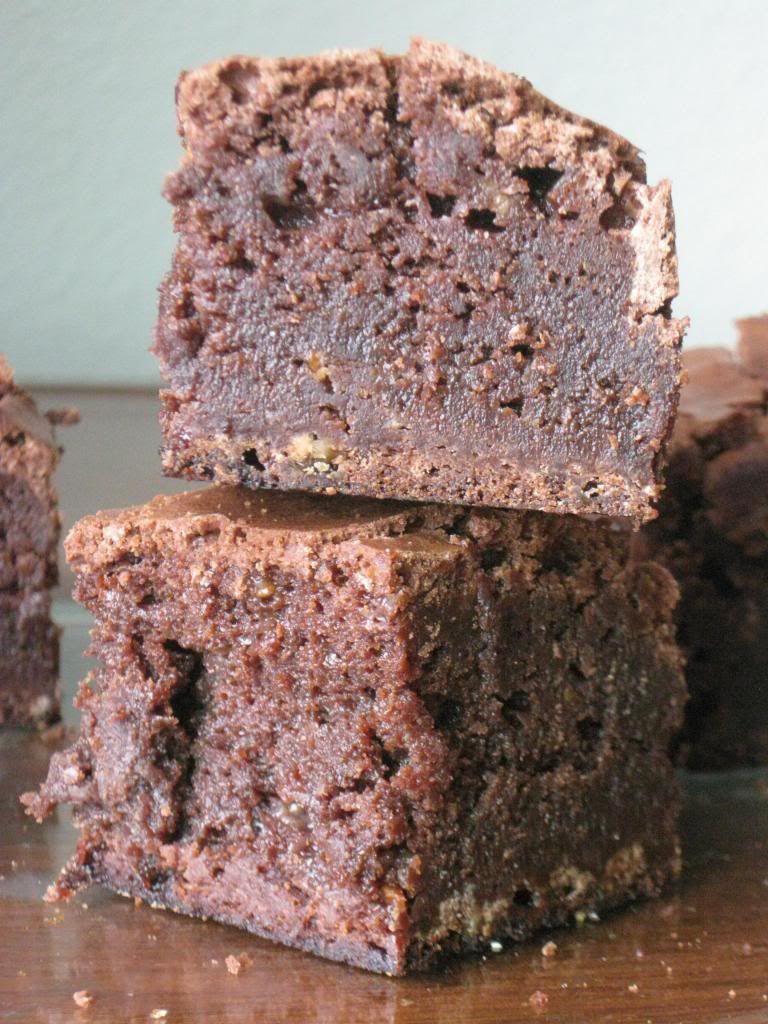
Fudgy Toffee Brownies
I am so in love with the idea of this type of brownie. This type of brownie being one with no leavening agent (baking powder or baking soda). The execution of said type of brownie is somewhat elusive to me. These brownies are so incredibly delicious and rich and fudgy it is amazing. The baking is what gives me trouble. I have so much trouble finding that just done point. I think that this recipe is the closest I have come to having success in this area, and the edges were still slightly on the burned side. The trick is getting them to bake all the way through to the thick fudgy center without charring the edges. If you (like me) are worried about this, you can simply cut the recipe in half and bake the brownies for about 20 minutes. They will be much thinner, but just as fudgy, delicious, and addicting!
Fudgy Toffee Brownies
1 1/2 cups semi sweet chocolate chips
12 Tablespoons (1 1/2 sticks) butter
1 1/2 cups granulated sugar
4 eggs
1 teaspoon vanilla extract.
3/4 cup all purpose flour
1 cup toffee bits
Preheat the oven to 350F. Line a 9x9 inch baking pan with foil, and lightly grease the foil. Set aside.
In a medium size microwavable bowl, combine the chocolate chips and butter. Microwave in 30 second intervals, stirring after each, until chocolate is melted and smooth. Stir in the sugar, then the eggs, one at a time, followed by the vanilla extract. Add the flour, and stir until just combined. Stir in the toffee bits.
Pour the brownie batter into the prepared pan and smooth the top. Bake the brownies for 45 to 50 minutes, or until a toothpick inserted in the center comes out with moist crumbs. Remove brownies from the oven and let cool completely. Cover and place in the refrigerator until chilled before cutting. Makes 16 brownies.
Enjoy! -Cardamommy
Labels:
Bars
,
Brownies
,
Butter
,
Chocolate
,
Chocolate Chips
,
Dessert
,
Toffee Bits
Monday, November 18, 2013
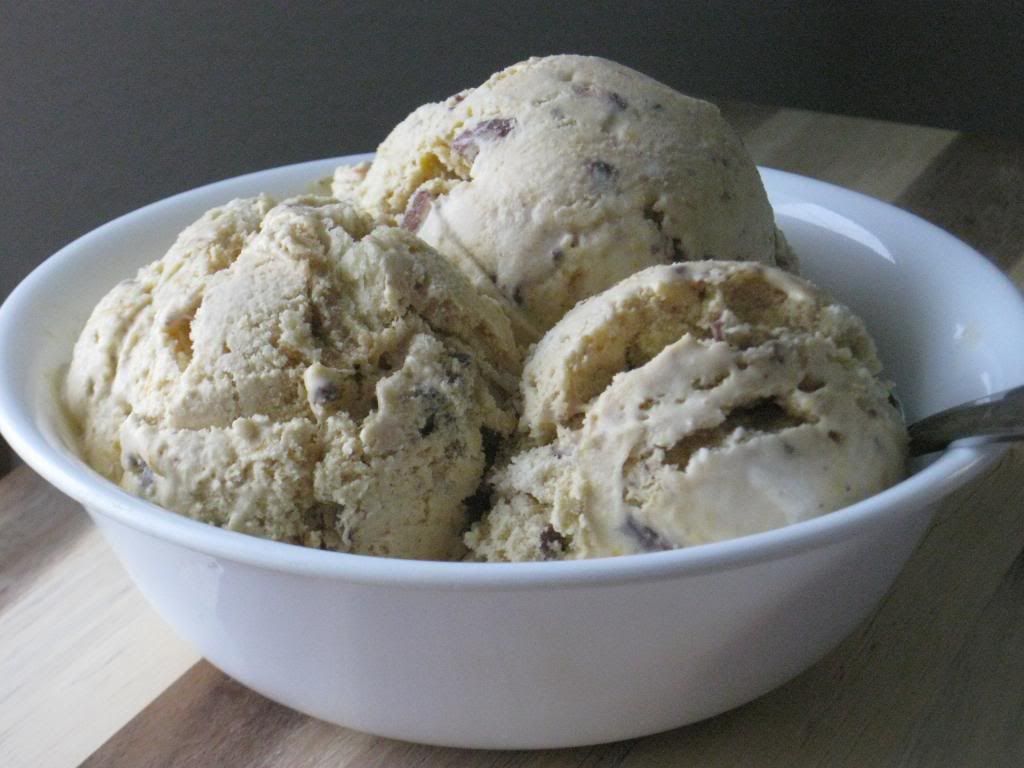
Pumpkin Toffee Butter Pecan Ice Cream
This ice cream recipe is very similar to this one that I made several years ago. Sometimes you need a fast and easy way to make your own ice cream that doesn't include an ice cream maker or a recipe. This recipe totally fits that bill. I actually feel a little weird calling it a recipe even because there is really nothing to it! My oldest Hungry Puppy had a little pumpkin left over from Halloween, and it was decision time. I told her that she had to figure out what to do with it because it can't sit on my counter forever. She thought to bake that little pumpkin and make something with the puree! Smart girl, she chose ice cream, and together we came up with this combination. And let me tell you, it is winning.
Pumpkin Toffee Butter Pecan Pie Ice Cream
Pastry:
1 cup all purpose flour
2 Tablespoons granulated sugar
1/2 teaspoon salt
1/2 cup butter, cold
Ice Cream:
1/2 gallon Butter Pecan Ice Cream, softened
1 tub (8 ounces) cool whip
1 cup pumpkin puree
1 bag chocolate toffee bits
Preheat the oven to 350F. Lightly grease a 9x9 inch baking pan.
In a medium bowl, combine the flour, sugar, and salt. Cut in the cold butter until the mixture resembles coarse crumbs. Press the crumbly mixture firmly into the prepared pan. Bake for 15 minutes or until lightly browned at the edges. Cool completely. Break the pastry into bite sized pieces.
For the ice cream, in a large bowl stir together the ice cream, cool whip, pumpkin puree, and toffee bits. Carefully stir in the pastry pieces. Transfer the ice cream to a freezer container and place in the freezer until firm. Makes about 9 cups of ice cream.
Enjoy! -Cardamommy
Labels:
Butter
,
Dessert
,
Ice Cream
,
Pastry
,
Pecan
,
Pie Crust
,
Pumpkin
,
Toffee Bits
,
Whipped Cream
Friday, November 15, 2013
Frosted Sugar Cookies
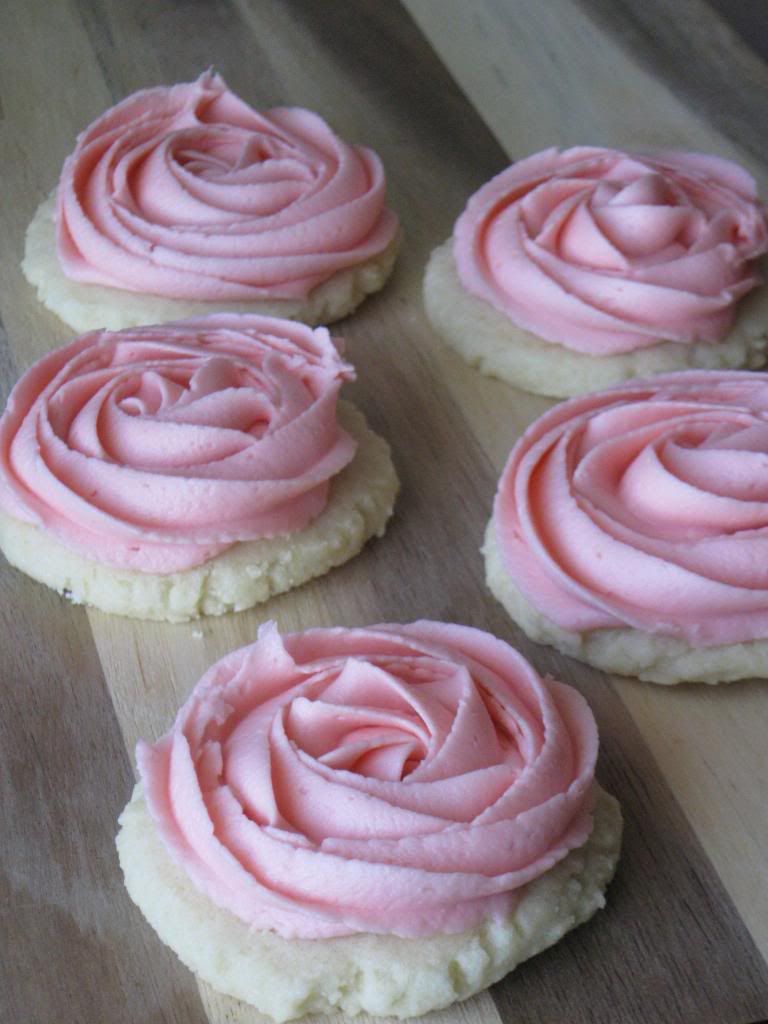
I'm headed to my oldest Hungry Puppy's school again this week for another Art Mom experience. We decided on sugar cookies as the treat to bring. I saw this recipe and decided to give it a shot. With a few modifications of course. They turned out so well, I am really pleased! If you don't pipe the rosettes, you will probably only use about half of the frosting, so just cut the recipe in half or make the whole recipe and refrigerate the leftovers (I can think of worse things than extra frosting in the fridge...) I wonder how all of those 8 year old boys are going to handle eating pink rosette cookies?! These cookies are so stinking cute!
Frosted Sugar Cookies
Cookies:
1/2 cup (1 stick) butter, room temperature
1/4 cup shortening
1 cup granulated sugar
2 eggs
2 teaspoons vanilla extract
1/2 teaspoon almond extract
2 1/2 cups all purpose flour
2 teaspoons cornstarch
1 1/2 teaspoons baking powder
1/4 teaspoon salt
Frosting:
1/2 cup butter, room temperature
1/2 cup shortening
2 teaspoons vanilla extract
4 cups powdered sugar
1 to 2 Tablespoons milk
1 to 2 drops of red gel food coloring
Line a baking sheet with parchment paper. Set aside.
Cream together the butter, shortening, and granulated sugar until light and fluffy. Beat in the eggs, one at a time, scraping down the sides of the bowl as necessary. Beat in the vanilla extract and almond extract. Add the flour, cornstarch, baking powder, and salt, and beat until incorporated.
Using a small cookie scoop, scoop the dough into balls and place on the prepared baking sheet about 2 inches apart. Using a lightly floured glass, or the bottom of a measuring cup, press down the dough balls until they are about 1/2 inch thick. Place the dough cookies in the refrigerator for 10 to 15 minutes while you preheat the oven.
Preheat the oven to 375F. When the oven is ready, remove the cookies from the refrigerator and place in the oven. Bake for 8 minutes, or until the cookies are just set in the center. Remove cookies from the oven and let cool on the pan for several minutes. Transfer cookies to a cooling rack to cool completely before frosting.
For the frosting, cream together the butter, shortening, and vanilla extract. Beat in the powdered sugar in two additions (2 cups at a time) until combined. Beat in the milk, 1 tablespoon at a time until you reach a stiff but still spreadable consistency (if the frosting is too soft, the rosettes will not hold up). Beat in the red gel food coloring until the desired color is reached. Spoon the frosting into a pastry bag fitted with a 1M star tip. Starting in the center of each cookie, pipe the frosting in a circle moving outward until you reach the edge of the cookie. Repeat with the remaining cookies. If you choose not to pipe the rosettes, just spread the frosting on top of the cookies. Makes 30 cookies.
Enjoy! -Cardamommy
Labels:
Cake Decorating
,
Cookies
,
Dessert
,
Frosting
,
Sugar Cookies
Monday, November 11, 2013
Tahiti Blondies
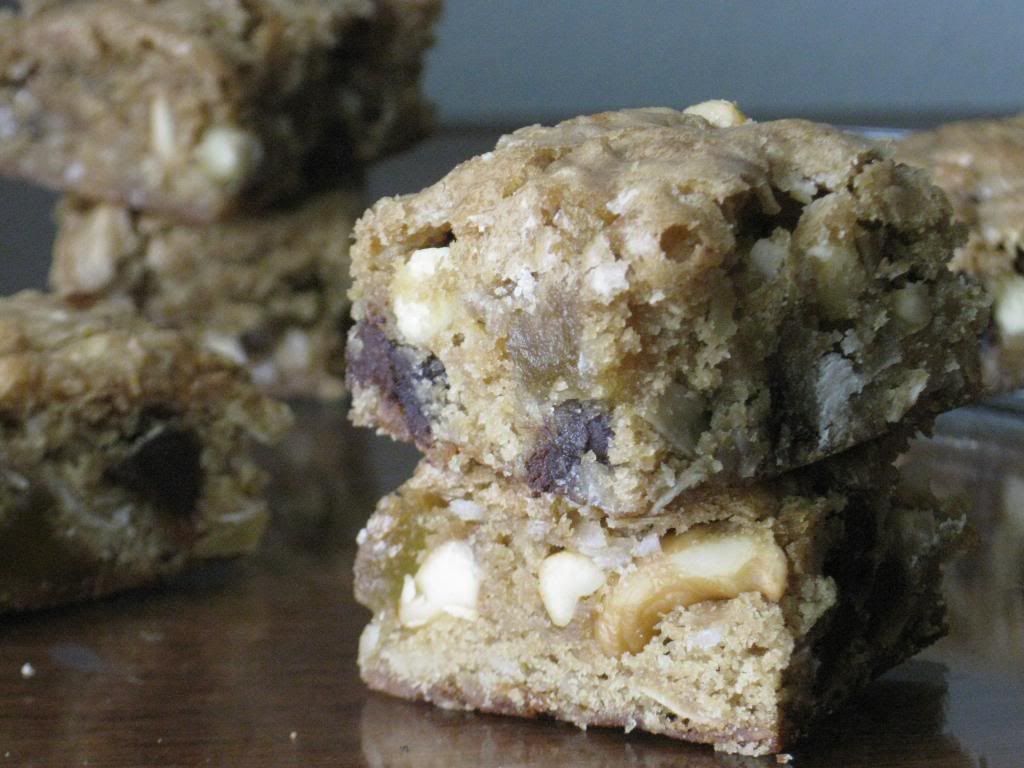
We don't eat a lot of blondies at my house. Not because we don't like them, it just never comes to mind to make them. That being said, we have had a variety of blondies and this recipe ranks pretty high in the favorites. These blondies are not your typical blondie. They are full of cashews, coconut, chocolate and white chocolate, and dried pineapple. They are full of a variety of flavors and textures, and so simple to throw together!
Tahiti Blondies
6 Tablespoons butter, melted
3/4 cup packed brown sugar
1 egg
2 teaspoons vanilla extract
3/4 cup all purpose flour
1/2 teaspoon baking powder
1/4 teaspoon salt
3/4 cup shredded coconut
1/2 cup cashews, chopped
1/2 cup dried pineapple, chopped
1/4 cup semi sweet chocolate chips
1/4 cup white chocolate chips
Preheat the oven to 350F. Line a 9x9 inch baking pan with foil, then lightly spray the foil with cooking spray. Set aside.
Stir together the melted butter and brown sugar until smooth. Add the egg and vanilla and stir until well blended. Add the flour, baking powder, and salt, and stir until just combined. Stir in the coconut, cashews, dried pineapple, chocolate chips, and white chocolate chips. Pour the batter into the prepared pan and smooth the top.
Bake the blondies for 25 minutes, or until a toothpick inserted in the center comes out clean, or with a few crumbs. Remove from the oven and let cool before cutting. Makes 16 blondies.
Enjoy! -Cardamommy
Friday, November 8, 2013
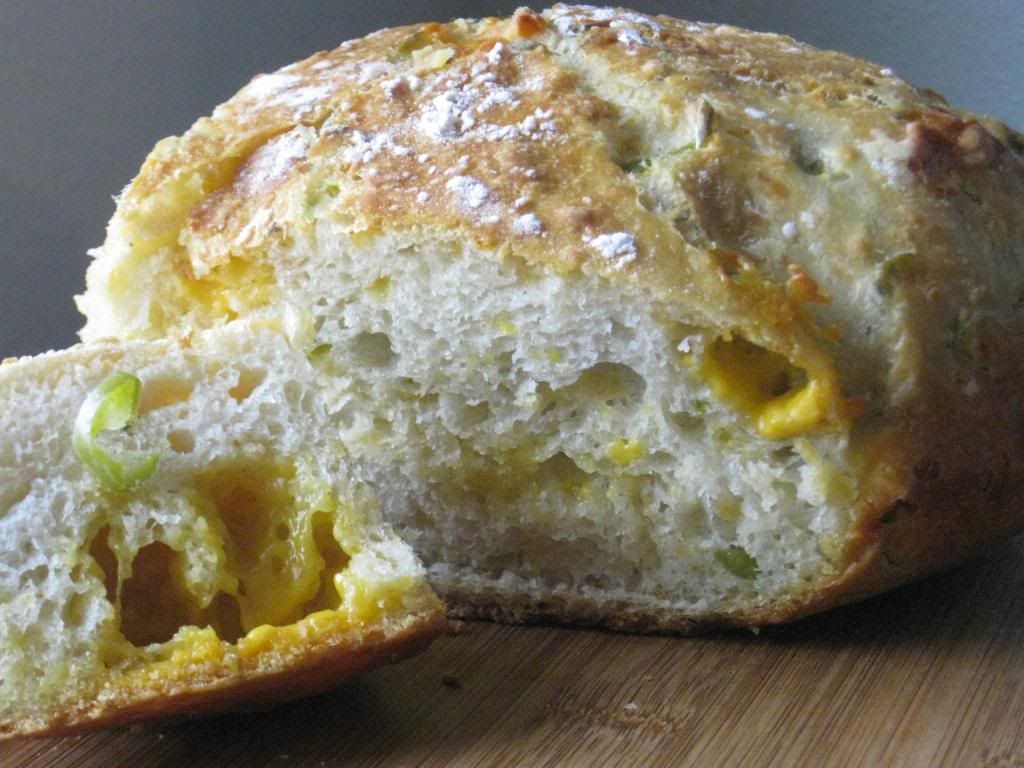
No Knead Cheddar Jalapeno Beer Bread
I have been making no knead beer bread for quite some time and it is one of the best artisan no knead bread recipes I have ever made. It is flavorful and delicious and so so simple! It's hard to believe that you put so little effort in and get such an amazing product out! I received an abundant amount of jalapenos last week, and have been trying to use them up. I had the idea to do a cheddar jalapeno zucchini bread and the flavor was amazing (although the texture had some difficulties...). It was so amazing, that I immediately knew that I had to turn it into my favorite no knead beer bread. So that's what I did, and oh man is it ever good. I may have made a meal out of it twice this week. My recipe makes 2 loaves, but you can easily cut the recipe in half to make just one. Why you would want to, though, is beyond my capacity to understand. This bread needs to rise for 8 to 18 hours, so plan ahead. I make this dough the night before I want to bake it.
No Knead Cheddar Jalapeno Beer Bread
6 cups (30 ounces) all purpose flour
1 Tablespoon salt
1/2 teaspoon instant yeast
1 3/4 cup warm water
3/4 cup beer, room temperature
2 Tablespoons white vinegar
2-3 jalapenos, seeded and sliced into rings
6 ounces shredded cheddar cheese
6 ounces cubed cheddar cheese
In a large bowl (I actually use a 21 cup, which is about 1.3 gallons, tupperware container with a lid), stir together the flour salt and yeast. Add the water, beer, and vinegar and stir until there is no standing liquid. Add the jalapenos, shredded cheese, and cubed cheese, and continue stirring the dough until a shaggy looking ball forms, making sure to scrape up the dry flour from the bottom of the bowl. Cover the bowl with plastic wrap, or cover the tupperware container with the lid, only pressing down on 2 corners, and let the dough sit at room temperature for 8 to 18 hours.
Line an oval dutch oven or french oven (8 quart size) with parchment paper, or 2 round 10 inch dutch or french ovens. If you don't have a dutch or french oven, you can use a heavy bottomed pot with a lid, but you will have the best results with a dutch or french oven. Spray the parchment paper lightly with cooking spray. Remove the dough from the bowl or tupperware container, and knead on a floured surface several times. Divide the dough into two equal portions and form each portion into a ball. If using a large oval french oven, place the two dough balls seam side down on opposite sides of the french oven. If using two smaller french ovens, place one dough ball in each. Lightly spray the top of the dough with cooking spray, then loosely cover with plastic wrap. Let the dough rise for about 2 hours.
About 30 minutes before baking the bread, carefully remove the bread dough from the french oven, using the parchment paper as a sling to lift it out, and place dough on the counter. Put the lid on the french oven and place it in the oven. Preheat the oven to 500F. When the oven has preheated and is ready, remove the plastic wrap from the bread dough and lightly dust the dough with flour. With a very sharp knife or razor blade, make a long slash about 1/2 inch deep in the top of each dough ball.
Carefully remove the preheated french oven from the oven and remove the lid. Again using the parchment paper as a sling, carefully lift the dough and place in the french oven. If the parchment paper hangs over the sides, it is okay. Put the lid on the french oven and place in the preheated oven. Immediately lower the oven temperature to 425F, and bake the bread, covered, for 30 minutes. Remove the lid and continue baking the bread for 15 to 20 minutes until the top is golden brown. Remove the french oven from the oven and carefully take the bread out, again using the parchment as a handle. Place the bread on a cooling rack. If you don't eat both loaves immediately, you can place the remaining loaf in a 450F oven for about 5 to 7 minutes to crisp up the crust. Makes 2 loaves.
Enjoy! -Cardamommy
Monday, November 4, 2013
Peanut Butter Apple Cookies
I was totally fascinated by the idea of these cookies, and at first was a little skeptical. Then I remembered how fabulous peanut butter and apples are together and decided to give these cookies a try. They turned out really nicely! They are a tiny bit crumbly and a little sandy in texture. The apple chunks provide little bursts of tart apple flavor in the peanut butter cookie. The final and somewhat surprising component is cinnamon! I almost didn't add the cinnamon because cinnamon in a peanut butter cookie didn't seem quite right to me. It is totally right. There is just enough cinnamon to be an intriguing flavor without screaming cinnamon.
Peanut Butter Apple Cookies
1/2 cup shortening
1/2 cup creamy peanut butter
1/2 cup granulated sugar
1/2 cup packed brown sugar
1 egg
1 Tablespoon milk
1/2 teaspoon vanilla extract
1 1/2 cups all purpose flour
1/2 teaspoon baking soda
1/2 teaspoon salt
1/4 teaspoon cinnamon
1 small granny smith or other tart apple, peeled and diced
Preheat the oven to 375F. Line a baking sheet with parchment paper. Set aside.
Cream together the shortening, peanut butter, granulated sugar, and brown sugar until light and fluffy. Beat in the egg, milk, and vanilla extract until well combined. Add the flour, baking soda, salt, and cinnamon, and beat until just combined. Stir in the diced apples.
Use a 2 Tablespoon size scoop to scoop the dough into balls. Place on the prepared baking sheet about 2 inches apart. Bake for 12 minutes, or until lightly browned at the edges and the top. Remove the cookies from the oven and let cool for a minute or two on the pan before transferring to a cooling rack. Makes about 18 cookies.
Enjoy! -Cardamommy
Friday, November 1, 2013
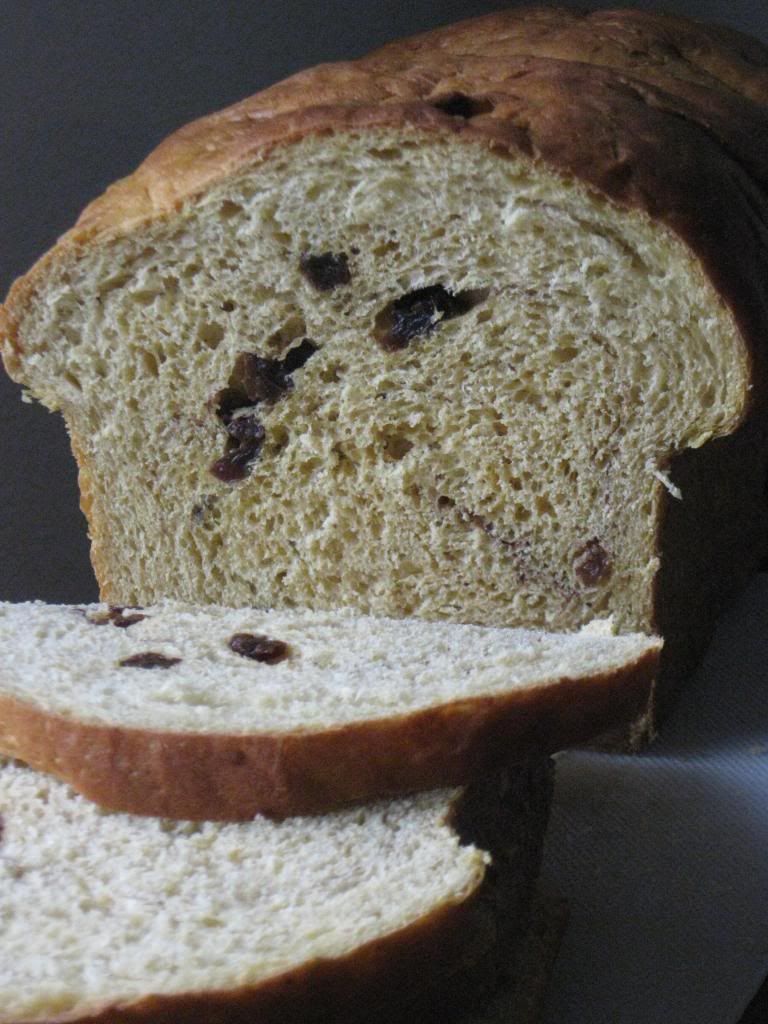
Pumpkin Sandwich Bread
I have pretty much fallen into a bread making rut. I make the same basic recipe every time I make bread. Now, don't get me wrong, my recipe is absolutely delicious, and it is our favorite. It is super versatile and I frequently add different flavors, spices, sweeteners, and flours to change things up. Today, however, something new was calling to me. So, I decided to jump on the pumpkin bandwagon (I love pumpkin, but September 1st is a little early for me. I'm still in Summer mode!). This pumpkin sandwich bread is adapted from a King Arthur Flour recipe, and we love it. It is soft and moist and flavorful, with a hint of warm cinnamon that doesn't overpower. This recipe makes 2 loaves, so I made one as is, and added raisins and a cinnamon swirl to the second. You can do both plain, both raisin cinnamon swirl, or one of each! Either way, you will love this bread.
Pumpkin Sandwich Bread
1/2 cup warm water
2 Tablespoons yeast
2/3 cup warm water
1/4 cup dry milk powder
2 eggs
1/2 cup mashed potato flakes
1 can (15 ounces) pumpkin puree (or use homemade)
2 Tablespoons canola oil
1/2 cup brown sugar
2 teaspoons salt
1 teaspoon cinnamon
1/2 teaspoon cardamom
6 cups all purpose flour
cinnamon (optional for creating a swirl)
raisins (optional)
Place the 1/2 cup warm water in a large bowl and sprinkle the yeast on top. Let sit for a minute or two until the yeast softens and starts to get bubbly. Add the remaining water, dry milk powder, eggs, mashed potato flakes, pumpkin puree, canola oil, brown sugar, salt, cinnamon, and cardamom, and stir until combined. Add the flour and stir until the dough begins to come together. When you can no longer stir it by hand, turn the dough out onto a lightly floured surface and knead until smooth and elastic, continuing to sprinkle flour on the work surface as needed.
Place the dough in large greased bowl, then turn the dough over to grease the top. Cover the bowl with a towel or plastic wrap, and let the dough rise for about 1 hour, or until the dough has doubled in volume. After the dough has risen, remove it from the bowl and place on a lightly greased or floured counter. Divide the dough into two equal parts. Form the dough into two loaves and place each in a lightly greased 9x5 inch loaf pan. Or, to make one loaf a cinnamon swirl pumpkin bread, knead the desired amount of raisins (I used about 1/2 cup for one loaf) into one portion of the dough, then roll or pat the dough into a large rectangle. Sprinkle the dough with cinnamon, then roll the dough like a cinnamon roll, tucking the ends under, and place the dough into the loaf pan.
Preheat the oven to 375F. Cover the loaves and let rise for 30 to 45 minutes, until the bread has risen over the top of the pan about an inch or two. Bake the bread for about 20 to 25 minutes, or until the top is golden brown. Remove the bread from the oven and immediately take the bread out of the loaf pans. Cool the bread on a cooling rack. Makes 2 loaves.
Enjoy! -Cardamommy
Wednesday, October 30, 2013
Spooky Owl Pretzels (Angry Birds)
I have a last minute, mid week, Halloween treat to share with you today. I'm posting these super last minute, because they were totally unplanned! I saw the idea, and had to make them right away because Halloween is tomorrow!!!! My Hungry Puppies loved this little kitchen craft, and it was fast and easy! A perfect craft for some last minute Halloween fun!
Spooky Owl Pretzels (Angry Birds)
8 Giant Pretzels (I used Snyder of Hanover Sourdough Hard Pretzels)
12 ounces (1/2 package) vanilla almond bark
8 Oreo Cookies, split in half
Chocolate licorice
16 white M&Ms
16 chocolate chips
8 black jelly beans
Cut the chocolate licorice into 2 1/2 to 3 inch lengths with one end cut diagonally. With another piece of licorice, cut thin slices to use for the owl's toes.
Carefully melt the vanilla almond bark in a bowl in the microwave, heating in 30 second intervals and stirring after each until smooth. Dip the pretzels in the white chocolate, coating them evenly. Press 2 Oreo halves onto the top of the pretzel. Using the white chocolate as glue, attach the white M&Ms to the Oreos, and the chocolate chips on top of the M&Ms. "Glue" (with white chocolate) the licorice pieces at the top of the Oreos. Press a black jelly bean in the middle between the Oreo eyes to make the nose. Arrange the thinly sliced licorice at the base of the pretzel owl to form its toes. Makes 8 spooky owls.
Enjoy! -Cardamommy
Labels:
Candy
,
Chocolate
,
Chocolate Chips
,
Dessert
,
Halloween
,
M&Ms
,
Oreo
,
Pretzels
,
White Chocolate
Subscribe to:
Comments
(
Atom
)
