Friday, August 30, 2013
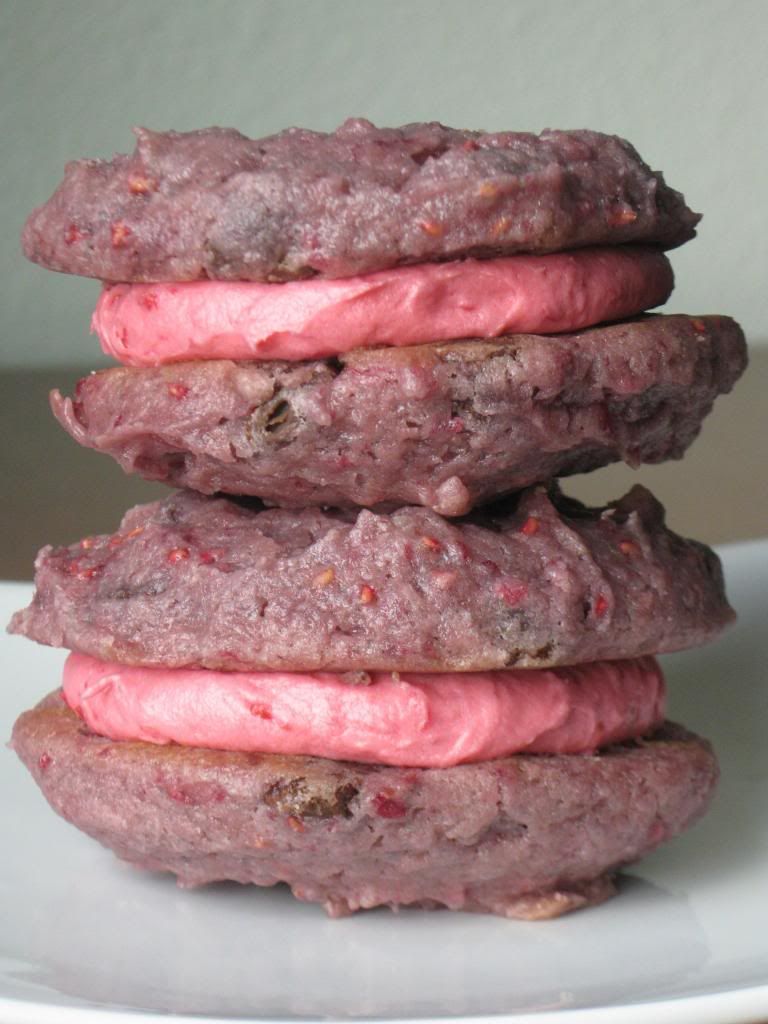
Raspberry Chocolate Chip Cookie Sandwiches
These raspberry chocolate chip cookies are soft with a nice raspberry flavor (not to mention a fabulous color that my Hungry Puppies thought was amazing!), and studded with chocolate chips. A fresh raspberry buttercream is sandwiched between two cookies for a delicious double raspberry treat.
Raspberry Chocolate Chip Cookies Sandwiches
Raspberry Chocolate Chip Cookies:
1/2 cup butter, room temperature
1/2 cup shortening
1 cup fresh raspberries
3/4 cup brown sugar
3/4 cup granulated sugar
1 egg
1 teaspoon vanilla
3 cups flour
1 Tablespoon cornstarch
1 teaspoon baking soda
1/2 teaspoon salt
1 1/2 cups chocolate chips
Fresh Raspberry Buttercream:
1/4 cup butter, room temperature
1/4 cup shortening
1/2 teaspoon vanilla
2 cups powdered sugar
2 to 4 Tablespoons raspberry puree
Preheat the oven to 350F. Line a baking sheet with parchment paper.
For the cookies, cream together the butter, shortening, raspberries, brown sugar, and granulated sugar until smooth. Beat in the egg and vanilla until incorporated. Add the flour, cornstarch, baking soda, and salt. Beat until the flour begins to blend with the creamed mixture. Add the chocolate chips, and continue beating until just incorporated and no streaks of flour remain.
Scoop dough with a 2 tablespoon cookie scoop and drop onto the prepared baking sheet. Bake for 12 to 13 minutes, or until just set on the top. Remove cookies from the oven and let cool for a couple minutes on the pan, then transfer to a cooling rack to cool completely.
To make the frosting, cream together the butter, shortening, and vanilla. Beat in the powdered sugar. Beat in the raspberry puree, 1 tablespoon at a time until it reaches the desired consistency. Place a tablespoon of frosting between two cookies. Makes about 18 sandwich cookies.
Enjoy! -Cardamommy
Labels:
Chocolate
,
Chocolate chip cookies
,
Chocolate Chips
,
Cookies
,
Dessert
,
Frosting
,
Raspberry
Monday, August 26, 2013
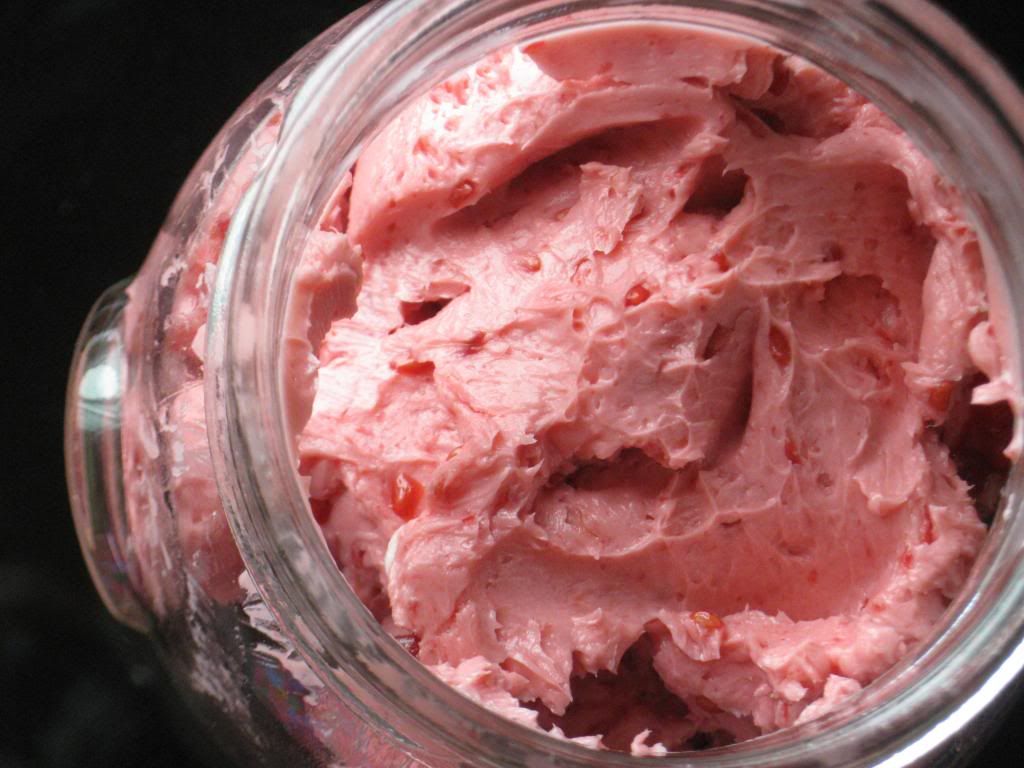
Whipped Raspberry Butter
I came across this recipe for whipped raspberry butter and knew that I had to try it immediately. Which totally worked out perfectly because I happened to have quite a large quantity of fresh raspberries in my refrigerator. This recipe has put all sorts of wonderful ideas in my head of how/if I could cook with this butter...Mmmm raspberry chocolate chip cookies anyone? This recipe is easily doubled.
Whipped Raspberry Butter
1 Tablespoon honey
1/4 cup fresh red raspberries
1 stick (1/2 cup) butter, room temperature
Place the honey and raspberries in a microwave safe bowl (or in a small saucepan). Heat the mixture until it reaches a boil, stirring to break up the berries. Let the mixture cool completely. Place the honey/raspberry mixture and butter into a medium sized bowl, and beat with a hand mixer on low until combined. The butter will separate at first, just keep beating. Increase the mixer speed to high, and beat the butter for 2 to 3 minutes, or until light and fluffy. Transfer the butter to a jar and refrigerate, or freeze.
Enjoy! -Cardamommy
Friday, August 23, 2013
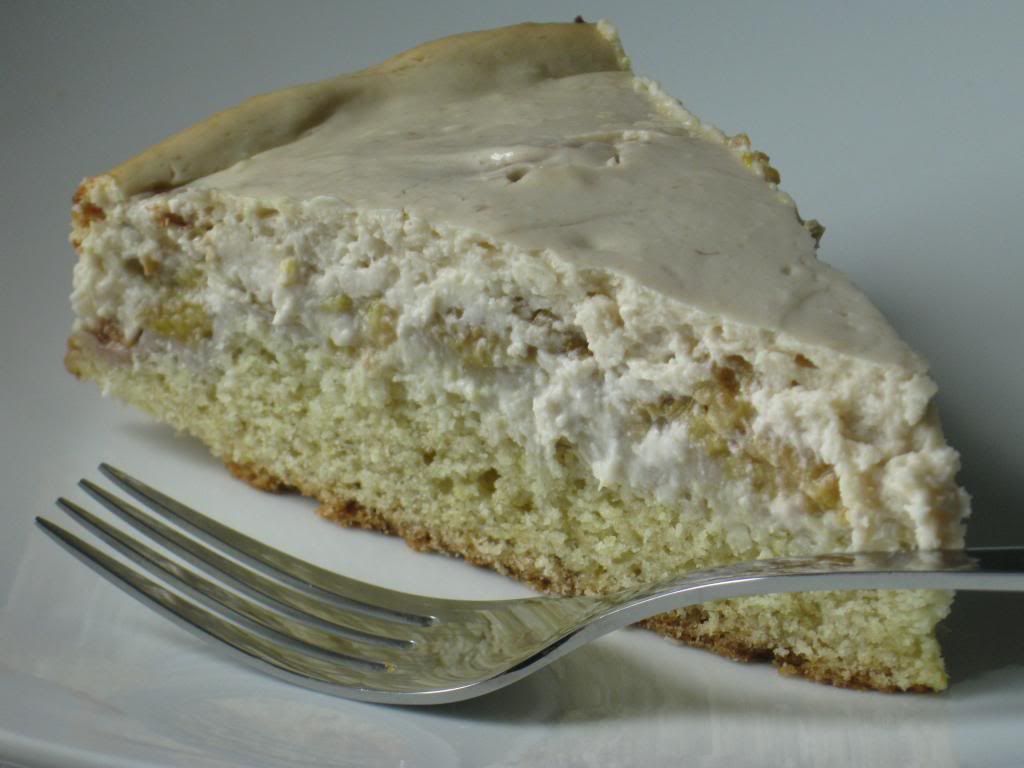
Raspberry Cream Cake
My Dad has an amazing garden. Grapes, raspberries, potatoes, rhubarb, carrots... all kinds of fabulous things. Least year I made more pints of grape jelly than I can remember at this point. I made jelly for an entire day. The. Entire. Day. And absolutely the best grape jelly ever. So far this week, I have made two batches of red raspberry jam. I had some golden raspberries as well, but I didn't know what to do with them. I needed something simple and delicious, where the raspberries would take center stage and not be drowned out by the dessert. I think this recipe fits the bill. Start with a simple press-in crust, followed by berries, followed by a cream filling. Recipe adapted from King Arthur Flour.
Raspberry Cream Cake
Crust:
1 1/2 cups all purpose flour
1/2 cup granulated sugar
1 1/2 teaspoons baking powder
1/4 teaspoon salt
1/2 cup (1 stick) butter, room temperature
1 egg
2 teaspoons vanilla
4 cups fresh raspberries (I used golden raspberries, but red is perfect as well)
Filling:
1 cup (8 ounces) sour cream
1 (8 ounce) package cream cheese, room temperature
1/2 cup granulated sugar
1 egg
2 teaspoons vanilla
Preheat the oven to 350F. Spray a 9 1/2 inch springform pan with cooking spray.
Combine the flour, sugar, baking powder, salt, butter, egg and vanilla in the bowl of a stand mixer, and with the paddle attachment, beat until combined. The dough will be very stiff. Press the dough evenly onto the bottom of the prepared pan. Pour the raspberries evenly over the dough.
In a medium bowl (or re-use your stand mixer), beat the sour cream, cream cheese, sugar, egg, and vanilla until well blended. Pour the cream mixture on top of the raspberries and spread evenly.
Bake the cake in the preheated oven for 60 minutes, or until the edges of the cake are lightly browned. Remove the cake from the oven and let cool to room temperature before serving (or refrigerate until ready to serve). When ready to serve, run a knife around the edge of the cake to loosen from sides of the pan, then remove side of pan. Makes about 16 servings.
Enjoy! -Cardamommy
Labels:
Butter
,
Cake
,
Cream Cheese
,
Dessert
,
Raspberry
,
Sour Cream
,
Vanilla
Monday, August 19, 2013
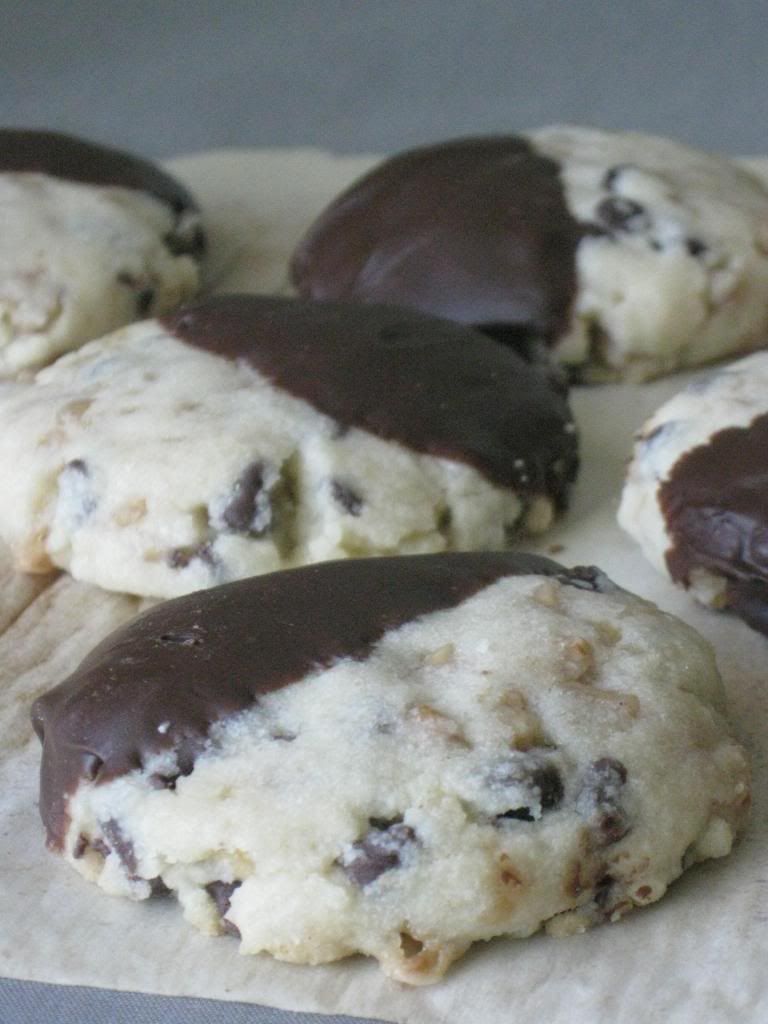
Chocolate Chip Toffee Shortbread Cookies
I wasn't originally going to post these cookies, but my arm was twisted by some Hungry Puppies that I know. And they are totally right. These cookies need to be shared. These toffee and chocolate studded shortbread cookies are wonderfully simple to make, and absolutely delicious. Not to mention good looking too! They don't need to be dipped in chocolate, as they stand alone beautifully, so whatever you prefer or have time for.
Chocolate Chip Toffee Shortbread Cookies
1/2 cup (1 stick) butter, room temperature
1/4 cup powdered sugar
1/2 teaspoon vanilla extract
1 cup all purpose flour
1/2 cup miniature chocolate chips
1/2 cup toffee bits
1 1/2 teaspoons shortening
1/2 cup semi sweet chocolate chips
Preheat the oven to 350F. Line a baking sheet with parchment paper.
Cream together the butter, powdered sugar, and vanilla. Beat in the flour, until just combined, then beat in the mini chocolate chips and toffee bits.
Using a 1 tablespoon size cookies scoop, scoop the dough into balls and place on the prepared baking sheet. Flatten each cookie dough ball slightly with the palm of your hand. These cookies will not spread, so you can place them a bit closer together than normal. Place cookies in the oven and bake for 10 to 12 minutes, or until the edges are lightly browned. Remove from the oven and let cool on the pan for 5 minutes, then transfer to a cooling rack to finish cooling.
Place the shortening and chocolate chips in a small bowl, and microwave in 15 second intervals, stirring after each, until the chocolate is melted and smooth. Dip each cooled shortbread cookie into the chocolate halfway. Place the dipped cookies on a piece of wax paper until the chocolate is set. Makes about 18 cookies.
Enjoy! -Cardamommy
Labels:
Chocolate
,
Chocolate chip cookies
,
Chocolate Chips
,
Cookies
,
Dessert
,
Toffee Bits
Friday, August 16, 2013
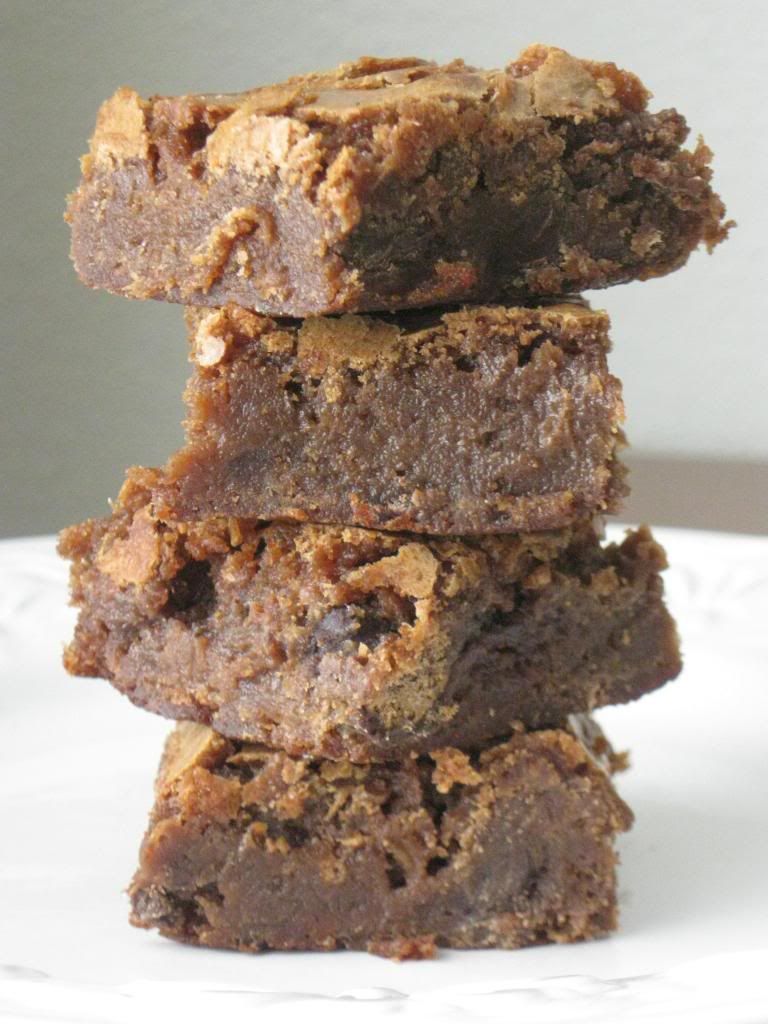
Chocolate Rhubarb Brownies
I made these brownies for the first and only time about...oh...forever ago. Probably in the vicinity of 5 to 7 years ago. At the time, I didn't add the chile powder or the cinnamon, and I remember them being delicious. Fantastic. So amazing, that I'm not sure why I haven't repeated them until now. My Dad actually inspired me to re-try these delicious brownies. He's been experimenting with brownies by adding a ground up chipotle pepper to each batch that he makes. Imagine the surprise of my brother in law when he bit into a brownie that quickly started his mouth burning!
This time, I was adventurous and added the chili powder and cinnamon (even thought I really don't like chocolate and cinnamon together). What I loved about these brownies was that you could totally taste the rhubarb beyond the chocolate. Now, you get the chocolate, tart rhubarb, warm cinnamon, and a very slight bite from the chile powder. Great combination. Don't be scared, give it a try!
Chocolate Rhubarb Brownies
Rhubarb Compote:
1 cup rhubarb, cut into 1/2 inch slices
1/4 cup water
2 Tablespoons granulated sugar
Brownies:
1/2 cup semi sweet chocolate chips
1/2 cup butter, room temperature
1 1/2 cups granulated sugar
2 eggs, room temperature
1 teaspoon vanilla extract
3/4 cup all purpose flour
1/2 teaspoon baking powder
2 Tablespoons New Mexico Chile powder
1 teaspoon cinnamon
1/2 teaspoon kosher salt
1/4 cup semi sweet chocolate chips
Preheat the oven to 350F. Spray a 9 inch square baking pan with cooking spray, then line the bottom with a piece of parchment paper, then spray the parchment.
For the rhubarb compote, in a small saucepan over medium heat, combine the rhubarb, water, and sugar. Bring to a boil, then reduce heat and simmer for about 10 minutes (stirring occasionally) or until the rhubarb is soft and tender. Cool slightly.
Place the 1/2 cup chocolate chips in a medium size bowl. Carefully melt the chocolate chips in the microwave, stirring after every 15 to 30 seconds until smooth. Stir the rhubarb compote into the melted chocolate.
In a large bowl, cream together the butter and sugar until light and fluffy. Beat in the eggs, one at a time, and the vanilla until blended. Add the rhubarb/chocolate mixture to the creamed mixture and beat until combined. Add the flour, baking powder, chile powder, cinnamon, and salt. Stir until just incorporated. Stir in the chocolate chips.
Pour the batter into the prepared pan, and bake for 35 minutes, or until a toothpick inserted in the center comes out clean. Let the brownies cool on a wire rack. Cut into squares and serve. Makes 12 to 16 servings.
Enjoy! -Cardamommy
Monday, August 12, 2013
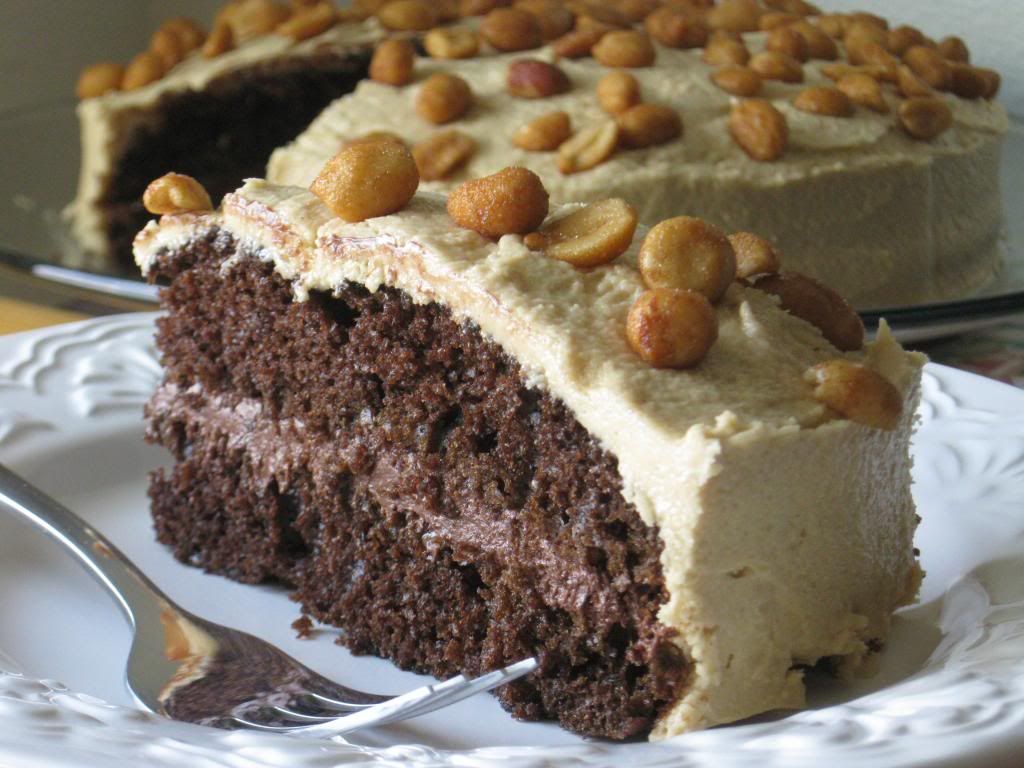
Chocolate Peanut Butter Layer Cake
This is the second of the peanut butter cakes that I baked. I cut the recipe in half, so as to have a more manageable amount of cake leftover in my house. If you want the full size cake, just double everything. The chocolate cake was wonderfully moist and easy to put together. The chocolate marshmallow filling is absolutely my new favorite cake filling recipe. I can't even get over it, and I totally can't wait to make it again! I adapted this cake from this recipe.
Chocolate Peanut Butter Layer Cake
Cake:
1 cup granulated sugar
1/2 cup +6 Tablespoons all purpose flour
6 Tablespoons cocoa powder
3/4 teaspoons baking powder
1/2 teaspoon baking soda
1/2 teaspoon salt
1 egg
1/2 cup milk
1/4 cup vegetable oil
1 teaspoon vanilla extract
1/2 cup boiling water
Chocolate Marshmallow Filling:
1/2 cup cocoa powder
1 cup powdered sugar
pinch of salt
1/4 cup butter, room temperature
1/4 cup shortening
1 Tablespoon milk
1 cup (1/2 of a 7 ounce container) marshmallow cream
Peanut Butter Frosting:
1/4 cup butter, room temperature
1/2 cup peanut butter
2 cups powdered sugar
pinch of salt
1/2 teaspoon vanilla extract
2 to 3 Tablespoons milk
Honey roasted peanuts, for garnish, if desired
Preheat the oven to 350F. Grease and flour 2 9-inch round cake pans. Set aside.
In a large bowl, whisk together the sugar, flour, cocoa powder, baking powder, baking soda, and salt. Beat in the egg, milk, oil, and vanilla until smooth. Stir in the boiling water until incorporated.
Pour the batter evenly between the two prepared pans. Bake in the preheated oven for 20 minutes, or until a toothpick inserted in the center comes out clean. Remove cakes from the oven and let cool completely in the pans. Once the cakes are cool, run a knife round the edge of the pan and turn the cakes out of the pans.
For the chocolate marshmallow filling, stir together the cocoa powder, powdered sugar, and salt. With the mixer on low speed, beat in the butter and shortening. Mixture will be crumbly. Beat in the milk until the mixture comes together. Add the marshmallow cream, increasing the speed to high, beat until the filling is light and fluffy.
For the peanut butter frosting, cream together the butter and peanut butter. Add the powdered sugar and salt, and beat on low speed until the mixture comes together. Add the vanilla, and enough milk to reach the desired consistency.
To assemble the cake, place one cake layer upside down on a serving plate. Spread the chocolate marshmallow filling on top. Place the second layer on top of the filling. Spread the peanut butter frosting over the top and sides of the cake. Sprinkle with honey roasted peanuts, if desired. Makes 8 to 12 servings.
Enjoy! -Cardamommy
Labels:
Cake
,
Chocolate
,
Dessert
,
Marshmallows
,
Peanut Butter
,
Peanuts
Friday, August 9, 2013
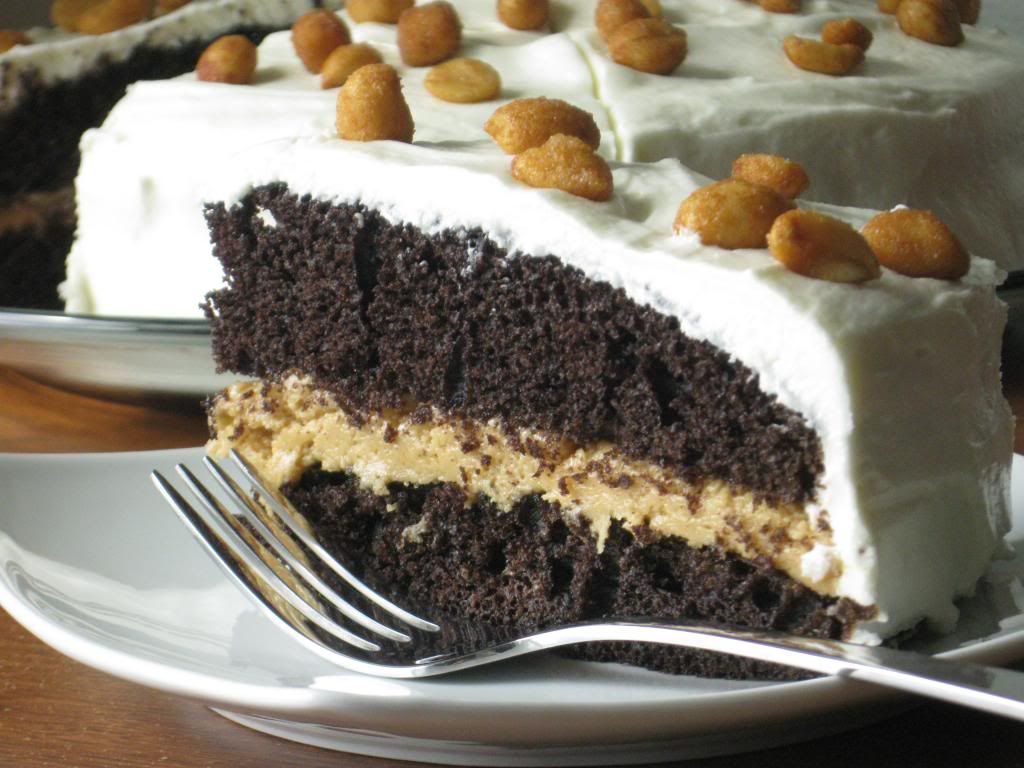
Chocolate Peanut Butter Marshmallow Cake
Okay, I have two chocolate peanut butter cakes to share with you, and this is the first. The reason I have two, is because I couldn't decide which one to make. This is also my husband's birthday cake! Yet another year gone as I smile that however old I get, he will always be older. My husband loves peanut butter, while I am not a super fan. I can totally live without it. This means that we don't often have peanut butter themed anything at our house. Not peanut butter cookies, or peanut butter pie, or cake, or anything besides peanut butter sandwiches for lunch. I figure that his birthday would be a perfect opportunity to whip out the peanut butter and bake him up a much desired treat.
Chocolate Peanut Butter Marshmallow Cake
Cake:
1 cup all purpose flour
1 cup granulated sugar
1 Tablespoon cornstarch
1/3 cup black cocoa powder, or dark cocoa powder
1 teaspoon baking powder
1/2 teaspoon salt
1/4 teaspoon baking soda
2 eggs
1/3 cup vegetable oil
1 teaspoon vanilla extract
1/2 + 2 Tablespoons water
Peanut Butter Filling:
3/4 cup creamy peanut butter
2 cups (8 ounces) powdered sugar
1 teaspoon vanilla extract
1/3 cup milk
Vanilla Marshmallow Frosting:
1/2 cup butter, room temperature
1/2 cup shortening
3 cups powdered sugar
1 teaspoon vanilla extract
3 Tablespoons milk
1 cup (1/2 of a 7 ounce jar) marshmallow cream
Honey Roasted peanuts, for garnish, if desired
Preheat the oven to 350F. Grease and flour 2 9-inch round baking pans. Set aside.
In a large bowl, whisk together the flour, sugar, cornstarch, cocoa powder, baking powder, salt, and baking soda until combined. Add the eggs, oil, and vanilla, and beat until smooth. Add the water and beat on low speed just until combined. Pour the cake batter evenly into the prepared pans. Bake for about 20 minutes, or until a toothpick inserted in the center of the cake comes out clean. Remove cakes from the oven and let cool for about 10 minutes in the pan, then turn the cakes out onto a cooling rack to finish cooling.
For the peanut butter filling, in a medium bowl, beat together the peanut butter, powdered sugar, and vanilla extract. Add the milk and beat until smooth. Note: It will look very thin, like there is too much liquid. As you continue to beat, the filling will tighten up to a firmer consistency.
For the vanilla marshmallow frosting, in a large bowl cream together the butter and shortening. Beat in the powdered sugar. The mixture may be crumbly. Add the vanilla extract and milk, and beat until smooth. Beat in the marshmallow cream until incorporated.
To assemble the cake, place a cake layer upside down on a serving plate. Spread the peanut butter filling over the top just to the edges. Place the second cake layer right side up on top of the filling. Frost the top and sides of the cake with the vanilla marshmallow frosting. Garnish with peanuts, if desired. Note: You will probably have about a cup of frosting left over. Just store it in a covered container in the refrigerator for another use. Makes 8 to 12 servings.
Enjoy! -Cardamommy
Labels:
Birthday Cake
,
Cake
,
Chocolate
,
Dessert
,
Frosting
,
Marshmallows
,
Peanut Butter
Monday, August 5, 2013
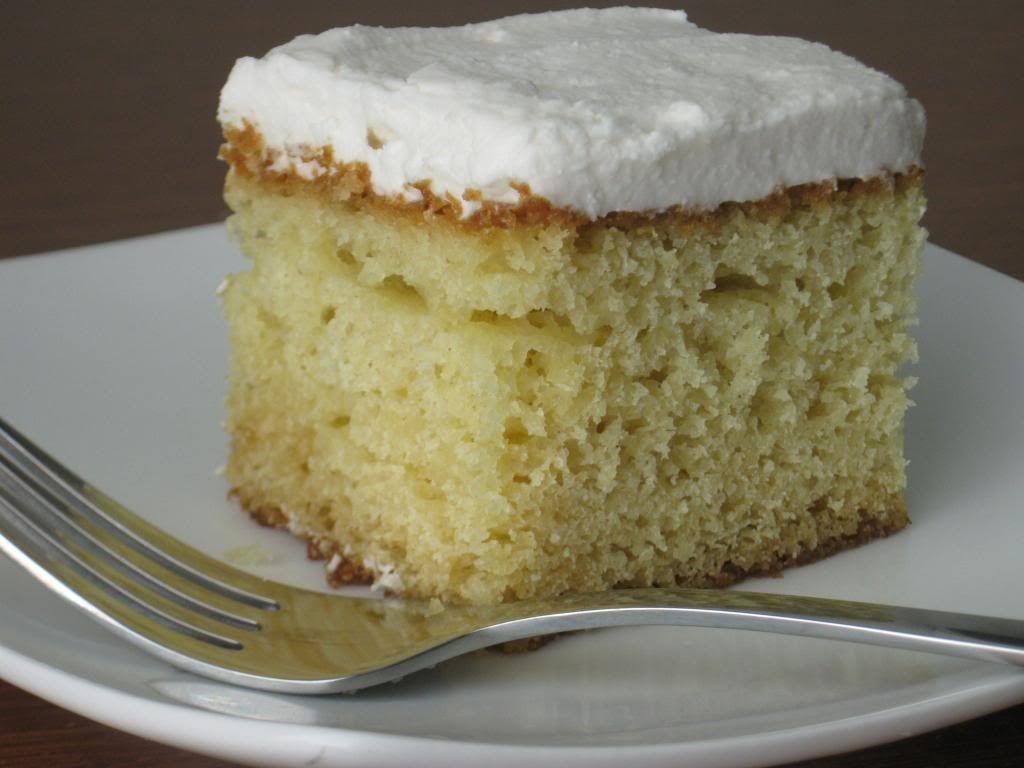
Buttermilk Yellow Cake
I've been experimenting with yellow cake recipes recently (such as this one), and I thought that I had found my favorite. I may have been wrong, because this one may be my new favorite. Or maybe I just need several favorites. This recipe is so delicious! It is moist and perfect and delicious. I just received some vanilla butternut flavoring in the mail that I ordered from King Arthur Flour, and I love it. I might be obsessed. If you don't have vanilla butternut flavoring, you should buy some. Or you could just use vanilla, and it would still be good. Lastly, I couldn't decide which kind of frosting I wanted to use on this cake, so I made two different batches and frosted half of the cake with one and half with the other. Problem solved. One is the classic american buttercream that I love, and the other is a bakery style frosting. They are both delicious, but I eventually decided that I prefer the classic american buttercream. I will post them both and let you decide your favorite! Original cake recipe found here.
Buttermilk Yellow Cake
Cake:
1 cup (2 sticks) butter
2 cups granulated sugar
1 teaspoon vanilla extract
1/4 teaspoon vanilla butternut flavoring (substitute with another flavor or 1 tsp of vanilla)
4 eggs
2 cups buttermilk
4 cups all purpose flour
2 teaspoons baking powder
1 1/2 teaspoons baking soda
1 teaspoon salt
Bakery
Frosting:
½
cup shortening
2
Tablespoons powdered nondairy creamer
1/8
teaspoon vanilla butternut flavoring
½
teaspoon vanilla
2
cups powdered sugar
2
Tablespoons water
OR
Classic
American Buttercream:
¼
cup shortening
¼
cup butter, room temperature
½
teaspoon vanilla
1/8
teaspoon vanilla butternut flavoring
2
cups powdered sugar
1
Tablespoon milk
Preheat
oven to 350°F. Spray a 9x13
inch baking pan with cooking spray.
In
a large bowl, cream together the butter, sugar, vanilla extract, and
vanilla butternut flavor until light and fluffy. Beat in the eggs,
one at a time until well blended. Add the buttermilk and beat on low
speed until just combine. Add the flour, baking powder, baking soda,
and salt and beat until incorporated.
Transfer
the batter to the prepared pan and spread evenly. Tap the pan on
the counter to remove any large air bubbles. Bake for about 35
minutes, or until a toothpick inserted in the center comes out clean. Remove cake from the oven and let cool completely on a cooling rack.
For
the bakery frosting, cream together the shortening, creamer,
flavoring, and vanilla. Beat in the powdered sugar a little at a
time until incorporated. Beat in the water until frosting reaches
the desired consistency.
For
the American buttercream, cream together the shortening, butter,
vanilla, and flavoring. Beat in the powdered sugar a little at a
time until incorporated. Beat in the milk. Spread frosting on top of cake. Makes 20 to 24 servings.
Enjoy! -Cardamommy
Friday, August 2, 2013
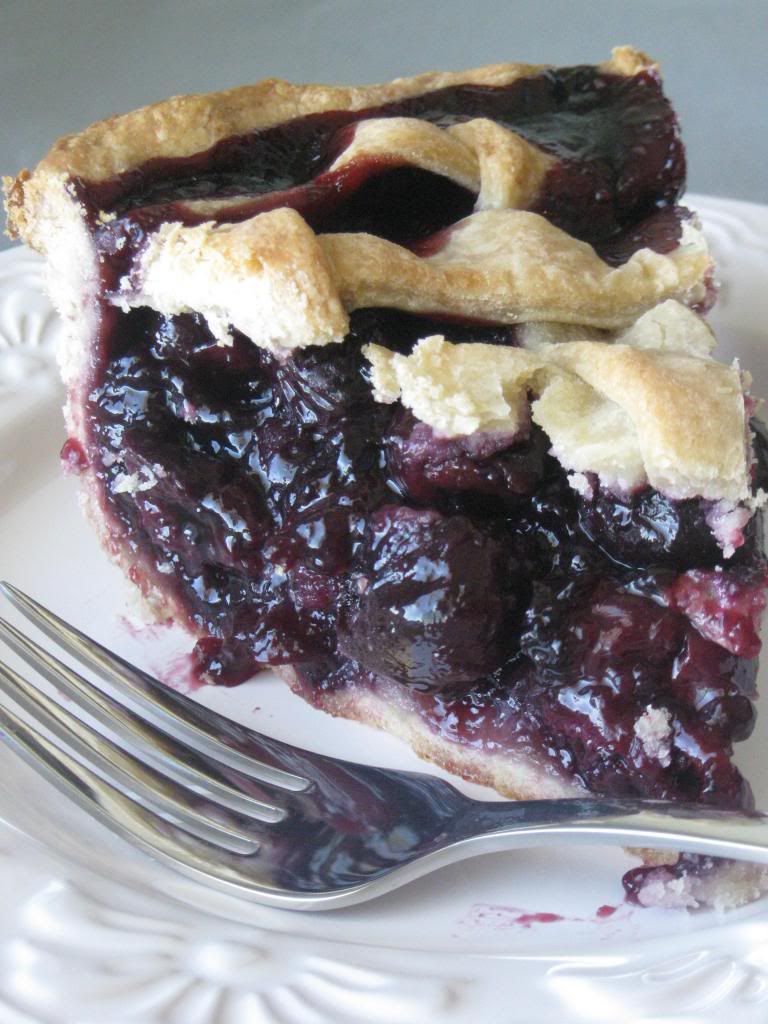
Fresh Bing Cherry Pie
In researching a recipe for this pie on the internet, I can't tell you how many "Ba Da Bing" cherry pies I came across. It made me a little depressed, I have to say. It just seems so corny. So, on to this pie. I thought it would be a great idea to buy 11 pounds of cherries since they were such a good price, and they are never a good price where I live. Did I mention that I don't have a cherry pitter? And that 11 pounds of cherries is a lot? And that I will never again buy that many cherries? Ever. At least I got a fabulous pie out of the deal! P.S. if you don't have a cherry pitter, you could do like me and use a bottle with a small opening and a sturdy plastic straw. Place the cherry on top of the bottle opening and push the straw through. The pit will fall nicely into the bottle, and you (along with everything in your kitchen in a 3 foot radius) will be sprayed and splattered with cherry juice. 11 pounds of messy fun!
Fresh Bing Cherry Pie
9 inch double crust pie crust (this one is my favorite)
6 cups (about 2 pounds pitted) fresh bing cherries, pitted
2 Tablespoons quick cooking tapioca
2 Tablespoons cornstarch
1/4 teaspoon salt
1/4 teaspoon almond extract
1/2 teaspoon vanilla extract
In a large bowl, mix together the cherries, tapioca, cornstarch, salt, almond extract, and vanilla extract. Stir until well combined. Place in the refrigerator for about 30 minutes.
Preheat the oven to 400F. Roll out the bottom crust and place inside a 9 inch pie plate. Pour the cherry filling into the bottom crust. Roll out the top crust and place on top of the cherry filling (or make a lattice crust), cutting slits in the dough to let the steam escape.
Place the pie in the preheated oven and bake for about 1 hour, or until the filling is bubbly in the center of the pie. If the crust gets too brown, cover loosely with a piece of tin foil. Makes 8 servings.
Enjoy! -Cardamommy
Subscribe to:
Comments
(
Atom
)
