Showing posts with label Main Dish. Show all posts

Friday, March 27, 2015

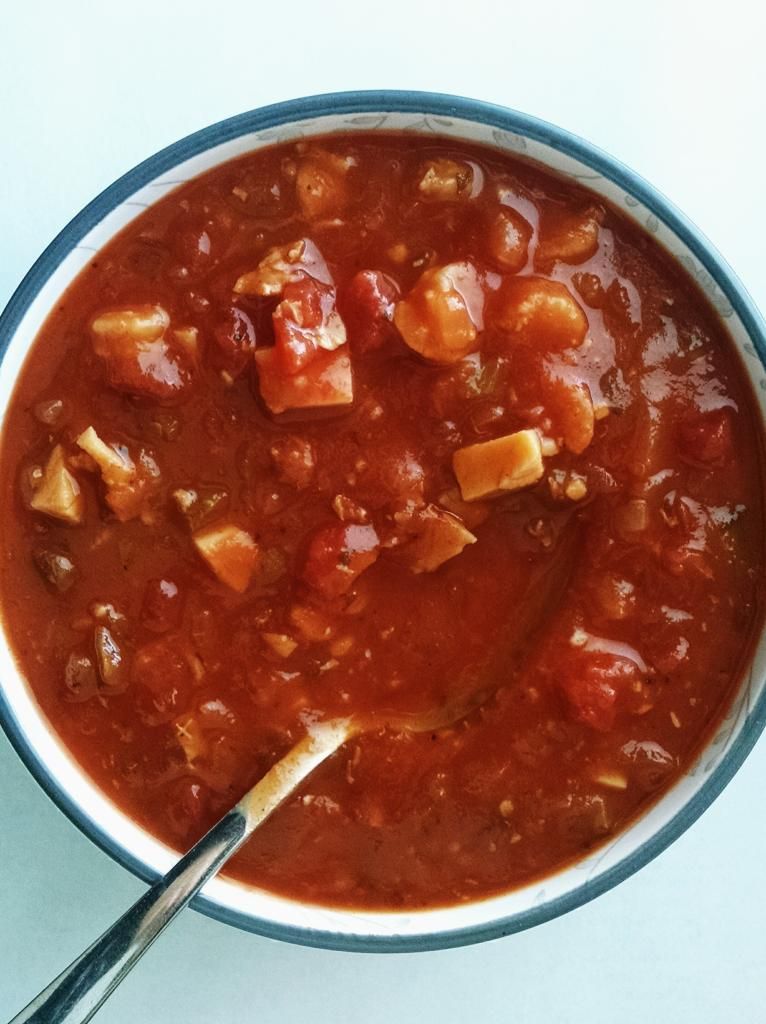
Tomato Seafood Soup


I found this recipe in a teeny tiny little notepad that was tucked deep in the recesses of my cookbook bookcase.  I remember handwriting the recipe years ago, and then never making this soup.  I decided that I needed to make it immediately.  This soup is simple to put together and doesn't take too much time.  And it is really yummy!  I was totally worried that my Hungry Puppies would not like it at all, but they surprised me when they said that they loved it!  Win!


Tomato Seafood Soup

½ cup chopped onion
½ cup chopped green pepper
½ teaspoon minced garlic
1 Tablespoon olive oil
1 can diced tomatoes
1 jar (14 ounces) spaghetti sauce
1 cup salsa
1 1/4 cup chicken broth
3 teaspoons dried parsley
1/2  teaspoon pepper
¼ teaspoon dried oregano
12 ounces frozen uncooked shrimp, thawed, peeled, deveined (or use cooked, and add immediately before serving)
8 ounces imitation crab meat, chopped
1 can (6.5 ounces) minced clams, undrained


In a large pot, sautee the onion, pepper, and garlic in oil until tender.  Stir in the tomatoes, spaghetti sauce, salsa, broth, parsley, pepper, and oregano.  Bring to a boil, then reduce heat, cover, and simmer for 20 minutes.  Add the seafood, cover and simmer 5 to 7 minutes or until shrimp are done.  Makes 8 servings.

Enjoy!  -Cardamommy

Friday, November 29, 2013

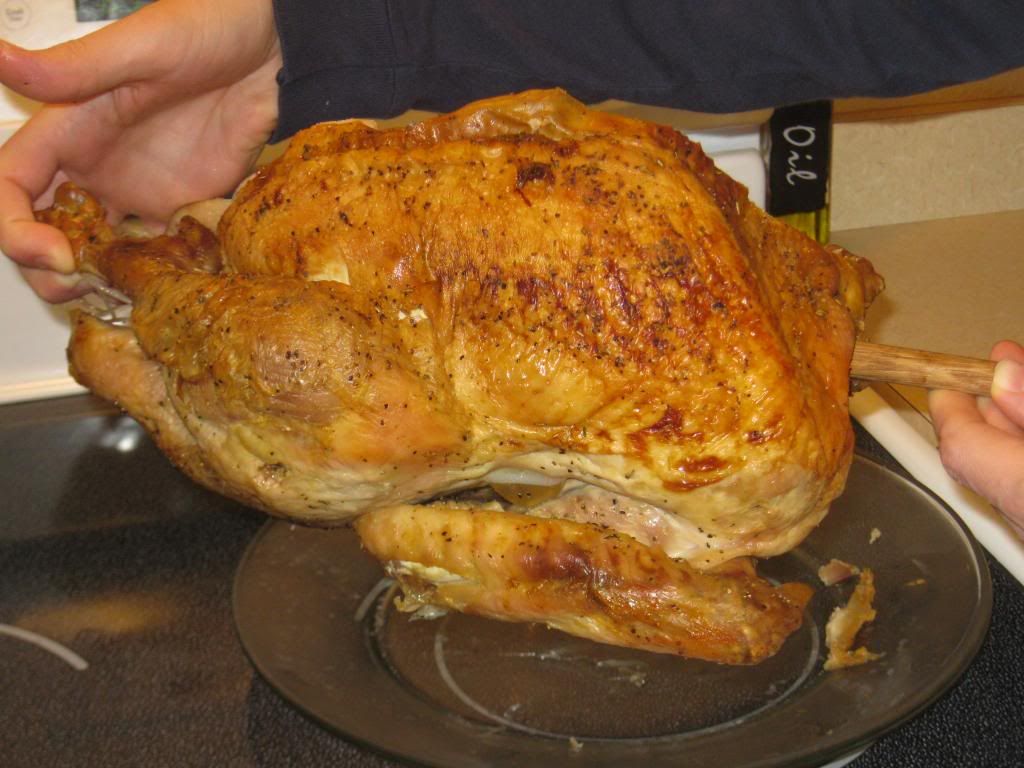
Flipping the Bird


I had a great idea for roasting our turkey this year.  If you have to turn over your turkey midway through the roasting process, you've probably found that it can be exceedingly difficult, hot, awkward, and messy.  I had my husband go to the hardware store and get a 1/2 inch in diameter wooden dowel.  We cut it down so that it would be just long enough to fit in our roasting pan.  Then, I stuck it through the large opening of the turkey cavity, and out the other side, giving you essentially a turkey on a stick.  The stick makes it so much easier to flip the bird!  When it's time, simply grab and lift the two protruding ends of the dowel, and spin the turkey 180 degrees and set back down in the roasting pan to finish roasting.  Our turkey came out absolutely perfectly this year!

Enjoy!  -Cardamommy

Monday, March 4, 2013

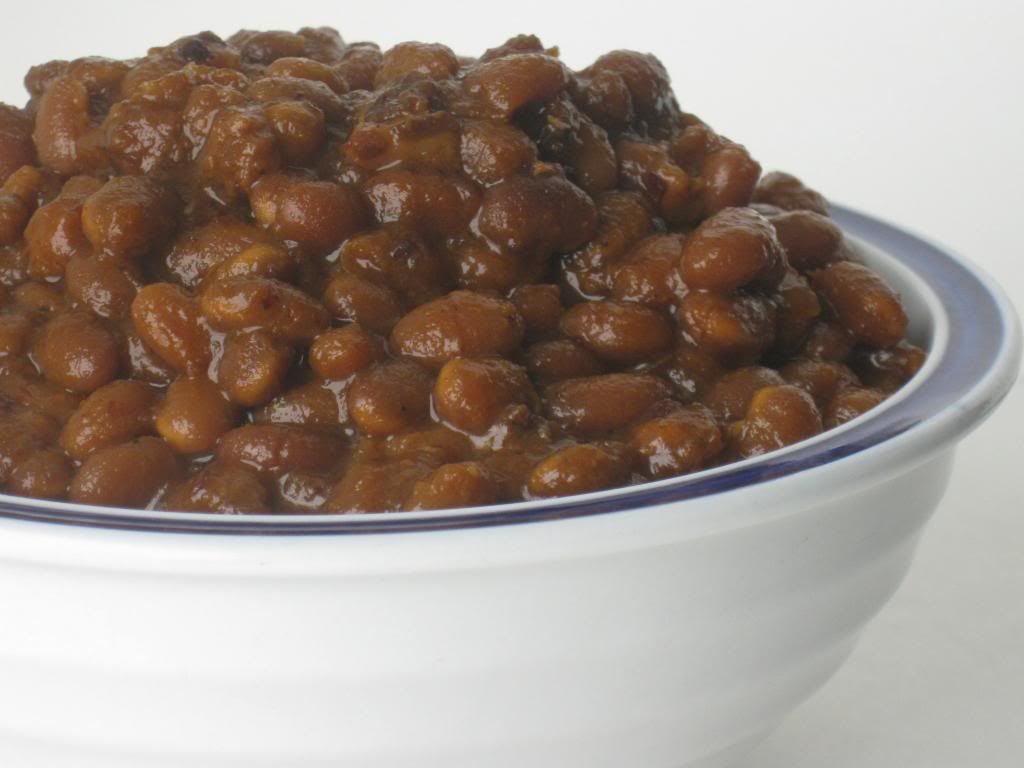
Slow Cooker Baked Beans


I really like baked beans, and have been looking for a slow cooker baked bean recipe for forever.  Forever.  I wanted a recipe that was made from scratch...no canned or prepared beans involved.  I found this recipe on Chow.com, and I love it.  It uses dried beans, which means you have to soak them, so the preparation takes a bit longer, but it is worth it.  I changed just a couple of minor things from the original recipe, and I absolutely love the result.  You could also easily change up the flavors.  Want sweeter baked beans?  Increase the brown sugar just a bit.  Or try substituting dark beer or bourbon for some of the water.  Add some chipotle chiles (or chipotle chile powder) for a little extra kick.  You can totally make these beans your own.

Slow Cooker Baked Beans


1 pound dried navy beans
Water for soaking the beans
8 ounces thick-cut bacon slices (about 6 slices), cooked and diced
1 medium yellow onion, chopped
2 1/2 cups water
1/2 cup ketchup
1/4 cup dark molasses
1/4 cup packed brown sugar
1 tablespoon cider vinegar
1 tablespoon Dijon mustard
1 1/2 teaspoons kosher salt
1/2 teaspoon freshly ground black pepper
1/8 teaspoon ground cloves

Pour beans onto the counter (a little at a time) and pick out any rocks or stones.  Place the picked through beans in a large bowl.  Fill the bowl with cold water about 3 inches over the beans.  Allow the beans to soak uncovered at room temperature for at least 8 hours, or overnight.  Drain the beans.

Place the beans, bacon, onion, and 2 1/2 cups of water in the slow cooker.  In a medium bowl, whisk together the ketchup, molasses, brown sugar, vinegar, mustard, salt, black pepper, and cloves.   Pour the ketchup mixture into the slow cooker and stir until well combined.  Cover the slow cooker and cook on low heat for about 12 hours or high heat for about 6 hours, until the beans are tender.  Liquid will thicken as it cools.

Enjoy!  -Cardamommy

Monday, February 25, 2013

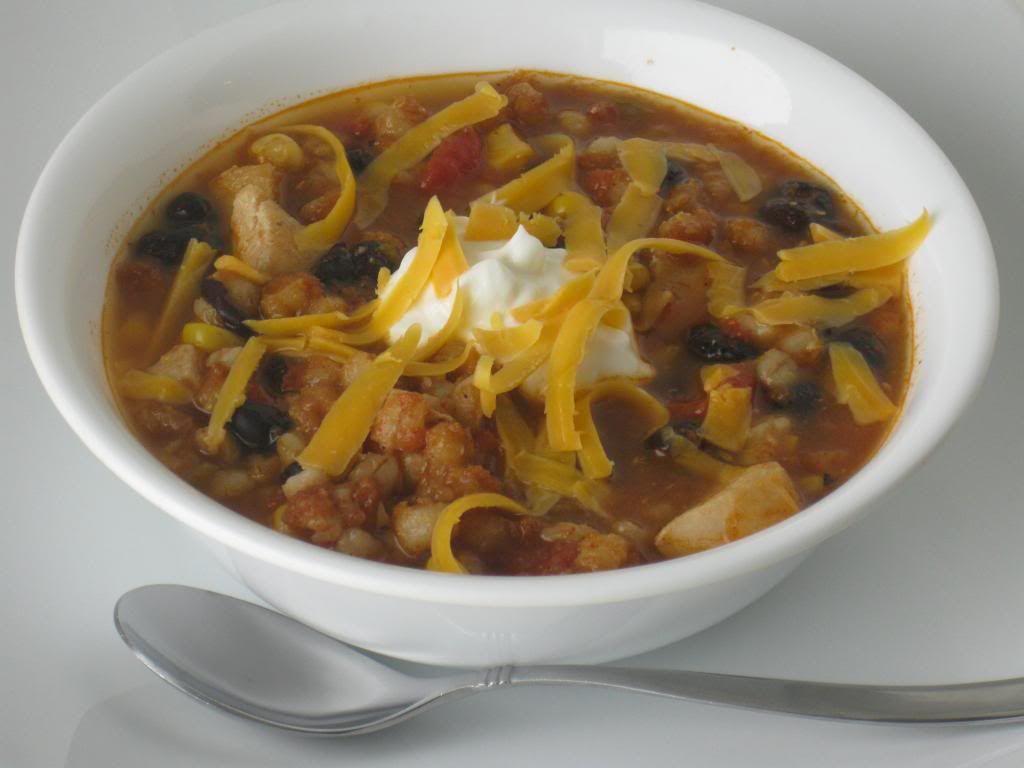
Chicken Barley Chili


I have another soup for you today.  Well, chili actually.  I love this hearty and delicious chili.  It is a little bit different than your normal chili because this one has barley in it.  I actually found this recipe on the back of the barley box.  I love it!  I love the slightly firm but chewy texture that the barley gives.  It might sound odd, but it works extremely well.  An added bonus, is that this is a very healthy chili and is not high calorie (as long as you watch the sour cream and cheese garnish!).  I also think that this combination would be good in a white chili.  Something to think about for the next time I make this.

Chicken and Barley Chili

4 cups water
1 (14 ounce) can diced tomatoes, undrained
1 (14 ounce) can chicken broth
1 (16 ounce) jar salsa (Chipotle is delicious)
1 cup Medium Barley
1 Tablespoon chili powder
1 teaspoon cumin
1 (15 ounce) can black beans, drained
1 (15 ounce) can whole kernel corn, undrained
3 cups (about 1 ½ lbs) chopped cooked chicken breast
Sour cream, for topping, if desired
Shredded cheese, for topping, if desired

In a 6 quart saucepan combine the water, tomatoes, chicken broth, salsa, barley, chili powder, and cumin. Bring to a boil over high heat, then cover and reduce heat to low. Simmer for 40 minutes, stirring occasionally. Add the beans, corn, and chicken. Increase the heat to high until the chili comes to a boil. Cover and reduce heat to low. Simmer for an additional 5 minutes, or until heated through and barley is tender.  Serve with sour cream and shredded cheese, if desired.  Makes about 11 cups.

Enjoy!  -Cardamommy

Friday, January 18, 2013

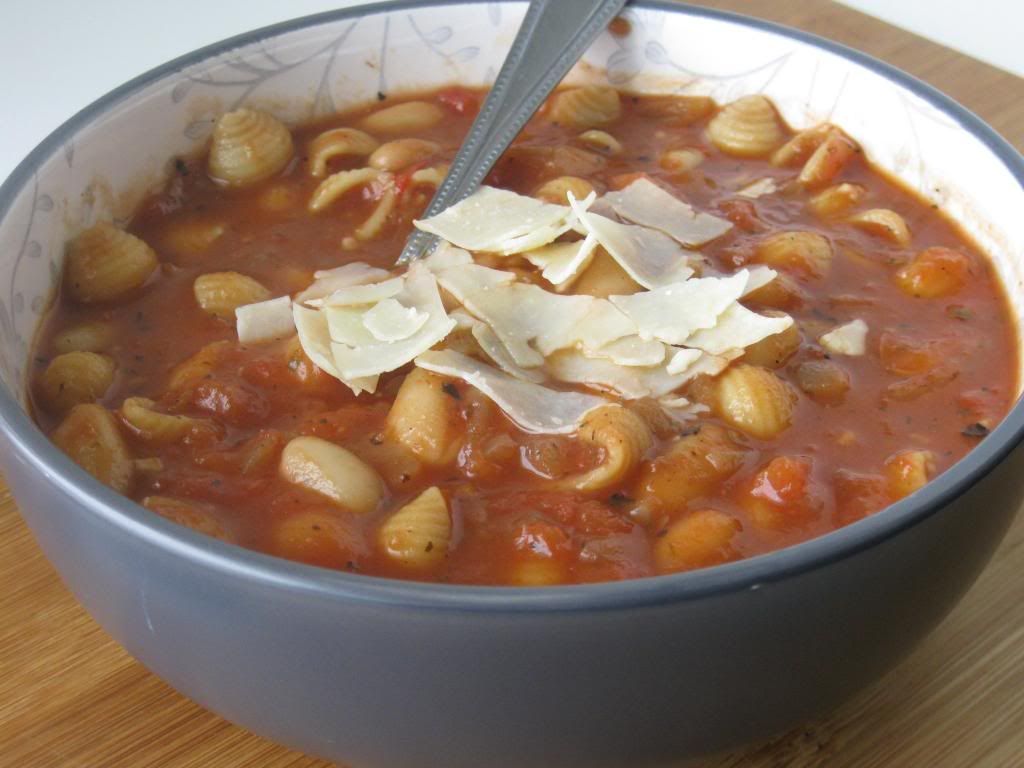
Pasta Bean Soup


I am not the best soup maker of all time.  In fact, I am a little bit intimidated by soup.  I think that is because I rarely make soup.  Rarely ever make soup.  This is sort of problematic because my family frequently desires soup for dinner, and I have had a couple of unfortunate fails.  As such, I have decided to expand my soup repertoire by making soup for dinner one night every week.  This is a pasta bean soup from Taste of Home.  It is hearty and delicious.  You can adjust the spice by adding more or less chipotles.

Pasta Bean Soup

1 Tablespoon olive oil
1 large onion, chopped
3 garlic cloves, minced
2 cans (14.5 ounces each) chicken broth (about 4 cups)
3/4 cup uncooked small pasta shells
2 teaspoons granulated sugar
1 1/2 teaspoons Italian seasoning
1 to 2 chipotle chiles in adobo sauce, chopped
2 cans (15 ounces each) white kidney beans, drained
1 can (28 ounces) crushed tomatoes
Parmesan cheese, shredded or shaved, for garnish if desired


In a large saucepan or dutch oven, saute the onion and garlic in the olive oil until translucent.  Add the chicken broth, pasta, sugar, Italian seasoning, and chopped chipotle chilis.  Bring to a boil, then reduce heat and simmer uncovered for 15 minutes, or until pasta is tender.  Stir in the white beans and crushed tomatoes.  Continue cooking until heated through.  Serve sprinkled with Parmesan cheese.  Makes 6 servings.

Enjoy!  -Cardamommy

Monday, September 17, 2012

Cavatini


This is a delicious dish that my Mom first made for us years ago.  It is a simple and hearty dish, and tastes wonderful.  My Hungry Puppies loved this meal, and I am relatively certain that it will be making the dinner request list frequently.

Cavatini

8 ounces Rigatoni
1 pound ground beef
1 onion, chopped
3 ounces pepperoni
4 ounces Velveeta cheese, diced
2 cups spaghetti sauce
1/2 cup sliced black olives
1 cup shredded mozzarella cheese

Preheat the oven to 350F.  Grease an 8x11 baking dish.  Set aside.

Cook the rigatoni according to package directions.

While the pasta is cooking, in a large saucepan, cook the ground beef and chopped onion together until the beef is browned and the onion is translucent.  Add the pepperoni and diced cheese and stir together until the cheese starts to melt.  Add the spaghetti sauce and stir in the olives.  Bring to a simmer, stirring frequently.  

Drain the cooked rigatoni and add the pasta to the sauce.  Stir together until well combined, then transfer to the prepared baking dish.  Sprinkle the mozzarella cheese on top of the pasta.  Bake uncovered for about 30 minutes.  Makes about 4 servings.

Enjoy!  -Cardamommy

Wednesday, August 22, 2012

Mexican Pizza


I have a great pizza recipe for you!  This was another absolute hit at my house the other night.  Beans, seasoned ground beef, Mexican cheese, lettuce and tomato make give this pizza a delicious Mexican flavor.  My oldest hungry puppy said that this Mexican pizza was better than the one she had at our favorite Mexican restaurant!  High praise, indeed!  

Mexican Pizza
Pizza dough (homemade like this one, or store bought)
1 pound ground beef
1/2 teaspoon chili powder
1 to 2 Tablespoons taco seasoning
1/2 cup water
1 can (15 ounces) pinto beans
8 ounces Mexican melting cheese, shredded ( I used La Morenita Authentic Mexican Melting Cheese)
Shredded lettuce
Chopped tomato

Preheat the oven to 425F.  Grease a pizza pan.  Set aside.

Brown the ground beef.  Drain off any grease, then stir in the chili powder, taco seasoning, and water.  Simmer over medium-low heat until the water has almost cooked away.  Meanwhile, mash the pinto beans.

Roll out the pizza dough to fit the prepared pan.  Spread the beans over the unbaked crust.  Spoon the meat over the beans.  Sprinkle the cheese over the pizza and bake for about 15 to 20 minutes, or until the crust is golden and the cheese is melted and bubbly.  
Remove the pizza from the oven and sprinkle the lettuce and tomato over the top. Makes 1 pizza, about 8 slices.

Enjoy!  -Cardamommy

Monday, June 18, 2012

Chicken Alfredo Pizza with Mushrooms and Bleu Cheese


I love to make pizza at home. It is so fun and versatile and delicious!  My youngest Hungry Puppy is on a bit of a red sauce strike, so I decided to do an alfredo pizza this time.  I haven't made one of these in several years, so it was definitely about time!  I made a simple alfredo sauce to spread over the crust, then topped it with chicken, bacon, fresh mushrooms, tomatoes, and three types of cheese.  The secret ingredient?  Bleu cheese!  It gave the pizza an incredible burst of flavor that fit perfectly, yet was unexpected.  By far the new favorite pizza in my family.


Chicken Alfredo Pizza with Mushrooms and Bleu Cheese


Pizza dough for 1 pizza (I used about 12 ounces, but use more if you like a thicker crust)


2 Tablespoons butter
2 Tablespoons flour
3/4 cup milk
1/2 teaspoon chicken bouillon granules
1/3 cup parmesan cheese


8 ounces boneless skinless chicken breast, cut into 1/2 to 1 inch cubes
1/2 teaspoon lemon pepper seasoning
8 ounces fresh mushrooms
8 slices bacon, cooked and crumbled
1/2 cup mozzarella cheese, shredded
1/2 cup colby jack cheese, shredded
1/4 cup bleu cheese
2 roma tomatoes, diced


Preheat the oven to 375F.  Roll out the pizza dough and place on a lightly greased pizza pan.  Set aside.


In a small saucepan over medium heat, melt the butter and stir in the flour.  Slowly add the milk, whisking constantly to prevent lumps from forming.  Add the bouillon granules and continue to cook, stirring constantly until the mixture is thick and bubbly.  Remove the pan from the heat and stir in the parmesan cheese.  Set aside.


Sprinkle the lemon pepper seasoning over the chicken and brown the chicken in a pan on the stovetop.  Place the cooked chicken in a bowl.  Cook the mushrooms in the same pan until they are cooked slightly and still firm.


Spread the alfredo sauce over the rolled out pizza dough.  Place the chicken, mushrooms, and bacon evenly over the pizza.  Sprinkle with the mozzarella, colby jack, and bleu cheeses.  Bake for about 20 minutes, or until the cheese is melted and the crust is very lightly browned.  Remove the pizza from the oven and sprinkle the tomatoes over the top.  Place the pizza back in the oven for about 5 minutes.  Remove pizza from the oven and let sit for about 5 minutes before slicing. 


Enjoy!  -Cardamommy

Monday, May 28, 2012

Rueben Loaf


Rueben sandwiches are one of my most favorite things to eat. Using her freshly-baked rye bread and homemade sauerkraut, my mom used to cook up these sandwiches and serve them to us fresh off the griddle. The only down side was that the toasted bread would rip up the top of your mouth a little bit. But it was so good that a little pain was definitely worth it. This version of a rueben sandwich is much faster than cooking individual sandwiches, and the outside of the bread stays so you can fully enjoy your meal, injury free! The only thing I will change for next time, is I will use a rye bread dough rather than a plain pizza dough.

1 Recipe Pizza Dough (use your favorite recipe, or this one will work)
8-10 oz Corned Beef, thinly sliced
3 T Thousand Island Dressing
1 C Sauerkraut (drained)
4 oz Swiss Cheese, thinly sliced
1 Egg White
Fennel Seeds

Spray a large baking sheet with non-stick spray. Roll dough out into a long oval shape on the pan (should cover the majority of the sheet).

Spread dressing over the dough, keeping away from the edges by at least 1.5 inches. Then spread your corned beef on top of the dressing, followed by the sauerkraut, followed by the cheese.

Cut edges of dough diagonally into 1.5 in strips.

Pull the strips of dough up and over the middle of the cheese. The two opposite sides of the dough should overlap.

Brush with egg and sprinkle with fennel seeds.

Bake at 375 for 20 minutes, or until golden brown.

Mahlzeit!
-Coriaunty


Monday, March 26, 2012

Chicken Salad


This chicken salad is so delicious, you might be struck speechless.  I think I was a little bit.  It  is perfect as a side dish, sandwich, wrap, croissant, on a bed of lettuce, or any other way you might like to eat it (like straight out of the bowl...is that weird?).


This recipe is fully of hearty healthy ingredients.  Chicken, celery, cashews, craisins, wheat berries...wheat berries?  What the heck?  Trust me!  I too was a little bit skeptical, but I'm an adventurous kind of girl, so what the heck.  The wheat berries add a unique nutty flavor to the salad, but aren't overpowering.  Absolutely delightful!


Chicken Salad


1 cup uncooked wheat berries
3 cups cooked chopped chicken (fresh or canned)
1 cup (about 3 stalks) celery, finely diced
1 teaspoon dried parsley
1/2 cup dried cranberries
1/2 cup cashews, roughly chopped
1/2 cup shredded parmesan cheese
1/2 cup low fat sour cream
1/2 cup low fat mayonnaise
Garlic salt and pepper to taste


Sort through the wheat berries, removing any rocks you may find.  Place the wheat berries in a small saucepan and add 3 to 4 cups of water.  Bring the wheat berries to a boil, then reduce heat to low and simmer, covered for about 1 hour.  Drain any excess water, then set cooked wheat berries aside and let cool to room temperature.


In a large bowl, combine the chicken, celery, parsley, cranberries, cashews, parmesan cheese, and wheat berries.  In a small bowl, stir together the sour cream, mayonnaise, and garlic salt and pepper to taste.  Pour the sour cream mixture over the chicken  mixture and toss together until combined.  Cover the bowl and place in the refrigerator for 1 to 2 hours until chicken salad is chilled.  Serve on croissants, sandwiches, wraps, lettuce, or by itself. Makes 6 to 8 servings.


Enjoy!  -Cardamommy

Friday, March 2, 2012

Chicken and Black Bean Burritos


These simple burritos are full of hearty ingredients tucked inside a soft-crispy tortilla.  They are a fun spin on regular soft burritos or wraps.  You can serve them either warm or cold, whatever strikes your fancy.  If you want to serve them warm, simply warm the filling in the microwave before filling the tortillas, as cooking them in the pan will  not heat them all the way through.


Chicken and Black Bean Burritos


1 cup cooked rice
1 boneless skinless chicken breast, cooked and shredded
1 can black beans, rinsed and drained
1 small can sliced olives
1/2 teaspoon chili powder
1/4 teaspoon garlic salt
1/4 to 1/2 cup salsa
2 cups (8 ounces) shredded cheese (cheddar, monteray jack, colby jack)
6 Tablespoons sour cream
6 burrito size flour tortillas


In a large bowl, combine the rice, shredded chicken, black beans, olives, chili powder, salt, and salsa.  Stir together until well combined.  Warm the chicken mixture gently in the microwave until it is heated through.  Spread each tortilla with 1 tablespoon of sour cream.  Sprinkle cheese over the sour cream, then spoon the chicken  mixture down the center of each tortilla.  Roll up each tortilla, tucking in the ends.  


Place 2 burritos in a large skillet or on a griddle over medium-high heat.  Cook for 2 to 3 minutes on each side, or until the tortilla is golden brown and crispy.  Makes 6 burritos.


Enjoy!  -Cardamommy

Thursday, February 23, 2012

Pasta E Ceci Soup


I'm not really one for soup.  I don't know exactly what it is, but if I have the option I will opt not for soup.  This one, however, I think will be opted for.  More than once.  It is hearty and delicious.  Pasta, carrots, and chickpeas and a hint of rosemary and thyme topped with some grated parmesan cheese unite to create a wonderful dish. Adapted from Williams-Sonoma.


Pasta E Ceci Soup


3 Tablespoons extra-virgin olive oil
3 carrots, finely diced
1 large white onion, finely diced
1 teaspoon minced garlic
1/3 cup diced tomatoes
1 1/4 cups dried chickpeas, soaked in water overnight, drained, then rinsed
6 cups water
1/4 teaspoon dried rosemary
1/4 teaspoon dried thyme
1/2 pound ditalini pasta, cooked and drained
Salt and Pepper to taste
Grated parmesan cheese for serving


In a 3 -4 quart stockpot or dutch oven over medium heat, warm the olive oil.  Add the carrots and onions and cook, stirring occasionally, for about 8 minutes until soft.  Stir in the garlic and tomatoes and cook 1 more minute.  Add the chickpeas, water, rosemary, and thyme.  Increase the heat to medium high and bring to a boil.  Reduce the heat and simmer, uncovered, for about 1 hour, or until chickpeas are tender.


Strain the chickpea mixture through a colander, reserving the cooking liquid.  Place 2 cups of the chickpea mixture in a bowl or food processor and mash or blend until almost smooth. 


Return the the chickpea mixture, mashed chickpea mixture and cooking liquid to the dutch oven.  Bring to a boil, then add the ditalini pasta.  Season with salt and pepper to taste.  Ladle into bowls and top with grated parmesan cheese.  Makes 4 to 6 servings.


Enjoy!  -Cardamommy

Friday, February 17, 2012

Slow Cooker Pulled Pork


It is incredibly easy to have a "go to" recipe if you only have one recipe.  This pulled pork recipe was the first that I ever tried.  I have never tried another.  It is so simple and so delicious that you might be a little skeptical until you try it for yourself.  

Slow Cooker Pulled Pork

5 to 6 pound pork shoulder or pork butt
1 to 2 red onions, thinly sliced

Barbecue Sauce:
1 cup ketchup
2/3 cup apple cider vinegar
1/2 cup brown sugar
1 can (6 ounces) tomato paste
3 Tablespoons Worcestershire sauce
3 Tablespoons coarse ground mustard
2 teaspoons paprika
2 teaspoons garlic powder
1/4 teaspoon chipotle chili powder
1 teaspoon salt
1 teaspoon black pepper

In a medium size bowl, whisk together all of the barbecue sauce ingredients until well blended.  Set aside.

Place the sliced onions in a 6 quart slow cooker.  Trim any excess fat off of the pork, then place the pork on top of the onions in the slow cooker.  Pour about 1/4 of the barbecue sauce over the pork, reserving the remaining sauce for later.  Cover the slow cooker and turn on low.  Cook the pork on low for 8 hours.  

Remove the pork from the slow cooker.  Shred the cooked pork with two forks.  If there is a lot of juice left in the slow cooker, remove it until there is about an inch of juice left in the bottom.  Transfer shredded pork back to the slow cooker.  Stir the reserved barbecue sauce into the pulled pork.  If the pulled pork seems too dry, add some of the extra juice back into the pulled pork.  Note:  This dish freezes very well.  Simply place any leftovers in resealable freezer containers and store in the freezer until ready to use.

Enjoy!  -Cardamommy

Wednesday, February 1, 2012

Cheeseburger Macaroni


This quick and delicious dinner dish has quickly risen to the top of the favorites list at my house.  I have actually lost count of the number of times I have made this recently.  My hungry puppies will inhale this dinner.  I occasionally have to remind them to chew.  


The style of this recipe actually reminds me of something that you would find in a box and add a pound of ground beef and some water.  This, however, is completely home made and delicious!  You can adjust the spice to your taste.  I like to add chipotle chili powder.  Be careful with the salt, however, as not much extra is needed.  Ground beef and tomatoes with pasta with a luscious cheese sauce stirred in...this will undoubtedly become a weeknight staple in your house too.  Original recipe found here.


Cheeseburger Macaroni
1 pound ground beef
1 package (1.25 ounces) taco seasoning
1 can (14.5 ounces) diced tomatoes (with or without green chilies)
1 1/4 cups beef broth
1 cup elbow macaroni noodles


Cheese Sauce:
2 Tablespoons butter
3 Tablespoons flour
3/4 cup milk
1 cup (4 ounces) shredded cheddar cheese, or cubed velveeta
salt and pepper to taste


In a large saucepan, brown and drain the ground beef.  Stir in the taco seasoning, diced tomatoes, beef broth, and macaroni.  Bring to a boil, then reduce heat to low and cover the pan.  Simmer for about 14 minutes or until the macaroni is tender.


While the macaroni is cooking, melt the butter in a small saucepan.  Whisk in the flour until smooth.  Slowly add the milk, whisking constantly to prevent lumps, and bring mixture to a boil.  Remove from the heat and add the cheese. Whisk until completely melted and smooth.  Add salt and pepper to taste.  


When the macaroni mixture is done cooking, pour in the cheese sauce and stir to combine.  Makes about 4 servings.


Enjoy!  -Cardamommy

Monday, January 23, 2012

Roman-Style Meatballs


I don't often make meatballs, but decided to try this recipe out.  It was definitely worth it.  These meatballs are bursting with flavor, and not overpowered by the simple tomato sauce.  This dish pairs well with Gnocchi alla Romana.


Roman-Style Meatballs


1 1/2 cups breadcrumbs
1/2 cup milk
4 ounces finely chopped prosciutto
1 pound ground beef
1 pound ground pork
2 eggs, lightly beaten
1/2 cup grated parmesan cheese
2 teaspoons dried parsley
3/4 teaspoon dried oregano
6 teaspoons dried basil
5 garlic cloves, minced, divided
1 teaspoon kosher salt
1/2 teaspoon fresh ground pepper
5 Tablespoons olive oil, divided
1 yellow onion, diced
1 can (28 ounces) crushed tomatoes


In a small bowl, combine the breadcrumbs and milk.  Set aside.  In a large bowl, combine the prosciutto, ground beef, ground pork, eggs, cheese, parsley, oregano, 3 teaspoons basil, 3 minced garlic cloves, salt and pepper.  Add the milk and breadcrumb mixture, then mix gently until combined.


Divide the meatballs into 1/4 cup portions.  Roll into balls and set aside on a baking sheet. In a large skillet, heat 2 tablespoons of oil.  Add the meatballs (in two batches) and brown on all sides, about 5 to 8 minutes per batch.  Transfer the meatballs to a clean baking sheet or plate.  


In the same pan as was used for the meatballs, heat the 3 remaining tablespoons of oil.  Cook the onion in the oil until softened.  Add the remaining 2 garlic cloves and cook about 1 minute.  Add the crushed tomatoes and remaining 3 teaspoons basil.  Season with salt and pepper to taste.  Bring the sauce to a simmer.  Add the meatballs and cook, turning occasionally, for about 30 minutes, or until cooked through.  Makes 6 to 8 servings.


Enjoy!  -Cardamommy

Wednesday, January 18, 2012

Gnocchi alla Romana


I started making my own gnocchi several years ago.  It is different, fun, and delicious.  So when I came across this recipe in an old Williams-Sonoma catalogue, I had to try it out.  This has actually been on my to make list for quite a long time.  This gnocchi is very much like polenta, but uses semolina flour.  And did I mention that is is delicious?  My youngest hungry puppy inhaled the scraps left over from cutting the rounds.  They were cold.  But she loved them.  This dish was an even bigger hit baked.


Gnocchi alla Romana


5 1/2 cups milk
2 cups semolina
2 teaspoons kosher salt (not table salt)
1 1/4 cups grated parmesan cheese, divided
2 egg yolks
6 Tablespoons (3/4 stick) butter, cut into cubes, plus 3 Tablespoons butter, melted


Spray a 9x13 inch pan with cooking spray, then line the bottom with parchment paper and spray again.  Set aside.


In a 4 quart saucepan over medium-high heat, bring the milk to a simmer.  Add the semolina in a steady stream, whisking constantly.  Reduce the heat to medium low and add the salt.  Continue whisking to prevent lumps from forming.  Cook and stir the semolina until it is thick,  about 10  minutes.  Remove from heat and stir in 3/4 cup cheese, the egg yolks, and 6 tablespoons butter.  Pour the semolina into the prepared pan and spread evenly.  Cover and refrigerate until firm, about 2 hours.


Preheat the oven to 425F.  Butter a 9 inch french skillet, pie plate, or baking dish.


Using a 2 1/2 inch round biscuit or cookie cutter, cut the gnocchi.  Arrange the gnocchi in the prepared pan so they are overlapping in a spiral fashion.  Brush the top of the gnocchi with the 3 tablespoons melted butter, then sprinkle with the remaining 1/2 cup cheese.  Bake for about 30 to 35 minutes or until the top is golden brown.  Let the gnocchi stand for about 10 minutes before serving.  Makes 6 to 8 servings.


Enjoy!  -Cardamommy

Monday, November 14, 2011

Pretzel Dogs


It is an exciting day at my house when I make these pretzel dogs.  They are such a fun food for my hungry puppies to enjoy, and me too for that matter!  Simply wrap hot dogs (or sausage for those of us who can't stomach hot dogs...) in pretzel dough, boil them, then bake them!  If you are wondering about boiling in baking soda water, it gives the pretzels that wonderful chewiness.  So delicious, and so easy to put together.  Paired with a vegetable side, this makes a perfect meal.


Pretzel Dogs


Dough:
3/4 cup warm water
1/2 Tablespoon sugar
1 teaspoon salt
1 1/2 teaspons yeast
2 1/4 cups all purpose flour
1 Tablespoon melted, cooled butter


4 hot dogs (or sausages) 
5 cups water
1/3 cup baking soda
Kosher salt


Combine the dough ingredients in your bread machine and set for a dough cycle, or combine the water, sugar, and salt in a bowl, and sprinkle the yeast on top.  Let stand for five minutes, then add the flour and butter, and mix and knead until the dough is shiny an elastic.  Place in a greased bowl, cover, and let rise for one hour.


Preheat oven to 450F.  In a non reactive saucepan, bring the water and baking soda to a boil.  While the water is heating, punch down the dough and divide into four pieces.  Roll each piece into a rope about 12 to 18 inches long.  Dry each hot dog (or sausage) with a paper towel (or the dough will not stick) and wrap a rope of dough around each hot dog, taking care to seal completely.


Boil each pretzel dog in the baking soda/water mixture for one minute.  Remove from the water and place on a greased baking sheet.  While the pretzel dogs are still wet, sprinkle with kosher salt.  Repeat with remaining pretzels.  Bake for about 14 minutes, or until a deep golden brown.  Makes 4 generous servings.


Enjoy!  -Cardamommy

Thursday, May 5, 2011

Gnocchi with Cheese Sauce


I have made gnocchi exactly two times in my entire life, and both were absolute successes.  The first time I made this, I used pesto to sauce it.  This time, I used my cheater mac and cheese sauce.  I wanted to do a cheese sauce, but I didn't want to overpower the flavor of the gnocchi, so the mild cheesy flavor was just the thing.  Don't be intimidated by the thought of making your own gnocchi.  It is not hard!  It doesn't take a ton of time either.  You may stress a little bit the first time you make these, but they are so delicious and simple that you will make them again and again without a second thought.  Gnocchi are definitely a hit at my house.  I think that my two year old hungry puppy ate more than I did.  I am lucky that she even ate anything else.  The original gnocchi recipe (with pesto) comes from King Arthur Flour (where else?).


Gnocchi with Cheese Sauce


Gnocchi:
1 1/3 cups (3 ounces) instant potato flakes
1 1/3 cups boiling water
2 large eggs
1 teaspoon salt
2 cups (8 1/2 ounces) all purpose flour


Cheese Sauce:
1 Tablespoon butter
2 Tablespoons sour cream
1 cup (4 ounces) shredded Italian blend cheese
Fresh ground pepper


In a large bowl, combine the instant potato flakes and boiling water, and stir until flakes are thoroughly moistened.  Stir in the eggs and salt, then add the flour to make a soft dough.  Lightly sprinkle your work surface with flour, then turn out the dough and knead it a few times until it is smooth.  Divide the dough into eight pieces.


Working with one piece at a time, roll the dough into a rope about 20 to 24 inches long.  The rope will be about the width of your thumb.  Using a bench knife, kitchen shears, or a knife, cut the rope into 1/2 to 3/4 inch pieces.  Using a fork, press down lightly on the gnocchi and roll towards you. This will produce the telltale grooves that are found in gnocchi.  Place the gnocchi on a piece of parchment or wax paper dusted with flour. Repeat with remaining gnocchi.  


To cook the gnocchi, bring a large, wide pot of water to a boil.  Add 1/2 teaspoon of salt to the water.  Carefully drop about half of the gnocchi into the boiling water.  Cook the gnocchi for about 4 minutes.  They will float to the surface after about 2 minutes, and should cook for 2 minutes longer once they have surfaced.  With a slotted spoon, remove the gnocchi from the water and place in a colander while you cook the second half of the gnocchi.  When the remaining gnocchi are finished cooking, pour them into the same colander to drain, discarding the water this time.  


In the same pan that you used to boil the gnocchi, melt the butter, then return the gnocchi to the pan and toss to coat with the butter.  Add the sour cream and stir until evenly distributed, then add the shredded cheese and toss lightly to coat.  Sprinkle with fresh ground pepper before serving.  Makes about 5 cups cooked gnocchi, 4 to 6 main dish servings.


Enjoy!  -Cardamommy

Saturday, March 19, 2011

Barbecue Shrimp with Cheesy Polenta


If you can believe this, I had actually forgotten just how good this dinner was.  Thankfully, I have rediscovered exactly how much I love it.  The polenta is so smooth and full of cheesy flavor, and the shrimp and homemade barbecue sauce go so nicely with the polenta.  Do you think it sounds weird?  Maybe it does, but it doesn't taste weird and since that is what matters, I think we're good.  I you prefer, you can also change out the polenta for grits instead, adding the butter and cheese as normal.

Barbecue Shrimp With Cheesy Polenta

1 recipe homemade Polenta (recipe to follow)
1 teaspoon butter
1/2 large onion, diced
1 cup frozen corn
1 recipe Honey Barbecue Sauce (recipe to follow) or use your favorite
12 ounces medium sized, precooked shrimp

In a large skillet, cook the onion in butter until tender, then add the corn and barbecue sauce.  Cook and stir until simmering, then quickly stir in shrimp and remove from heat.  Serve the barbecue shrimp over the cheesy polenta.

Enjoy!  -Cardamommy


Honey Barbecue Sauce
1 (8 ounce) can tomato sauce
2 Tablespoons brown sugar
2 Tablespoons honey
1 Tablespoon lemon juice
1 Tablespoon molasses
1 1/2 teaspoons Worcestershire sauce
1 1/2 teaspoons prepared mustard
1 garlic clove, minced
1/4 teaspoon dried oregano
1/4 teaspoon chili powder
1/8 teaspoon pepper

In a small saucepan, combine all ingredients.  Bring to a boil.  Serve.  Makes about 1 1/3 cups.


Cheesy Polenta 
1 cup cornmeal
1 cup cold water
1/2 teaspoon salt
2 Tablespoons butter
2 cups extra sharp cheddar cheese, shredded

In a saucepan, bring 2 3/4 cups water to a boil. Meanwhile, combine cornmeal, cold water, and salt in a small bowl. Carefully add cornmeal mixture into boiling water, stirring constantly. Cook and stir until mixture returns to a boil. Reduce heat to low and cook 10 to 15 minutes or until mixture is very thick, stirring occasionally. Add the butter and shredded cheese, and stir well.

Thursday, January 27, 2011

White Chili With Chile Cornbread


When I saw this recipe on the King Arthur Flour website, I knew that I had to try it out at my house for a couple of reasons.  One, King Arthur has almost never steered me wrong.  Two, my hungry puppies love chili, and if you know me, you know that I will do anything for my hungry puppies.  Including sorting through an entire 14 ounce tub of rainbow sprinkles (jimmies) to take out the pink ones.  Sure enough, this recipe was a huge (and I mean huge) success

This recipe consists of an incredible simple white chili placed in a baking dish and topped with green chile cornbread batter.  This is all baked in the oven for about 25 minutes, and you have a wonderful, warm, comforting meal ready to go.  I adapted this recipe from King Arthur Flour.

White Chili with Chile Cornbread

Chili:
1 Tablespoon olive oil
1/2 large onion, peeled and chopped
2 small carrots, peeled and sliced thinly
1 large chicken breast, chopped into small pieces
1 chipotle chile (in adobo sauce), chopped
1 can (14 ounces) whole kernel corn
1 can (4 1/2 ounces) chopped green chiles, undrained
1 can (15 ounces) white beans, or canellini beans, undrained
1 1/2 teaspoons ground cumin, or to taste
1/2 teaspoon garlic salt, or to taste
1/4 cup sour cream
1 cup grated cheddar or white cheddar cheese, for topping

Cornbread topping:
3/4 cup + 2 Tablespoons all purpose flour
1/2 cup yellow cornmeal
1 Tablespoon sugar
1 teaspoon baking powder
1/4 teaspoon baking soda
1/4 teaspoon salt
1/2 of a 4 1/2 ounce can chopped green chiles, drained
1/2 cup + 2 Tablespoons buttermilk
1/4 cup butter, melted and cooled
1 large egg

To make the chili, in a large frying pan or small dutch oven, heat the oil over medium heat.  Add the onions, carrots, and chicken, and cook until the vegetables are crisp tender and the chicken is no longer pink, about 10 minutes.  Add the chipotle chili, corn, and green chiles, stirring to combine.  

In a food processor or blender, place the beans with their liquid, and process until smooth. Add to the pan with the chicken and vegetables and stir to combine.  Stir in the cumin and garlic salt.  Simmer the chili for about 30 minutes, stirring frequently.

Meanwhile, preheat the oven to 375F, and begin making the cornbread topping.  In a medium bowl, combine the flour, cornmeal, sugar, baking powder, baking soda and salt.
In a small bowl, or large measuring cup, combine the butter and green chiles, then whisk in the egg and buttermilk.  Pour the liquid into the flour mixture and stir until just combined.

To finish the chili, stir in the sour cream, then transfer the chili to a greased 9 x 9 square baking dish.  Sprinkle the grated cheese evenly over the top of the chili, then spoon the cornbread batter over the top, spreading it evenly to the edges.  Bake for about 25 minutes, or until a toothpick inserted into the center of the cornbread comes out clean.  Remove from the oven and serve hot or warm.  Makes 4 to 5 servings.

Enjoy!  -Cardamommy
Related Posts Plugin for WordPress, Blogger...