Showing posts with label Frosting. Show all posts

Monday, July 18, 2016

Rainbow Layer Cake


My sister and her two kids have been staying with me for the last two weeks and it has been so fun to have them here.  My niece had her 4th birthday while she was here, so of course I had to make her a fabulous birthday cake!  I saw the idea for this cake, and figured it couldn't be too hard.  I've seen recipes making this cake from scratch, but I decided to use cake mixes.  Just for simplicity.  And for my sanity. Sometimes the two go hand in hand.  I prepared the mixes using a whole egg instead of just the egg white called for on the package, and I baked the cakes in a 9 inch round cake pan.  For the frosting, you can use home made or storebought.  I made my own frosting, and I'll tell you what.  It totally elevated this cake.  This cake was devoured in record time, and it was enormous.  When you look at the frosting recipe, don't panic.  It looks like a gigantic recipe.  And it kind of is.  But keep in mind that this is a gigantic cake.  Six layers people. We're talking cake for days weeks.  If you decide to use storebought frosting, you will need 3 cans of whichever flavor you want.  For the colorful licorice, I had some technical difficulty.  Originally, I placed the licorice at an angle and trimmed the tops, thinking that it would be not to hard to cut the cake at an angle to match the licorice.  I was wrong.  After reducing several pieces of cake to a giant pile of crumbs, I repositioned the licorice to be straight up and down, which made it no big deal to slice.  This cake looks amazing when decorated, and is so fun when you slice into it!

Rainbow Layer Cake

Cake:
Pillsbury Red Cake Mix Pouch (8.25 ounces)
Pillsbury Orange Cake Mix Pouch (8.25 ounces)
Pillsbury Yellow Cake Mix Pouch (8.25 ounces)
Pillsbury Green Cake Mix Pouch (8.25 ounces)
Pillsbury Blue Cake Mix Pouch (8.25 ounces)
Pillsbury Purple Cake Mix Pouch (8.25 ounces)
4 cups water, divided (2/3 cup for each cake mix)
1 1/2 cups oil, divided (1/4 cup for each cake mix)
6 eggs (1 for each cake mix)

Frosting:
3 sticks butter
1 1/2 cups vegetable shortening (preferably Crisco)
1/4 teaspoon salt
1 1/2 teaspoons lemon extract
1 1/2 teaspoons almond extract 
1 1/2 tablespoons meringue powder
3 pounds powdered sugar
4 tablespoon milk (optional)
3 packages of rainbow colored licorice
Gummy Bears
Rainbow Sprinkles


Preheat the oven to 350F.  Grease and flour 2 9 inch round cake pans.

For the cake, prepare the red cake mix using 2/3 cup water, 1/4 cup oil, and 1 egg.  Stir until well blended, then pour the batter into one of the prepared pans.  Repeat process with the orange cake mix, pouring the batter into the second prepared pan.  Bake the cakes in the preheated oven for 20 to 25 minutes, or until a toothpick inserted in the center comes out clean.   Cool for several minutes in the pan, then turn the cake out of the pan and let cool completely on a cooling rack.  Repeat the process with the yellow, green, blue, and purple cake mixes, regreasing and flouring the pans between uses.  Cool all of the cake layers completely.

For the frosting, cream together the butter, shortening, and salt in the bowl of a stand mixer. Add the lemon and almond extracts and beat until well blended. Turn off the mixer and add the meringue powder and half of the powdered sugar. Mix on low speed until blended. Mix in the remaining powdered sugar a little at a time, and scraping down the sides and bottom of the bowl, until all the sugar is mixed in. Turn the mixer up to medium and beat until smooth and creamy.  If the icing seems too thick to spread, beat in enough milk to reach the desired consistency.

To assemble the cake, level the cakes if necessary.  Spread a little bit of frosting on a serving plate to adhere the first layer to the plate.  Place the purple cake layer upside down on the plate.  Spread with a thin layer of frosting.  Place the blue cake layer upside down on top, and spread with a thin layer of frosting.  Repeat with the green layer, then the yellow layer, then the orange layer, then the red layer on the very top.  Spread frosting over the top and sides of the cake.  Press the licorice onto the sides of the cake, in the red, orange, yellow, green, blue, purple pattern until the entire circumference of the cake is covered with licorice.  Using kitchen shears, trim off the licorice that extends over the top of the cake.  Sprinkle the rainbow sprinkles over the top of the cake, and place the gummy bears around the top edge of the cake.  Makes 36 - 48 servings.

Enjoy!  -Cardamommy


Monday, July 11, 2016

White Cake with Lemon Curd and Mascarpone Frosting


This cake started with lemon curd.  I really really wanted to try this microwave lemon curd from King Arthur Flour.  So I did, and it worked out really well.  It was fairly quick and easy, and the flavor is super bright tart and lemony.  So then.  I have 2 cups of lemon curd in the fridge.  What to do.  We decided to make a cake.  Sort of by chance, I found a beautiful white cake recipe also on King Arthur Flour. It. Was. Incredible.  The batter was so smooth and satiny, I just knew it was going to bake up delightfully.  Instead of using vanilla extract, I used lemon with the almond and the flavor was really nice.  Not super almond, not super lemon, but a fantastic combination.  Finally, I topped this crazy cake off with some mascarpone frosting.  Enough said.  The tart lemon curd was a perfect compliment to the fluffy white cake and sweet and rich frosting.  Definitely a success! Note: You will need to make the lemon curd the day before you assemble the cake. 

White Cake with Lemon Curd and Mascarpone Frosting

Lemon Curd:
1 cup fresh lemon juice
1 cup granulated sugar
1/2 cup butter
2 eggs

White Cake:
2 3/4 cups (326g) cake flour
1 2/3 cup (333) granulated sugar 
1 Tablespoon baking powder
3/4 teaspoon salt
3/4 cup (12 Tablespoons, 170g) butter, room temperature
4 large egg whites
1 egg
1 cup (227g) full fat vanilla yogurt or 1 cup (227g) whole milk
1 teaspoon lemon extract
1 teaspoon almond extract

Mascarpone Frosting:
2 sticks butter, room temperature
8 ounces mascarpone cheese
1/2 teaspoon vanilla extract
1 vanilla bean, split and seeds scraped out
4 cups powdered sugar

For the lemon curd, combine the lemon juice, sugar, butter and eggs in an 8 cup glass bowl or measuring cup.  If you use a smaller bowl, your curd may boil over in the microwave.  Microwave in 1 minute increments, stirring the lemon curd well after each.  When the lemon curd thickens and coats the back of a spoon it is done.  The temperature should be at least 185F.  This will take between 4 and 10 minutes.  


Stir the lemon curd, transfer to a container with a lid and refrigerate until the curd is chilled and firm.Preheat the oven to 350F.  Grease and flour two 8-inch round cake pans.

Place the cake flour, sugar, baking powder, and salt in the bowl of a stand mixer and mix on low speed to blend.  Add the butter and mix until incorporated and the mixture looks like damp sand.  Beat in the egg whites, one at a time, beating well after each addition, followed by the whole egg, beating well until incorporated.  Make sure that you are scraping down the sides of the bowl as you go.

Combine the yogurt (or milk) and extracts in a small bowl.  Add one third of the mixture to the batter and beat for 1 to 2 minutes, scraping the sides and bottom of the bowl.  Add another third then beat for 1 to 2 minutes, followed by the remaining third and beat for 1 to 2 minutes.

Pour the batter into the prepared pans and smooth the tops.  Bake in the preheated oven for 25 to 30 minutes, or until a toothpick inserted in the center comes out clean.  Remove cakes from the oven and let cool for several minutes.  Turn the cakes out of the pans and cool completely on a cooling rack.

For the frosting, cream together the butter and mascarpone cheese until smooth.  Beat in the vanilla extract and vanilla bean seeds.  Beat in the powdered sugar, one cup at a time, until incorporated.  Continue to beat until light and fluffy.

To assemble the cake, trim the domes off the tops of the cakes if necessary.  Cut each cake layer in half horizontally, giving you 4 thinner cake layers.  Place one cake layer on a serving plate and spread about 1/3 cup of lemon curd on top.  Place the second cake layer on top.  Spread another 1/3 cup of lemon curd on top and place the third cake layer on top.  Spread another 1/3 of the lemon curd on top and place the final cake layer on top of the stack. You will have leftover lemon curd, just store it for another use.  Frost the top and sides of the cake with the mascarpone frosting.  Makes 16 servings.

Enjoy!  -Cardamommy

Friday, July 8, 2016

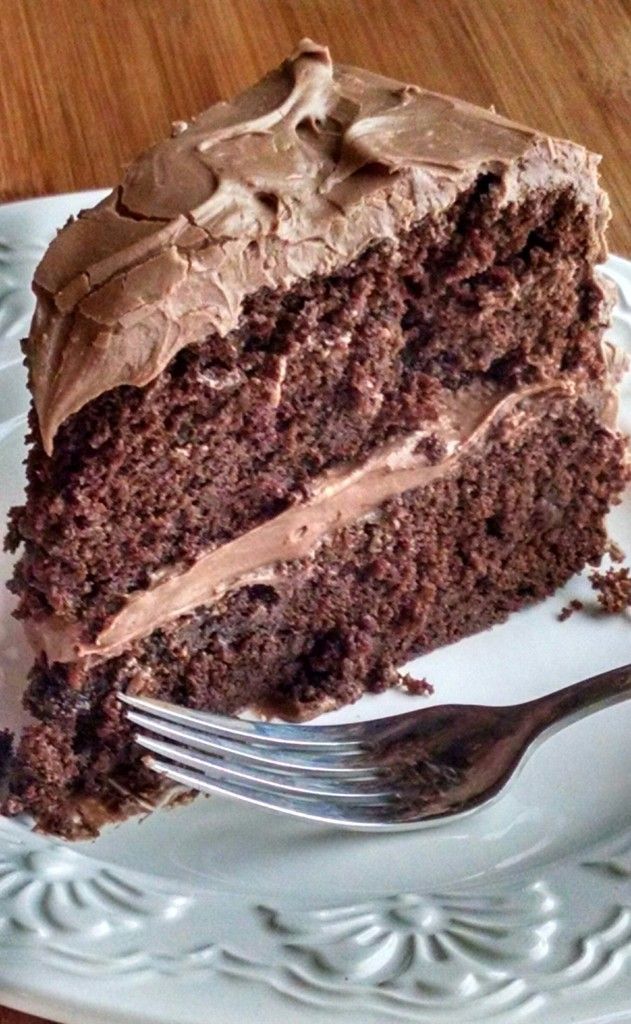
Chocolate Strawberry Cake


My older sister and I came up with the idea for this cake when I was out visiting her a couple of months ago. We made it quick version, and I loved it so much that I had to come home and make it again.  The best thing about this cake is that you can make it completely from scratch, or you can use a box mix and it is still super delicious!!  Sweet strawberry jam fills this super light and fudgy cake covered in chocolate strawberry frosting.

Chocolate Strawberry Cake

Chocolate Cake:
1 ½ ounces semi sweet chocolate chips                               
2/3 cup milk
2/3 cup hot water
2/3 cup mayonnaise
2 eggs
1 teaspoon vanilla extract
1 teaspoon coffee extract
1 ½ cups granulated sugar
1 ½ cups all purpose flour
2/3 cup cocoa powder
1 ½ teaspoons baking soda
¾ teaspoon baking powder
¾ teaspoon salt

Chocolate Strawberry Frosting:
1/2 cup butter, room temperature
1/2 cup shortening
1/2 teaspoon vanilla extract
1/2 teaspoon coffee extract
1/2 cup cocoa powder
4 cups powdered sugar

1/2 cup strawberry jam

1/2 cup strawberry jam, for assembly


Preheat the oven to 350F.  Grease 2 9-inch round cake pans and line the bottoms with parchment paper rounds.  Grease the parchment paper, set aside.

In a medium microwaveable bowl, combine the chocolate chips, and milk.  Heat in the microwave for about 1 minute, or until the milk is steaming, but not boiling.  Remove from the microwave and let sit for a minute or two.  Stir gently until combined, then add the hot water and set aside.

In a large bowl, or with a stand mixer, beat together the mayonnaise, eggs, vanilla, and sugar until well blended and smooth.  Add the flour, cocoa powder, baking soda, baking powder, salt, and the milk/chocolate mixture.  Beat together until combined and smooth. Divide the batter equally among the pans. 

Bake the cakes for 20 to 25 minutes, or until a toothpick inserted in the center comes out clean. Remove the cakes from the oven and place on cooling racks for about 10 to 15 minutes.  Turn out the cakes onto the cooling racks and peel the parchment paper off the bottoms of the cakes.  Let the cakes cool completely before frosting.

For the frosting, Cream together the butter, shortening, vanilla, and coffee extract.  Beat in the cocoa powder.  Gradually beat in the powdered sugar, one cup at a time, until incorporated.  Mixture will be very thick and a bit crumbly.  Add the strawberry jam and beat until incorporated and frosting is smooth.

Place one cake layer on a serving plate and spread the 1/2 cup of strawberry jam on top.  Place the second cake layer on top.  Frost the top and sides with the chocolate strawberry frosting.  Makes 16 servings.

Enjoy!  -Cardamommy
Friday, May 20, 2016

Birthday Cake Swig Sugar Cookies


So, I kind of got into the birthday cake groove with my Hungry Puppy's birthday recently.  I had the idea for these cookies, but it got voted down by the Birthday Girl.  So what did I do?  I made them anyway.  Because I'm like that.  I've done a few variations of these cookies before because my family loves them.  These also did not disappoint.  And the frosting. Be still my heart.  This recipe makes a super ton of cookies.  If you want bigger cookies, just use a 2 tablespoon size scoop and you'll get about 30-36.

Birthday Cake Swig Sugar Cookies

Birthday Cake Cookies:
1 cup (2 sticks) butter, room temperature
3/4 cup canola oil
1 1/4 cups granulated sugar
3/4 cup powdered sugar
1 teaspoon butter flavoring
1 teaspoon cream cheese flavoring
1 Tablespoon water
2 eggs
1/2 teaspoon baking soda
1/2 teaspoon cream of tartar
1 teaspoon salt
5 1/2 cups all purpose flour
1/2 cup multicolored jimmies sprinkles

Birthday Cake Frosting:
1/2 cup (1 stick) butter, room temperature
1/2 cup shortening
1/2 teaspoon butter flavoring
1/2 teaspoon cream cheese flavoring
1 1/2 teaspoons meringue powder
3 3/4 cups powdered sugar
1 Tablespoon milk
1/4 cup multicolored jimmies sprinkles

Preheat the oven to 350F.  Line a baking sheet with parchment paper.

Cream together the butter, oil, granulated sugar, powdered sugar, butter flavoring, cream cheese flavoring, water, and eggs.  Add the flour, salt, baking soda, and cream of tartar, and beat until almost combined.  Beat in the sprinkles until evenly distributed.

Scoop the dough into tablespoon size balls, and place on the prepared baking sheet.  Using a glass dipped in sugar, flatten the dough balls until they are flat, and the edges are cracked.  

Bake the cookies in the preheated oven for about 8  minutes.  Remove cookies from the oven and transfer to a cooling rack to cool completely before frosting.


For the frosting, Cream together the butter, shortening, butter flavoring, cream cheese flavoring, and meringue powder.  Beat in the powdered sugar, one cup at a time, until combined.  Beat in the milk and continue beating the frosting for 2 to 3 minutes until light and fluffy.  Add the sprinkles and beat until evenly distributed.  Spread or pipe the frosting on top of the cooled cookies.  Makes about 70 cookies.

Enjoy!  -Cardamommy

Friday, May 13, 2016

Neapolitan Checkerboard Cake


So this cake. It's my youngest Hungry Puppy's Birthday Cake!!  I told her that I would make it, then I realized what I had committed to and wondered if I had made a mistake.  Needless to say, I am extremely pleased that it turned out. And relieved.  I had visions of making a super simple last minute night before the party birthday cake.  Thankfully I didn't have to.  This cake maybe looks a little complex, but it was really quite easy.  A couple of notes: If you only want to do two colors, just eliminate the third and alternate dark and light, and make it a two layer cake.  You can use a cake mix (I did cake mixes this time), or use your favorite cake recipes.  You will want a somewhat sturdier cake, as you will be cutting and moving it around, so a softer crumbly cake may fall apart.  For the frosting, again, make your own (I made my own to counter the cake mix!) or use store bought.  Lastly, you will need one cake layer of each color you use, so if you use a cake mix you will have an extra layer for each color that won't be used.  I turned my extra batter into cupcakes (for a separate birthday treat), or you could tightly wrap and freeze the extra cake for another occasion.

Neapolitan Checkerboard Cake

1 9-inch Chocolate cake layer
1 9-inch Strawberry cake layer
1 9-inch Vanilla cake layer
2 cups Chocolate Frosting
2 cups Strawberry Frosting
2 cups Vanilla Frosting

For each cake layer, use a 5.5 inch round cookie cutter (or find a 5.5 inch round template and cut the cake with a knife), and cut out one ring (repeat for all three cakes).  Next, use a 2.5 inch round cookie cutter and cut out a ring inside the 5.5 inch ring (repeat for all three cakes). For each cake layer you should now have 2 rings and a center circle.

For the first layer, place the largest vanilla ring on a cake plate.  Place the second largest chocolate ring inside the vanilla ring.  Place the strawberry circle in the center.  Spread a layer of strawberry frosting on top.  For the second layer, place the largest strawberry ring on top of the first frosted layer. Place the second largest vanilla ring inside the strawberry ring.  Place the chocolate circle in the center.  Spread a layer of strawberry frosting on top.  For the top layer, place the largest chocolate ring on top of the frosting.  Place the second largest strawberry ring inside the chocolate ring.  Place the vanilla circle in the center.  

Frost the top of the cake with vanilla frosting, and frost the sides with the chocolate frosting.  Sprinkle chocolate sprinkles over the top, if desired.  Makes 16 to 20 servings.

Enjoy!  -Cardamommy
Monday, May 2, 2016

Lemon Cake with Chocolate Lemon Frosting


I really wanted to make this cake for Easter dinner.  But...it failed.  Big time.  The cake came out of the pan in pieces and was kind of tough.  Not awesome.  So I threw together a quick lemon frosting (which actually rocked), and had my oldest Hungry Puppy frost it for me.  Not to be deterred, I tried again.  I used a different cake recipe this time, and created my own frosting.  I added lemon to the chocolate frosting just to keep the lemon theme throughout the entire cake, and it is so perfect.  Don't be afraid to pair lemon with chocolate, it totally works amazingly well!  The chocolate lemon frosting is going to be a new favorite for sure!  I am seeing this combination in brownie form in the future.  Cake recipe slightly adapted from here.

Lemon Cake with Chocolate Lemon Frosting

Lemon Cake:
2 3/4 cups cake flour
2 1/2 teaspoons baking powder
1/2 teaspoon salt
1 cup (2 sticks) butter, room temperature
2 cups granulated sugar
1 teaspoon vanilla extract
1 teaspoon lemon extract
1/3 cup fresh lemon juice
Zest of 3 lemons
1/2 cup lemon curd
3 eggs
1 cup milk

Chocolate Lemon Frosting:
1/2 cup butter, room temperature
1/2 cup shortening
Zest of 1 lemon
1 teaspoon lemon extract
1/2 teaspoon coffee extract
1/2 cup cocoa powder
4 cups powdered sugar
4 Tablespoons fresh lemon juice
1/2 cup lemon curd

Preheat the oven to 350F.  Grease 2 8 or 9 inch round baking pans, then line the bottoms with parchment paper and grease the parchment.

In a medium bowl, combine the flour, baking powder and salt.  Set aside.

Cream together the butter and sugar until light and fluffy.  Beat in the vanilla extract, lemon extract, lemon juice, lemon zest, and lemon curd until well blended.  Beat in the eggs one at a time until combined.  Add 1/3 of the flour mixture and beat on low until combined.  Add half of the milk and beat until blended. Repeat with another 1/3 of flour mixture followed by the remaining milk, and finishing with the remaining flour mixture and beating until just blended.

Pour the batter into the two prepared cake pans and smooth the top.  Bake in the preheated oven for 35 to 45 minutes, or until a toothpick inserted in the centers comes out clean.  Remove the cakes from the oven and let cool for about 10 to 15 minutes.  Remove the cakes from the pans and remove the parchment from the bottom of the cakes.  Place the cakes on a cooling rack to cool completely.

For the frosting, cream together the butter, shortening, lemon zest, lemon extract, and coffee extract until blended.  Add the cocoa powder and beat on low until combined.  Beat in the powdered sugar, one cup at a time, until incorporated.  Beat in 2 tablespoons of the lemon juice, adding the remaining lemon juice if necessary to reach the desired consistency.

To assemble the cake, place one cake layer on a serving plate.  Spread with some of the chocolate frosting, then with the 1/2 cup of lemon curd.  Place the second cake layer on top.  Frost the top and sides with the chocolate lemon frosting.  Makes 12 to 16 servings.

Enjoy!  -Cardamommy
Friday, April 15, 2016

Brownie Marshmallow Swirl Ice Cream Cake


I am so in love with this ice cream cake!! This is the second time I have made it in a week, and I made it totally different this time.  The first time I made an actual cake for the base and used chocolate ice cream with cake pieces in it.  I accidentally overmixed the marshmallow swirl, though, so it was more of a chocolate marshmallow ice cream.  Still totally amazing to the point that I knew that I had to make it again, and fast!  This time I used a frosted brownie base with frosted brownie pieces in toffee ice cream (Yes frosted.  Frosting makes everything better!).  I also was super careful and swirled the marshmallow swirl just the right amount to get those super yummy ribbons of marshmallow in the brownie studded ice cream!  Original recipe found here.

Brownie Marshmallow Swirl Ice Cream Cake

Brownies:
1/2 cup butter, room temperature
1/2 cup oil
2 cups granulated sugar
4 eggs
1 teaspoon vanilla extract
1 teaspoon coffee extract
1 1/2 cups all purpose flour
1/2 cup cocoa powder
1/2 teaspoon salt

Frosting:
6 Tablespoons butter, room temperature
6 Tablespoons cocoa powder
2 Tablespoons corn syrup
1/2 teaspoon vanilla
1/2 teaspoon coffee extract
2 cups powdered sugar
1-2 Tablespoons milk

Marshmallow Swirl:
4 large egg whites, room temperature
1 cup sugar
1/4 teaspoon cream of tartar
1 teaspoon pure vanilla extract
6 cups ice cream, any flavor, slightly softened

For the brownies, preheat the oven to 350F.  Line the bottom of a 10 inch springform pan with parchment paper and grease the pan and parchment, and line the bottom of a 9 inch square baking pan with parchment paper and grease the pan and parchment.

Beat together the butter, oil, and sugar until smooth.  Beat in the eggs, vanilla, and coffee extract until blended.  Add the flour, cocoa powder, and salt, and beat until incorporated.  Pour about 2/3 of the brownie batter into the 10 inch springform pan, and the remaining 1/3 of the brownie batter into the 9 inch square pan and smooth the tops.  Bake in the preheated oven for  20 to 30 minutes (the 9 inch pan will be done sooner than the springform), until a toothpick inserted in the center comes out with moist crumbs.  Remove the brownies from the oven and let cool.

For the frosting, beat together the butter, cocoa powder, corn syrup, vanilla, and coffee extract until smooth.  Beat in the powdered sugar.  Beat in enough of the milk to reach the desired consistency.  Spread the frosting over the cooled brownies (if they are still slightly warm it is okay).  Place the brownies in the fridge until chilled.  When cold, remove the brownies from the 9 inch square pan and roughly chop or crumble into bite size pieces.

For the marshmallow swirl, place the egg whites, sugar, and cream of tartar in a bowl set on top of a saucepan of simmering water (make sure the bottom of the bowl isn't touching the water). Whisk constantly until sugar dissolves and mixture is warm, 3 to 4 minutes. Remove from heat. Beat with a mixer (I used my stand mixer), starting on low speed and gradually raising to high, until stiff, glossy peaks form, 5 to 7 minutes. Beat in vanilla until thoroughly combined. 

To assemble the ice cream cake, place the softened ice cream in a large bowl and stir in the brownie pieces. Gently fold in the marshmallow swirl until it is swirled throughout the ice cream.  You do not want to over mix, or the marshmallow will disappear into the ice cream.  Spread the ice cream mixture over the frosted brownies in the springform pan, cover with plastic wrap, and place in the freezer until firm, 6 to 24 hours.  When ready to serve, remove the sides of the pan and cut the cake with a warm knife.  Makes 12 servings.

Enjoy!  -Cardamommy


Monday, April 11, 2016

Blueberry Oatmeal Crumb Coffee Cake


Oh my friends.  What I am sharing with you today comes from the depths of my soul.  I do it for the good of all.  You need to make this cake.  Don't like blueberries?  Doesn't matter.  Oh, oatmeal just isn't your thing? Irrelevant.  Crumb topping and vanilla filling just aren't for you?  Relax.  Even if you can't bear to eat this cake, the smell alone will make you swoon.  I am sitting here with this cake fresh out of the oven, and I keep inhaling deeply to get more of that smell in my nose!! Yes, it is that incredible.  And the cake is fabulous too.  This super simple cake starts with a box mix and comes out looking like you spent hours slaving on it!  

Blueberry Oatmeal Crumb Coffee Cake

Crumb Topping:
2/3 cup all purpose flour
3/4 cup powdered sugar
1/2 teaspoon cinnamon
1/4 cup (4 Tablespoons) melted butter
1 teaspoon vanilla

Blueberry Oatmeal Cake:
1 box yellow or vanilla cake mix (plus ingredients called for on the box)
3/4 cup old fashioned oats, cooked in 1 to 1 1/4 cups water
1 to 1 1/2 cups blueberries (fresh or frozen)

Vanilla Filling:
1/4 cup (4 Tablespoons) butter, room temperature
1/4 cup vegetable shortening
Pinch of salt
1/2 teaspoon french vanilla flavoring (or use plain vanilla)
1/4 teaspoon butter flavoring
8 ounces powdered sugar

1 tablespoon milk (if needed)

Vanilla Glaze:
1/2 cup powdered sugar
2 - 3 teaspoons milk
1/4 teaspoon french vanilla extract

Preheat the oven to 350F.  Grease and flour 2 9-inch round cake pans.  Set aside.

For the crumb topping, place the flour, sugar, and cinnamon in a bowl and stir to combine. Pour in the melted butter and vanilla and toss together with a fork until crumbly.  Set aside.

For the cake,  prepare the cake mix according to the package directions.  Stir in the cooked oatmeal and blueberries.  Pour the batter into the two prepared pans and smooth the top.  Bake in the preheated oven for 10 minutes.

Carefully remove the cakes from the oven and sprinkle the crumble evenly over the tops.  Return the cakes to the oven and continue baking for about 12 to 14 minutes, or until a toothpick inserted in the center comes out clean.  Remove cakes from the oven and let cool in the pans for 15 to 20 minutes.  Carefully turn the cakes out of the pans (they are fragile), and place on a cooling rack to cool completely.

For the vanilla filling, place the butter, shortening, salt, french vanilla flavoring, and butter flavoring in a medium bowl and beat until smooth.  Gradually beat in the powdered sugar until incorporated.  Beat in the milk, a little at a time, until the desired consistency is reached.  Beat the frosting for several minutes until fluffy.

For the glaze, in a small bowl, stir together the powdered sugar, french vanilla flavoring, and enough milk to reach your desired consistency.

To assemble the cake, place one cake layer on a serving plate, crumb side up.  Spread carefully with the filling then place the second cake layer on top, crumb side up.  Drizzle the vanilla glaze over the top.  Makes 12 servings.

Enjoy!  -Cardamommy

Friday, April 8, 2016

Blueberry White Chocolate Chip Brownies with White Chocolate Frosting


I've been kind of thinking lately that I need to make brownies. So I found this recipe and decided to give it a try.  Of course, I couldn't just make the brownies plain, so I decided to top them with a white chocolate frosting.  Which sounded amazing to me!  But then I decided that it might be slightly better if I added blueberries to the brownies.  And some white chocolate chips as well.  I just can't help myself sometimes.  Note:  You can use fresh or frozen blueberries. If you use frozen berries, your baking time will be slightly longer.

Blueberry White Chocolate Chip Brownies with White Chocolate Frosting

Brownies:
10 Tablespoons butter
8 ounces (about 1 1/4 cups) semi sweet chocolate chips
1 1/2 cups granulated sugar
2 eggs
1 teaspoon vanilla extract
1 teaspoon coffee extract
1 cup +2 Tablespoons all purpose flour
1/2 teaspoon salt
1 cup blueberries (fresh or frozen)
1/2 cup white chocolate chips

White Chocolate Frosting:
3 ounces white chocolate chips
2 Tablespoons butter
2 ounces sour cream
1/4 teaspoon vanilla extract
1 1/4 cups powdered sugar

Preheat the oven to 350F.  Line a 9x9 inch square baking pan with parchment paper, letting the long ends of the parchment hang over the sides as handles.  Grease the pan and parchment.

Place the butter and chocolate chips in a microwaveable bowl, and microwave in 30 second intervals, stirring after each, until chocolate is melted and smooth.

Place the sugar, eggs, vanilla, and coffee extract into a large bowl and whisk until completely smooth and well blended.  Add the melted chocolate mixture and whisk until incorporated.  Stir in the flour and salt, until no streaks of flour remain.  Fold in the blueberries and chocolate chips.  

Pour the batter into the prepared pan and smooth the top.  Bake in the preheated oven for 30 to 45 minutes (if you used frozen blueberries, it will take longer to bake), or until a toothpick inserted in the center comes out with moist crumbs.  Remove brownies from the oven and let cool completely.  While the brownies are cooling, make the frosting.

For the frosting, place the white chocolate chips and butter in a microwaveable bowl, and microwave in 30 second intervals, stirring after each, until melted and smooth.  Using a hand mixer (or mix by hand), beat in the sour cream and vanilla until blended.  Beat in the powdered sugar on low speed until combined, then increase the speed and beat until the frosting is smooth.  Spread the frosting over the cooled brownies.  Chill the brownies for an hour or two to let the frosting set up.  Makes 16 brownies.

Enjoy!  -Cardamommy

Monday, March 7, 2016

Chocolate Whoopie Pies with Orange Marmalade Marshmallow Filling


I kind of have a love hate thing going on with orange marmalade.  In my humble opinion, really good quality orange marmalade is amazingly delicious, while cheaper orange marmalade is really quite awful. I, unfortunately, had some of the latter on hand and no one (seriously no one) would touch the stuff.  I really hate to throw anything away, so I started brainstorming what I could do with it. Frosting.  Of course.  And what better than frosting?  Marshmallow frosting.  These whoopie pies are soft and cakey and full of orange marmalade marshmallow filling.  What's not to love?  If ever you need to motivate your family to use up some sub standard orange marmalade, here's your answer.

Chocolate Whoopie Pies with Orange Marmalade Marshmallow Filling

Chocolate Whoopie Pies:
6 Tablespoons butter, room temperature
1 cup granulated sugar
1 egg
1 teaspoon vanilla extract
2 cups all purpose flour
1/2 cup cocoa powder
1 teaspoon baking soda
1/4 teaspoon salt
3/4 cup milk

Orange Marmalade Marshmallow Filling:
1/2 cup shortening
1 container (7 ounces) marshmallow cream
1/3 cup powdered sugar
1/2 teaspoon vanilla extract
1/2 to 3/4 cup orange marmalade (to taste)

preheat the oven to 350F.  Line 2 baking sheets with parchment paper.

In a large bowl, cream together the butter and sugar until crumbly.  Beat in the egg and vanilla until incorporated.  Add the flour, cocoa powder, baking soda, and salt.  Beat until partially combined.  Gradually beat in the milk until incorporated.

Drop the dough by 2 tablespoon size scoops onto the prepared baking sheets, leaving room between each to spread.  Bake in the preheated oven for about 12 minutes, or until puffed, and a toothpick inserted into the center of one comes out clean.  Remove from the oven and transfer to a cooling rack to cool completely.

While the cookies are cooling, make the filling.  In a large bowl, beat together the shortening, marshmallow cream, powdered sugar, vanilla, and marmalade until smooth.

To assemble, spread, dollop, or pipe the marshmallow filling onto the bottom of half of the cookies.  Place a second cookie on top of the filling.  Makes 10 to 12 whoopie pies.

Enjoy!  -Cardamommy


Friday, February 26, 2016

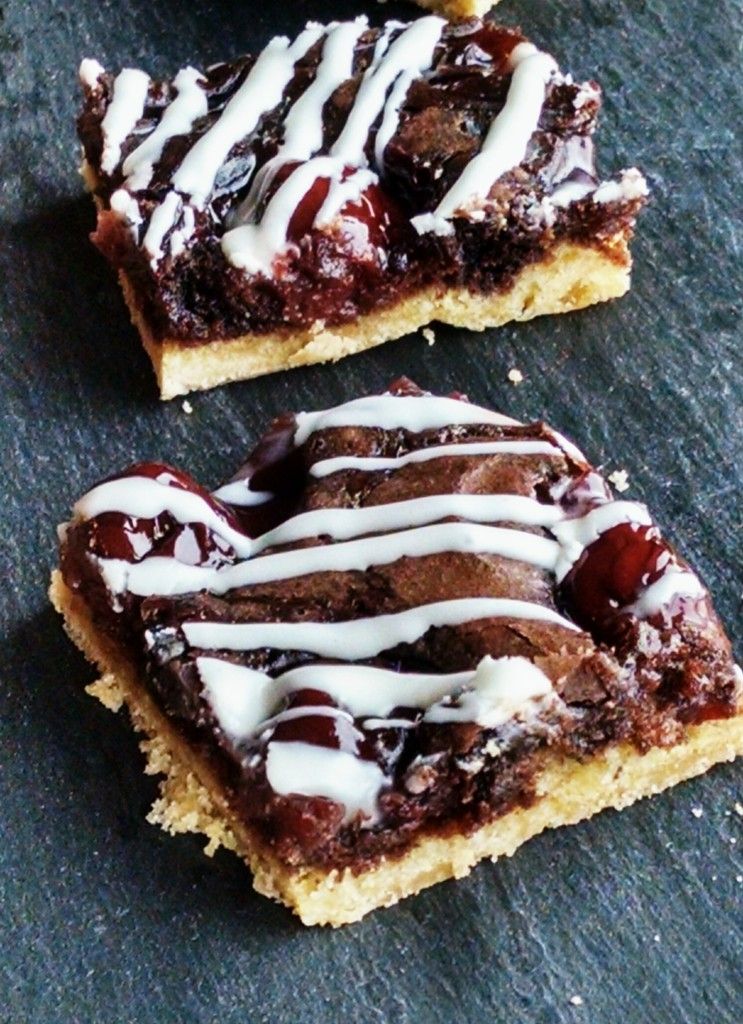
Black Forest Shortbread Bars


I found this recipe on the General Mills Food Services website. Which means it was huge. Huge!! It called for 6 pounds of brownie mix, people.  So, I scaled it down just a tiny bit.  Actually, I fiddled with the recipe quite a lot, so it isn't exactly a half recipe.  A shortbread crust topped with a cherry studded brownie layer, and drizzled all over with vanilla frosting. Regardless of the size (which is now significantly smaller), these bars are completely easy and super delicious, and so pretty! 

Black Forest Shortbread Bars

1 box (18.25 ounces) yellow cake mix
1/2 cup (1 stick) butter, room temperature
1 box (19.5 ounces) brownie mix, and ingredients called for on the box
1 can (21 ounces) cherry pie filling
1/2 cup vanilla frosting

Preheat the oven to 350F.  Grease a half sheet pan (13x18).

For the crust, beat together the cake mix and the butter until crumbly.  Press the mixture into the bottom of the prepared pan.  Set aside.

For the brownies, prepare the brownie mix according to the package directions.  Spread the brownie batter evenly on top of the crust.  Drop the cherry pie filling in spoonfuls over the brownie batter.  Use a knife to swirl the cherry filling through the brownie batter (be careful to not gouge the crust layer).  

Place the bars in the preheated oven and bake for about 40 minutes, or until the brownies are done in the center.  Remove from the oven and cool completely.  Warm up the vanilla frosting until it is a pourable consistency.  Drizzle the frosting over the cooled bars.  Let the frosting set before cutting.  Makes about 48 bars.

Enjoy!  -Cardamommy

Monday, February 15, 2016

Chocoloate Orange Layer Cake


Hello, most fabulous cake ever.  My birthday was right after Thanksgiving, and I had planned on making this for my birthday cake.  Then Thanksgiving happened, and life happened, and I couldn't even deal with cooking anything else.  So this is my belated birthday cake, and it was totally worth the wait!!  This rich fudgy chocolate cake is full of orange zest and chopped orange chocolate.  The frosting is thick and rich and smooth and also quite fudgy.  Altogether, this cake is pretty close to perfection, in my book!  Note:  I used Terry's Chocolate Oranges in this cake.  You can substitute regular chocolate chips and orange extract and more orange zest if you can't find the chocolate oranges.  Original frosting recipe found here.

Chocolate Orange Layer Cake

Cake:
3/4 cup cocoa powder
1 cup semi sweet chocolate chips

Zest of 2 oranges
3/4 cup boiling water
1 3/4 cup all purpose flour
1 1/2 teaspoons baking soda
1 teaspoon kosher salt
1 cup (2 sticks, 16 Tablespoons) butter, room temperature
2 cups brown sugar
4 eggs

2 teaspoons coffee extract
1 teaspoon vanilla extract
1 1/4 cups sour cream
1 1/4 cups chopped Terry's Chocolate Orange (or substitute milk chocolate chips)


Frosting:
12 ounces (2 chocolate oranges) Terry's Chocolate Orange
1/2 cup butter
8 ounces sour cream
1 Tablespoon light corn syrup
1 teaspoon vanilla extract
4 1/2 cups powdered sugar

Preheat the oven to 350F.  Lightly grease 2 9-inch round cake pans with cooking spray, then line the bottoms with parchment paper and lightly grease the parchment.  Set aside.

For the cake, place the cocoa powder, semi sweet chocolate chips, and orange zest in a medium bowl.  Pour the boiling water over the chocolate and stir until melted and smooth.  Set aside.  In a separate bowl whisk together the flour, baking soda, and salt.  Set aside.  In a large bowl, cream together the butter and brown sugar until light and fluffy.  Beat in the eggs, one at a time, followed by the coffee extract and vanilla, scraping down the sides of the bowl if necessary.  Beat the mixture until well blended.  On low speed, beat in 1/3 of the flour mixture, followed by 1/2 of the sour cream.  Repeat with another 1/3 of the flour and the remaining sour cream, finishing with the last of the flour.  Beat just until blended.  Add the chocolate mixture and beat on low until incorporated.  Stir in the chocolate chips. 

Divide the batter evenly between the two prepared pans and smooth the tops.  Place the cakes in the oven and bake for about 35 to 40  minutes, or until a toothpick inserted in the center comes out with a few moist crumbs.  Remove the cakes from the oven and place on a cooling rack to cool for about 10 minutes.  Run a knife around the edge of the cakes to loosen from the pans, then carefully turn the cakes out of the pans and let cool completely on a cooling rack.

For the frosting, place the chocolate oranges and butter in a microwaveable bowl, and microwave in 30 second intervals, stirring after each, until melted and smooth.  Using a hand mixer, beat in the sour cream, corn syrup, and vanilla until blended.  Beat in the powdered sugar on low speed until combined, then increase the speed and beat until the frosting is smooth.

To assemble the cake, place a cake layer on a serving plate and spread with frosting.  Place the second cake layer on top and frost the top and sides of the cake.  Makes 16 to 20 servings.

Enjoy!  -Cardamommy

Monday, January 18, 2016

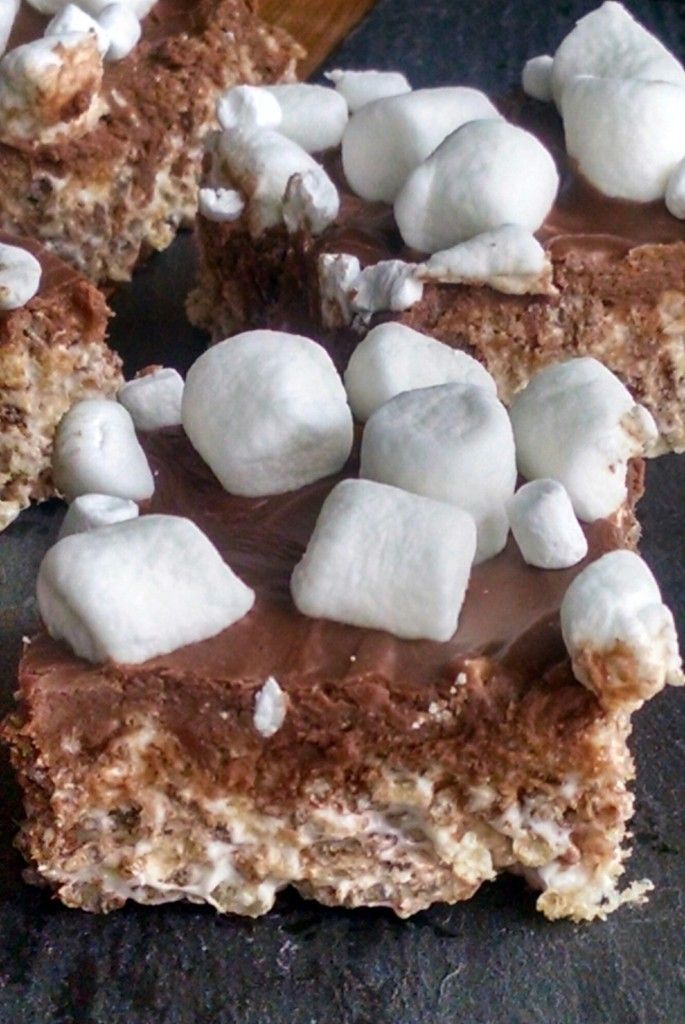
Hot Chocolate and Marshmallow Rice Krispies Treats


I have one last hot chocolate recipe to share before we get into Valentine's Day, then spring, and summer (please hurry!).  It's still January, so we're doing this!  I found this recipe the other day and immediately knew that I had to come up with  my own tasty version.  I have so many things on my baking list that I thought that I wouldn't have time to make these, but my youngest Hungry Puppy had her first Children's Music Academy program yesterday and we decided to make these for the reception afterward.  These deliciously gooey rice krispie treats are topped with a fudgy hot chocolate frosting and marshmallows!  The frosting recipe looks long and complicated, but don't be deterred.  It is so seriously easy!  So gooey and chocolatey and delicious!

Hot Chocolate and Marshmallow Rice Krispies Treats

Rice Krispies Treats:
1 10 ounce bag marshmallows 
2 Tablespoons butter
3 cups Rice Krispies cereal
3 cups Cocoa Rice Krispies cereal

Hot Chocolate Frosting:
4 ounces milk chocolate chips
1/4 cup hot chocolate powder
2 Tablespoons butter
2 ounces sour cream
1 teaspoon light corn syrup
1/2 teaspoon coffee extract
1 1/2 cups powdered sugar
1 cup mini marshmallows
Marshmallow Bits

Grease a 9x13 in baking dish.

Place the marshmallows and butter in a large microwaveable bowl.  Place in the microwave and heat in 30 second intervals, stirring after each, until melted and smooth.  Quickly add the rice krispies and cocoa rice krispies and stir until evenly coated in marshmallow.  Spread the rice krispies mixture into the prepared baking dish and press in evenly.

For the frosting, place the chocolate chips, hot chocolate powder, and butter in a microwaveable bowl.  Heat in the microwave in 30 second intervals, stirring after each, until melted and smooth.  Stir in the sour cream, corn syrup, and coffee extract until smooth.  Stir in the powdered sugar, 1/2 cup at a time, until incorporated.  

Pour the chocolate frosting over the rice krispie treats and spread evenly.  Immediately top with the mini marshmallows and marshmallow bits and press down slightly to adhere to the frosting.  Place in the refrigerator until the treats set up.  Cut into squares.  Makes 24 bars.

Enjoy!  -Cardamommy

Monday, December 28, 2015

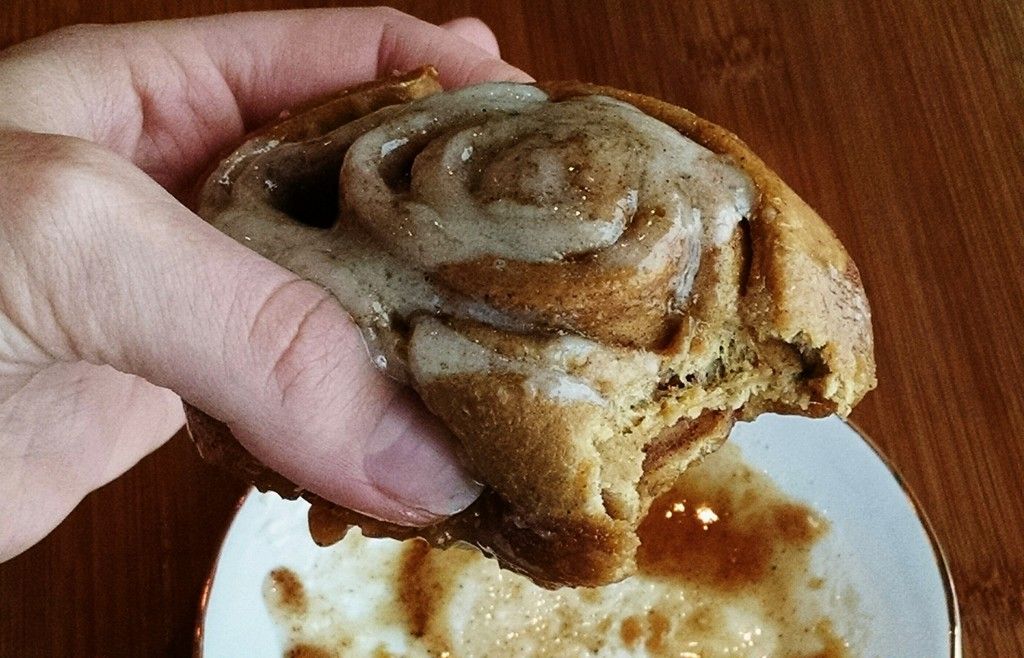
Gingerbread Cinnamon Rolls with Mascarpone Frosting


These cinnamon rolls!  I made these for our Christmas morning breakfast, and they were so amazing, I think I ate 3 of them!!  They are soft and gooey and full of warm gingerbread flavor.  And the frosting!! You know I have a weakness for mascarpone, and this frosting did not disappoint!  

Gingerbread Cinnamon Rolls

Dough:
1 1/4 cups warm water
1/4 cup molasses
1 egg
1/4 cup powdered milk
1/4 cup granulated sugar
1/4 cup shortening
1/2 cup mashed potato flakes
1 1/2 teaspoons salt
1 teaspoon vanilla extract
1 teaspoon cinnamon
3/4 teaspoon ground ginger
1/2 teaspoon cloves
1/2 teaspoon nutmeg
1 Tablespoon instant yeast
3 to 3 1/2 cups all purpose flour

Filling:
1/2 cup packed brown sugar
1/4 cup granulated sugar
1 1/2 teaspoons cinnamon
1/4 teaspoon ginger
1/4 teaspoon cloves
3 to 4 Tablespoons butter, melted

Mascarpone Frosting:
2 Tablespoons butter, room temperature
1/2 cup (4 ounces) mascarpone cheese
1 cup powdered sugar

For the dough, in the bowl of a stand mixer (or by hand), combine all of the dough ingredients (starting with 3 cups of flour), and mix until a soft dough forms, adding the remaining 1/2 cup of flour if necessary.  Knead the dough, either with the dough hook of your stand mixer, or by hand, until the dough is smooth and elastic.  Place the dough in a greased bowl, and grease the top of the dough.  Cover with plastic wrap and let rise for about 1 hour.

Preheat the oven to 350F.  For the filling, combine the brown sugar,granulated sugar, cinnamon, ginger, and cloves.  Roll the dough into a large rectangle.  Spread the melted butter over the dough.  Sprinkle the filling mixture evenly over the buttered dough.  Roll up the dough, starting at the widest edge, and pinch the seam to seal.  Cut the dough into 12 rolls, using a knife or dental floss, and place in a greased 9x13 inch pan, and press down slightly on the top of the rolls.  

Cover with plastic wrap and let rise for about 30 minutes. (At this point, you can cover with plastic wrap and refrigerate overnight.  Remove the rolls from the fridge while you preheat the oven, then bake as usual).  After the rolls have risen, remove the plastic wrap and bake the cinnamon rolls in the preheated oven for about 20 to 25 minutes, or until golden brown.  Let cool slightly before frosting.  

For the frosting, combine the butter and mascarpone cheese until smooth.  Stir in the powdered sugar, a little at a time until well blended and smooth.  Spread the frosting over the warm cinnamon rolls.  Makes 12 cinnamon rolls.

Enjoy!  -Cardamommy
Related Posts Plugin for WordPress, Blogger...