Showing posts with label Buttermilk. Show all posts

Friday, April 1, 2016

Peanut Butter Nutella Buttermilk Fudge


I recently tried my hand at buttermilk fudge, and it turned out really well.  It was sweet, but still a little tangy, and really delicious.  Since it turned out so well, I decided to try a variation of the same recipe.  I threw in some peanut butter and nutella and something magical happened.  It is crazy delicious!  It isn't excessively peanut buttery (which I appreciate), and the tanginess is toned down a little (which my youngest hungry puppy appreciates).  This fudge didn't last long in my house!

Peanut Butter Nutella Buttermilk Fudge

2 cups granulated sugar
1 cup buttermilk
1/2 cup butter
Pinch of salt
1/4 cup creamy peanut butter
1/4 cup nutella

Line a 9x5 inch loaf pan with foil, and lightly spray the foil with cooking spray.  Place the peanut butter and nutella in a large bowl.

Place the sugar, buttermilk, butter, and salt in a medium saucepan.  Heat the mixture over medium-high heat, stirring frequently until melted and smooth.  Bring the mixture to a boil, continuing to stir frequently, until the mixture reaches 238F.

Immediately pour the mixture over the peanut butter and nutella in the bowl, and beat with an electric mixer or stand mixer on medium high speed until thickened and no longer shiny.  Pour the fudge into the prepared loaf pan and smooth the top.  Let cool completely before cutting.  Makes 16 pieces.

Enjoy!  -Cardamommy

Friday, March 18, 2016

Irish Soda Bread with Cheddar and Currants


So I realize that St. Patrick's day was yesterday.  Which means this post is a day late perhaps.  However, I am not the person who has their holiday recipes posted a week in advance.  I usually make my holiday recipe on that holiday, which means I deliver to you post holiday recipes.  Here's the cool thing, I think, you can make Irish soda bread any dang time you want.  Like this weekend.  Or right now.  This Irish soda bread starts with a super traditional recipe.  No butter, no sugar, no eggs (what happened to me, right? Totally out of character).  To this basic recipe I added currants and cheddar cheese.  Oh yes, raisins and cheddar do work together.  They will make your tummy happy.

Irish Soda Bread with Cheddar and Currants

2 cups all purpose flour
2 cups whole wheat flour
1 teaspoon baking soda
1 teaspoon salt
2 cups buttermilk (about)
1 cup currants
2 cups cubed Irish Cheddar cheese

Place the currants in a bowl and add a dash of cinnamon.  Pour just enough boiling water over the currants to cover them.  Let sit for 15 to 30 minutes.

Preheat the oven to 425F.  Line a baking sheet with parchment paper.


In a large bowl stir together the flour, wheat flour, baking soda, and salt.  Drain the water from the currants. Add the cheese and drained currants to the flour mixture and toss to coat.  Pour in the buttermilk and gently work the mixture until a shaggy dough forms.  Shape the dough into a slightly flattened ball and place on a baking sheet lined with parchment paper.  Cut a large X into the top of the dough.  Bake in the preheated oven for 45 to 50 minutes, or until golden brown.  Remove from the oven and let cool slightly before slicing and serving warm.  Makes one loaf.

Enjoy!  -Cardamommy

Monday, March 14, 2016

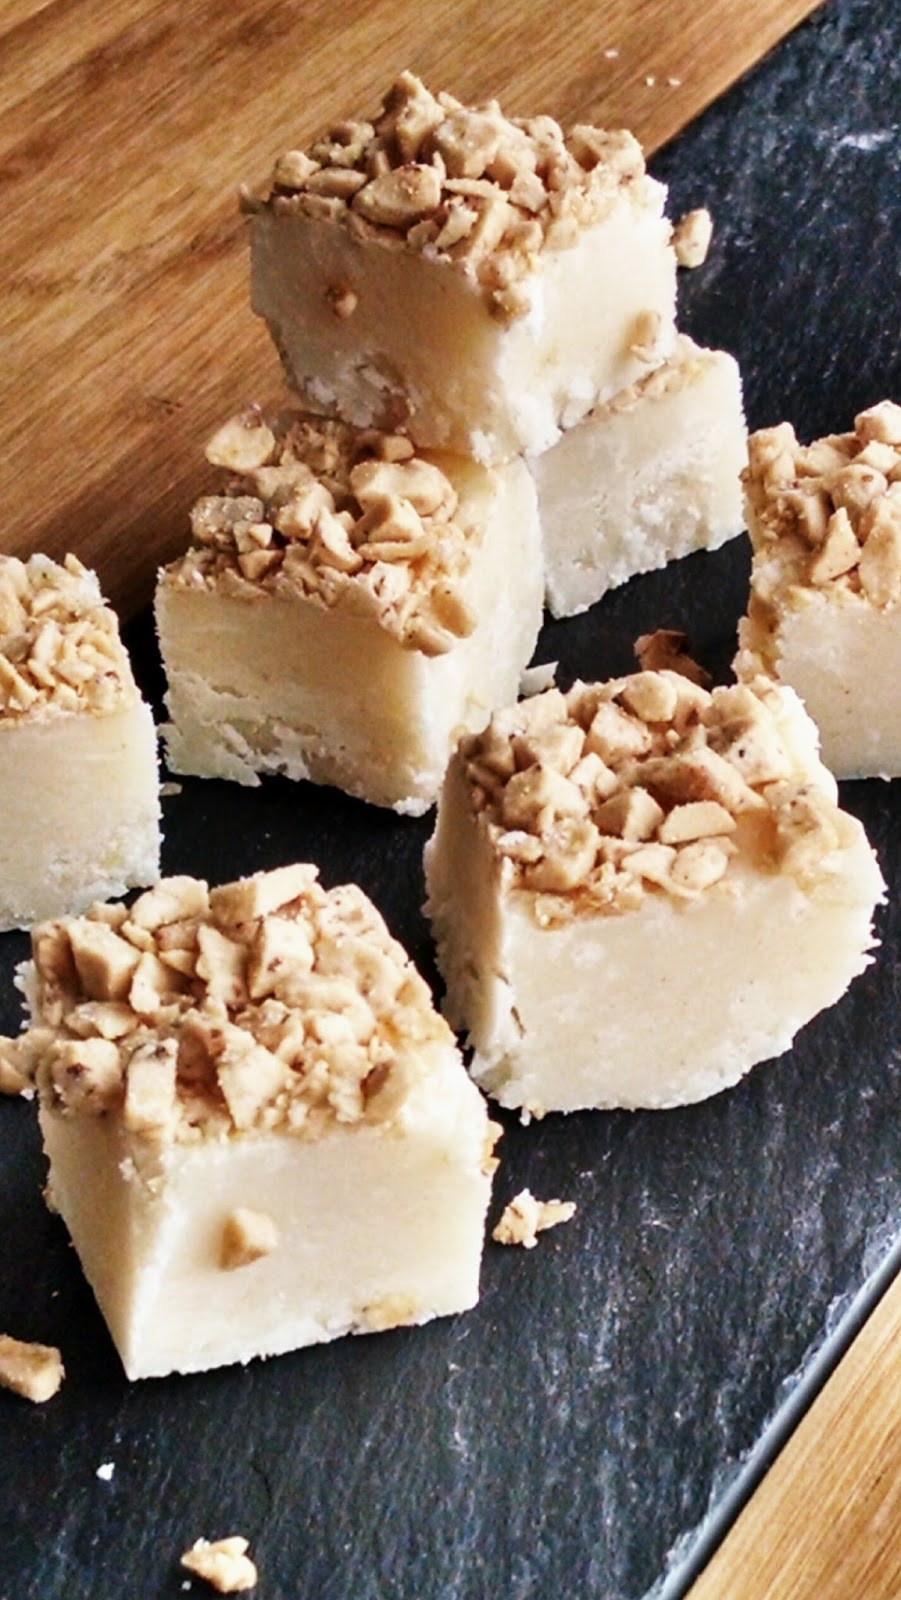
Buttermilk Toffee Fudge


Same old story. I have buttermilk in the fridge that I need to get rid of.  I wanted to come up with a creative way to use it, and I found this recipe.  I was totally intrigued, and my oldest Hungry Puppy was desperate for me to make it.  So I did.  I left out the pecans and sprinkled toffee over the top instead, and we really loved it!  This fudge is the perfect combination of tangy and sweet, and the toffee is the perfect topper!

Buttermilk Toffee Fudge

2 cups granulated sugar
1 cup buttermilk
1/2 cup (1 stick) butter
1 Tablespoon honey
Pinch of salt
1/3 cup toffee bits

Line a 9x5 inch loaf pan with foil, and lightly spray the foil with cooking spray.

Place the sugar, buttermilk, butter, honey, and salt in a medium saucepan.  Heat the mixture over medium-high heat, stirring frequently until melted and smooth.  Bring the mixture to a boil, continuing to stir frequently, until the mixture reaches 238F.

Immediately pour the mixture into a bowl and beat with an electric mixer or stand mixer on medium high speed until thickened and no longer shiny.  Pour the fudge into the prepared loaf pan and smooth the top.  Sprinkle the toffee bits over the top and press down slightly to adhere.  Let cool completely before cutting.  Makes 16 pieces.

Enjoy!  -Cardamommy

Friday, November 13, 2015

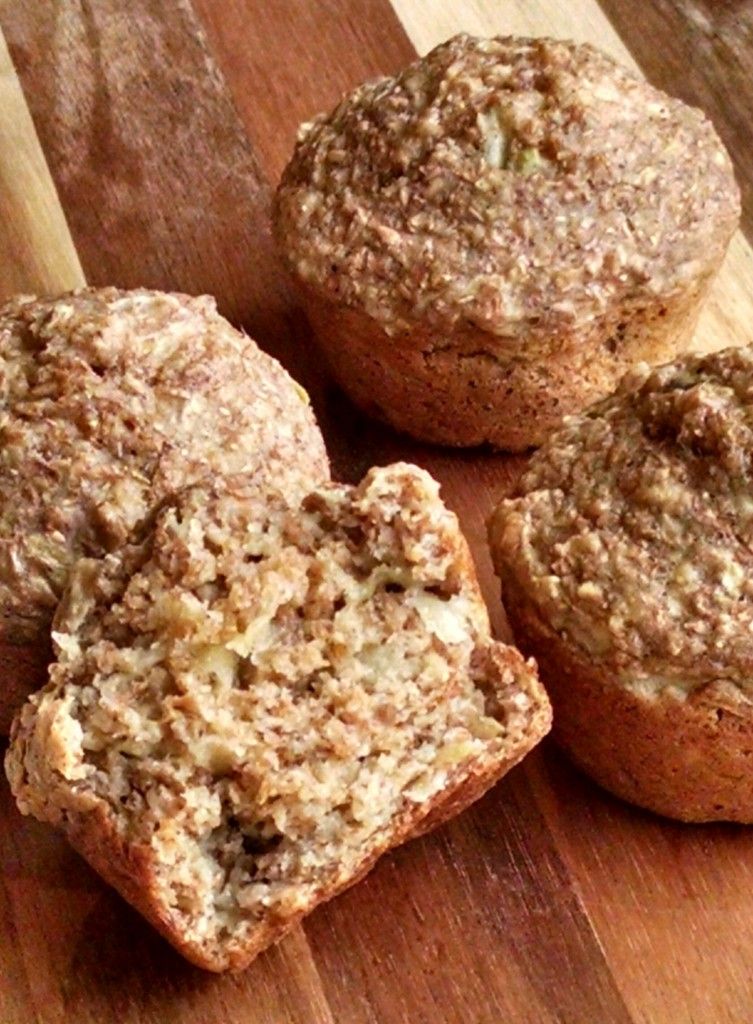
Double Apple Spice Bran Muffins


I have to say that I love bran muffins.  Not the dry flavorless cardboard kind that are so prevalent, but the moist and flavorful kind that come out of my kitchen.  I feel that bran muffins get such a bad view, but they don't have to!  These muffins were such a hit at my house, I think they would have all been eaten had I not put a limit on them!  I started with my favorite bran muffin recipe, and just tweaked it a bit.  I substituted applesauce for the butter and honey, and used brown sugar instead of white.  I also added some shredded apples and apple pie spice.  The result?  Deliciously moist and warm spiced apple bran muffins.  These muffins are amazing warm from the oven, or even later cold from the fridge!

Double Apple Spice Bran Muffins

2 cups wheat bran
1 cup oat bran
1 cup boiling water
1 cup unsweetened applesauce
1/2 cup packed brown sugar
2 eggs
2 cups buttermilk
2 1/2 cups all purpose flour
2 teaspoons baking soda
2 teaspoons apple pie spice
1 teaspoon salt
2 large apples, shredded

Preheat the oven to 375F.  Lightly spray 24 regular muffin cups with cooking spray.


In a medium bowl, place the wheat and oat bran.  Add the boiling water and stir together.  Let sit for about 5 minutes.  Add the applesauce, brown sugar, eggs, and buttermilk.  Mix well until completely combined.  Add the flour, baking soda, apple pie spice, and salt and stir until just combined. Stir in the shredded apple.

Spoon the batter into the prepared muffin cups and bake in the preheated oven for about 13 to 15 minutes, or until a toothpick inserted in the center comes out with moist crumbs.  Remove muffins from the oven and cool on a cooling rack.  Makes 24 muffins.

Enjoy!  -Cardamommy

Friday, June 26, 2015

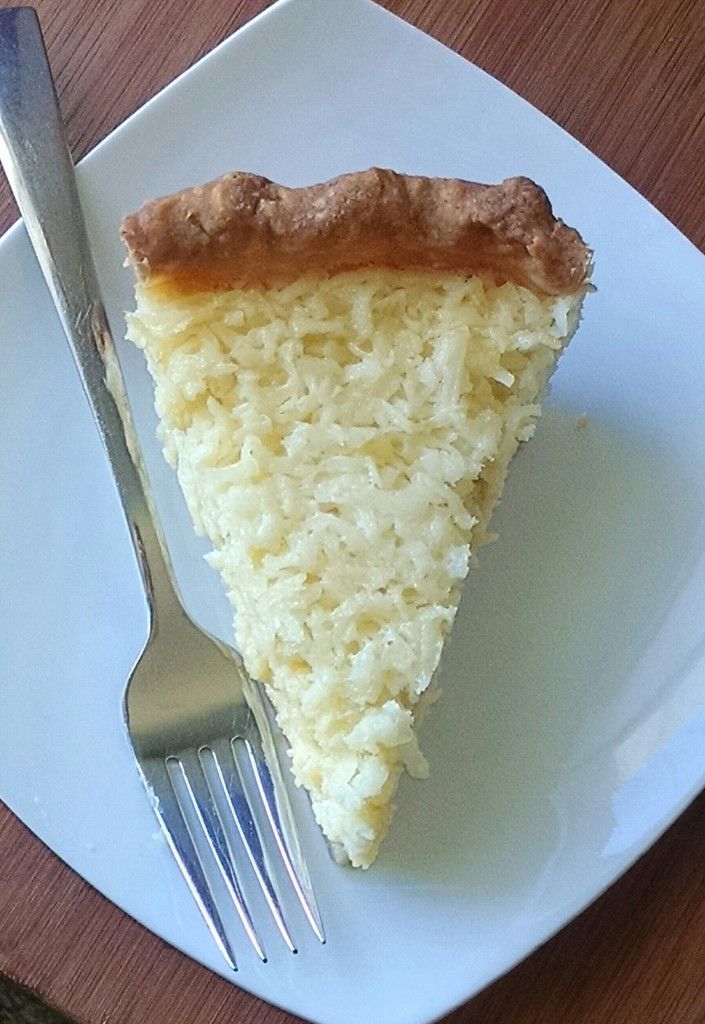
Coconut Custard Pie


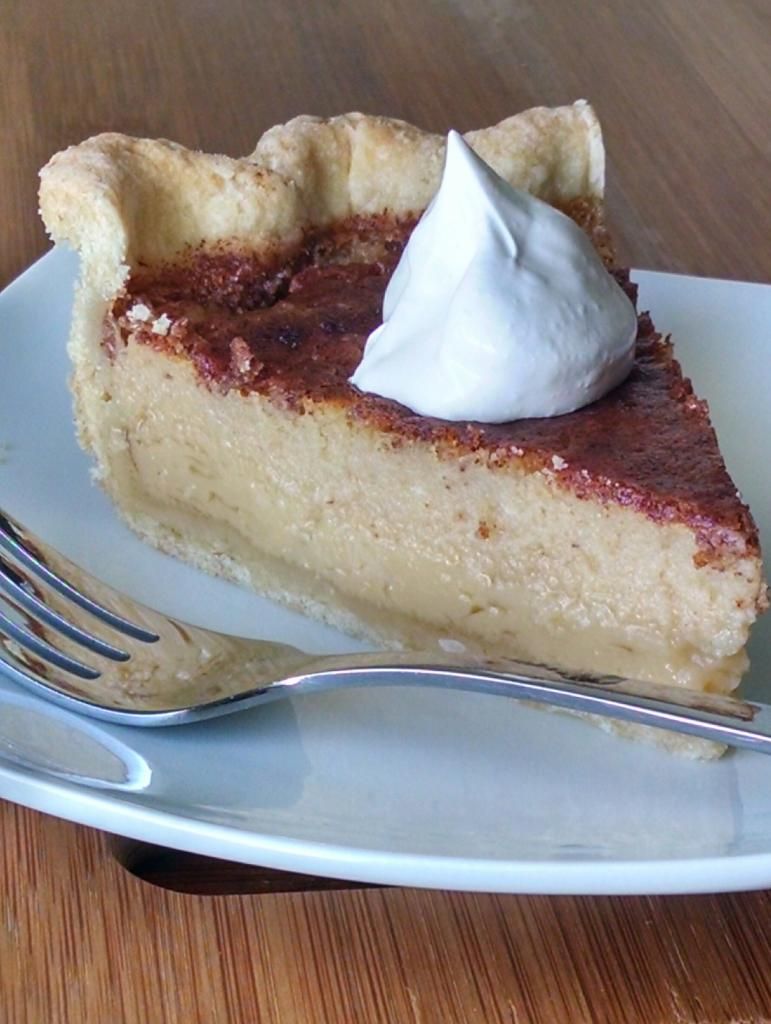
I am so loving this pie.  It is simple and delicious, and the top totally reminds me of coconut macaroons!  Next time I might try adding some cinnamon to the filling, or perhaps serving it with some cinnamon or vanilla ice cream.  Original recipe found here.

Coconut Custard Pie

1 9-inch Pie crust
1 cup granulated sugar
1/4 teaspoon salt
4 Tablespoons (1/2 stick) butter, melted
6 eggs
1 cup buttermilk
2 teaspoons vanilla extract
2 cups shredded coconut

Preheat the oven to 375F.  Roll out the pie crust and fit into a 9 inch pie plate.  Crimp the edges.  Carefully line the pie crust with foil, letting it hang over the sides of the pie place.  Pour rice or beans (or use pie weights if you have them) into the foil lined crust, filling it about 1/4 to 1/3 full.  Bake the pie crust for about 15 to 20 minutes.  Remove from the oven and lift out the foil and rice/beans/weights.  Cover the edges with strips of foil, and return the crust to the oven and bake for about 5 minutes more, until the crust is just set.  Lower the oven temperature to 350F.

In a large bowl, whisk together the sugar, salt, and melted butter until combined.  Whisk in the eggs, one at a time until incorporated.  Add the buttermilk and vanilla extract and whisk until well blended.  Stir in the coconut.  Pour the filling into the crust and bake the pie for about 45 minutes, keeping the edges of the crust covered with foil to prevent overbrowning.  The center of the pie will be just set and the top should be golden brown.  Let the pie cool completely before slicing.  Makes 8 servings.

Enjoy!  -Cardamommy


Friday, March 20, 2015

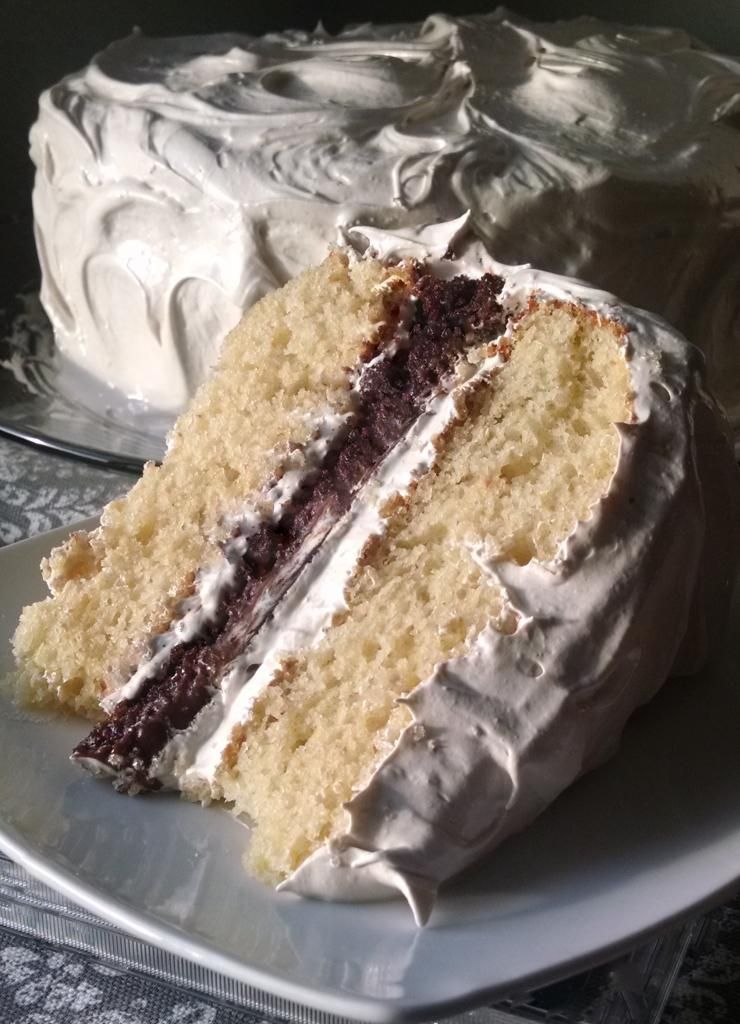
Fudge Brownie Filled Buttermilk Cake with Brown Sugar Marshmallow Frosting


I saw a recipe a few weeks ago for a Vintage Cake.  It looked super amazing, and I wanted to try it out, but with a few changes. First, I really wanted my brownie layer to be in the middle of the cake, sort of replacing the filling.  Second, I wanted to use a slightly lighter frosting, something not too heavy and dense, so I settled on a brown sugar marshmallow frosting (which my entire family loves!).  The buttermilk cake layers are moist, flavorful, and delicious while the fudge brownie filling is a rich and dense chocolate layer.  The marshmallow frosting is smooth and fluffy and just the right touch to finish it off!  Note:  The brownies will need time to cool completely and chill in the refrigerator, so plan ahead!

Fudge Brownie Filled Buttermilk Cake with Brown Sugar Marshmallow Frosting

Fudge Brownie Layer:
1/2 cup canola oil
1 cup granulated sugar
1 teaspoon vanilla extract
2 eggs
1/2 cup all purpose flour
1/4 cup +2 Tablespoons cocoa powder
1/4 teaspoon baking powder
1/8 teaspoon salt
7 ounces (1/2 of a 14 ounce can) sweetened condensed milk
2 ounces (1/3 cup) semi sweet chocolate chips

Buttermilk Cake:

2 1/3 cups cake flour (Or sub 2 cups +3 Tbsp all-purpose flour and 2 Tbsp cornstarch)
1 1/2 teaspoons baking powder
1/2 teaspoon baking soda
1/4 teaspoon salt
12 Tablespoons (1 1/2 sticks) butter, room temperature
1 1/3 cups granulated sugar
3 eggs
1 1/2 teaspoons vanilla
1 cup buttermilk
Brown Sugar Marshmallow Frosting:

1 cup brown sugar (packed)
1/4 cup water
1/2 cup corn syrup
4 egg whites
2 tsp vanilla

Preheat the oven to 350F.  Spray a 9 inch round cake pan with cooking spray, then line the bottom with parchment paper and spray the parchment.  Set aside.

In a large bowl, whisk together the oil, sugar, vanilla, and eggs until well blended and smooth.  Add the flour, cocoa powder, baking powder, and salt, and stir until combined and no streaks of flour remain.  Pour the batter into the prepared pan and smooth the top.  Bake for 18 to 20 minutes, or until a toothpick inserted in the center comes out clean.  Do not overbake, or the brownies will be too hard to cut through in the cake. 

While the brownies are baking, place the condensed milk and chocolate chips in a microwaveable bowl and heat in 30 second intervals, stirring after each, until melted and smooth.  When the brownies are done, remove from the oven and immediately pour the condensed milk mixture over the top of the brownies, spreading all the way to the edges.  Let cool completely, then chill until cold.  When the brownies are cold, run a knife around the edge of the pan and carefully lift the brownie layer out of the pan.  Set on a plate, cover with plastic wrap, and set aside while you make the cake layers.

For the cake, preheat the oven to 350F.  Spray 2 9-inch round cake pans with cooking spray. Set aside.


In a medium bowl, whisk together the cake flour, baking powder, baking soda, and salt.  
In a large bowl, cream together the butter and sugar until well blended and smooth.  Add the eggs and vanilla, and beat for 2 to 3 minutes, or until fluffy.  Beat in 1/3 of the flour mixture until just combined, followed by half of the buttermilk.  Add another 1/3 of the flour mixture, followed by the remaining buttermilk.  Beat in the remaining flour until just combine.  

Pour the batter evenly into the two prepared pans and smooth the tops.  Place in the preheated oven and bake for 20 to 22 minutes, or until a toothpick inserted in the center comes out clean.  Remove cakes from the oven and let cool in the pans for 10 to 15 minutes.  Carefully turn the cakes out of the pans and let cool completely on a cooling rack.  


For the brown sugar marshmallow frosting, mix brown sugar, water and corn syrup in a medium saucepan. Bring to a full rolling boil. (Be careful, as it will rise, so make sure the sides of your pan are taller). Let it boil at medium to medium high until the syrup reaches 240F. Meanwhile in a stand mixer, beat egg whites until stiff.

Slowly pour the hot syrup in a thin stream into egg whites, beating constantly. Beat until icing holds peaks, then blend in vanilla.

To assemble the cake, place a buttermilk cake layer on a serving plate.  Spread with a thin layer of the frosting.  Place the brownie layer on top.  Spread with another thin layer of frosting.  Place the second cake layer on top and frost the top and sides with the remaining marshmallow frosting.  Makes 16 servings.  

Enjoy!  -Cardamommy

Monday, March 9, 2015

Buttermilk Lemon Pie


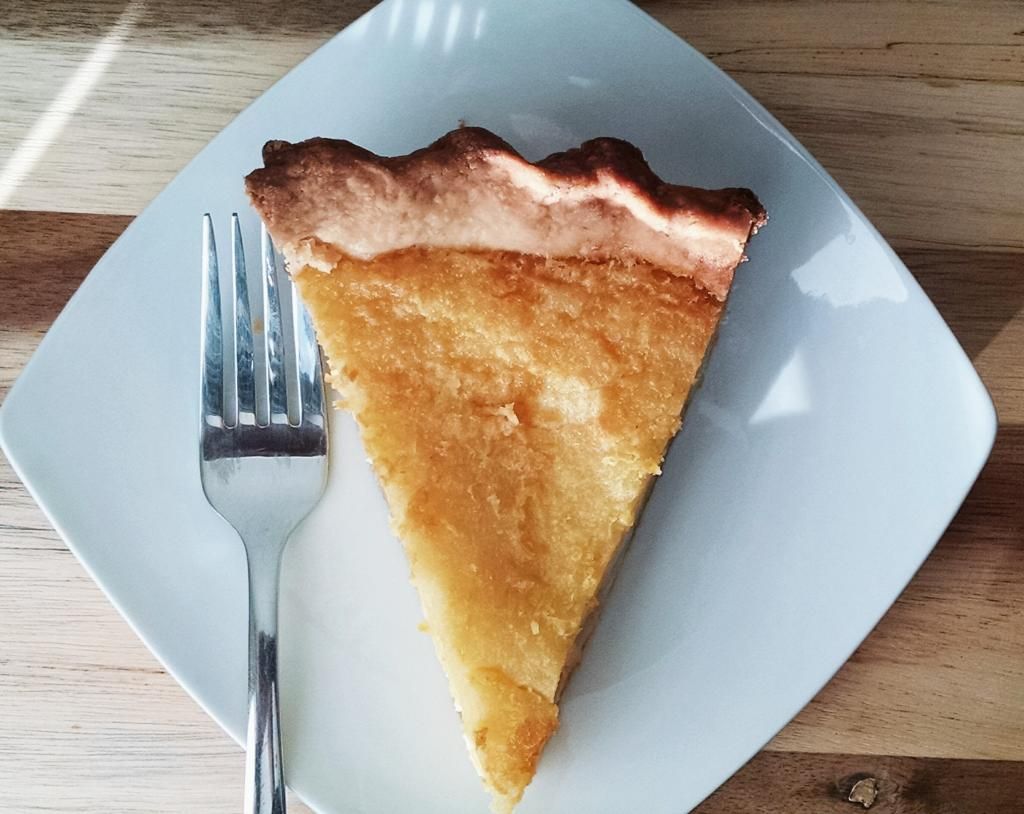
I found this recipe at chow.com, and originally thought it was not a success, and I almost threw away the recipe.  I tasted a sliver and wasn't really impressed because it tasted overwhelmingly of eggs.  I was planning on serving this pie the next day, however, and decided to just go with it.  When I served it the next day it tasted so much better, and everyone who ate it loved it!  So I kept the recipe and decided to share it! This pie is sweet and custardy with the perfect touch of lemon.


Buttermilk Lemon Pie

1 9-inch pie crust
2 cups granulated sugar
2 Tablespoons all purpose flour
1/2 teaspoon salt
1 cup buttermilk
4 eggs
4 egg yolks
2 teaspoons vanilla extract
1/2 cup (1 stick) butter, melted
Zest of 1 lemon

Preheat the oven to 350F.  Fit the the pie crust into a 9 inch pie plate and trim and crimp the edges.

In a large bowl, whisk together the sugar, flour, and salt until combined.  Add the buttermilk, eggs, egg yolks, and vanilla and whisk until smooth.  Add the melted butter and lemon zest and whisk until completely incorporated.  Pour the filling into the prepared pie crust.

Place the pie in the oven and bake for about 50 to 60 minutes, or until the filling is just set in the middle and the top is golden brown.  The pie may puff up a bit at the end of baking, this is okay.  Remove the pie from the oven and let cool completely.  Cover the pie and refrigerate overnight.  Serve the pie at room temperature, or chilled.  Makes 8 servings.

Enjoy!  -Cardamommy

Friday, February 13, 2015

Buttermilk Layer Cake


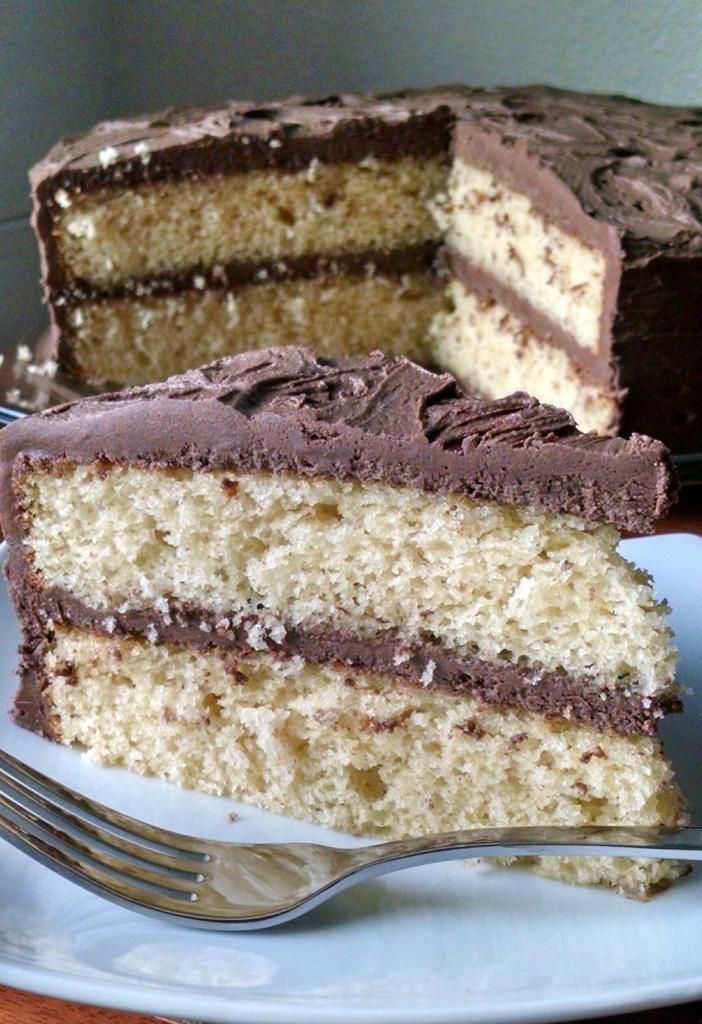
I was searching for a buttermilk layer cake and stumbled across this one from the NY Times, and I love it!  Love it.  This cake is definitely going to be my brand new go to favorite vanilla layer cake recipe.  It is nice and light, and tender, and flavorful, and pretty much just amazing!  I frosted mine with this browned butter chocolate frosting, but you can use whatever frosting you want!  

Buttermilk Layer Cake

2 1/3 cups cake flour (Or sub 2 cups +3 Tbsp all purpose flour and 2 Tbsp cornstarch)
1 1/2 teaspoons baking powder
1/2 teaspoon baking soda
1/4 teaspoon salt
12 Tablespoons (1 1/2 sticks) butter, room temperature
1 1/3 cups granulated sugar
3 eggs
1 1/2 teaspoons vanilla
1 cup buttermilk

Preheat the oven to 350F.  Spray 2 9-inch round cake pans with cooking spray. Set aside.

In a medium bowl, whisk together the cake flour, baking powder, baking soda, and salt.  

In a large bowl, cream together the butter and sugar until well blended and smooth.  Add the eggs and vanilla, and beat for 2 to 3 minutes, or until fluffy.  Beat in 1/3 of the flour mixture until just combined, followed by half of the buttermilk.  Add another 1/3 of the flour mixture, followed by the remaining buttermilk.  Beat in the remaining flour until just combine.  

Pour the batter evenly into the two prepared pans and smooth the tops.  Place in the preheated oven and bake for 20 to 22 minutes, or until a toothpick inserted in the center comes out clean.  Remove cakes from the oven and let cool in the pans for 10 to 15 minutes.  Carefully turn the cakes out of the pans and let cool completely on a cooling rack.  Frost with your favorite frosting.  Makes 12 to 16 servings.

Enjoy!  -Cardamommy


Friday, January 16, 2015

Cinnamon Honey Buttermilk Pie


I don't think that I have ever made a buttermilk pie.  Mostly, I think, because I was a tiny bit afraid that it would taste like buttermilk.  In a pie.  Now, don't get me wrong, I like buttermilk.  Just not in pie form, I don't think.  I once made a buttermilk chocolate pudding and I really wasn't a fan because I could really taste the buttermilk tang through the chocolate. This pie is so amazing!  It doesn't taste like tangy buttermilk, but has a wonderful custard flavor and the honey comes through very nicely.  Just lightly spiced with cinnamon, this pie is just perfect!


Cinnamon Honey Buttermilk Pie

9 inch unbaked pie crust
1/2 cup butter, melted
2/3 cup granulated sugar
1/2 cup honey
1/2 teaspoon salt
3 Tablespoons all purpose flour
3 eggs, lightly beaten
2 teaspoons vanilla extract
1 cup buttermilk
1 teaspoon cinnamon

Preheat the oven to 350F.  

Stir together the melted butter, sugar, and honey until smooth.  Add then salt and flour, and stir until combined.  Stir in the eggs and vanilla.  Add the buttermilk and cinnamon and stir until completely incorporated.  

Pour the mixture into the unbaked pie crust and bake in the preheated oven for 15 minutes.  Reduce the oven temperature to 325F, and continue to bake the pie for 40 to 45 more minutes, or until the filling jiggles slightly.  Remove the pie from the oven and let cool completely (and chill if desired) before serving.  Makes about 8 servings.

Enjoy!  -Cardamommy

Monday, December 1, 2014

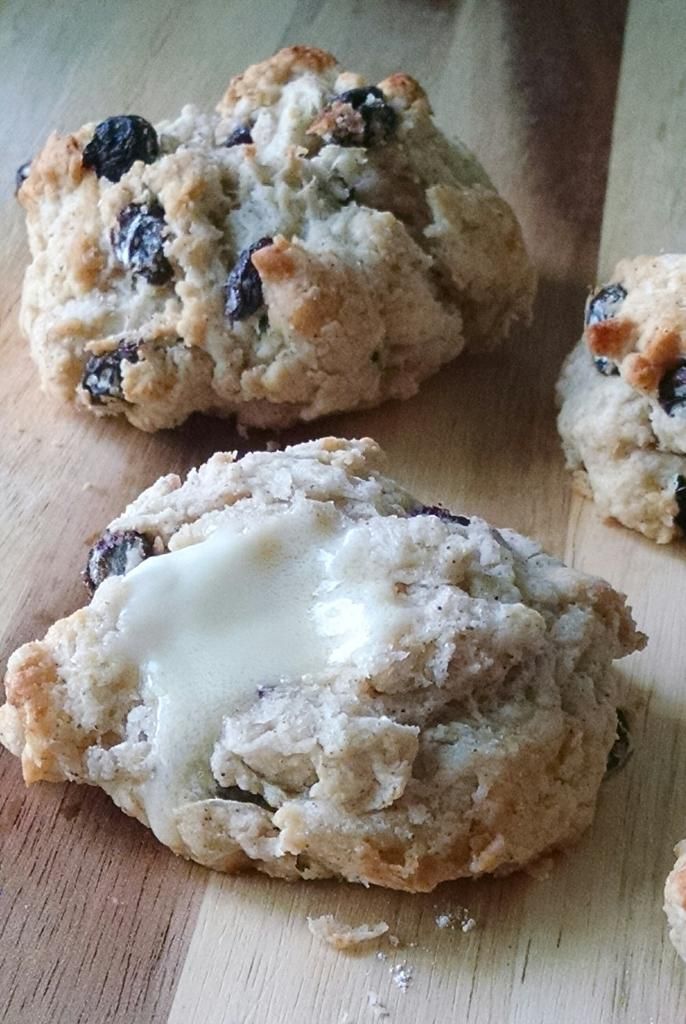
Cinnamon Raisin Buttermilk Biscuits


This is my absolute favorite biscuit recipe ever.  It's in the America's Test Kitchen cookbook, and it is my tried and true best loved ever.  This time though, I decided to add cinnamon and raisins to the dough to change things up a bit.  These biscuits blew me away!  My Hungry Puppies were in heaven!  Crunchy on the outside and tender on the inside and bursting with cinnamon and raisins, I didn't want to stop eating them!

Cinnamon Raisin Buttermilk Biscuits

1 cup all purpose flour
1 cup cake flour
2 teaspoons baking powder
1 teaspoon granulated sugar
1 teaspoon cinnamon
1/2 teaspoon baking soda
1/2 teaspoon salt
1/2 cup (1 stick) cold butter
3/4 cup raisins
3/4 cup cold buttermilk

Preheat the oven to 450F.  Line a baking sheet with parchment paper.

In a large bowl, stir together the all purpose flour, cake flour, baking powder, sugar, cinnamon, baking soda, and salt.  Cut in the butter using a pastry blender until coarse crumbs form.  Stir in the raisins.  Add the buttermilk and stir together until evenly moistened.  Scoop out pieces of the dough and drop onto the prepared baking sheet.  

Place the biscuits in the preheated oven and bake for about 10 to 12 minutes, or until the tops are lightly browned.  Remove from the oven and transfer to a cooling rack.  Makes 12 biscuits.

Enjoy!  -Cardamommy

Friday, July 18, 2014

Butter Pecan Cake


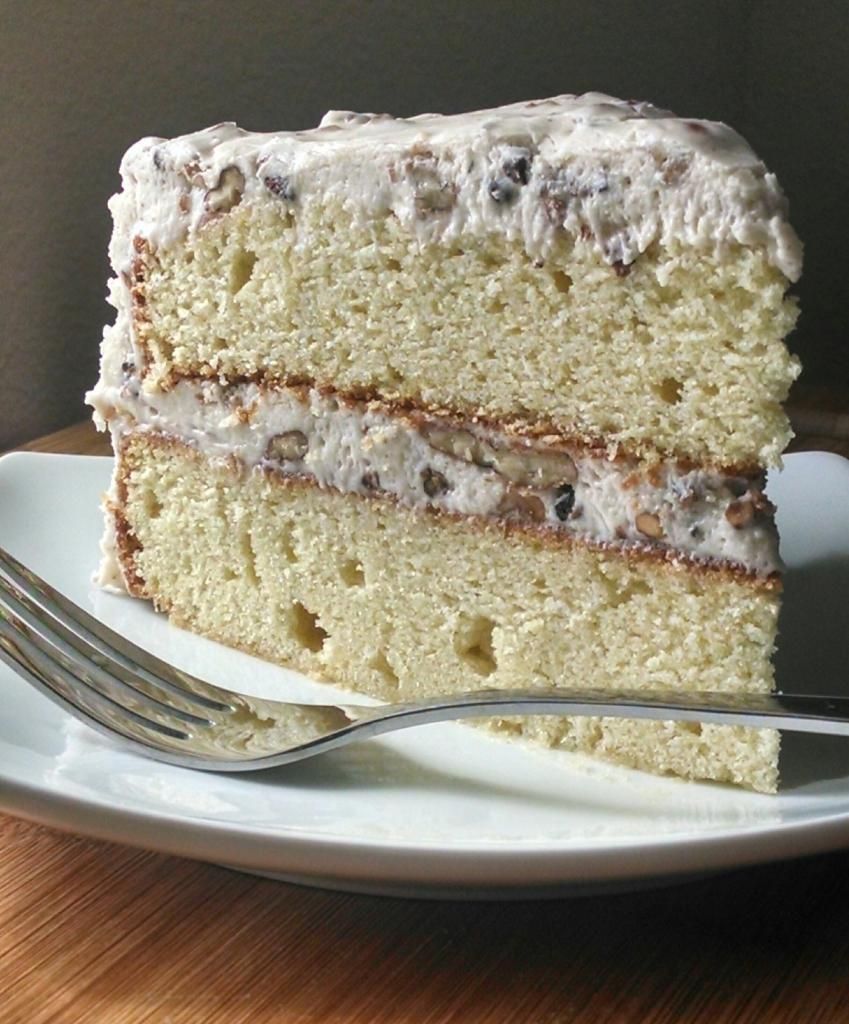
I made this cake over the weekend, and oh my was it ever delightful.  I'm usually not a super fan of nuts, but I knew that I had to give this one a shot.  And I was right.  A fair amount of the frosting may not have actually made it to the final cake.  Oops.  Yeah, it was that good.  The original recipe for this cake makes 3 layers.  Whoa.  My little family can't really handle a three layer cake, so I reworked the recipe and made it a two layer cake.  I made the original amount of frosting, and it worked out just fine.  The cake is deliciously moist and not too sweet, which is perfect for the buttery pecan frosting.

Butter Pecan Cake

Frosting:
2 Tablespoons butter
1 1/4 cups chopped pecans
1/2 cup butter, room temperature
2 teaspoons vanilla extract
16 ounces (it should equal about 3 3/4 cups, but I measured by weight) powdered sugar
11 ounces cream cheese, cold

Cake:
4 ounces white chocolate, chopped
5 Tablespoons boiling water
2/3 cup (10 2/3 Tablespoons) butter, room temperature
1 cup granulated sugar
3 eggs, separated
1 teaspoon vanilla
2/3 cup buttermilk
3/4 teaspoon baking soda
2 cups flour, loosely measured

First, make the frosting.  In a large skillet, melt the 2 tablespoons of butter over medium heat.  Add the chopped pecans and cook, stirring frequently until toasted, about 5 to 10 minutes.  Remove pecans from heat and let cool completely.

In a large bowl, beat together the butter and vanilla.  Gradually beat in the powdered sugar until incorporated (mixture will be dry and possibly crumbly).  Add the cold cream cheese and beat until blended and smooth.  Beat in the cooled pecans until evenly distributed.  Cover and chill frosting for about 1 hour, or until ready to use.

For the cake, preheat the oven to 350F.  Grease 2 9-inch round cake pans and line with parchment paper then lightly grease the parchment paper.  Set aside.

Place the chopped white chocolate in a small bowl and pour the boiling water over it.  Let sit until softened, then stir until smooth.  Set aside.  In a large bowl, cream together the butter and sugar until light and fluffy.  Add the egg yolks and vanilla, and beat until incorporated.  

Stir together the buttermilk and baking soda.  Add one cup of flour to the creamed mixture and beat until it is partially incorporated.  Carefully beat in the buttermilk, followed by the remaining 1 cup of flour. Beat until just combined and no streaks of flour remain.  

In a separate bowl, beat the egg whites until they form stiff peaks.  Fold the egg whites into the cake batter.  Pour the batter evenly in the prepared pans and smooth the tops.  Bake the cakes for 20 minutes, or until a toothpick inserted in the center comes out clean.  Remove cakes from the oven and let cool in the pans for 5 to 10 minutes, then turn the cakes out onto a cooling rack to cool completely.

To assemble, place one cake layer on a serving plate and spread with about 1/3 of the frosting.  Place the second cake layer on top and frost the top and sides of the cake with the remaining frosting.  Makes 12 to 16 servings.

Enjoy!  -Cardamommy

Monday, April 14, 2014

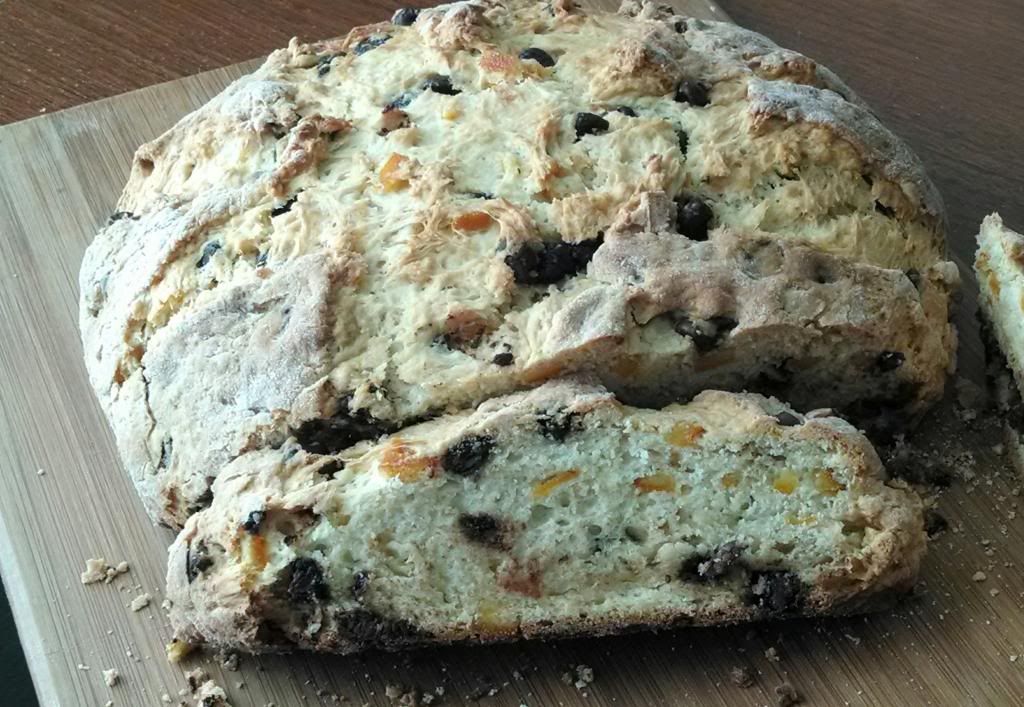
Chocolate and Candied Orange Peel Soda Bread


I came across this recipe while searching for a soda bread recipe for St. Patrick's day (long story...found a great one, forgot to add the baking soda), and immediately put it on my to bake list.  One problem.  Have you ever tried to find candied orange peel in ND in March?  No?  Neither have I, but I tried at Christmas time (you would think it'd be everywhere), and 7 stores later I was lucky to find some.  Crazy.  So, instead of doing the runaround searching for it, I decided to make my own!  Whoa, who'd have thought that would be a possibility that I could pull off? It totally worked, and it was totally easy and delicious.  In fact, I couldn't keep my family's hands out of it!  I used this recipe for the candied orange peel, but made a few changes: I used the peel of 3 oranges, not 2, and I did not coat the finished peel in sugar (since I would be baking with it), just placed it on a sheet of foil and let it dry.  This bread is amazing!

Candied Orange Peel and Chocolate Chunk Soda Bread

3 cups all purpose flour
1/2 cup granulated sugar
2 teaspoons salt
2 teaspoons baking powder
1/2 teaspoon baking soda
6 Tablespoons cold butter
1 cup semi sweet chocolate chips or chunks
6 ounces (about 1 cup diced) candied orange peel, diced
1 1/4 cups buttermilk
1 egg

Preheat the oven to 350F.  Line a baking sheet with parchment paper, and lightly grease the paper.

In a large bowl, whisk together the flour, sugar, salt, baking powder, and baking soda.  Cut in the butter using a pastry blender, fork, or your fingers, until course crumbs form.  Stir in the chocolate chips and candied orange peel.  In a separate bowl, whisk together the buttermilk and egg, then stir into the dry ingredients until just blended.

Turn the dough out onto a floured surface and knead 2 or 3 times, or until the dough comes together.  Shape the dough into a round, and place on the prepared baking sheet.  With a sharp knife, make 3 cuts across the top of the dough in the shape of an asterisk, about 1/2 to 1 inch deep.

Bake the bread in the preheated oven for 60 to 70 minutes, or until the top is golden brown and set, and a toothpick inserted deep in the center comes out clean.  Remove bread from the oven and let cool completely on a cooling rack before serving.  Makes 1 loaf. 

Enjoy!  -Cardamommy

Monday, January 6, 2014

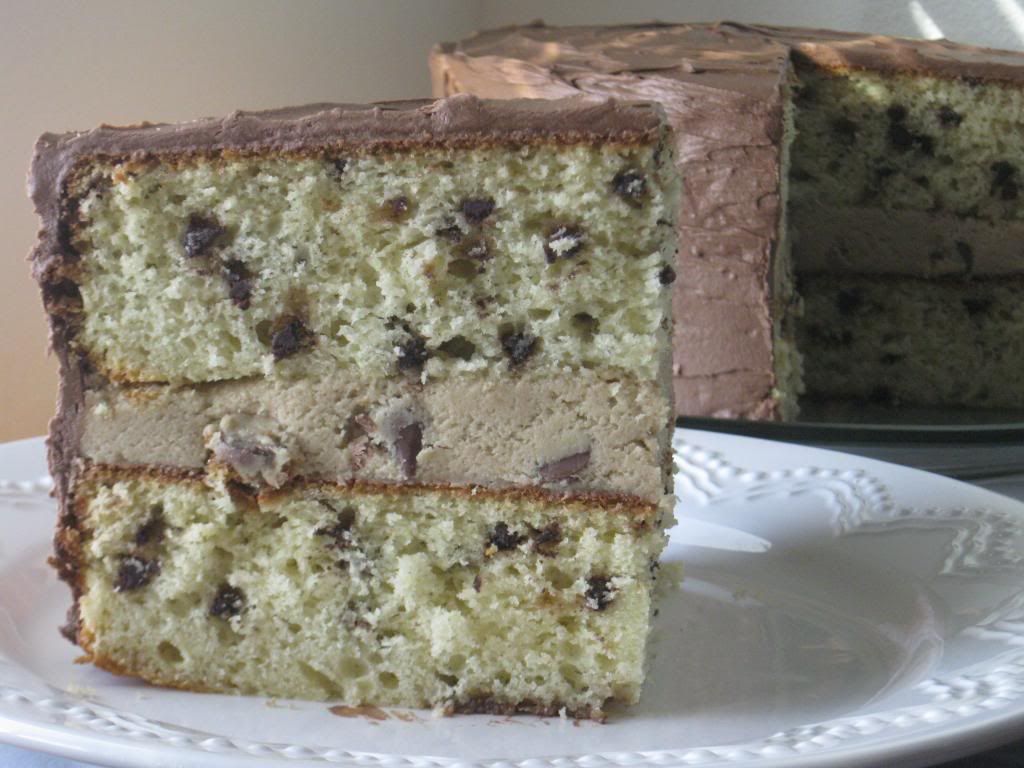
Chocolate Chip Cookie Dough Cake


I created this recipe especially for my youngest Hungry Puppy.  Sometimes, I like to  make a cake or other dessert that I know one or both of my Hungry Puppies will just absolutely love.  Something that I know will be their absolute favorite.  Why?  Just because.  They get so excited to come home from school to find their favorite flavor of treat baked just for them.  This cake, though, was one that I knew could be everyone's favorite.  My Hungry Puppies and I have a major weakness for cookie dough, so I decided to  stuff a cake with it!  It turned out brilliantly. I slightly modified the cookie dough recipe found here.  I used my current favorite yellow cake recipe, and the frosting from the Copy Cat Nestle Cafe Oreo Brownies (which I need to make again soon, by the way...).  We love this cake!

Chocolate Chip Cookie Dough Cake

Cake:
1 cup (2 sticks) butter, room temperature
2 cups granulated sugar
1 1/2 teaspoon vanilla extract
1/4 teaspoon vanilla butternut flavoring
4 eggs
2 cups buttermilk
4 cups all purpose flour
2 teaspoons baking powder
1 1/2 teaspoons baking soda
1 teaspoon salt

1 cup mini chocolate chips

Chocolate Chip Cookie Dough Filling:
½ cup butter, softened
1 cup packed brown sugar
¼ cup granulated sugar
5 tbsp milk
2 tsp vanilla extract
1 ¾ cups flour
½ tsp salt
1 cup milk chocolate chips


Chocolate Frosting:
3 cup powdered sugar, divided
1/2 cup cocoa powder
1/2 cup (1 stick) butter, room temperature
1 teaspoon vanilla extract
3 to 4 Tablespoons milk

Preheat the oven to 350F.  Grease and flour 2 9-inch round baking pans.  Set aside.


In a large bowl, cream together the butter, sugar, vanilla extract, and vanilla butternut flavor until light and fluffy. Beat in the eggs, one at a time until well blended. Add the buttermilk and beat on low speed until just combine. Add the flour, baking powder, baking soda, and salt and beat until incorporated. Stir in the mini chocolate chips until evenly distributed.

Divide the batter between the prepared pans and spread evenly. Tap the pans on the counter to remove any large air bubbles. Bake for about 35 minutes, or until a toothpick inserted in the center comes out clean. Remove cakes from the oven and let cool on a cooling rack for about 10 to 15 minutes.  Run a knife around the edges of the cakes, then turn the cakes out of the pans and let finish cooling on a cooling rack.  

For the cookie dough filling, stir together the butter, brown sugar, and granulated sugar until blended.  Add the milk and vanilla extract and stir until combined.  Add the flour and salt and stir until completely incorporated. Stir in the chocolate chips.  Set aside.

For the chocolate frosting, place 1 cup of the powdered sugar, the cocoa powder, butter, vanilla, and 2 tablespoons of the milk in a bowl.  Beat together until combined.  Add the remaining 2 cups of powdered sugar and beat until incorporated.  Beat in the remaining milk, one tablespoon at a time until the desired consistency is reached.  Beat frosting on high until fluffy and smooth.

To assemble the cake, level the cakes (if necessary - just use a serrated knife to cut the rounded domes off the top).  Place one cake layer upside down on a serving plate.  Spoon the cookie dough filling on top of the cake layer and pat it evenly over the cake.  Place the second cake layer upside down on top of the cookie dough filling.  Frost the top and sides of the cake with the chocolate frosting.  Makes 16 servings.

Enjoy!  -Cardamommy

Friday, December 20, 2013

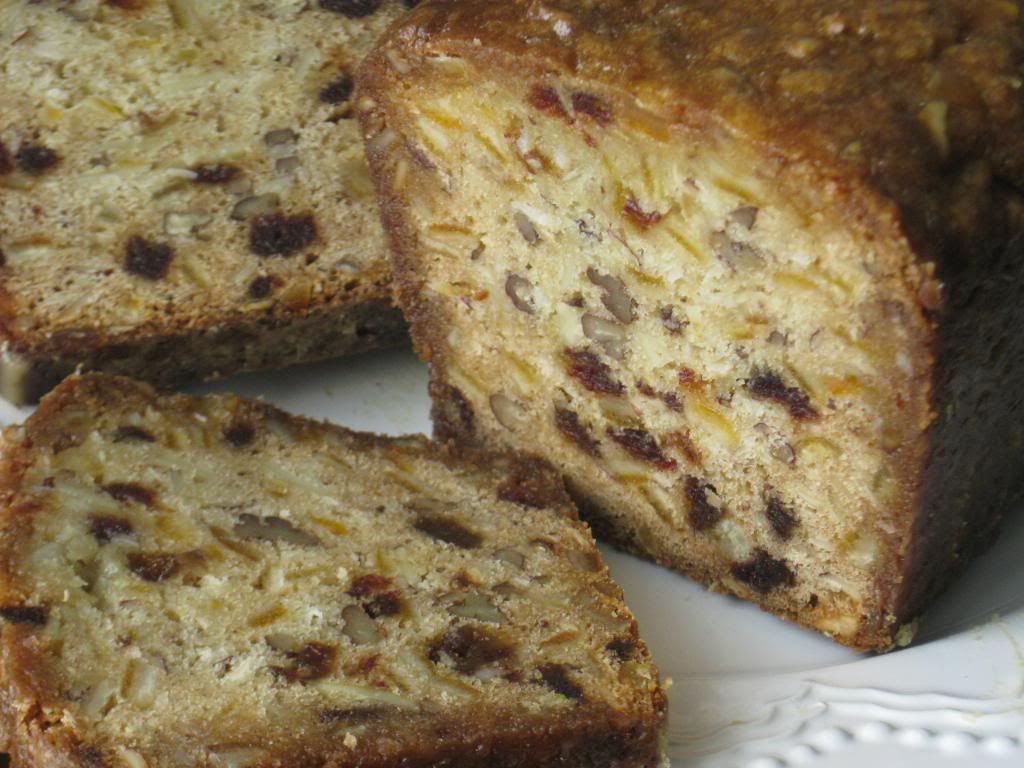
Orange Slice Fruitcake


I don't even know where to start with this fruitcake.  I am so excited to share this with you, mostly because the only thing you ever hear about fruitcake is that it is awful!  And how often do you come across a fruitcake recipe?  Almost never (in my recipe wanderings anyway).  So, I am here to introduce you to my most favorite fruitcake ever.  Not that I have a lot of experience, but why look for better when the best is right here?!  And yes, my Hungry Puppies have given this fruitcake their stamp of approval.

This is my Mom's fruitcake recipe, and I have always loved it.  This is not a dark molasses-y fruitcake at all.  In fact, there is no molasses in this fruitcake at all.  It is full of candied orange peel, dates, pecans, almonds, and coconut, and is smothered in an orange glaze.  The glaze soaks into the outside of the fruitcake and you get a wonderfully magnificent coating all around the outside.  Please try this.  This is not a storebought, thing of nightmares and Christmas spoofs fruitcake.  This is not the fruitcake that has been regifted (ie: pawned off) multiple times over the last five years.  This fruitcake is one that you will want to eat!  A couple things to note: You can easily cut the recipe in half to make one 8x4 inch loaf.  Also, it will look like you have an obscene amount of mix-ins (candied orange peel, dates, nuts, etc...) but don't worry, there is supposed to be that much!

Orange Slice Fruitcake
3 1/2 cups all purpose flour
1/2 teaspoon salt
1 pound candied orange peel
8 ounces chopped dates
1 cup sliced almonds
1 cup chopped pecans
1 cup shredded coconut
1/2 cup buttermilk
1 teaspoon baking soda
1 cup (2 sticks) butter, room temperature
2 cups granulated sugar
4 eggs
1 cup orange juice
2 cups powdered sugar

Preheat the oven to 300F.  Grease and Flour two 9x5 inch loaf pans.  Set aside.

In a medium size bowl, mix together the flour and salt, remove 1/2 cup of the flour mixture and set aside.  In a separate large bowl, combine the the candied orange peel, dates, almonds, pecans, and coconut.  Add the reserved 1/2 cup of the flour mixture to the fruit mixture and toss until all of the fruit is evenly coated.  In a separate small bowl, mix together the buttermilk and the baking soda.

In a large bowl, cream together the butter and sugar until light and fluffy.  Beat in the eggs, one at a time, until combined.  Add half of the flour mixture to the creamed mixture, and beat until combined.  Pour in the buttermilk/baking soda mixture and beat until blended.  Beat in the remaining flour until just combined.  Stir in the fruit/nut mixture.  Divide the batter equally between the two prepared pans and smooth the tops.  Place the fruitcake in the oven and bake for 1 hour and 45 minutes.  Remove from the oven.

When the fruitcake has almost finished baking, whisk together the orange juice and powdered sugar.  Pour the orange juice mixture carefully over the hot fruitcakes (you want the orange juice to run down the insides of the pan, not overflow to the outside and land on the counter).  Let the fruitcakes cool to room temperature, then cover with plastic wrap and refrigerate overnight.  Run a knife around the edges of the pans to loosen the cakes, then remove the fruitcakes from the pans, slice, and serve.  Store fruitcake wrapped tightly in plastic wrap.  Makes two 8x4 inch loaves of fruitcake.

Enjoy!  -Cardamommy


Monday, September 23, 2013

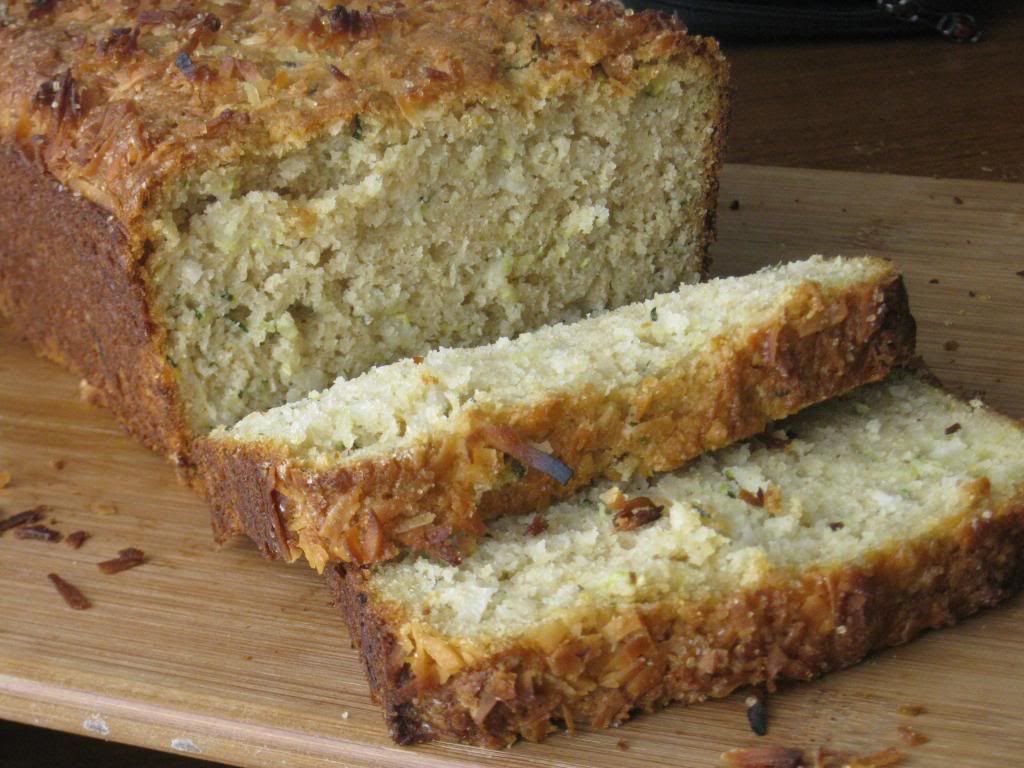
Coconut Lime Zucchini Bread


I am back with more zucchini bread for you!  The last loaf of honey zucchini bread was such a huge hit, I had to experiment with more zucchini bread (good thing I had 2 zucchini left).  Not to mention the fact that my Hungry Puppies asked me to make more zucchini bread no less than 79 times.  This bread is totally delicious!  It is moist and the lime gives it a fresh taste.  The coconut is a wonderful addition, and the toasted coconut on the top is the perfect topping!

Coconut Lime Zucchini Bread

1 cup white whole wheat flour
1 cup all purpose flour
1/2 cup granulated sugar
1 1/2 teaspoons baking powder
1/2 teaspoon baking soda
1/2 teaspoon salt
2 eggs
1/2 cup honey
1/2 cup oil
1/2 cup buttermilk
1 teaspoon vanilla
Juice of 1 lime (about 2 tablespoons)
Zest of 1 lime (about 2 teaspoons)
1 1/2 cups shredded zucchini (about 1 medium zucchini)
1 cup shredded coconut, divided

Preheat the oven to 350F.  Grease a 9x5 inch loaf pan.  Set aside.

In a large bowl combine the whole wheat flour, all purpose flour, sugar, baking powder, baking soda, and salt.  Set aside.  In a medium bowl, whisk together the eggs, honey, oil, buttermilk, vanilla, lime juice, and lime zest.

Pour the egg mixture into the flour mixture and stir until just combined.  Stir in the shredded zucchini and 1/2 cup of the shredded coconut.  Pour the batter into the prepared loaf pan and smooth the top.  Sprinkle the remaining 1/2 cup coconut over the top of the batter.  

Bake in the preheated oven for 50 to 60 minutes, or until a toothpick inserted in the center comes out clean.  Remove bread from the oven and let cool in the pan for about 10 to 15 minutes.  Carefully run a knife around the edges of the pan to loosen the bread, then turn the bread out onto a cooling rack to finish cooling.  Makes 1 loaf.

Enjoy!  -Cardamommy

Monday, August 5, 2013

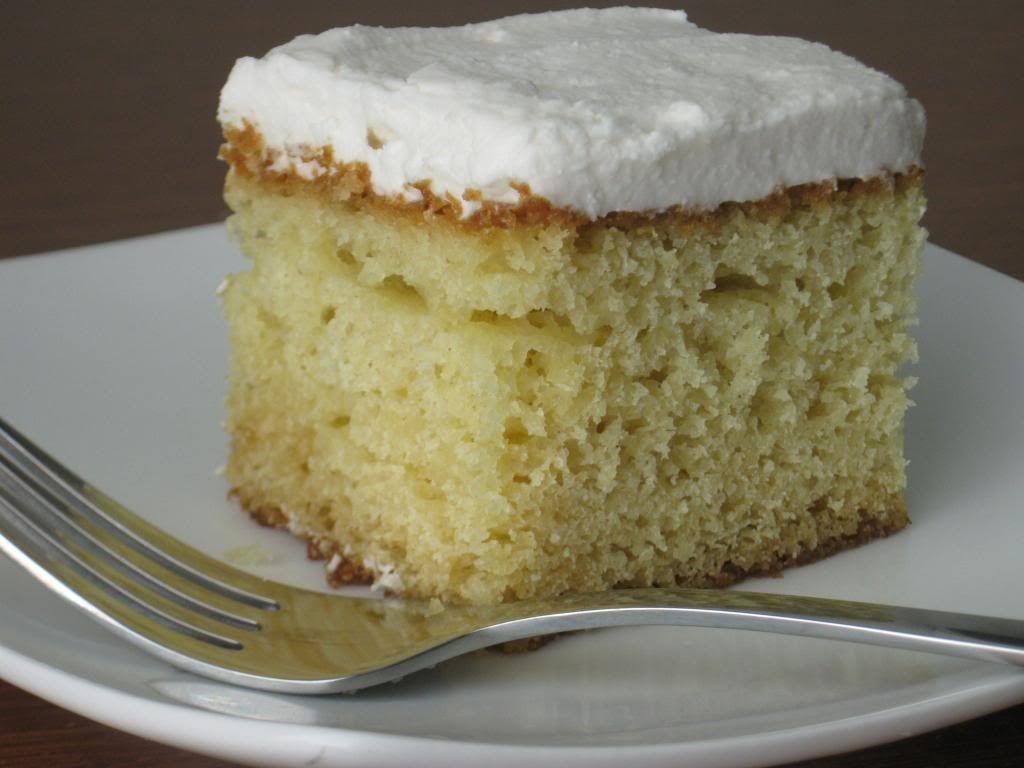
Buttermilk Yellow Cake


I've been experimenting with yellow cake recipes recently (such as this one), and I thought that I had found my favorite.  I may have been wrong, because this one may be my new favorite.  Or maybe I just need several favorites.  This recipe is so delicious!  It is moist and perfect and delicious.  I just received some vanilla butternut flavoring in the mail that I ordered from King Arthur Flour, and I love it.  I might be obsessed.  If you don't have vanilla butternut flavoring, you should buy some.  Or you could just use vanilla, and it would still be good.  Lastly, I couldn't decide which kind of frosting I wanted to use on this cake, so I made two different batches and frosted half of the cake with one and half with the other.  Problem solved.  One is the classic american buttercream that I love, and the other is a bakery style frosting.  They are both delicious, but I eventually decided that I prefer the classic american buttercream.  I will post them both and let you decide your favorite! Original cake recipe found here.

Buttermilk Yellow Cake

Cake:
1 cup (2 sticks) butter
2 cups granulated sugar
1 teaspoon vanilla extract
1/4 teaspoon vanilla butternut flavoring (substitute with another flavor or 1 tsp of vanilla)
4 eggs
2 cups buttermilk
4 cups all purpose flour
2 teaspoons baking powder
1 1/2 teaspoons baking soda
1 teaspoon salt


Bakery Frosting:
½ cup shortening
2 Tablespoons powdered nondairy creamer
1/8 teaspoon vanilla butternut flavoring
½ teaspoon vanilla
2 cups powdered sugar
2 Tablespoons water

OR

Classic American Buttercream:
¼ cup shortening
¼ cup butter, room temperature
½ teaspoon vanilla
1/8 teaspoon vanilla butternut flavoring
2 cups powdered sugar
1 Tablespoon milk
Preheat oven to 350°F.  Spray a 9x13 inch baking pan with cooking spray.

In a large bowl, cream together the butter, sugar, vanilla extract, and vanilla butternut flavor until light and fluffy. Beat in the eggs, one at a time until well blended. Add the buttermilk and beat on low speed until just combine. Add the flour, baking powder, baking soda, and salt and beat until incorporated.

Transfer the batter to the prepared pan and spread evenly. Tap the pan on the counter to remove any large air bubbles. Bake for about 35 minutes, or until a toothpick inserted in the center comes out clean. Remove cake from the oven and let cool completely on a cooling rack.  

For the bakery frosting, cream together the shortening, creamer, flavoring, and vanilla. Beat in the powdered sugar a little at a time until incorporated. Beat in the water until frosting reaches the desired consistency.

For the American buttercream, cream together the shortening, butter, vanilla, and flavoring. Beat in the powdered sugar a little at a time until incorporated. Beat in the milk.  Spread frosting on top of cake. Makes 20 to 24 servings.

Enjoy!  -Cardamommy


Monday, November 5, 2012

Banana Coconut Bread


I am not a fan of banana bread.  At all.  There are some recipes that I have made before that are tolerable, and I am constantly looking for a new variation that I will be okay with eating.  Generally, I avoid the topic all together.  However, my youngest Hungry Puppy has been asking to make banana bread all week, so what's an indulgent mom to do?  Search out/create a new recipe and make it happen.  This bread is very light and straight forward.  No brown sugar, no spices.  I think that the banana and the coconut go together well, and neither flavor dominates the other.  It is quite delicious.  Even for a banana bread non-lover.

Banana Coconut  Bread

1/2 cup butter, melted
1 cup granulated sugar
2 eggs, beaten
1/2 teaspoon vanilla extract
1/4 teaspoon coconut extract
1/4 cup buttermilk
1/4 cup cream of coconut
3 bananas, mashed (about 1 cup)
1 3/4 cup all purpose flour
1 teaspoon baking powder
1/2 teaspoon salt
1/8 teaspoon baking soda
1 cup shredded coconut (I used fresh coconut, packaged will work as well)
Demerara sugar (optional) to sprinkle on top

Preheat the oven to 350F.  Grease and flour a 9x5 inch loaf pan.

In a large bowl, stir together the butter and the sugar until completely combined.  Stir in the eggs, vanilla and coconut extracts, buttermilk, cream of coconut, and mashed bananas.  Stir in the flour, baking powder, salt, and baking soda.  Add the coconut and stir until just combined.

Pour the batter into the prepared pan and smooth the top.  Sprinkle with the desired amount of Demerara sugar.  Bake for 55 to 60 minutes, or until a toothpick inserted in the center of the loaf comes out with a few moist crumbs.  Remove bread from the oven and let cool in the pan for about 15 minutes.  Carefully remove bread from the pan and let cool before slicing.  Makes 1 loaf.

Enjoy!  -Cardamommy

Friday, June 29, 2012

Bran Muffins Part 2


This is bran muffin recipe number 2, and I am excited to share it with you.  This recipe uses wheat and oat bran, not bran cereal.  I really enjoy the flavor and texture of the bran.  These muffins are moist and delicious, and not at all difficult to throw together.  One more major perk to these muffins?  The batter can be made in advance and stored for 2 to 4 weeks in the refrigerator in an airtight container.  Just bake however many muffins whenever you feel like it!


Bran Muffins


2 cups unprocessed wheat bran (not bran cereal)
1 cup oat bran
1 cup boiling water
1/2 cup butter, melted
1/2 cup granulated sugar
1/2 cup honey
2 eggs, lightly beaten
2 cups buttermilk
2 1/2 cups all purpose flour
2 teaspoons baking soda
1 teaspoon salt


Preheat the oven to 375F.  Grease 12 jumbo muffin cups, or 24 regular size muffin cups.  Set aside.


In a medium bowl, place the wheat and oat bran.  Add the boiling water and stir together.  Let sit for about 5 minutes.  Add the melted butter, sugar, honey, eggs, and buttermilk.  Mix well until completely combined.  Add the flour, baking soda, and salt and stir until just combined.


Spoon the batter into the prepared muffin cups and bake in the preheated oven for about 17 to 19 minutes for jumbo muffins or 12 to 14 minutes for regular size muffins, or until a toothpick inserted in the center comes out with moist crumbs.  Remove muffins from the oven and cool on a cooling rack.  Makes 12 jumbo muffins, or 24 regular size muffins.


Enjoy!  -Cardamommy

Monday, June 25, 2012

Bran Muffins


I compiled this recipe several weeks ago, and came up with an incredible hit.  No one in my family could resist these muffins.  My hungry puppies both said that these were the best muffins I have ever made, and can you please make them again, Mommy?  Please?  Wait, wait, are we talking about the same muffins here? Bran?  Dry, tasteless, dry, tasteless, cardboard bran muffins?  Not these.  These muffins are full of flavor and are so delectably moist it is barely believable. Even after several days in the refrigerator, these muffins were still incredibly moist.


Bran Muffins


2 cups Fiber One cereal
1/2 cup old fashioned oats
1 cup boiling water
1/2 cup granulated sugar
1/2 cup brown sugar
OR 1 cup honey (omit granulated and brown sugar)
1/2 cup butter, melted
2 eggs
1/4 cup wheat germ
2 1/2 cups all purpose flour
2 1/2 teaspoons baking soda
1/2 teaspoon salt
2 cups buttermilk


Preheat the oven to 375F.  Grease a jumbo muffin pan.


In a large bowl, combine the cereal and oats. Pour the boiling water over the cereal mixture and let sit for about 5 minutes.  Stir in the granulated sugar, brown sugar (or honey), melted butter, and eggs.  Add the wheat germ, flour, baking soda, and salt, and buttermilk and stir until everything is just combined.  Do not overmix.  


Spoon the batter into the prepared  muffin cups, filling each cup about 3/4 full.  Place the muffins in the oven and bake for about 22 to 25 minutes, or until a toothpick inserted in the center of a muffin comes out with moist crumbs.  Let the muffins cool in the pan for several minutes, then turn the muffins out onto a cooling rack.  Repeat with remaining muffin batter.  Makes about 12 jumbo muffins.  Note: if you would like smaller muffins, simply use a traditional size muffin pan and reduce the bake time.


Enjoy!  -Cardamommy

Wednesday, March 14, 2012

Irish Soda Bread


Although not Irish, I love Irish Soda Bread.  I have made it several times before, and is perfect for St. Patrick's Day.  I love the tender crumb, crunchy crust, and simple flavor.  The currants provide little bursts of flavor throughout this delicious quick bread.  If you don't have currants, you can use raisins.


Irish Soda Bread


3 cups all purpose flour
1 cup cake flour
2 Tablespoons sugar
1 1/2 teaspoons baking soda
1 1/2 teaspoons cream of tartar
1 1/2 teaspoons salt
3 Tablespoons butter, softened
1 Tablespoon butter, melted
1 1/2 cups buttermilk
1 cup currants or raisins


Preheat the oven to 400F.  Line a baking sheet with parchment paper.  Lightly grease the parchment paper.


In a large bowl, whisk together the flour, cake flour, sugar, baking soda, cream of tartar, and salt.  Cut in 3 tablespoons of the butter until the mixture is crumbly (the butter will blend right in).  Add the buttermilk and currants, and toss together gently until the dough just starts to come together.  Turn the dough out onto a lightly floured surface and knead just until the dough comes together in a rough ball.  The dough will be lumpy, do not knead it until smooth.


Shape the dough into a 6 inch disk about 2 inches thick.  Place on the prepared baking sheet and cut an X into the top of the dough using a sharp knife.  Do not cut too deep, or your loaf will not hold its round shape (see the above picture).  Bake in the preheated oven until the loaf is golden brown and a toothpick inserted in the center of the loaf comes out with moist crumbs, about 40 minutes.  Remove the bread from the oven and brush with the melted butter.  Place on a cooling rack and cool for about an hour before serving.  Makes one loaf.


Enjoy!  -Cardamommy
Related Posts Plugin for WordPress, Blogger...