Showing posts with label Whipped Cream. Show all posts
Sunday, August 7, 2016
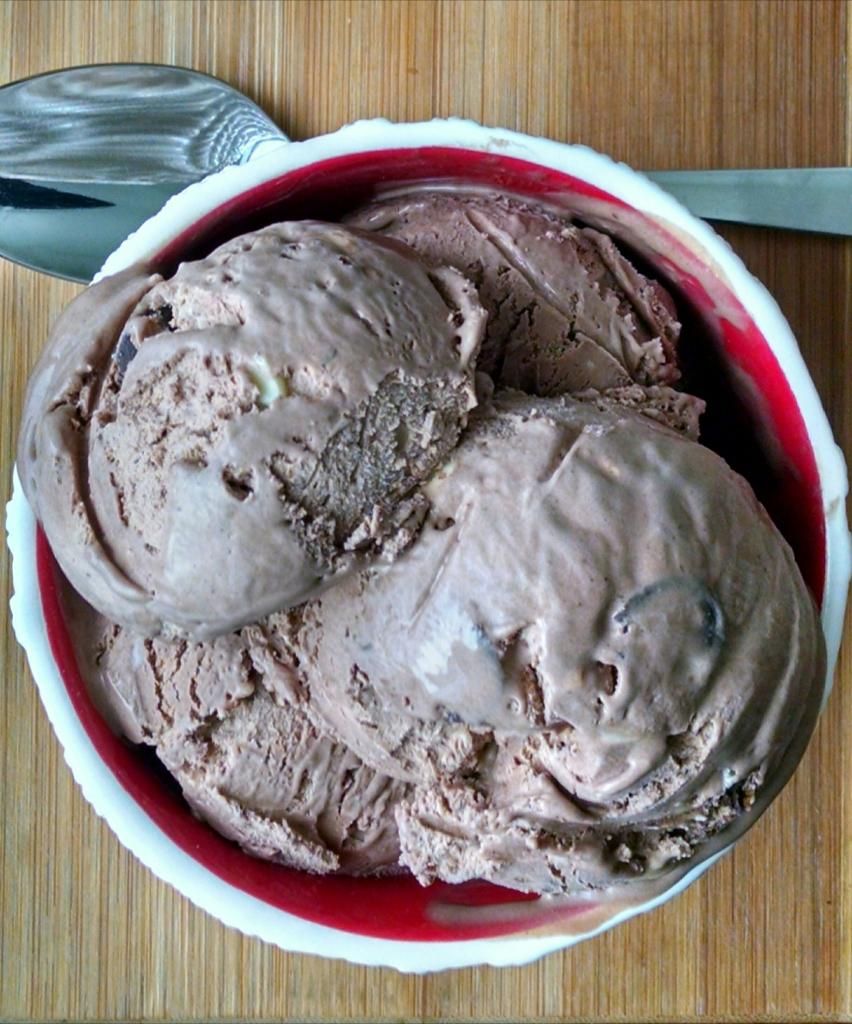
Fudge M&M Ice Cream Pie
This recipe was chosen by popular demand at my house. Whenever we have dinner guests (I always want to say guests for dinner...), I try to make a dessert that is a little bit nicer, fancier, bigger, badder, etc. This lovely recipe was on my to bake list, and was agreed upon by all. Which was nice, because there is usually a huge debate and negotiating involved. I made a few changes, and a few oopses (because I was in a hurry...), and the end result was kind of ridiculous. After I served it there was one piece left. I totally called dibs. Yes I did. An Oreo cookie crust is topped with cake and sprinkle filled ice cream, then covered with a thick fudge sauce, M&Ms, sprinkles, and whipped cream. Notes: I like to scoop the ice cream into the mixing bowl scoop by scoop, as I have found that it helps to mix the add ins more evenly. Be sure that your fudge sauce is cool before pouring it over the ice cream, or it will melt and mix into the ice cream a bit. Also, when you unmold the pie, the fudge sauce will be oozy, so be prepared for that.
Fudge M&M Ice Cream Pie
Fudge Sauce:
1 can (14 ounces) sweetened condensed milk
1/2 cup milk chocolate chips
1/2 cup semi sweet chocolate chips
1/2 teaspoon vanilla
Crust:
1 package (14 ounces) Oreo cookies
6 Tablespoons butter, melted
Ice Cream:
1/2 gallon Chocolate Chip Ice Cream, slightly softened (or use your favorite flavor)
4 frosted cupcakes, roughly crumbled (I used 2 vanilla and 2 chocolate)
1/3 cup sprinkles
1 cup M&Ms
Additional Sprinkles
Whipped Topping
For the fudge sauce, place the sweetened condensed milk in a microwaveable bowl and heat in the microwave for about 45-60 seconds, or until very warm. Stir in the milk chocolate chips, semi sweet chips, and vanilla until completely melted and smooth. Set aside to cool to while you prepare the pie.
Place the Oreo cookies in a food processor and process until you have fine crumbs. Place the cookie crumbs in a bowl with the melted butter and stir until the crumbs are evenly moistened. Press firmly into the bottom of a 9 inch springform pan. Freeze while you prepare the ice cream layer.
Scoop the softened ice cream into a large bowl and add the roughly crumbled cupcakes and sprinkles. Stir together quickly until evenly distributed, then transfer to the prepared crust and spread it evenly. Freeze until firm, 30 minutes to 1 hour.
Remove pie from the freezer and pour the fudge sauce over the top and spread evenly. Top with M&Ms, additional sprinkles, and whipped topping. Freeze until firm, about 1 hour, or cover and freeze overnight. When ready to serve, remove the sides of the springform and slice. Makes about 12-16 servings.
Enjoy! -Cardamommy
Friday, August 5, 2016
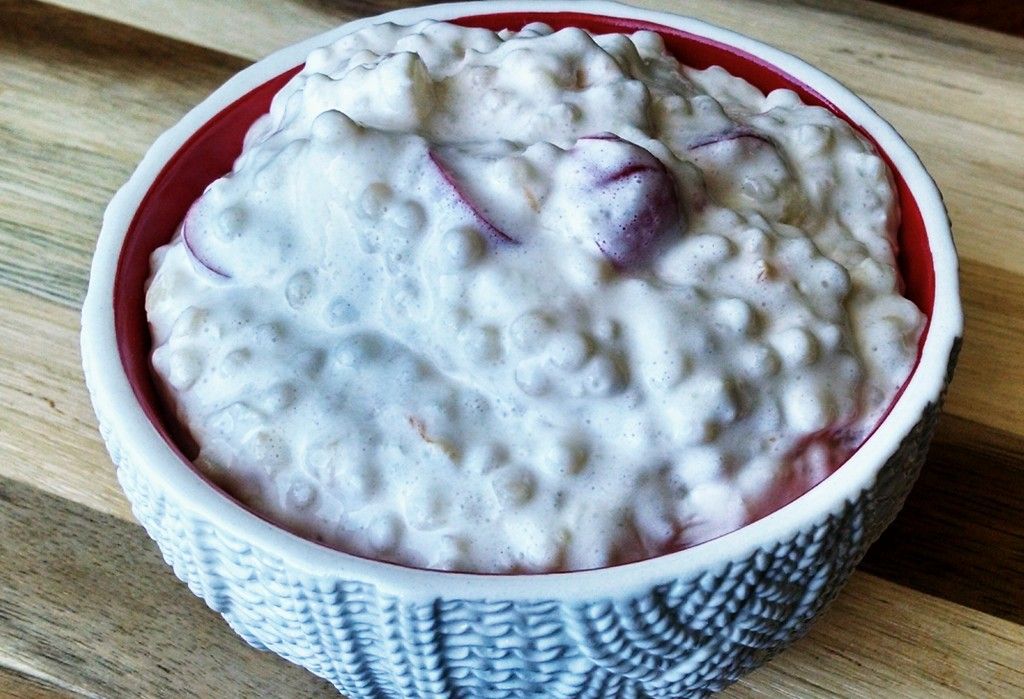
Strawberry Vanilla Bean Sherbet
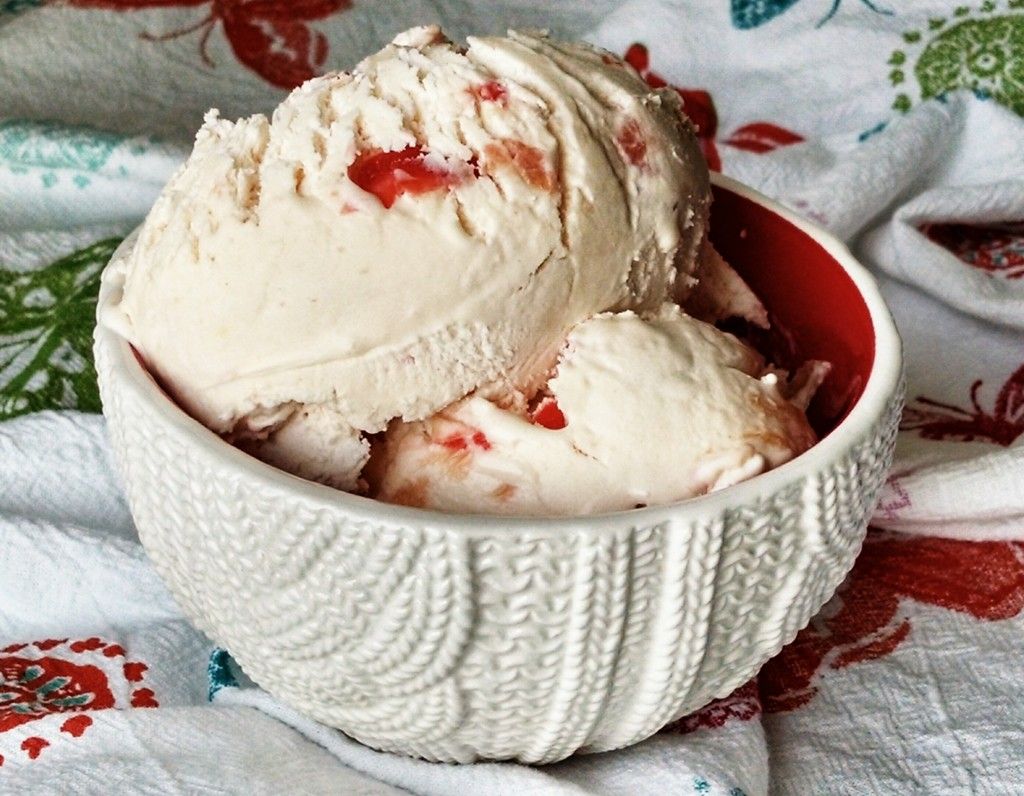
My sister made this simple and delicious sherbet when she was here a couple of weeks ago. I have made lots of home made ice cream, but never sherbet, and I was so impressed with how it turned out! It was really delicious. I was a little bit skeptical about the flavor of the vanilla bean coming through, but you could really taste the vanilla flavor with the strawberry. And honestly? Not difficult at all to make. So you should. Original recipe found here.
Strawberry Vanilla Bean Sherbet
4 cups chopped strawberries, fresh or frozen
1/2 cup granulated sugar
2 Tablespoons lemon juice
Pinch of salt
1 cup heavy cream
1 vanilla bean, halved and seeds scraped out
Place the strawberries, sugar, lemon juice, and pinch of salt in a food processor or blender and process until pureed. Pour into a large bowl.
Place the whipping cream in a bowl and add the vanilla bean seeds. Beat the whipping cream until soft peaks form. Fold the whipped cream into the strawberry puree. Chill for several hours, or until cold.
When you are ready to freeze the sherbet, pour the strawberry mixture into your ice cream maker and process according to the manufacturer's directions. Transfer the sherbet to a freezer container and freeze until firm. Makes about 1 1/2 quarts.
Enjoy! -Cardamommy
Labels:
Dessert
,
Ice Cream
,
Strawberry
,
Vanilla Bean
,
Whipped Cream
Friday, May 27, 2016
Fudge Ice Cream Sandwich Cake
I have not made this ice cream cake in years. Years!! What is my problem? How could I have deprived my children for so long? I honestly don't know, but I am rectifying the situation now. With this cake. It is so easy, and seriously, who doesn't like ice cream sandwiches? With an Oreo fudge filling? Topped with whipped topping, more Oreos, and hot fudge sauce? Yeah. Everyone wants this cake. I originally found this recipe in a Kraft Foods magazine quite a few years ago, and have adapted it.
Fudge Ice Cream Sandwich Cake
24 ice cream sandwiches (you can get creative and use different flavors)
4 cups whipped topping
1 cup hot fudge, warmed
2 packages (4 serving size each) instant chocolate pudding mix
2-4 Tablespoons milk
24 Oreo Cookies, chopped
Layer 12 of the ice cream sandwiches on the bottom of a 9x13 pan. Place in the freezer.
In a large bowl, stir together 2 cups of the whipped topping and the warm hot fudge until blended. Add the pudding mixes and stir until combined. Stir in enough of the milk to reach a spreadable consistency. Stir in about 2/3 of the chopped Oreo cookies. Remove the pan of ice cream bars from the freezer, and spread the fudge mixture evenly over the top. Layer the remaining 12 ice cream sandwiches on top of the filling.
Spread the remaining 2 cups of whipped topping evenly over the top. Sprinkle with the remaining 1/3 of the chopped Oreos, and drizzle with extra hot fudge sauce, if desired. Freeze until solid. Makes 24 servings.
Enjoy! -Cardamommy
Friday, January 29, 2016
Bayou Goo Pie
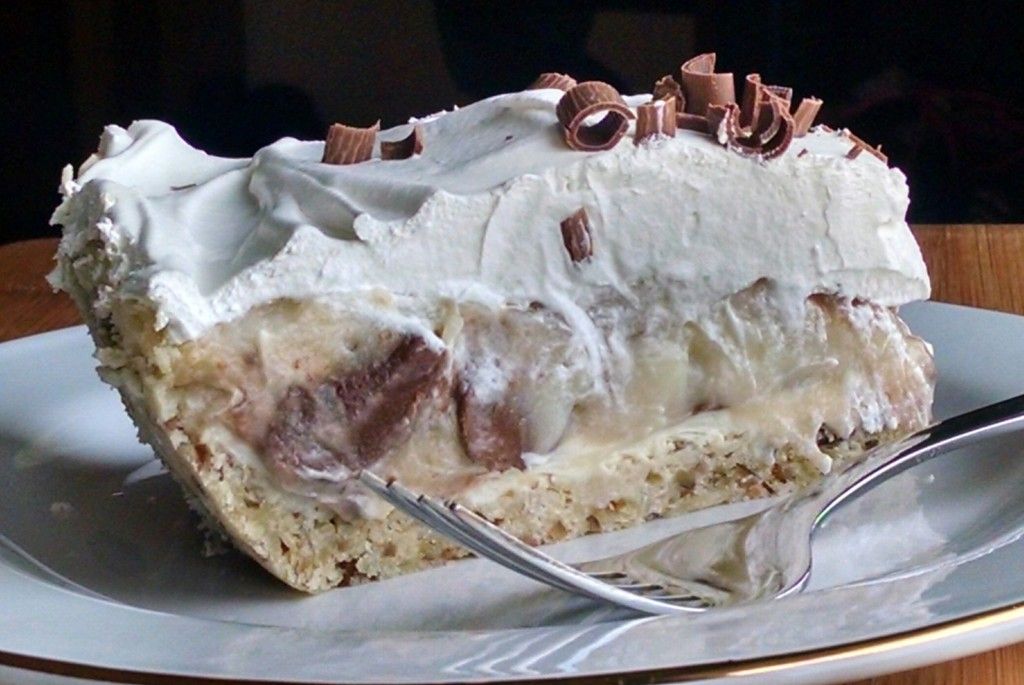
When we were in Houston last Summer, my sister really really wanted to get a Bayou Goo Pie from House of Pies. We purchased several other pies there, but unfortunately didn't get around to the Bayou Goo. So many pies...too little time... So, my sister asked me to make one instead. I figured out all of the components to the original Bayou Goo: Pecan crust, sweetened cream cheese, vanilla custard with chocolate chunks, and whipped cream with chocolate shavings, and put it together. Unfortunately, I never tried the Bayou Goo pie from House of the Pies, so I don't actually know how close this pie is (bummer), but it is completely delicious.
Bayou Goo Pie
Pecan
Crust:
1 cup all-purpose
flour
2 Tablespoons sugar
1/2 teaspoon salt
1/2 cup (1 stick)
cold butter
½
cup finely chopped pecans
Sweetened
Cream Cheese:
8
ounces cream cheese
½
cup powdered sugar
½
teaspoon vanilla extract
Vanilla
Custard:
3/4 cup sugar
1/4 teaspoon salt
3 1/2 Tablespoons
cornstarch
2 1/2 cups milk (I
used skim)
2 eggs
2 Tablespoons butter,
cut into 4 pieces
2 teaspoons vanilla
3 large Hershey Bars,
chopped
8 ounces Cool Whip (or use fresh whipped cream)
Chocolate shavings (optional)
Preheat the oven to 350F.
In a medium bowl, whisk together the flour, sugar, and salt. Cut in the butter using a pastry blender until the mixture is crumbly. Stir in the chopped pecans. Press the mixture onto the bottom and up the sides of a 9 inch pie plate. Bake in the preheated oven for 15 minutes, or until light golden brown. Remove from oven and cool completely.
For the sweetened cream cheese, beat together the cream cheese, powdered sugar, and vanilla extract until smooth. Spread evenly over the bottom of the cooled pecan crust. Place in the refrigerator while you prepare the pudding.
For the pudding, in a medium saucepan, whisk together the sugar, salt, and cornstarch. Whisk in the milk and eggs until smooth. Cook the mixture over medium heat, whisking constantly, until the mixture thickens and just starts to bubble (do not boil). Immediately remove from heat and stir in the butter and vanilla. Let the pudding cool for about 15 minutes, then quickly stir in the chopped Hershey bar (you want to have barely melted chunks in the pudding, not completely melted chocolate). Immediately pour the pudding over the cream cheese layer in the crust and smooth the top. Chill in the refrigerator until cold, at least four hours or overnight. Spread the cool whip over the top and garnish with chocolate shavings. Makes 8 servings.
Enjoy! -Cardamommy
Labels:
Candy
,
Chocolate
,
Cream Cheese
,
Dessert
,
Pastry
,
Pecan
,
Pie
,
Pudding
,
Vanilla
,
Whipped Cream
Monday, November 16, 2015
No Bake Pumpkin Apple Pie
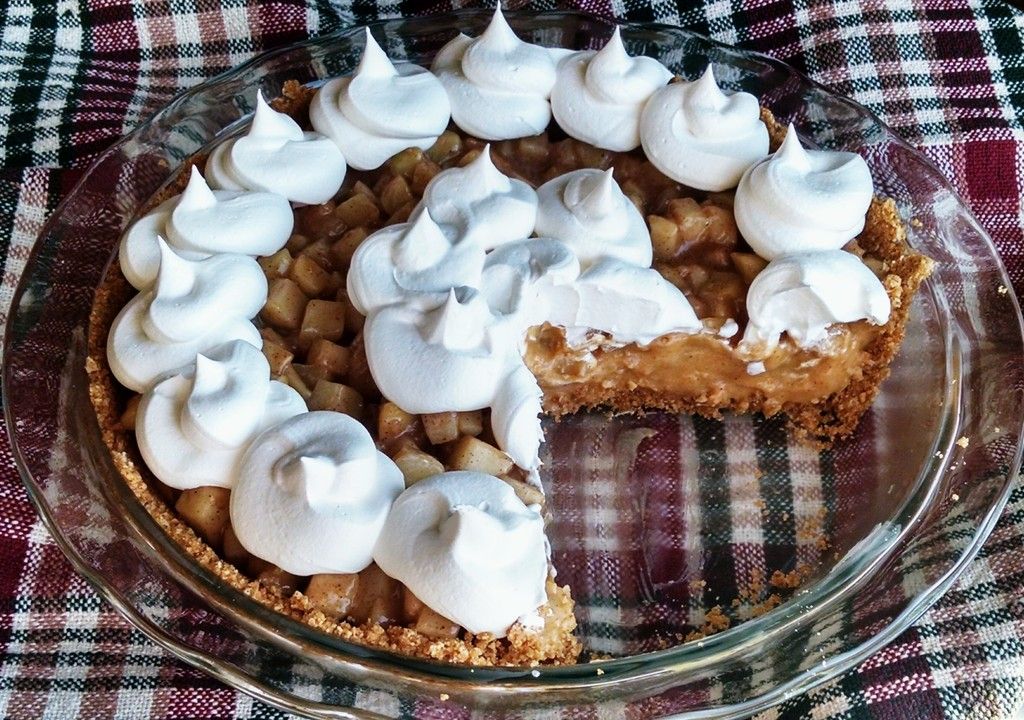
I have been working on this pie for quite a while now, but have only just gotten around to making it. Perfect timing, wouldn't you say? I got the idea when I saw this dessert, and thought I could transform it into a pie made from scratch. So that's what I did. The simple no bake graham cracker crust is filled with a spiced pumpkin pudding followed by a sauteed apple pie filling (recipe adapted from here), and topped with whipped cream. Now here is where it gets non homemade. I used cool whip to top my pie, but you can make fresh whipped cream if you'd rather.
No Bake Pumpkin Apple Pie
Graham Cracker Crust:
1 1/2 cups graham cracker crumbs
1/4 cup packed brown sugar
1/2 teaspoon cinnamon
7 Tablespoons melted butter
Pumpkin Pudding:
3/4 cup packed brown sugar
1/4 cup cornstarch
1/2 teaspoon pumpkin pie spice
1/4 teaspoon salt
2 eggs
1 cup canned pumpkin
1/2 teaspoon vanilla
Apple Pie Filling:
3-4 large apples (I used granny smith and golden delicious), peeled, cored, and chopped
1 Tablespoons all purpose flour
2 Tablespoons brown sugar
1 Tablespoon lemon juice
1 Tablespoon maple syrup
1 teaspoon apple pie spice
2-4 Tablespoons water (if necessary)
Cool Whip (or fresh whipped cream)
For the crust, combine the graham cracker crumbs, brown sugar, and cinnamon in a bowl. Pour the melted butter over the top and stir until the crumbs are evenly moistened. Pour the crumb mixture in a 9 inch pie plate and press into the bottom and up the sides of the plate. Chill for about 30 to 60 minutes before filling with pudding.
For the pudding, in a large saucepan, whisk together the brown sugar, cornstarch, salt, and pumpkin pie spice. Whisk in the eggs and milk until smooth. Cook the mixture over medium - high heat, whisking constantly until it is thick and just starting to bubble. Whisk in the pumpkin puree and vanilla until smooth. Remove pudding from heat and let cool to about room temperature. Pour into the prepared graham cracker crust and smooth the top. Place the pie in the refrigerator to chill while you make the apples.
Place the apples in a large skillet. Stir in the flour, brown sugar, lemon juice, maple syrup, and apple pie spice. Bring mixture to a simmer and continue to cook, stirring occasionally for 15 to 20 minutes, or until apples are tender. If the apple mixture starts to dry out too much, add enough water to make a sauce. Let the apples cool to room temperature, then carefully spoon on top of the pumpkin pudding. Refrigerate the pie for 4 hours, or overnight, until completely chilled. Top with cool whip or whipped cream. Makes 8 servings.
Enjoy! -Cardamommy
Labels:
Apples
,
Dessert
,
Graham Cracker
,
No Bake
,
Pie
,
Pudding
,
Pumpkin
,
Whipped Cream
Monday, June 15, 2015
Mississippi Mud Pie
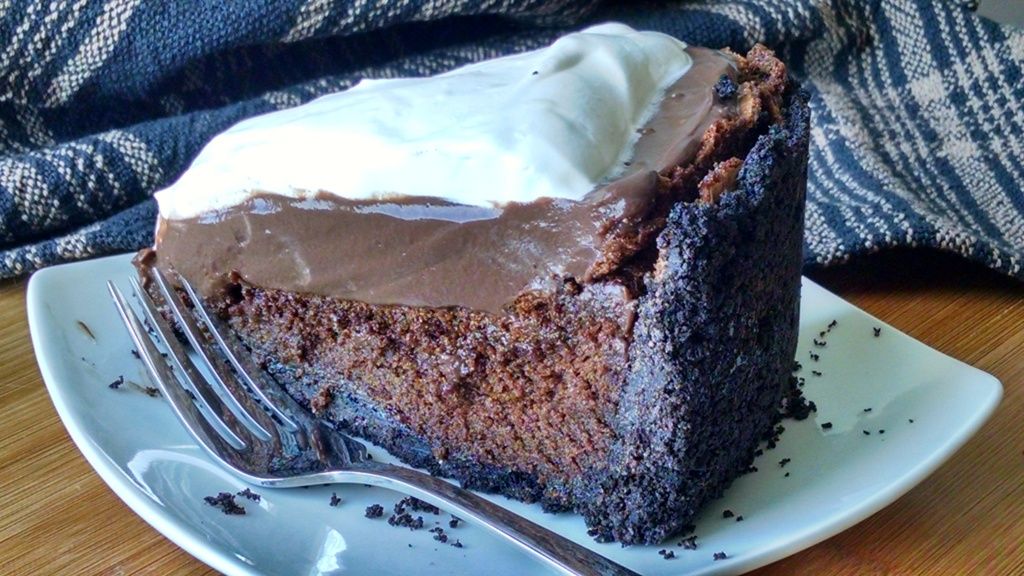
This cake has been two years in the making. Well, it took me two years to work up the guts to try it again after the first one was an epic failure. Epic. I originally found this recipe on Martha Stewart's website and decided to make it for my dad's birthday. I'm still not totally sure what happened... The oreo crust somehow leaked some sort of grease onto the bottom of my oven which burned off to create a noxious gas in my apartment. Then I think I rushed things a bit. I didn't really strictly follow the chilling time, so my pudding layer kind of got swallowed by the cake. I can't even remember if I topped it with whipped cream or if I just quit at that point. To top things off, it had a faint scorchy taste, which everyone else said they didn't notice. Maybe they were just being nice? Well, round two, and I decided to do a little bit more research. I found this recipe on a lot of different blogs, with a variety of suggestions. This time, I'm pleased to announce, the pie was a complete success. If your heart goes pitter patter over oreos, flourless chocolate cake, chocolate pudding, and whipped cream, then this pie is for you. Notes: I deviated from Martha's recipe just a bit. I substituted water for coffee in the cake, and added chocolate extract. I added slightly more cornstarch and 2 whole eggs instead of 4 egg yolks to the pudding. I also stabilized the whipped cream to help the leftovers last longer without melting into whipped cream puddles.
Mississippi Mud Pie
Crust:
16 ounces
whole (cream included) Oreos (35-40 cookies), crushed
5
tablespoons unsalted butter, melted
Flourless
Chocolate Cake:
4
tablespoons (1/2 stick) unsalted butter
6 ounces
good-quality dark chocolate (60-70%), chopped (I used chocolate chips)
1/4 water
1
tablespoon pure vanilla extract
2
teaspoons chocolate extract
6 large
eggs, separated, at room temperature
1 cup
sugar, divided
Chocolate
Pudding:
3/4 cup
sugar
1/2 cup
unsweetened cocoa powder
6
Tablespoons cornstarch
1/4
teaspoon salt
2 eggs
2 1/2
cups milk
3
tablespoons unsalted butter
2
teaspoons pure vanilla extract
3 ounces
good-quality dark chocolate (60-70%) (I used chocolate chips)
Stabilized
Whipped Cream:
4 teaspoons granulated sugar
1 teaspoon cornstarch
1 cup
heavy whipping cream, divided
1/2 teaspoon vanilla extract
For the crust, preheat the oven to 300F. Lightly grease a 9 inch springform pan with cooking spray.
Place the cookies in a food processor and process until you have fine crumbs. Transfer the crumbs to a bowl and pour in the melted butter. Stir together until evenly moistened. Press the buttered crumbs evenly onto the bottom and up the sides of the prepared pan, leaving about 1/2 inch at the top of the pan. Bake for about 10 minutes. Remove crust from the oven and let cool.
For the chocolate cake, increase the oven temperature to 350F. Place the butter and chocolate in a microwaveable bowl, and heat in the microwave in 30 second intervals, stirring after each, until chocolate is melted and smooth. Set aside.
In a small bowl, combine the water, vanilla extract, chocolate extract, and salt. Set aside.
Place the egg yolks and 1/2 cup of the sugar in a bowl. Beat until the mixture is a pale yellow color, 3 to 4 minutes. Add the chocolate mixture and beat until just combined, scraping down the sides of the bowl as necessary. Add the water mixture and beat on low until just combined.
In a separate bowl, beat the egg whites until foamy. Continue to beat while gradually adding the remaining 1/2 cup sugar until soft peaks form. Scoop about 1 cup of the egg whites into the chocolate batter and fold in gently with a spatula. Add the remaining egg whites and gently fold in until incorporated.
Pour the batter into the prepared crust and smooth the top. Place the cake in the oven and bake for 40 to 50 minutes or until the cake is set, but has a wiggle to it. The cake may look underdone. Remove cake from the oven and let cool completely. The cake will sink in the middle (leaving lots of room for pudding!). Cover the cake tightly with plastic wrap and refrigerate at least 3 hours, or overnight.
For the pudding, place the sugar, cocoa powder, cornstarch, and salt in a large saucepan and gently whisk together. Whisk in the eggs until combined. Slowly whisk in the milk. Cook the mixture over medium-high heat, whisking constantly, until the pudding thickens and just starts to bubble. Don't let it boil, or the eggs will scramble. Whisk in the butter, vanilla, and chocolate until melted and well blended.
Transfer the pudding to a bowl and cover with plastic wrap directly on the pudding surface to prevent a skin from forming on the top. Chill for at least 3 hours, or overnight.
For the stabilized whipped cream, place the sugar and cornstarch in a small bowl and stir together. Add 1/4 cup of the whipping cream and stir until smooth. Micrwave in 15 second intervals, stirring after each, until the mixture comes to a boil (be careful that it doesn't overflow in the microwave!). Stir the vanilla into the thickened mixture, then let cool completely.
Place the remaining 3/4 cup whipping cream in a bowl and beat until tracks begin to form in the cream. Continue to beat while slowly adding the thickened cream mixture. Beat until stiff peaks form.
To assemble the pie, spoon the cold pudding onto the cooled cake, staying within the crust, and smooth the top. Spread the whipped cream over the pudding. Refrigerate the cake for at least 30 minutes before serving. Makes 16 to 20 servings.
Enjoy! -Cardamommy
Friday, May 29, 2015
No Churn Pineapple Upside Down Cake Ice Cream
I found this recipe the other day and immediately wanted to make it. Then I changed my mind because I didn't want to deal with roasting the fruit and stuff, but then I changed my mind again because I had a half can of sweetened condensed milk to use up (because I rarely used condensed milk, and what recipe uses half a can?). So. Here we are. My husband was blown away because "Whoa, this totally tastes like pineapple upside down cake!" Win! I wrote the recipe as a full recipe, but you can cut it in half like I did if you have a half can of sweetened condensed milk in the fridge. Original recipe found here.
No Churn Pineapple Upside
Down Cake Ice Cream
1 ½ cups canned pineapple chunks, drained
¾ cup maraschino cherries, drained
1/2 cup coconut
1/2 cup coconut
2 Tablespoons packed brown sugar
½ teaspoon cornstarch
1 can (14 ounces) sweetened condensed milk
1 cup yellow cake mix
4 cups heavy whipping cream
Preheat the oven to 375F.
Grease an 8x11 inch baking dish.
Place the pineapple chunks, cherries, coconut, brown sugar, and
cornstarch in a bowl and stir until combined.
Pour the fruit mixture into the prepared pan, spreading the fruit evenly
in a single layer. Bake for 20 to 25
minutes, stirring halfway through.
Remove from the oven and use a fork to mash the fruit. Let cool.
In a medium bowl, stir together the condensed milk and cake
mix. Stir in the mashed fruit. In the bowl of a stand mixer, whip the
whipping cream until stiff peaks form.
Gently fold in the condensed milk mixture. Transfer to a freezer
container and freeze. Makes 12 cups (3
quarts).
Enjoy! -Cardamommy
Enjoy! -Cardamommy
Labels:
Brown Sugar
,
Cake
,
Cherry
,
Dessert
,
Ice Cream
,
Pineapple
,
Whipped Cream
Monday, May 25, 2015
Frog's Eye Salad
This pasta salad is so full of memories for me. My mom used to make this recipe when I was younger, and we all loved it! I think that it may have had a different name then, but we called it Frog's Eye Salad because of the shape, size, and texture of the pasta. I made this salad several years ago from a different recipe and it just wasn't the same! This recipe is directly handwritten from my mom, and it is still amazing. This sweet pasta salad is full of pineapple, oranges, cherries and whipped cream. Note: This recipe makes quite a lot, which makes it great for large groups or potlucks. You can easily cut the recipe in half.
Frog’s Eye Salad
1 box (16 ounces) Acini de Pepe Pasta, cooked according to
package directions
2 cans (20 ounces each) crushed pineapple, well drained and
juice reserved
2 cans (11 ounces each) mandarin oranges, drained and juice
of one can reserved
¼ cup lemon juice
1 cup granulated sugar
½ teaspoon salt
4 Tablespoons all-purpose flour
2 egg yolks
2 cups mini marshmallows
Small jar of Maraschino cherries, drained and halved
1 tub (12 ounces) Cool Whip
In a medium saucepan, stir together the pineapple juice, mandarin
orange juice (from one can only), lemon juice, sugar, and salt. Bring juice mixture to a boil. In a bowl, stir together the flour and enough
water to make a paste. Add the eggs and
stir until well blended. Slowly pour
some of the hot juice into the flour mixture, stirring constantly, then pour the
flour mixture back into the boiling juice mixture. Stir to combine (mixture should immediately
thicken), then remove from heat and let cool completely.
Place the cooked pasta and the cooled juice mixure into a
serving bowl and stir well. Cover
tightly with plastic wrap and let chill at least 1 hour or preferably
overnight.. When ready to serve the
salad, add the crushed pineapple, mandarin oranges, marshmallows, maraschino
cherries, and cool whip and stir until blended.
Serve cold.
Enjoy! -Cardamommy
Enjoy! -Cardamommy
Labels:
Cherry
,
Marshmallows
,
Orange
,
Pasta
,
Pineapple
,
Salad
,
Whipped Cream
Monday, April 20, 2015
No Churn Chocolate Coffee Bean Toffee Ice Cream
A while ago I posted on Facebook that I couldn't decide between "Give me chocolate, or give me death." and "Give me ice cream, or give me death". It was that kind of a day. My awesome husband promptly brought some chocolate fudge ice cream home. Then I decided that I had to create my own as well. This is what I came up with. A super easy no churn chocolate ice cream with chocolate covered coffee beans and toffee bits. It's dangerous!
No Churn Chocolate Coffee Bean Toffee Ice Cream
2 cups whipping cream
1 can (14 ounces) sweetened condensed milk
6 Tablespoons cocoa powder
1/2 -3/4 cup chocolate covered coffee beans, chopped
1/2 cup toffee bits
In a large bowl, or the bowl of a stand mixer, beat the whipping cream to stiff peaks. Place the condensed milk and cocoa powder in a bowl and stir until combined. Fold the chocolate condensed milk mixture into the whipped cream until incorporated. Fold in the coffee beans and toffee bits. Transfer the ice cream mixture to a freezer container and freeze at least 4 to 6 hours, or until frozen throughout. Makes about 6 cups.
Enjoy! -Cardamommy
Labels:
Chocolate
,
Coffee
,
Dessert
,
Ice Cream
,
Toffee Bits
,
Whipped Cream
Friday, November 14, 2014
Mascarpone Apple Pie
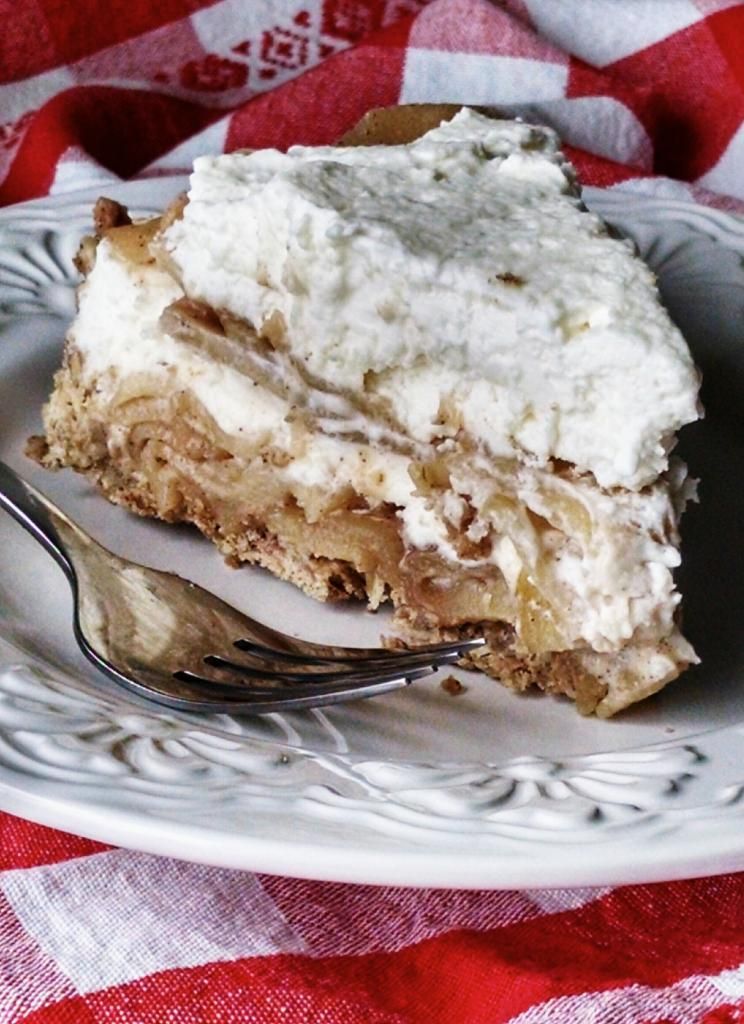
I have a slightly different sort of apple pie for you today. This pie is almost no bake! You only bake the crust, so it saves a little time and effort, and you don't have to roll any pie dough, which saves even more time and effort! You start by pressing in an easy oatmeal crust, then sautee the sliced apples on the stove. Layer the apple pie filling with mascarpone whipped cream and you have a winner apple pie! Recipe adapted from bhg.com
Mascarpone Apple Pie
Oatmeal Crust:
1 1/2 cups old fashioned oatmeal
3/4 cup all purpose flour
1/4 cup packed brown sugar
1/2 teaspoon cinnamon
1/4 teaspoon salt
1/2 cup (1 stick) butter, melted
Apple Pie Filling:
2 Tablespoons butter
1/2 cup packed brown sugar
1 Tablespoon lemon juice
1 teaspoon cinnamon
7 apples, peeled, cored, and sliced (I used granny smith, ginger gold, and honeycrisp)
1Tablespoon all purpose flour
2 to 3 teaspoons cold water
Mascarpone Whipped Cream:
1 carton (8 ounces) mascarpone cheese
1/4 cup granulated sugar
1/2 teaspoon almond extract
1 cup whipping cream
Preheat the oven to 350F. Lightly grease a 9 inch pie plate. Set aside.
For the crust, in a medium bowl, combine the oatmeal, flour, brown sugar, cinnamon, and salt. Stir in the melted butter until mixture is evenly moistened. Press evenly on the bottom and up the sides of the prepared pie plate. Bake in the preheated oven for 15 minutes. Remove crust from the oven and let cool.
For the apple pie filling, melt the butter in a very large skillet or saucepan. Add the brown sugar, lemon juice, and cinnamon and stir to combine. Add the sliced apples and cook over medium heat for about 20 to 25 minutes until tender, stirring occasionally. When the apples are tender, place the flour in a small bowl. Stir enough of the water into the flour to make a thick but pourable liquid. Scoot the apples to the edges of the skillet, leaving a well of liquid in the center. Pour the flour/water mixture into the liquid in the skillet, stirring quickly and constantly. Stir the apples back into the mixture. Remove from the heat and let cool.
For the mascarpone whipped cream, place the mascarpone cheese, sugar, and almond extract in a large bowl. Beat on low until combined. In a separate bowl, beat the whipping cream until stiff peaks form. Add the whipped cream to the mascarpone mixture and beat on low until blended.
To assemble the pie, place half of the apple filling into the pie crust. Spread with half of the mascarpone whipped cream. Place the remaining pie filling on top of the mascarpone mixture. Spread the remaining mascarpone whipped cream on top. Cover and refrigerate until chilled through. Makes 8 servings.
Enjoy! -Cardamommy
Labels:
Almond
,
Apples
,
Brown Sugar
,
Cheese
,
Dessert
,
Mascarpone
,
Oatmeal
,
Pastry
,
Pie
,
Whipped Cream
Friday, August 29, 2014
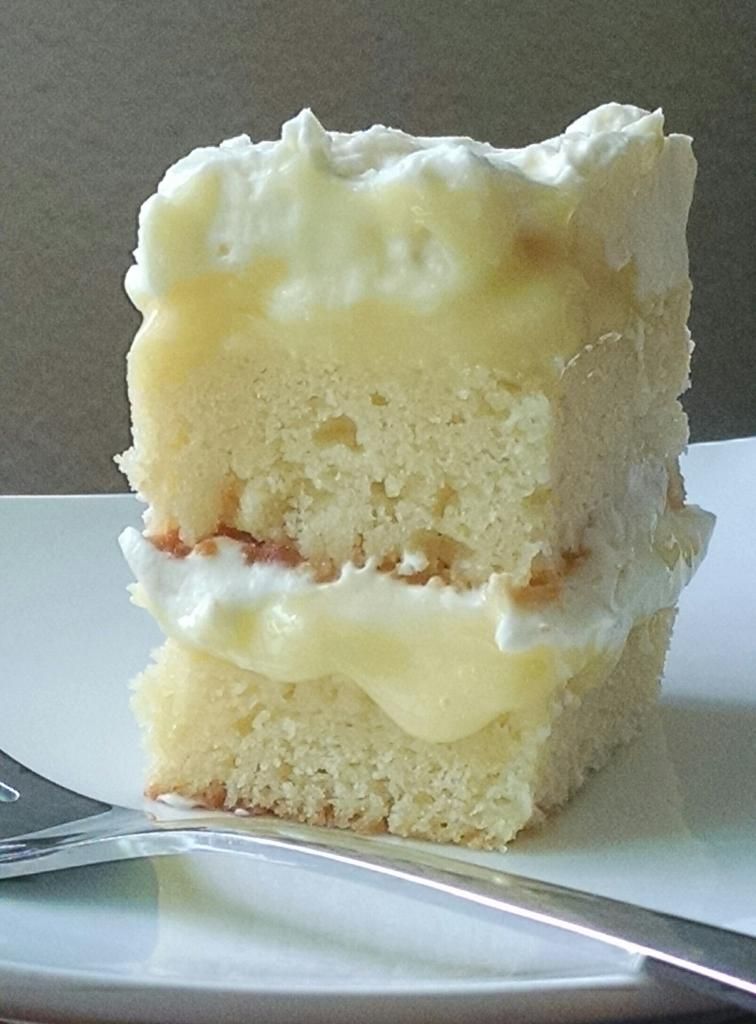
Lemon Mascarpone Tiramisu
I first made this recipe with my sister about a year ago, and we absolutely loved it. I found the recipe here, and the first time we made it we followed it pretty closely. This time, thought, I wanted to really make it awesome, so I made my own pound cake instead of ladyfingers (plus, I can't find ladyfingers anywhere!), and my own lemon curd. Is it a bit time consuming? Yes. Is it totally worth it? Absolutely. Layers of lemon pound cake, lemon curd, and mascarpone whipped cream make this sweet and tangy dessert one that you'll want to make again soon.
Lemon Mascarpone Tiramisu
Lemon Curd:
4 eggs
6 Tablespoons (3/4 stick) butter
1 cup granulated sugar
Juice of 2 lemons (6 Tablespoons)
Zest of 2 lemons
Pinch of salt
Lemon Pound Cake:
1 cup butter, room temperature
1 1/2 cups granulated sugar
4 eggs
2 teaspoons vanilla extract1 1/2 cups all-purpose flour
1 teaspoon baking powder
1/2 teaspoon salt
1/4 cup lemon juice
To Assemble:
1/2 cup lemon juice
3 Tablespoons powdered sugar
1 cup heavy whipping cream
1 carton (8 ounces) mascarpone cheese
1/2 cup powdered sugar, divided
1 teaspoon vanilla extract
For the lemon curd , whisk the eggs in a small bowl. Set aside. Melt the butter in a small saucepan over medium-low heat. Whisk the sugar, lemon juice, lemon peel, and salt into the butter, and bring to almost a simmer. Very slowly, drizzle the about 3/4 of the hot butter mixture into the beaten eggs, whisking the eggs constantly. Return the egg mixture to the saucepan, whisking constantly. Continue cooking over medium-low heat, whisking constantly until the mixture thickens and reaches about 180F. Do not boil. Transfer the lemon curd to a small bowl, and press a piece of plastic wrap directly on the surface. Chill at least four hours (can be made 2 days in advance, store covered in the refrigerator).
Preheat the oven to 350F. Lightly grease an 8x8 inch square baking pan, then line the bottom with parchment paper, then lightly grease the parchment.
For the lemon pound cake, cream together the butter and sugar until light and fluffy. Beat in the eggs, one at a time until completely incorporated, followed by the vanilla extract. Add the flour, baking powder, and salt, and beat until partially combined. Add the lemon juice, and beat on low until just combined, and no streaks of flour remain (being careful not to over beat). Scrape the batter into the prepared baking pan and smooth the top.
Bake for about 40 minutes, or until a toothpick inserted in the center comes out with moist crumbs. Remove from the oven and let cool in the pan for about 10 minutes, then turn out of the pan and remove the parchment paper from the bottom of the cake. Let cake cool completely on a cooling rack.
To assemble the tiramisu, in a medium bowl, beat the whipping cream with 1/4 cup of powdered sugar until stiff peaks form. Set aside. In a large bowl, combine the mascarpone cheese, the remaining 1/4 cup powdered sugar, and the vanilla extract. Mix until completely blended and smooth. Spoon the whipped cream into the bowl with the mascarpone cheese, and using a spatula, fold in the whipped cream until the mixture is combined.
In a small bowl, combine the lemon juice and 3 Tablespoons of powdered sugar, stirring until sugar is dissolved. Cut the lemon pound cake in half so you have two pound cake layers. Place the bottom layer cut side up in an 8 inch square pan and brush with half of the lemon juice mixture. Spread half of the lemon curd over the pound cake, then carefully spread half of the mascarpone mixture on top. Place the second pound cake layer cut side up on top of the mascarpone. Brush the pound cake with the remaining lemon juice. Spread the remaining lemon curd over the pound cake, followed by the remaining mascarpone mixture. Cover and chill at least 6 hours, or overnight. Makes 9 to 12 servings.
Enjoy! -Cardamommy
Labels:
Dessert
,
Lemon
,
Mascarpone
,
Pound Cake
,
Whipped Cream
Monday, June 23, 2014
Oreo Brownie Ice Cream
This is an amazing Summertime recipe, perfect for your kids to make and eat. My Hungry Puppies made this ice cream themselves and ate it mostly themselves as well. Just mix up some instant pudding, cool whip, and add ins. It is fast and easy to make and you don't have to churn it, just pop it in the freezer and you're good to go. One last slightly amazing thing about this ice cream is that when it melts, it doesn't run all over the place, it stays a pudding consistency. Perfect for a no mess ice cream cone on a warm day. Also, it is super easy to change up the flavors in this recipe. I made another batch using white chocolate pudding and coconut pudding with fudge stripe cookies and marshmallows. Be creative and use your favorites! Recipe found here.
Oreo Brownie Ice Cream
2 boxes (4 serving size) Oreo instant pudding mix
2 cups milk
1 tub (8 ounces) Cool Whip, thawed
1 1/2 to 2 cups brownie chunks (I used this recipe)
In a large bowl, whisk together the pudding mix and milk until thickened. Stir in the cool whip until blended. Fold in the brownie chunks. Spoon the ice cream mixture into a 2 quart freezer container and freeze until solid.
Enjoy! -Cardamommy
Monday, June 2, 2014
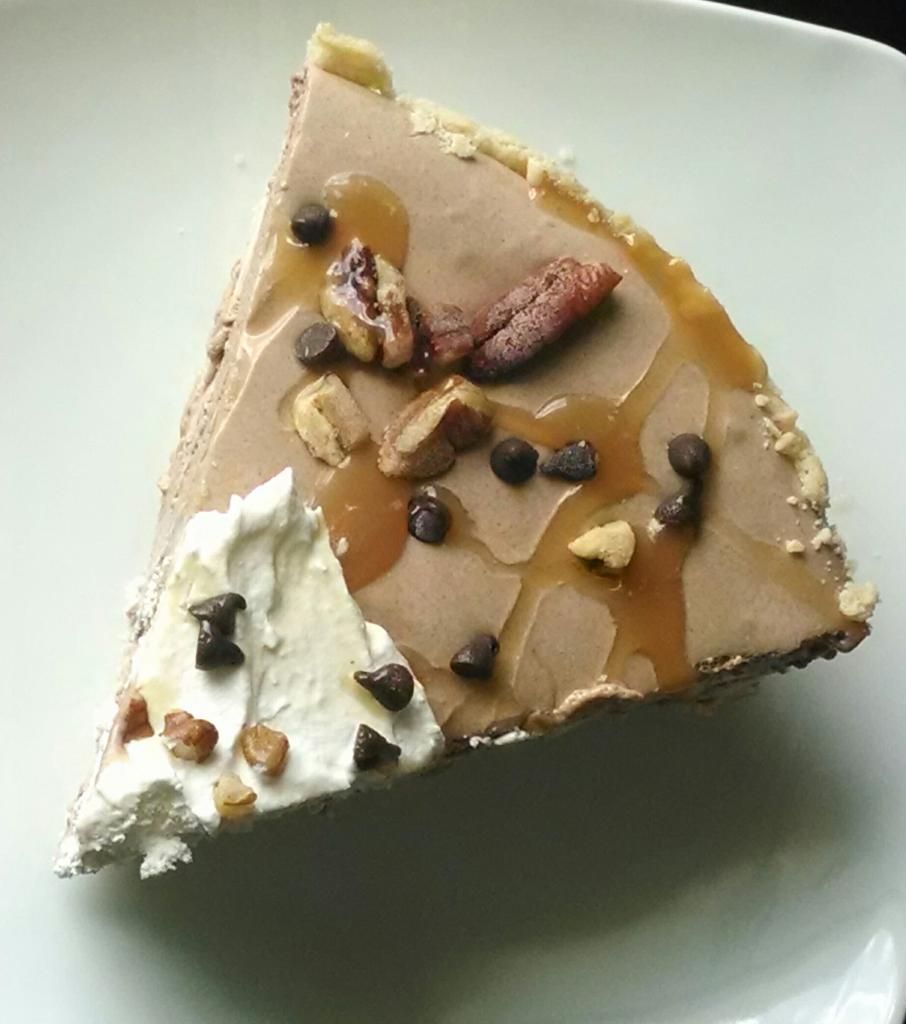
Malted Chocolate Marshmallow and Cream Cheese Pie
I haven't made very many pies lately, and I definitely haven't done a frozen pie in quite a long time. This pie is a mish mash of several different recipes and ideas. It honestly felt a little out of control when I was making it. It definitely turned out amazing though. A caramel chocolate chip pecan cream cheese layer is sandwiched between two layers of malted chocolate marshmallow filling and topped with whipped topping, caramel, pecans, and more chocolate chips. This pie is cold and delicious, and not too difficult to put together!
Malted Chocolate Marshmallow and Cream Cheese Pie
Pastry Crust:
1 cup all purpose flour
2 Tablespoons granulated sugar
1/2 teaspoon salt
1/2 cup cold butter
Malted Chocolate Marshmallow Layer:
8 ounces marshmallows (large or mini)
1/2 cup milk
Pinch of salt
1/2 cup semi sweet chocolate chips
1/4 cup malted milk powder
6 ounces (3/4 of an 8 ounce tub) Cool Whip (reserve the remaining cool whip)
Cream Cheese Layer:
8 ounces cream cheese, room temperature
1/4 cup caramel sauce
1/4 cup granulated sugar
1 teaspoon vanilla extract
1/4 cup chopped pecans
2 Tablespoons mini chocolate chips
2 ounces (remaining 1/4 tub) Cool Whip
Caramel Sauce
Chopped Pecans
Mini Chocolate Chips
Preheat the oven to 350F. Very lightly spray a 9 inch pie plate with cooking spray.
In a medium bowl, combine the flour, granulated sugar, and salt. Using a pastry blender or fork, cut in the butter until you have pea sized crumbs. Press the pastry mixture evenly on the bottom and up the sides of the pie plate. Bake in the preheated oven for about 15 minutes, or until lightly browned. Remove crust from the oven and let cool completely.
For the chocolate layer, in a medium bowl or small saucepan combine the marshmallows, milk, and salt. Heat on the stove or in the microwave, stirring often, until the marshmallows are melted and the mixture is smooth. Add the chocolate chips and stir until melted and smooth. Let cool to room temperature, then stir in the malted milk powder and fold in the Cool Whip. Spread half of the chocolate mixture into the prepared pastry crust and place in the freezer while you prepare the cream cheese layer.
For the cream cheese layer, beat together the cream cheese, caramel sauce, sugar, and vanilla until smooth. Stir in the chopped pecans and mini chocolate chips. Remove the pie from the freezer and spread the cream cheese mixture evenly over the chocolate layer. Carefully spread the remaining chocolate mixture evenly over the cream cheese layer and chill in the refrigerator until firm.
When ready to serve, top the pie with remaining cool whip. Drizzle with extra caramel sauce, chopped pecans, and mini chocolate chips. Makes 8 servings.
Enjoy! -Cardamommy
Labels:
Caramel
,
Chocolate
,
Chocolate Chips
,
Cream Cheese
,
Dessert
,
Malt
,
Marshmallows
,
Nuts
,
Pastry
,
Pecan
,
Pie
,
Pie Crust
,
Vanilla
,
Whipped Cream
Friday, May 16, 2014
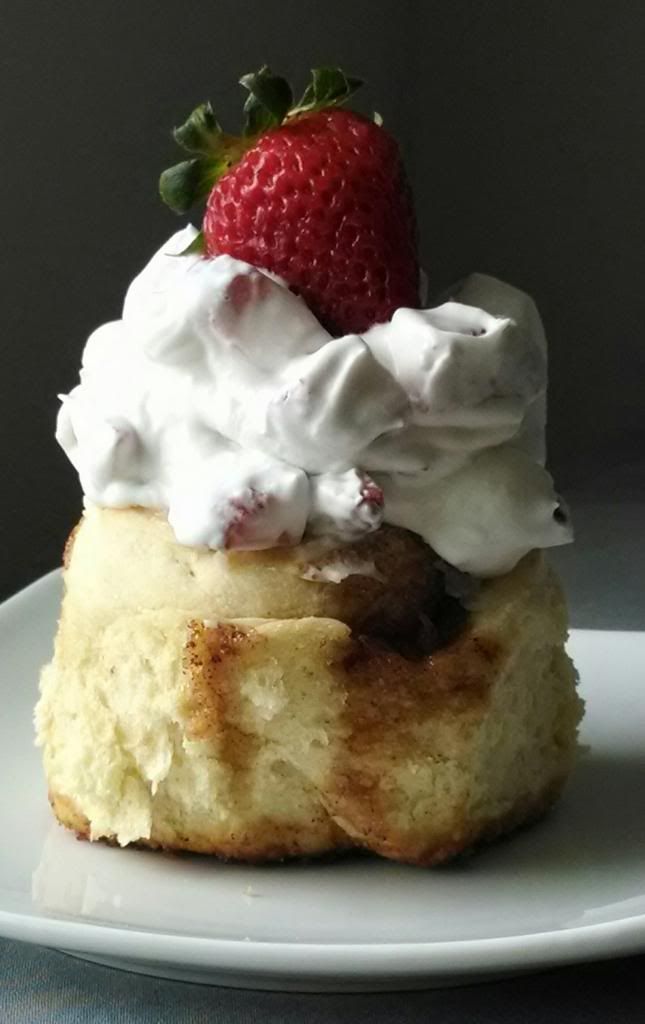
Cinnamon Roll Strawberry Shortcake
I have a multi purpose recipe for you today. I needed to get rid of some leftover whipping cream (seems to be the story of my life), and Coriaunty suggested whipping it up and folding in some strawberries for strawberry shortcake, which I thought was a brilliant idea! However, the shortcake portion of strawberry shortcake is not particularly exciting to me. So, I decided to make cinnamon rolls instead. These no yeast cinnamon rolls can be on the table, start to finish in under one hour. Yes. Less than 60 minutes. Pretty amazing, huh? And they taste great! If you aren't interested in having Cinnamon Roll Strawberry Shortcake (which would cause me to suspect that you have lost your mind...), you can just top them with a quick frosting.
Cinnamon Roll Strawberry Shortcake
Cinnamon Roll Filling:
3/4 cup packed brown sugar
6 Tablespoons granulated sugar
1 teaspoon cinnamon
pinch of ground cloves
pinch of salt
1 Tablespoon melted butter
Cinnamon Rolls:
2 1/2 cups all purpose flour
2 Tablespoons granulated sugar
1 1/4 teaspoons baking powder
1/2 teaspoon baking soda
1/2 teaspoon salt
1 1/4 cups buttermilk
4 Tablespoons melted butter, divided
Strawberry Whipped Cream:
1 cup heavy whipping cream
2 to 4 Tablespoons powdered sugar (to taste)
1 pound strawberries, chopped
Vanilla Frosting (optional):
1/4 cup (1/2 stick) butter, room temperature
1 cup powdered sugar
1/4 teaspoon vanilla extract
1 teaspoon milk (if necessary for consistency)
Preheat the oven to 425F. Grease a 9-inch round cake pan.
For the cinnamon roll filling, combine the brown sugar, granulated sugar, cinnamon, cloves, and salt in a small bowl. Add the melted butter and stir until the mixture resembles wet sand. Set aside.
For the cinnamon rolls, in a large bowl whisk together the flour, granulated sugar, baking powder, baking soda, and salt. Add the buttermilk and 2 tablespoons of the melted butter and stir until the dough comes together (the dough will look rough, like biscuit dough). Turn the dough out onto a floured surface and knead 3 or 4 turns until the dough is smooth.
Roll or pat the dough into a 9x12 inch rectangle and spread the remaining 2 tablespoons of butter over the dough. Sprinkle the filling mixture evenly over the buttered dough, and pat down evenly. Roll up the dough, starting at the long side, to form a tight log. Place the roll seam side down on your work surface and cut into 8 equal pieces. Place one roll in the center of the prepared pan, and gently flatten it slightly with your hand. Arrange the remaining seven cinnamon rolls around the perimeter of the pan, repeating the flattening process with each roll.
Place the pan of cinnamon rolls in the oven and bake for about 20 to 23 minutes, or until the rolls are golden brown. Remove the cinnamon rolls from the oven and use a thin plastic spatula to loosen the rolls from the side of the pan. Place a plate upside-down over the pan of cinnamon rolls, and flip it so the plate is on the bottom. Lift the pan off of the cinnamon rolls (the cinnamon rolls should be upside-down on the plate). Then place a cooling rack upside-down on the plate of cinamon rolls and flip it so the cooling rack is on the bottom. Lift off the plate (the cinnamon rolls should be right side up). Let cool while you make the strawberry whipped cream or frosting.
For the strawberry whipped cream, place the whipping cream and powdered sugar in a medium bowl. Beat with an electric mixer until stiff peaks form. Fold in the strawberries. Spoon the whipped cream mixture over the cooled cinnamon rolls. Serve with a whole strawberry on top, if desired.
For the vanilla frosting, mix together the butter and the powdered sugar. Mix in the vanilla and milk (if needed for consistency). Spread the frosting over the warm cinnamon rolls. Makes 8 Cinnamon Roll Strawberry Shortcakes, or 8 frosted Cinnamon Rolls.
Enjoy! -Cardamommy
Labels:
Breakfast
,
Cinnamon
,
Cinnamon Rolls
,
Dessert
,
Frosting
,
Quick Bread
,
Strawberry
,
Whipped Cream
Friday, May 2, 2014
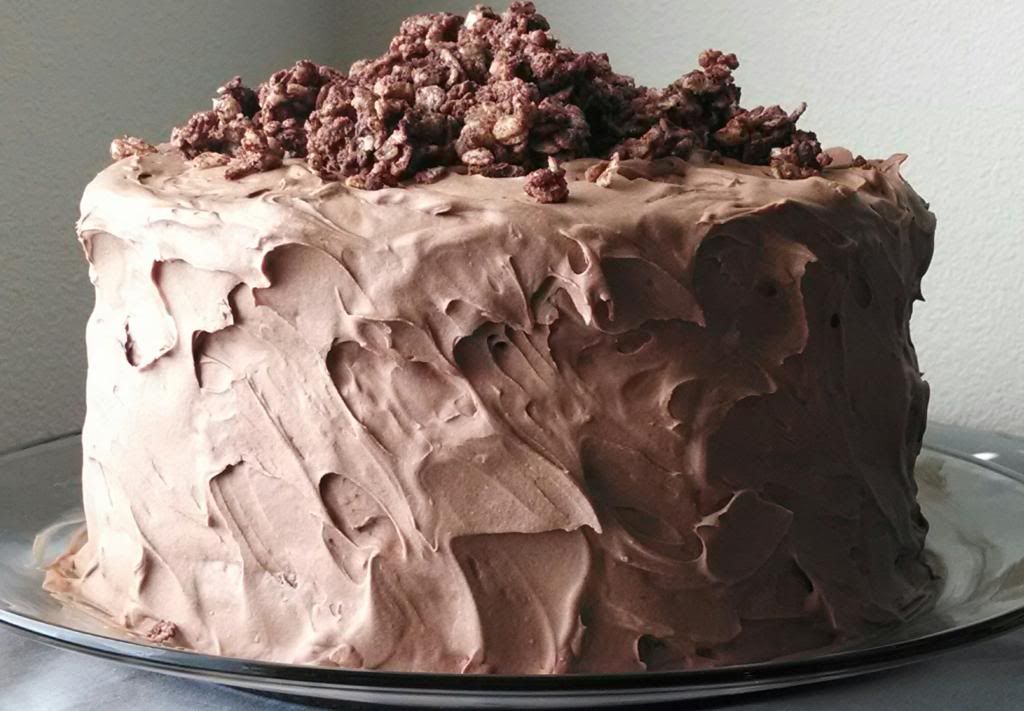
Hazelnut Crunch Layer Cake
I found this cake and may have lost my mind a little. Then I made this cake and finished the job. This cake is totally ridiculous. It is three layers of my favorite fudgy moist chocolate cake, filled with an insanely silky milk chocolate frosting and hazelnut crunch clusters (hello, I am definitely going to turn that into a bar cookie!), then covered with more of the chocolate frosting and topped with more hazelnut crunch clusters. This cake is completely delicious, and totally over the top. If you need a show stopper for chocolate lovers, this is it. Fun Tip: Do you hate cutting out parchment circles to fit your cake pans? Use a coffee filter instead! Just spray your pan as you normally would, then flatten out a coffee filter and place on the bottom of the pan. Lightly spray the filter and pour in your batter. Just don't forget to peel off the coffee filter at the end...
Hazelnut Crunch Layer Cake
Chocolate Cake:
2 1/2 ounces semi sweet chocolate chips
1 cup milk, boiling
1 1/4 cups water
2 1/4 cups all purpose flour
1 cup cocoa powder
2 1/4 teaspoons baking soda
1 1/4 teaspoons baking powder
1 teaspoon salt
1 cup mayonnaise
2 eggs
1 1/2 teaspoons vanilla extract
2 1/4 cups granulated sugar
Hazelnut Crunch:
2 ounces semi sweet chocolate chips
2 Tablespoons butter
1/2 cup Nutella
1/4 cup chopped hazelnuts, toasted
3 cups rice krispies cereal
Milk Chocolate Frosting:
16 ounces milk chocolate chips
1 1/2 Tablespoons light corn syrup
1 1/2 cups heavy cream, boiling
1 cup (2 sticks) cold butter, cut into 1/2 inch pieces
Preheat the oven to 350F. Grease 3 9-inch round cake pans and line the bottoms with parchment paper (or use a coffee filter!), then lightly grease the parchment paper. Set aside.
For the cake, place the chocolate chips in a large bowl and pour the boiling milk over them. Let sit for a minute or two, then stir until chips are melted and smooth. Add the water. Set aside.
In a separate bowl, whisk together the flour, cocoa powder, baking soda, baking powder, and salt. Set aside.
In the bowl of a stand mixer, or with a hand mixer, cream together the mayonnaise, eggs, and vanilla until smooth. Add the sugar and beat until blended. Add 1/3 of the flour mixture and beat, followed by 1/2 of the chocolate mixture. Add another 1/3 of the flour mixture, followed by the remaining chocolate mixture, then the remaining flour mixture, beating after each addition until smooth.
Divide the batter evenly between the prepared cake pans, then place in the oven and bake for about 25 minutes, or until a toothpick inserted in the center comes out clean. Remove cakes from the oven and let cool on a rack for about 10 minutes. Carefully turn the cakes out of the pans and remove the parchment (or coffee filter) from the bottom of the cakes. Let cool completely before assembling and frosting.
For the hazelnut crunch, in a medium bowl, melt together the chocolate chips and butter until smooth. Stir in the Nutella and toasted hazelnuts, followed by the rice krispies cereal. Spread the mixture onto a piece of waxed paper, and refrigerate until set up. Break into small pieces.
For the frosting, place the milk chocolate chips and corn syrup in the bowl of a stand mixer (or in a large bowl and use a hand mixer). Pour the boiling cream over the chips and let sit for a minute or two. Beat the mixture on low speed until blended, then increase the speed and beat the mixture for about 6 or 7 minutes, or until cooled. With the mixer running, start adding the cold butter, a couple of pieces at a time, beating well after each addition, until all of the butter has been added. Continue beating for 5 to 10 more minutes until the frosting comes together and thickens. If the frosting is thin and soupy, or looks broken, place the bowl in the refrigerator for 5 to 10 minutes then beat again. Continue chilling and beating the frosting until it sets up.
To assemble the cake, place one cake layer on a serving plate. Spread about 1 cup of frosting over the cake, and sprinkle some hazelnut crunch over the top. Cover with the second cake layer, then spread the cake with another cup of the frosting and sprinkle more hazelnut crunch over the top. Place the last cake layer on the top, and frost the top and sides of the cake with the remaining frosting. Sprinkle the top of the cake with hazelnut crunch. Makes 16 to 20 servings.
Enjoy! -Cardamommy
Labels:
Butter
,
Cake
,
Cereal
,
Chocolate
,
Chocolate Chips
,
Dessert
,
Frosting
,
Nutella
,
Nuts
,
Rice Krispies
,
Whipped Cream
Friday, April 4, 2014
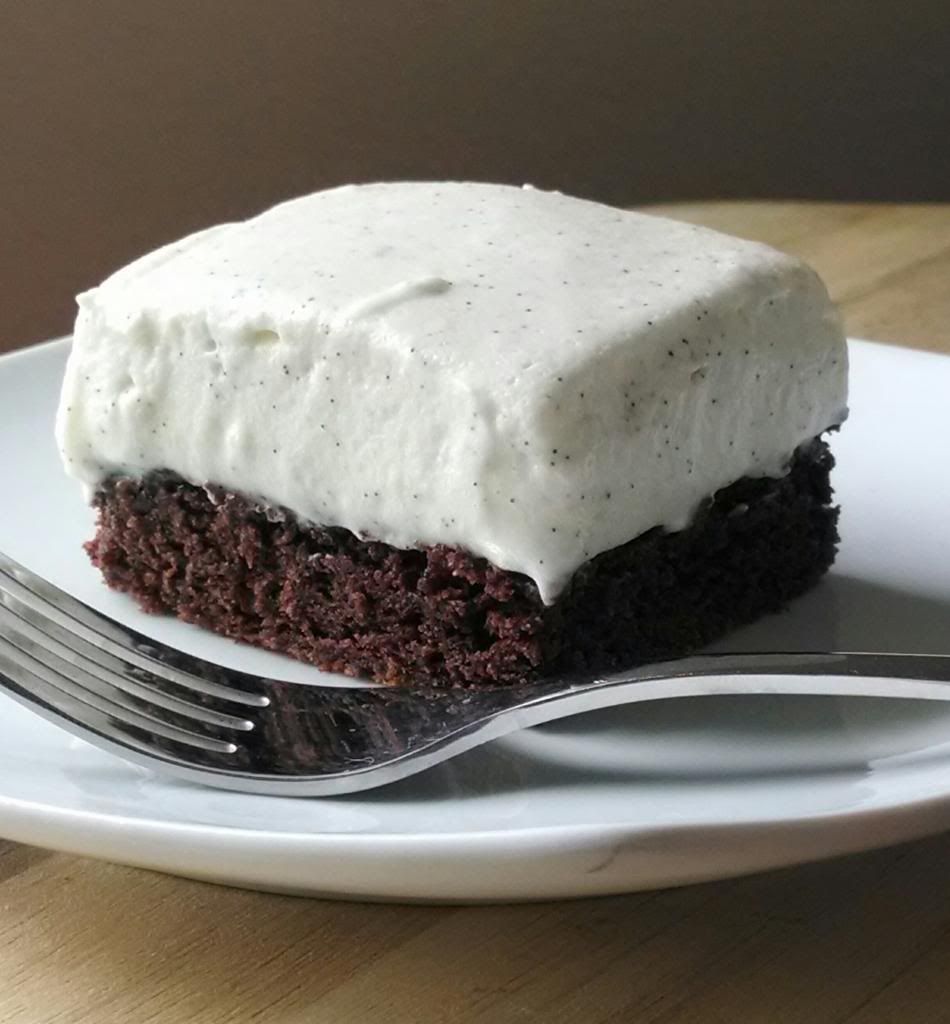
White Chocolate Vanilla Bean Mousse Brownies
So, I've had some vanilla beans in my possession for a really really long time. So long, in fact, that they dried out completely. So I plumped them back up, then didn't use them, causing them to dry out again. I won't mention how many times this occurred. I finally had to just buckle down and figure something out to do with them. So here we are. I love this combination of a moist and fudgy chocolate brownie topped with a sweet and light white chocolate mousse. So delicious, and not too difficult. Mousse recipe adapted from here.
White Chocolate Vanilla Bean Mousse Brownies
Brownies:
1/2 cup butter, room temperature
1 cup granulated sugar
1 teaspoon vanilla extract
2 eggs
1/2 cup all purpose flour
1/2 cup cocoa powder
1/4 teaspoon baking soda
1/4 teaspoon salt
White Chocolate Vanilla Bean Mousse:
6 ounces white chocolate, chopped
1/4 cup heavy whipping cream
2 egg whites
1/4 cup granulated sugar
1/2 cup heavy whipping cream
Seeds of 1 vanilla bean
Preheat the oven to 350F. Spray a 9x9 inch square baking pan with cooking spray, then line with parchment paper, leaving the edges hanging over the sides (for handles), then lightly spray the parchment. Set aside.
In a large bowl, beat together the butter and sugar until combined. Add the vanilla extract and eggs and beat until incorporated. Add the flour, cocoa powder, baking soda, and salt, and beat until just combined. Scrape the brownie batter into the prepared pan and bake for about 25 minutes, or until a toothpick inserted in the center comes out with moist crumbs. Remove brownies from the oven and let cool completely.
For the mousse, place the white chocolate in a large medium sized bowl. Heat the 1/4 cup of whipping cream until it is at a simmer, then pour over the white chocolate and let sit for a minute or two. Stir the chocolate mixture until completely melted and smooth. Let cool to room temperature.
In a separate bowl, beat the egg whites until frothy, then add the sugar one tablespoon at a time, while continuing to beat, until stiff peaks form. Set aside.
In another bowl, combine the 1/2 cup of whipping cream and the vanilla bean seeds. Beat the cream until stiff peaks form. Set aside.
Gently fold the egg whites into the cooled white chocolate mixture. Gently fold the whipped cream into the egg white and chocolate mixture. Spread the mousse over the completely cooled brownies and chill until firm. Cut into squares and serve.
Enjoy! -Cardamommy
Labels:
Bars
,
Brownies
,
Dessert
,
Vanilla
,
Vanilla Bean
,
Whipped Cream
,
White Chocolate
Monday, January 13, 2014
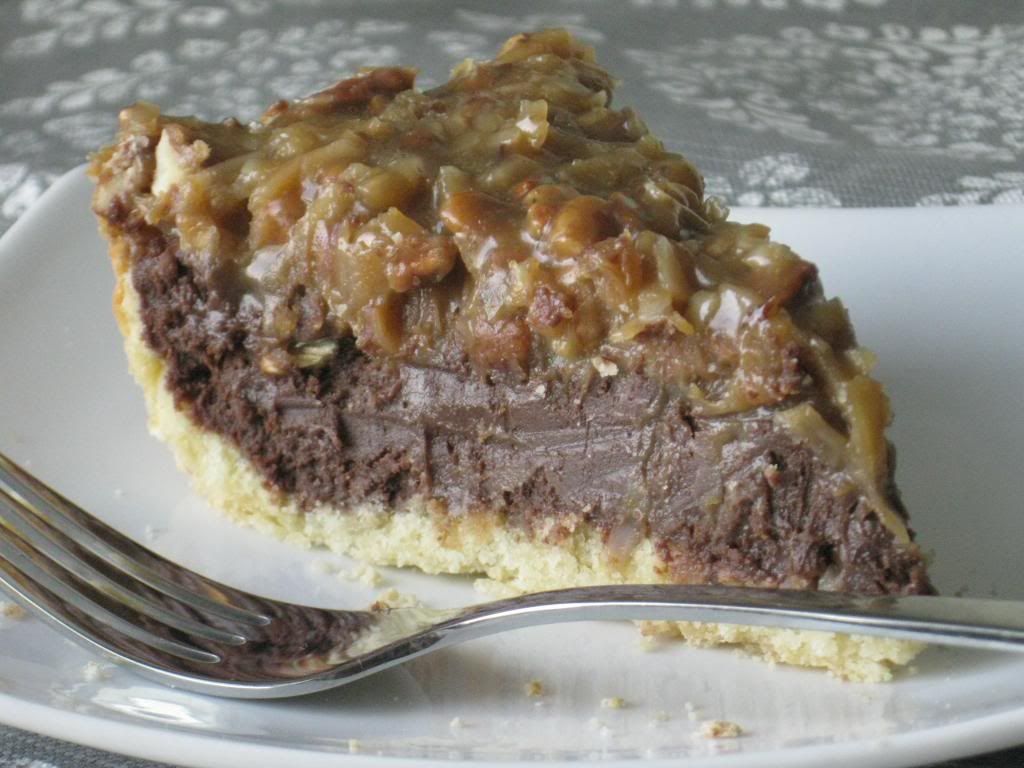
German Chocolate Pie
As soon as I saw this pie in a recent Taste of Home magazine, I knew I had to make it (although I did make a few changes). And soon! I'm usually not a fan of nuts, but I really like coconut pecan cooked frosting. Something about it just makes my tummy smile. This pie starts with my favorite pastry crust, filled with luscious chocolate and topped with a coconut pecan layer. This pie was a big hit at my house. My oldest Hungry Puppy (who isn't a super fan of chocolate) loved this pie. This pie does not disappoint!
German Chocolate Pie
Pastry Crust:
1 cup all purpose flour
2 Tablespoons granulated sugar
1/2 teaspoon salt
1 stick (1/2 cup) cold butter
Chocolate Filling:
4 ounces German Chocolate, chopped
2 ounces unsweetened chocolate, chopped
1 can (14 ounces) sweetened condensed milk
2 eggs
1 teaspoon vanilla extract
Coconut Pecan Layer:
1/2 cup packed brown sugar
1/2 cup whipping cream
1/4 cup butter
2 egg yolks
1 teaspoon vanilla extract
1 cup shredded coconut
1 cup chopped pecans
Preheat the oven to 350F. Very lightly spray a 9 inch pie plate with cooking spray. Set aside.
In a medium bowl, combine the flour, sugar and salt. Using a pastry blender or a fork, cut in the butter until the mixture resembles coarse crumbs. Pour mixture into the prepared pie plate, and press on the bottom and up the sides of the plate. Bake in the preheated oven for about 15 minutes, or until the crust is very lightly browned. Remove from the oven and set aside.
To make the chocolate filling, place the German chocolate and unsweetened chocolate in a microwavable bowl, and heat in the microwave in 30 second intervals, stirring well after each interval, until melted and smooth. Remove chocolate from the microwave and stir in sweetened condensed milk, eggs, and vanilla extract until well blended. Pour the chocolate mixture into the crust and return to the oven and bake for about 18 to 20 minutes or until just set in the center. Remove from the oven and let cool for about one hour.
For the coconut pecan layer, place the egg yolks in a medium bowl. Place the brown sugar, whipping cream, and butter in a saucepan and heat over medium heat until mixture is boiling, stirring frequently. Very slowly pour about 1/2 to 3/4 cup of the brown sugar mixture into the egg yolks, whisking constantly. Return the brown sugar mixture to the burner, and pour the egg yolk mixture into the pan, whisking constantly. Continue to cook the mixture over medium heat until thickened slightly and just starting to bubble. Remove the saucepan from the heat and add the vanilla extract, coconut, and pecans. Let cool slightly, then pour over the the chocolate filling layer. Place the pie in the refrigerator and chill for 4 hours, or overnight until cold. Makes 8 to 12 servings.
Enjoy! -Cardamommy
Subscribe to:
Posts
(
Atom
)