Showing posts with label Butter. Show all posts

Monday, June 27, 2016

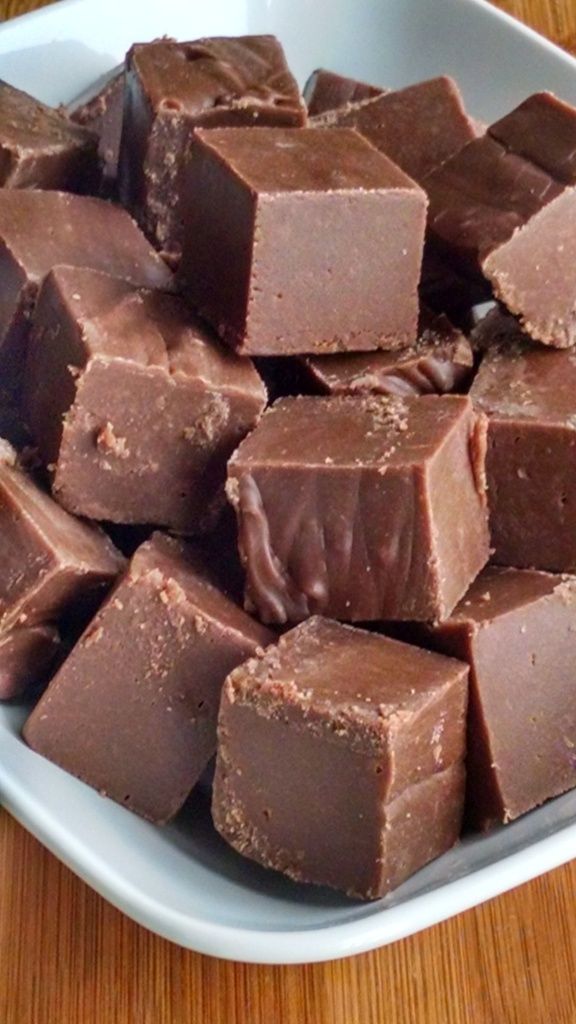
Butter Pecan Fudge


Several weeks ago we were on vacation and had several opportunities to have fudge and ice cream.  My oldest Hungry Puppy was asking for butter pecan.  Unfortunately, we didn't buy butter pecan fudge or butter pecan ice cream, and she was a little bummed.  So I told her that we could buy butter pecan ice cream any time we want, and that I would  make butter pecan fudge as soon as we got home.  And here it is.  She said that this fudge tastes better than the one that she tried on vacation!  It is seriously so amazing and flavorful!  Adapted from this recipe.

Butter Pecan Fudge

3 cups powdered sugar
2 teaspoons vanilla extract
3/4 cup butter
2 cups packed brown sugar
1/2 cup evaporated milk
1 cup chopped pecans, toasted

Line an 8x8 inch square pan with foil, and grease the foil.  Set aside.

Place the powdered sugar and vanilla in the bowl of a stand mixer.  Set aside.

In a medium saucepan, melt the butter over medium-high heat.  Continue cooking the butter, swirling it in the pan occasionally, until it is lightly browned and fragrant.  Immediately stir in the brown sugar and evaporated milk, and stir for about 2 minutes until the sugar is dissolved.  Bring the mixture to a full boil and continue to cook stirring constantly for 1 minute.  Immediately pour the mixture into the mixer bowl with the powdered sugar and vanilla.  

With the paddle attachment, beat the fudge on low speed to combine the ingredients, then increase the speed to medium and beat for about 6 to 8 minutes, or until the fudge cools slightly and begins to hold its shape.  Beat in the toasted pecans.  

Spread the fudge in the prepared pan.  Refrigerate for about 2 hours, or until firm.  Cut into squares.  Makes 36 (if you cut 6x6 rows) or 64 (if you cut 8x8 rows) pieces.

Enjoy!  -Cardamommy


Friday, March 25, 2016

Cheese Strudel


I finally made another one of my Grandmother's recipes!  This one is a cheese strudel, and I have been wanting to make it for a really long time but was a little bit intimidated by it.  I finally tackled it this week, and honestly, it was way easier than I thought it would be.  And of course so delicious!  Thin flaky layers of dough are filled with a lemony cottage cheese and raisin mixture.  Don't be intimidated, give it a try!  

Cheese Strudel

Strudel Dough:
1/2 cup water
2 Tablespoons butter
1 Tablespoon granulated sugar
2 cups all purpose flour
1 egg
1 egg white (reserve the yolk to use in the filling)

Cheese Filling:
1 1/2 pounds dry cottage cheese
1 egg
1 egg yolk (reserved from making the dough)
1/2 cup granulated sugar
1 teaspoon vanilla
grated peel from 1/2 lemon
1/2 cup raisins
3/4 cup butter, melted

Heat water and butter with sugar only long enough to melt the butter.  Set aside to cool.  Pile a mound of flour on a board and make a well in the center.  Drop unbeaten egg and extra egg white in the well.  With your fingertips work the egg into part of the flour until you have a smooth, sticky paste.  Add the cool water mixture gradually and continue stirring until all the flour is worked in.  Dough is smooth and sticky at this point. 

Now pretend you're bouncing a ball.  Slap the dough with the palm of your hand vigorously, stretching it up from the board and slapping it down on the board.  Do this about 100 times or until the dough no longer sticks to hands or board.  Shape dough into a smooth ball, brush with melted butter and cover with an inverted hot bowl for about 20 minutes.  While the strudel dough rests, prepare the cheese filling.

For the filling, work cottage cheese through a ricer or a sieve.  Mix remaining ingredients in with the cheese thoroughly (Instead of using a ricer, I just put the cottage cheese and remaining ingredients except the raisins in the food processor and processed it until the curds were a finer texture).  Set aside while you finish preparing the dough.

Spread a clean cloth over a large table - your kitchen table is fine.  Sprinkle the cloth with a generous coating of flour and put the ball of dough in the center.  Roll in a large circle as evenly as possible.  Put the rolling pin away and in a gentle hand over hand motion work from the center and stretch to the outer edge.  Be careful not to tear the dough for it cannot be mended.  keep moving around the table, stretching the dough until it hangs over the table and is as thins as tissue paper.  Trim off thick uneven edges with scissors to make a neat rectangle.

Preheat the oven to 400F.  Grease a large shallow baking pan or tray, one with a raised edge.  Brush the dough with half the melted butter.  Spread the cheese filling over half of the lengthwise surface of the dough.  Roll the dough lengthwise, starting with the cheese covered side and rolling toward the empty edge.  Tuck in ends of roll neatly.  Place on pan and shape into a big horseshoe, or circle.  Brush with melted butter and bake 10 minutes.  Turn oven down to 350F and bake 30 to 35 minutes longer, brushing with melted butter every 10 to 15 minutes.  Sprinkle with confectioners sugar and serve hot, warm, or cold.  Serves up to 12.

Enjoy!  -Cardamommy

Friday, January 15, 2016

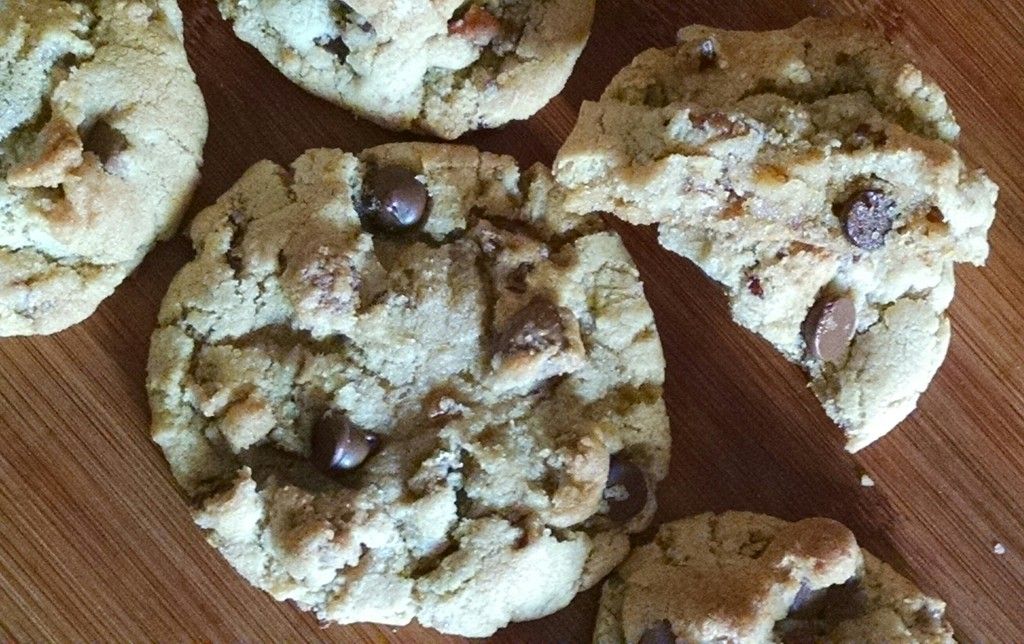
Serious Pecan Double Chocolate Chip Cookies


I know I know, another chocolate chip cookie recipe.  I honestly can't remember how many I have collected and made over the years, but I am driven to keep on testing out new variations.  I think it's an addiction.  Please make it stop!  Just kidding!  Who wants to quit making chocolate chip cookies? Plus, I get bored with the same old thing.  So.  This new cookie.  It is kind of ridiculous.  As in ridiculicious.  I'm kind of embarrassed to admit how many I actually ate.  In one sitting.  Oops.  Quality control people! I found the recipe here, and I changed only a couple of things.  First, I cut the recipe in half, because wow that's some major cookie going on.  Second, I don't like walnuts, and only sometimes tolerate pecans.  So walnuts out, pecans in.  Third, my Hungry Puppies prefer milk chocolate in their cookies, and since I make cookies for them (ahem...wink wink), I used part milk chocolate and part semi sweet chocolate chips.

Serious Pecan Double Chocolate Chip Cookies

For the nuts:
1 Tablespoon butter
2 Tablespoons granulated sugar
Pinch of salt
3/4 cup chopped pecans

For the cookies:
1/2 cup butter
1/4 cup butter, room temperature
1 cup packed brown sugar
1/2 cup granulated sugar
2 eggs
2 teaspoons vanilla extract
2 1/4 cups all purpose flour
1 1/4 teaspoons baking soda
3/4 teaspoon salt
3/4 cup (about 5 ounces) milk chocolate chips
1/3 cup (about 3 ounces) semi sweet chocolate chips

Preheat the oven to 375F.  Line a baking sheet with parchment paper.

For the nuts, melt the butter in a small skillet.  Stir in the sugar and salt and cook until golden brown.  Stir in the pecans until evenly coated.  Transfer to the lined baking sheet and bake for 4 to 5 minutes, or until pecans are toasted.  Remove from the oven and set aside.

Melt the 1/2 cup of butter in a small saucepan over medium high heat.  Continue to cook the butter, swirling the pan frequently (or stir with a spoon, whichever you are comfortable with), until the butter is a dark golden brown (be careful that it doesn't burn, as it happens very quickly!).  Remove from heat and place in the refrigerator (I just set the saucepan on top of a hot pad in the fridge) while you start the cookie dough.

Cream together the 1/4 cup butter, brown sugar, and granulated sugar.  Beat in the warm browned butter, followed by the eggs and vanilla until well blended.  Add the flour, baking soda, and salt, and beat until just combined.  Stir in the pecans, milk chocolate chips, and semi sweet chocolate chips.

Scoop the dough into 2 tablespoon size balls and place on the prepared baking sheet.  Flatten the dough balls very slightly (just enough to flatten the round top).  Place the cookie sheet in the fridge and let chill for 30 to 60 minutes.  Remove the cookie dough from the fridge and bake in the preheated oven for about 12 minutes, or until they are a light golden brown.  Remove the cookies from the oven and transfer to a cooling rack to cool completely.  Makes about 24 cookies.

Enjoy!  -Cardamommy

Friday, January 8, 2016

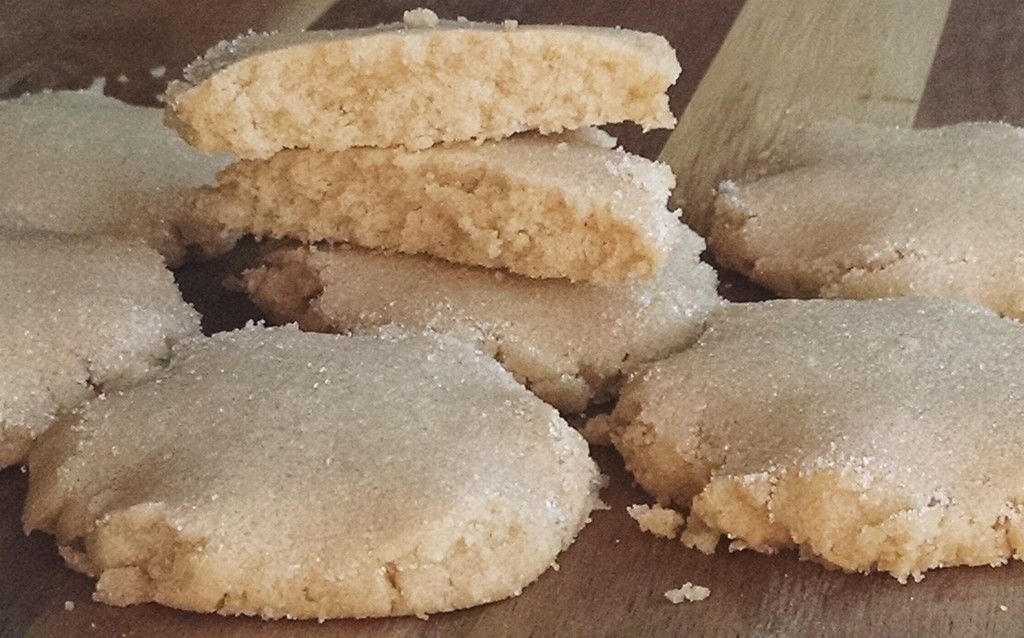
Desert Sand Cookies


Several years ago, I found the book Scandinavian Classic Baking by Pat Sinclair at the library.  Going through it, I bookmarked several recipes that I was interested in trying out.  This was one of them, and it has taken me this long to finally get around to making it!  Maybe it was their simplicity that caused me to keep putting them off.  I sorely regret that now.  These cookies are so amazingly simple and delicious!  They are tender and buttery and perfect!  The only change I made to the recipe was to press the cookies flat with the bottom of a glass instead of criss crossing with a fork.

Desert Sand Cookies


1 cup butter
2 cups all-purpose flour
½ teaspoon baking powder
1 cup sugar
½ teaspoon vanilla

Brown the butter by melting in a medium saucepan over medium heat.  Stir occasionally.  When the butter begins to foam, stir constantly until it turns a deep golden brown.  Watch carefully because at this point the color changes quickly.  It takes about 7 minutes to brown the butter.  Cool to room temperature, about 1 hour.


Heat the oven to 350F.  Mix the flour and baking powder together.  Add the cooled butter and vanilla to the sugar in a medium bowl and stir until evenly mixed.  Add the flour and mix to form a dough.  Shape the dough into balls using rounded teaspoons of dough.  Place on baking sheets and press a crisscross pattern with a fork.  Dip the tines of the fork in flour if necessary(I used the bottom of a drinking glass dipped in granulated sugar).  Bake 10 to 12 minutes.  These cookies do not brown much.  Cool the cookies on the baking sheet for 2 minutes before removing to a cooling rack.  Cool completely. Makes 3 dozen cookies


Monday, January 4, 2016

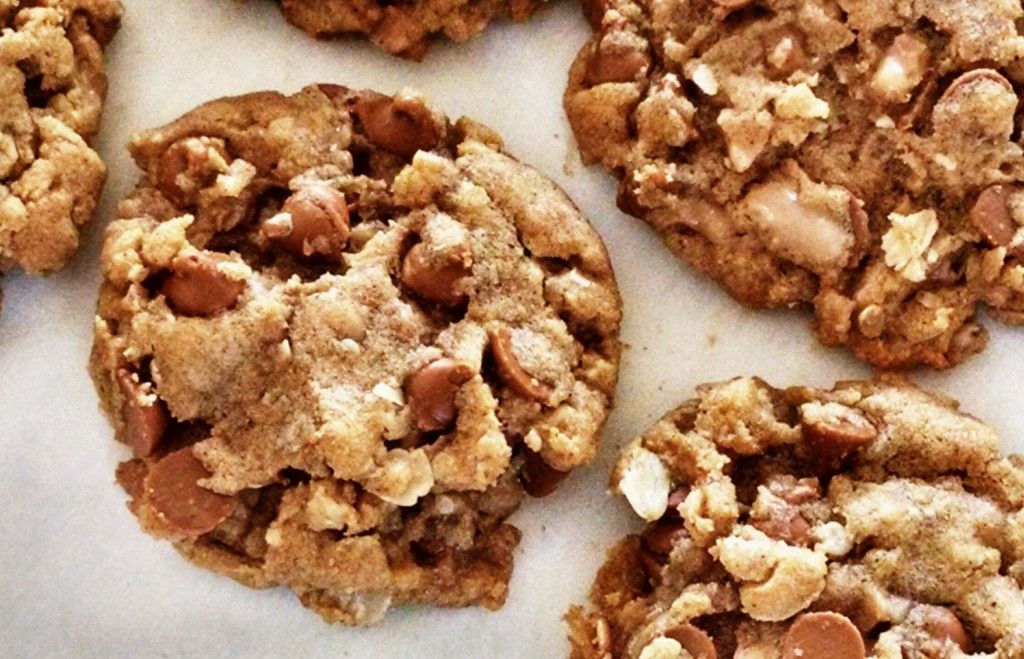
Browned Butter Oatmeal Cinnamon Toffee Cookies


These cookies are another recipe that has been on my list for some time.  I know I'll get around to them eventually, it just takes a while sometimes.  So much to bake, so little time.  Baker problems, huh?  These cookies are pretty delicious.  They start with a brown butter oatmeal cookie base, and are full of the warm flavors of cinnamon, clove, and molasses, and are studded with cinnamon chips and toffee bits.  Truly delightful! Original recipe found here.

Browned Butter Oatmeal Cinnamon Toffee Cookies

2 sticks (1 cup) butter, browned then cooled to room temperature
1 cup packed brown sugar
1/2 cup granulated sugar
1/4 cup molasses
2 teaspoons vanilla extract
2 eggs
2 1/2 cups all purpose flour (loosely measured)
1/2 cup quick cooking oatmeal
1/2 cup old fashioned oatmeal
1 teaspoon baking powder
1 1/2 teaspoon baking soda
1/2 teaspoon salt
2 teaspoons cinnamon
1/4 teaspoon cloves
1 1/2 cups cinnamon chips
1 cup toffee bits

Preheat the oven to 350F.  Line a baking sheet with parchment paper.

Cream together the browned butter, brown sugar, and granulated sugar until well blended.  Add the molasses and vanilla and beat until combined. Beat in the eggs, one at a time, until incorporated.  Add the flour, quick oatmeal, old fashioned oatmeal, baking powder, baking soda, salt, cinnamon, and cloves, and beat on low until just blended.  Stir in the cinnamon chips and toffee bits until evenly distributed.

Scoop the dough into tablespoon size balls and place on the prepared baking sheet.  Bake for about 8 minutes, or until the edges are golden and the tops are set.  Remove the cookies from the oven and let cool on the pan for several minutes.  Transfer cookies to a cooling rack to cool completely.  Makes about 60 cookies.

Enjoy! -Cardamommy

Thursday, December 24, 2015

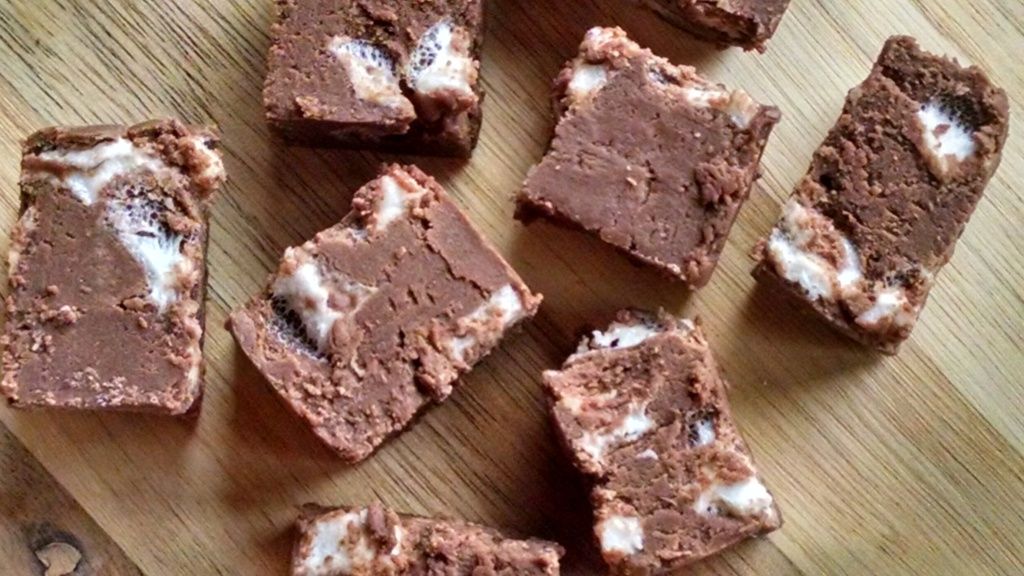
Coconut Milk Marshmallow Fudge


I swear I was only going to make one batch of fudge for Christmas.  Honest.  But then I had leftover coconut milk from these Pani Popo, and I knew I had to do it.  Coconut milk fudge.  How could I not?!  I used a basic marshmallow fudge recipe, and made a few minor tweaks and changes, and the result is kind of amazing.  This fudge is super simple, but so just crazy delicious!  Smooth, chocolatey, fudgy, and just coconutty enough to make you grab another piece!

Coconut Milk Marshmallow Fudge

2 cups granulated sugar
1/2 cup coconut milk
1/2 cup butter
12 large marshmallows
6 ounces (1 cup) milk chocolate chips
6 ounces (1 cup) semi sweet chocolate chips
1/2 teaspoon vanilla extract
1/2 teaspoon coffee extract
1/2 teaspoon coconut extract

Line a 9x9 inch square pan with foil, then grease the foil with cooking spray.

In a large saucepan, stir together the granulated sugar, coconut milk, and butter.  Bring to a boil, stirring constantly.  Once the mixture reaches a full boil, continue to boil for 2 minutes, still stirring constantly.  

Remove saucepan from the heat and immediately stir in the marshmallows, milk chocolate chips, semi sweet chocolate chips, vanilla extract, coffee extract, and coconut extract.  Continue to stir until the chocolate and marshmallows are completely melted and smooth.

Pour the the fudge into the prepared pan and chill until firm, about 4 hours.  Using the foil as handles, lift the fudge out of the pan and place on a cutting board.  Cut into squares.  Makes 64 pieces.

Enjoy!  -Cardamommy
Monday, December 21, 2015

Hot Chocolate Marshmallow Cream Fudge


This original fudge recipe comes from David Lebovitz, and was exactly what I was looking for!  His recipe called for peanuts, and since we all know I don't really go for peanuts, we switched to marshmallows and gave made a few changes to help it taste a little bit more hot chocolatey.  I think it is a total win!  My fudge turned out a bit taller than I expected, and I realized that it was because of the loads of marshmallows that I added.  You can use fewer marshmallows, or leave them out all together, but I think they add a perfect touch to this decadent fudge!

Hot Chocolate Marshmallow Cream Fudge

2/3 cup evaporated milk
6 ounces (3/4 cup,1 1/2 sticks) butter, cubed
3 cups granulated sugar
1 Tablespoon dark cocoa powder
8 ounces milk chocolate chips
4 ounces semi sweet chocolate chips
7 ounce jar marshmallow cream
1 teaspoon vanilla extract
2 cups mini marshmallows

Line an 8 inch square baking pan with foil.  Grease the foil with cooking spray.

In a 4 quart saucepan, stir together the evaporated milk, butter, sugar, and cocoa powder.  Cook, stirring constantly, until mixture reaches 234F using a candy or instant read thermometer.

Remove the pan from the heat and stir in the milk chocolate chips, semi sweet chocolate chips, marshmallow cream, and vanilla extract until completely melted and smooth.  Let the fudge cool for about 5 minutes, then quickly stir in the mini marshmallows.  Pour the fudge into the prepared pan and let cool completely.  Cut into squares.  Makes 64 pieces.

Enjoy!  -Cardamommy
Friday, December 18, 2015

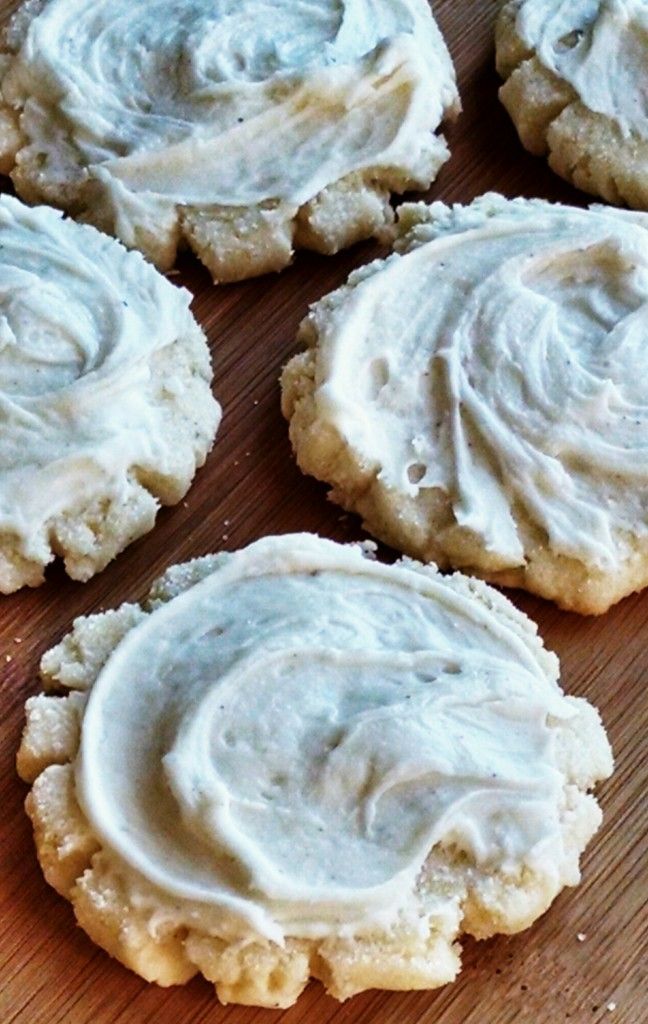
Eggnog Swig Sugar Cookies


A while ago, I made these Swig Sugar Cookies with Chocolate Coconut Sour Cream Frosting.  For the cookie recipe, I linked to this Swig Sugar Cookies recipe.  I've made these cookies several times because my family loves loves loves them.  Since it is Christmas time I decided to make them again, but this time eggnog flavored!  And since I made about 70 of them, I am donating most of them to a cookie drive for the new Airmen at the Air Force Base here.  I am so excited about these cookies because the eggnog flavor is totally spot on.  I let my Hungry Puppies taste test the dough and they said "Oh my goodness, Mom, it's eggnog!!!"  These soft eggnog sugar cookies are topped with a sweet sour cream eggnog frosting.

Eggnog Swig Sugar Cookies

Eggnog Cookies:
1 cup butter, room temperature
3/4 cup canola oil
1 1/4 cup granulated sugar (plus extra for pressing cookies)
3/4 cup powdered sugar
2 Tablespoons eggnog
2 eggs
1 teaspoon rum extract
5 1/2 cups all purpose flour
1 teaspoon nutmeg
1 teaspoon salt
1/2 teaspoon baking soda
1/2 teaspoon cream of tartar

Sour Cream Eggnog Frosting:
4 Tablespoons (1/2 stick) butter, room temperature
1/2 cup sour cream
6 to 7 cups powdered sugar
1/2 teaspoon nutmeg
1/2 teaspoon salt
1 teaspoon rum extract
3 to 4 Tablespoons eggnog

Preheat the oven to 350F.  Line a baking sheet with parchment paper.

Cream together the butter, oil, granulated sugar, and powdered sugar.  Beat in the eggnog, eggs, and rum extract.  Add the flour, nutmeg, salt, baking soda, and cream of tartar, and beat until blended.

Scoop the dough into tablespoon size balls, and place on the prepared baking sheet.  Using a glass dipped in sugar, flatten the dough balls until they are flat, and the edges are cracked.  

Bake the cookies in the preheated oven for 8 to 9 minutes.  Remove cookies from the oven and transfer to a cooling rack to cool completely before frosting.

For the frosting, cream together the butter and sour cream.  Add the sugar and beat until well blended and very thick.  Beat in the nutmeg, salt, rum extract, and 3 tablespoons of eggnog until smooth.  Add the remaining eggnog if needed to reach your desired consistency.  Spread the frosting on top of the cooled cookies.  Makes 70 cookies.

Enjoy!  -Cardamommy
Friday, October 9, 2015

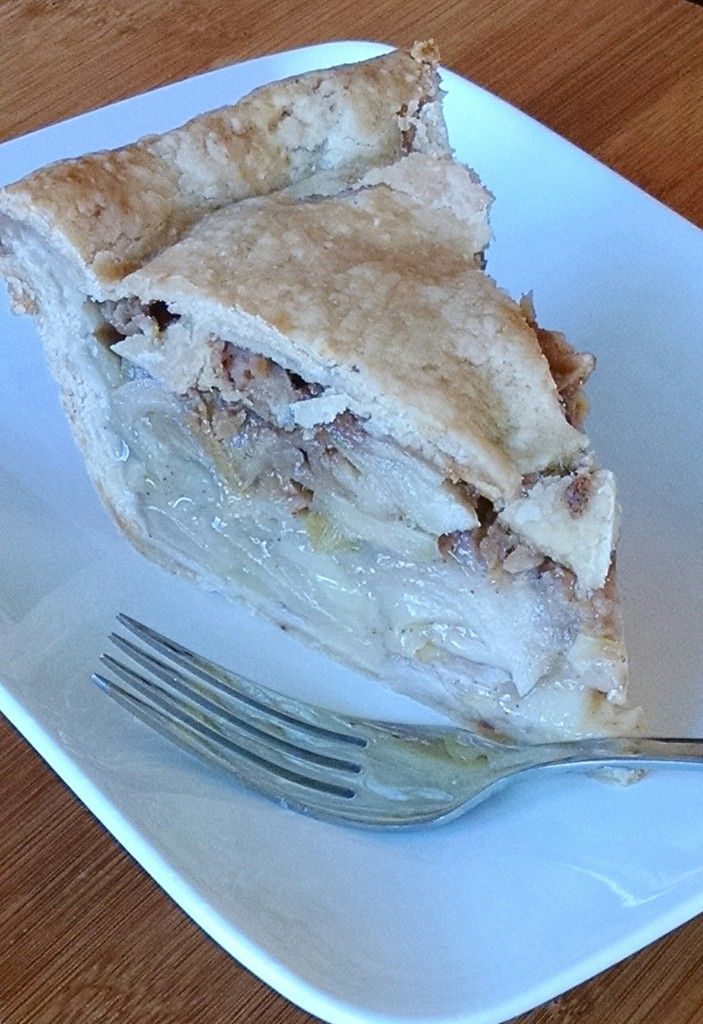
Biscoff Apple Pie with Browned Butter Crust


I'm not obsessed with all things browned butter, but I think that it definitely has its place.  Like in brownies, and chocolate frosting, and cookies.  And now in pie crust.  I totally did this, and it was totally amazing.  Also, Biscoff cookie butter on apples is so perfect, so isn't it totally a no brainer to put it in my apple pie?  And wrap the whole thing up in a crazy delicious browned butter crust?  You. Are. Welcome.  Original pie crust recipe found here.

Biscoff Apple Pie with Browned Butter Crust

Biscoff Apple Filling:
3 pounds peeled, sliced apples
2/3 cup granulated sugar
3 Tablespoons all purpose flour
1/2 teaspoon cinnamon
1/8 teaspoon cloves
3/4 cup Biscoff cookie butter spread, warmed in the microwave

Browned Butter Crust:
2 1/2 cups all purpose flour
2 Tablespoons granulated sugar
1 teaspoon kosher salt (or 3/4 teaspoon table salt)
16 Tablespoons (2 sticks) butter, browned and chilled and cut into small chunks
6 Tablespoons shortening
6 to 8 Tablespoons cold water

Preheat the oven to 375F.  Set aside a 9 inch pie plate.


In a large bowl, toss together the sliced apples, sugar, flour, cinnamon, and cloves, until the apples are evenly coated.  Set aside while you make the crust.

For the pie crust, place the flour, sugar, and salt in a food processor (if you don't have a food processor, just use a large bowl and cut in the butter with a pastry blender), and pulse several times to blend.  Place the cold browned butter and the shortening over the top of the flour mixture in the food processor, and pulse 20 to 25 times, or until the mixture is crumbly.  

Pour the pie crust mixture into a large bowl and sprinkle 6 tablespoons of the water over the top.  Toss and press the mixture together with a large spoon until it forms a ball, adding the remaining water if necessary.  Divide the dough in half and form into disks.  

On a floured surface, roll out one half of the dough, and fit it into your pie plate.  Pour the apple mixture into the prepared pastry.  Spoon the warmed Biscoff evenly over the top of the apple mixture.  Roll out the remaining crust and place it on top of the apple mixture.  Seal and crimp the edges, and cut several slits in the top crust to vent the steam.

Bake the pie for 60 to 80 minutes, or until bubbly.  If the crust starts to brown too quickly, loosely cover with a piece of foil.  Remove pie from the oven and let cool.  Makes about 8 servings.

Enjoy!  -Cardamommy
Monday, September 21, 2015

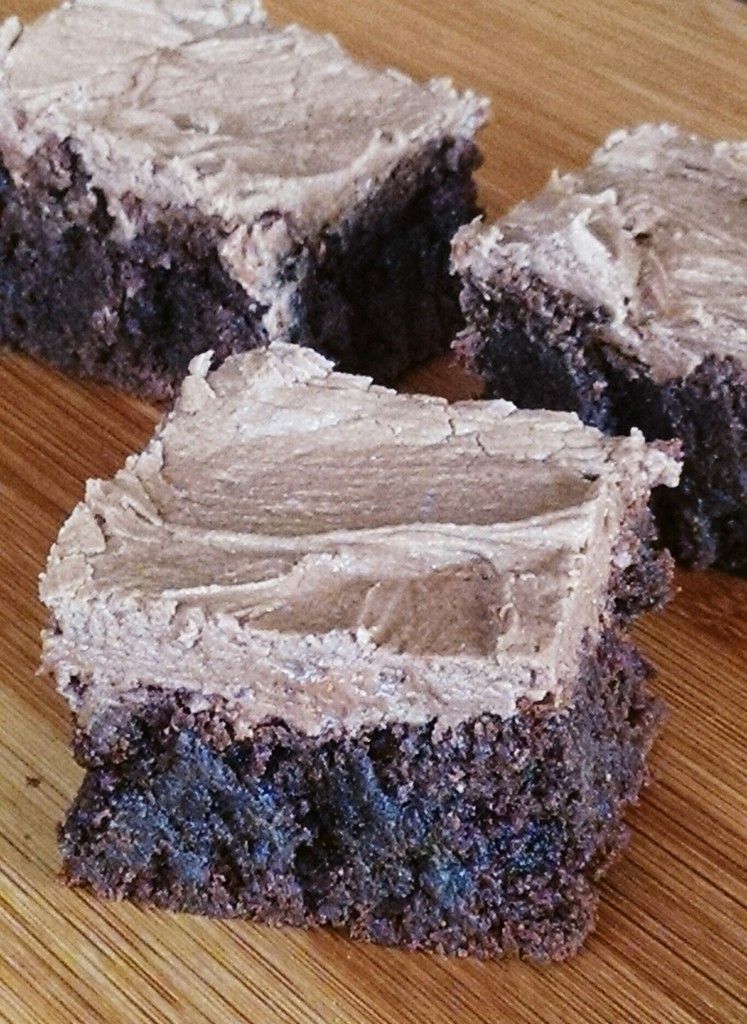
Browned Butter Brownies


I had the idea the other day to make brownies, but decided to use browned butter in them.  I made browned butter chocolate frosting a while ago, and was totally smitten.  Why, then, have I not done more browned butter chocolate recipes?  I have no idea.  But these brownies are incredible.  I used one of my favorite King Arthur Flour brownie recipes, added browned butter and milk chocolate chips, then topped it off with browned butter chocolate frosting.  So delicious!

Browned Butter Brownies

Brownies:
1/2 cup (1 stick) butter
1 cup + 2 Tablespoons granulated sugar
1/2 cup + 2 Tablespoons cocoa powder
1/2 teaspoon salt
1/2 teaspoon baking powder
1 1/2 teaspoons vanilla extract
2 eggs
3/4 cup all purpose flour
1/2 cup milk chocolate chips
Chocolate Frosting:
1/4 cup (1/2 stick) butter, browned and cooled to room temperature
2 Tablespoons cocoa powder
1 1/4 cups powdered sugar
1/2 teaspoon vanilla extract
1 1/2 to 3 Tablespoons milk

Preheat the oven to 350F.  Lightly grease a 9x9 inch square pan.

Place the butter in a shallow saucepan (one with a light colored bottom is best so you can see the progress of the browning).  Heat the butter over medium-high heat until melted and bubbling.  Continue cooking the butter, swirling the pan, or stirring occasionally to see how the butter is cooking.  Cook the butter until it reaches a golden brown color. Remove the saucepan from the heat and stir in the granulated sugar.  Let sit for several minutes to cool slightly.  Add the cocoa powder, salt, baking powder, and vanilla extract and stir until well blended and smooth.  Add the eggs, one at a time, stirring well after each addition.  Add the flour and stir until smooth.  Fold in the chocolate chips.

Pour the batter into the prepared pan and smooth the top.  Bake in the preheated oven for 23 to 25 minutes, or until a toothpick inserted in the center comes out clean.  Remove the brownies from the oven and let cool.

For the frosting, in a large bowl, beat together the browned butter, cocoa powder, and powdered sugar until crumbly.  Add the vanilla and 1 1/2 tablespoons of milk and beat until smooth.  Add the remaining milk, a little at a time, until the desired consistency is reached.  Spread the frosting over the cooled brownies.  Makes 16 brownies.

Enjoy!  -Cardamommy
Friday, May 15, 2015

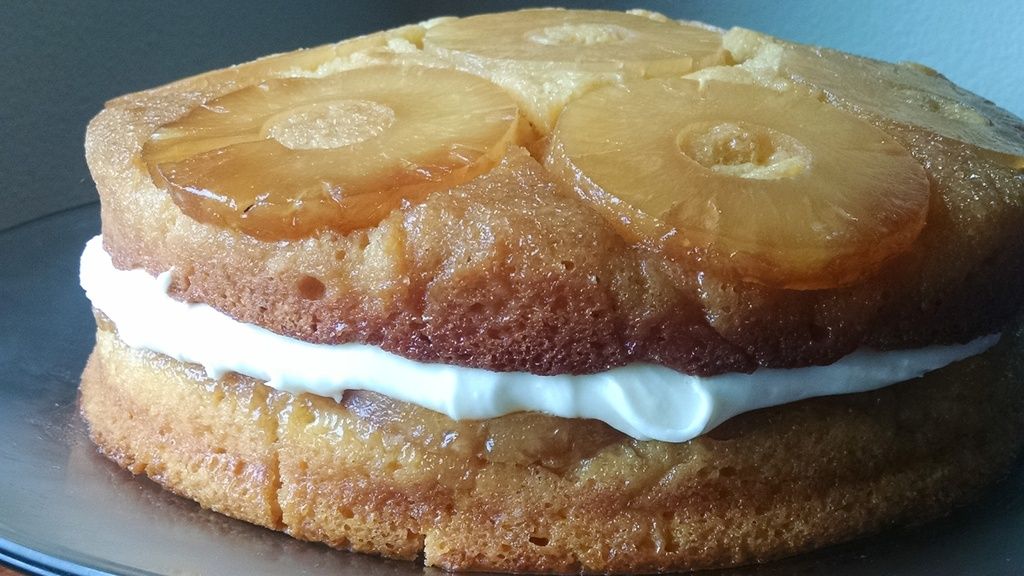
Pineapple Upside Down Layer Cake


I love pineapple upside down cake, but like so many other things, I just don't get around to making it very often. This time, I wanted to switch it up a bit by making it a layer cake! I started with a super simple pineapple upside down cake and used a cake mix.  I made a delicious coconut cream cheese frosting to put between the layers.  This cake is fruity and sweet and still a classic!

Pineapple Upside Down Layer Cake

Topping:
1/2 cup (1 stick) butter, divided
1 cup packed brown sugar, divided
14 pineapple slices, divided

Cake:
1 box yellow cake mix
1 box (4 serving size) instant vanilla pudding
4 eggs
1 cup water (or use pineapple juice)
1/2 cup oil

Frosting:
1/2 stick (4 Tablespoons) butter, room temperature
4 ounces cream cheese, cold
3 cups powdered sugar
1/2 teaspoon coconut extract
2 to 3 Tablespoons cream of coconut

Preheat the oven to 350F.  Grease 2 9-inch round cake pans.

In a small bowl, melt 1/4 cup of the butter.  Add 1/2 cup of the brown sugar and stir until smooth.  Pour the butter mixture into one of the prepared cake pans.  Arrange 7 of the pineapple slices on top.  Repeat with remaining butter, brown sugar, and pineapple slices in the second cake pan.

In a large bowl, combine the cake mix, vanilla pudding, eggs, water (or pineapple juice), and oil.  Beat until well blended and slightly thickened, 1 to 2 minutes.  Divide the batter equally between the two pans, and pour carefully over the pineapple, smoothing the top.  Bake the cakes for about 30 minutes, or until a toothpick inserted in the center comes out clean.  Remove from the oven and let cool in the pans for several minutes, then turn out one layer on a serving plate, and the other cake layer on a cooling rack.

For the frosting, beat together the butter and one cup of powdered sugar until combined.  Beat in the cream cheese, followed by the remaining powdered sugar. Add the coconut extract and cream of coconut, and beat until smooth.

Spread the frosting over the top of the cake layer on the serving plate.  Place the remaining cake layer on top of the frosting.  Makes 12 to 16 servings.  

Enjoy!  -Cardamommy

Monday, April 6, 2015

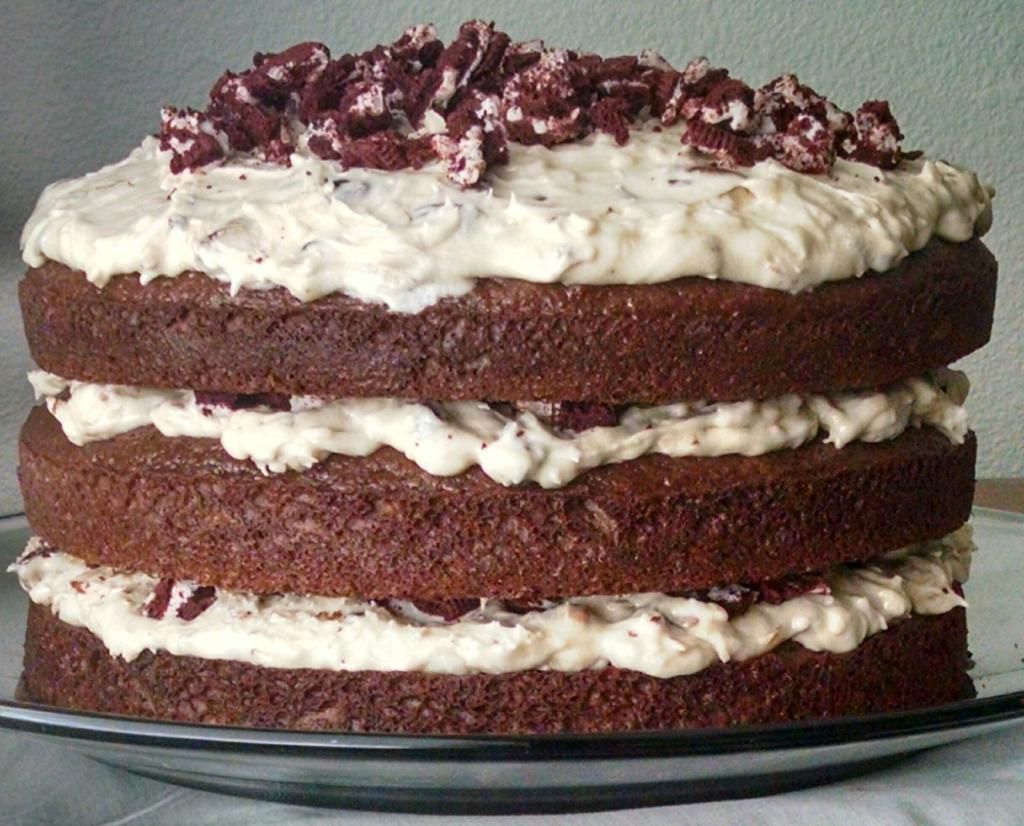
German Chocolate Cake


A couple of months ago, my oldest Hungry Puppy asked me to make a German Chocolate cake, which totally surprised me because she isn't really a big chocolate lover.  Okay, though, sure.  Twist my arm.  Of course I'll make her a German Chocolate Cake.  I didn't feel like doing a traditional German Chocolate cake, though.  I needed something different.  So I found this recipe and asked her if she was okay with it, then decided to run with it.  I doctored up a cake mix, then made my own frosting instead of using store bought.  We loved it!  

German Chocolate Cake

Cake:
1 chocolate cake mix
1 cup all purpose flour
1 cup granulated sugar
3/4 teaspoon salt
3 eggs
1 cup water
1/4 cup oil
1 cup sour cream
2 teaspoons vanilla extract

Frosting:
1/2 cup solid vegetable shortening
1/2 cup (1 stick) butter or margarine softened
1 teaspoon vanilla extract
4 cups sifted confectioners' sugar (approximately 1 lb.)
2 tablespoons milk
1/3 cup thick caramel sauce
1 cup shredded coconut, toasted
1 cup chopped pecans, toasted
12 Oreo cookies, chopped

Preheat the oven to 350F.  Grease 3 9-inch round cake pans and line the bottoms with parchment paper, then lightly grease the parchment. 

In a large bowl, whisk together the cake mix, flour, sugar, and salt.  Add the eggs, water, oil, sour cream, and vanilla, and stir until well blended.  Divide the batter evenly between the 3 cake pans, and smooth the tops.  Bake in the preheated oven for 16 to 18 minutes, or until a toothpick inserted in the center comes out with moist crumbs.  Remove cakes from the oven and let cool for about 10 minutes, then turn the cakes out of the pans and remove the parchment from the bottoms.  Let cakes cool completely on a cooling rack.  

For the frosting, in large bowl, cream shortening and butter with electric mixer. Add vanilla. Gradually add powdered sugar, one cup at a time, beating well on medium speed. Scrape sides and bottom of bowl often. When all sugar has been mixed in, icing will appear dry. Add milk and beat at medium speed until light and fluffy. Beat in the caramel sauce, then the coconut and pecans until evenly distributed.

To assemble the cake, place 1 cake layer on a serving plate.  Spread with 1/3 of the frosting and sprinkle with 1/3 of the chopped oreo cookies.  Place the 2nd cake layer on top and spread with another 1/3 of the frosting and oreos.  Place the last cake layer on top and spread with the remaining frosting and oreos.  Makes 16 to 20 servings.  

Enjoy!  -Cardamommy

Friday, February 13, 2015

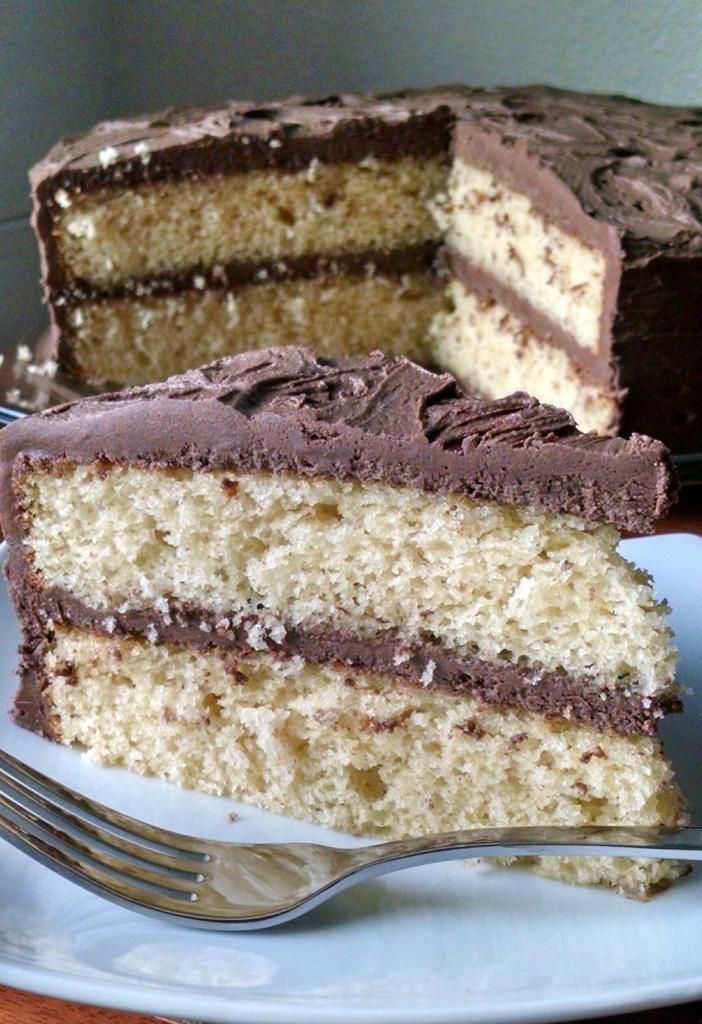
Buttermilk Layer Cake


I was searching for a buttermilk layer cake and stumbled across this one from the NY Times, and I love it!  Love it.  This cake is definitely going to be my brand new go to favorite vanilla layer cake recipe.  It is nice and light, and tender, and flavorful, and pretty much just amazing!  I frosted mine with this browned butter chocolate frosting, but you can use whatever frosting you want!  

Buttermilk Layer Cake

2 1/3 cups cake flour (Or sub 2 cups +3 Tbsp all purpose flour and 2 Tbsp cornstarch)
1 1/2 teaspoons baking powder
1/2 teaspoon baking soda
1/4 teaspoon salt
12 Tablespoons (1 1/2 sticks) butter, room temperature
1 1/3 cups granulated sugar
3 eggs
1 1/2 teaspoons vanilla
1 cup buttermilk

Preheat the oven to 350F.  Spray 2 9-inch round cake pans with cooking spray. Set aside.

In a medium bowl, whisk together the cake flour, baking powder, baking soda, and salt.  

In a large bowl, cream together the butter and sugar until well blended and smooth.  Add the eggs and vanilla, and beat for 2 to 3 minutes, or until fluffy.  Beat in 1/3 of the flour mixture until just combined, followed by half of the buttermilk.  Add another 1/3 of the flour mixture, followed by the remaining buttermilk.  Beat in the remaining flour until just combine.  

Pour the batter evenly into the two prepared pans and smooth the tops.  Place in the preheated oven and bake for 20 to 22 minutes, or until a toothpick inserted in the center comes out clean.  Remove cakes from the oven and let cool in the pans for 10 to 15 minutes.  Carefully turn the cakes out of the pans and let cool completely on a cooling rack.  Frost with your favorite frosting.  Makes 12 to 16 servings.

Enjoy!  -Cardamommy


Monday, February 9, 2015

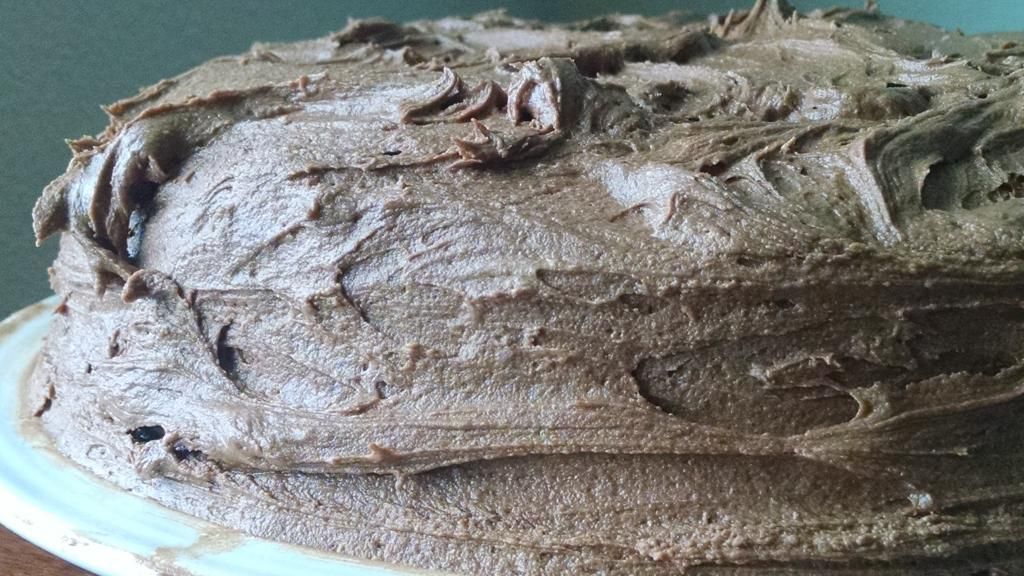
Browned Butter Chocolate Frosting - 2 Ways


A friend of mine told me several weeks ago that she uses browned butter in her chocolate frosting.  I had never heard of such a thing, and had obviously not thought of it myself, so I wanted to give it a try.  I totally did it, and I totally love it. The browned butter elevates the frosting to a whole new level, and doesn't get lost in or compete with the chocolate at all, which I was slightly worried about.  I made the frosting 2 different ways, and will share both.  The first uses cocoa powder and the second uses melted chocolate chips.  The texture of the two frostings are a bit different, the cocoa powder frosting is softer and a bit lighter.  The chocolate chip version is a bit heavier and solidifies more especially when refrigerated.  Both are delicious, and will frost a 9x13 or a 9 inch layer cake.  

Browned Butter Chocolate Frosting with Cocoa Powder

1 cup butter, browned and cooled to room temperature
1/2 cup cocoa powder
4 to 5 cups powdered sugar
1 1/2 teaspoons vanilla extract
6 to 7 Tablespoons milk

In a large bowl, beat together the browned butter, cocoa powder, and powdered sugar until crumbly.  Add the vanilla and 3 tablespoons of the milk and beat until incorporated.  Beat in the remaining milk, one tablespoon at a time until the desired consistency is reached.  


Browned Butter Chocolate Frosting with Melted Chocolate

1 cup (2 sticks, 16 tablespoons) butter, browned and cooled to room temperature
2 cups powdered sugar
1 teaspoon vanilla extract
1 cup (6 ounces) semisweet or bittersweet chocolate chips, melted and cooled

In a large bowl, beat together the browned butter and powdered sugar until smooth and combined. Beat in the vanilla extract.  Add the melted chocolate and beat the frosting until it is light and fluffy.  Makes about 3 cups.

Enjoy!  -Cardamommy

Friday, January 30, 2015

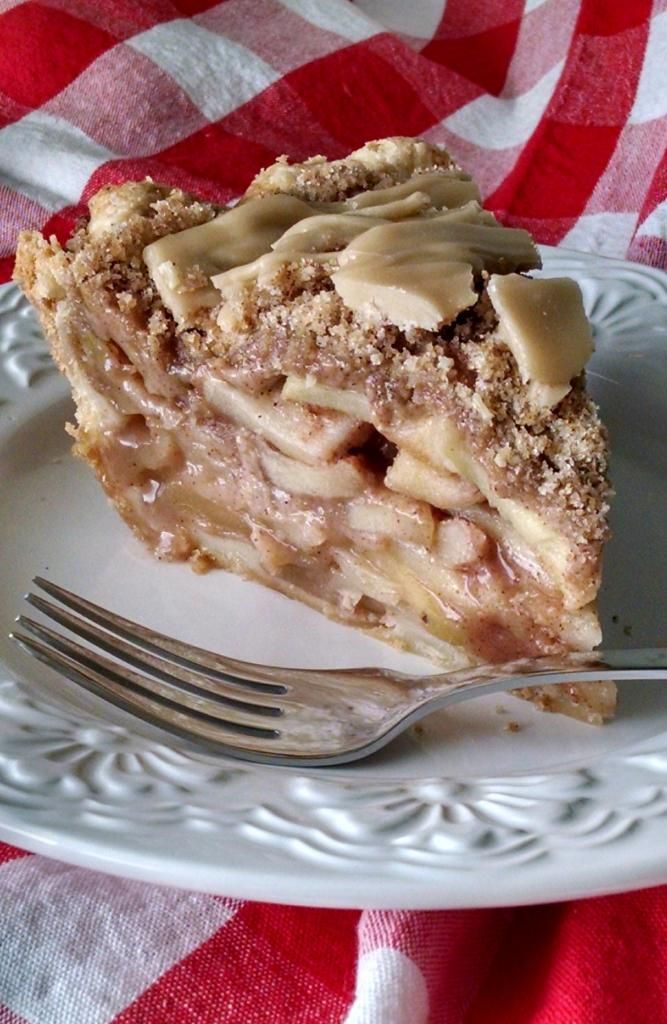
Cinnamon Apple Crumble Pie with Brown Sugar Glaze


My oldest Hungry Puppy requested an apple pie, so we decided to make one together.  I love when my Hungry Puppies help out in the kitchen!  It's so fun for them to be hands on and participating in creating the food that we eat, and the math skills!  This pie turned out brilliantly!  I wasn't sure at first, but it is luscious.  I tried a new crust recipe this time and I adore it, so I'll link to the recipe I used, but you can use your favorite or even store bought (no shame, life is busy!).  I almost want to scrape off the apples and just eat the crust.  Almost.  I read an interesting article on apple pie recently that suggested only partially peeling the apples.  By the time they are fully cooked, the skin is so tender anyway that you don't even notice, and save yourself some time and effort.  The apple filling is moist and not overspiced, letting the apple flavor really come through.  The crumble topping provides a wonderful crunchy texture and the glaze caps it off with a burst of brown sugar sweetness.  Original recipe found here.

Cinnamon Apple Crumble Pie with Brown Sugar Glaze

9 inch unbaked pie crust, fitted into a pie plate (I used this one and it was amazing!)

Apple Filling:
3 1/4 pounds (about 6 to 7 large) apples, halfway peeled, cored, and sliced
2/3 cup granulated sugar
3 Tablespoons all purpose flour
2 teaspoons cinnamon
2 Tablespoons melted butter

Crumble Topping:
1 cup all purpose flour
1/2 cup granulated sugar
1/4 cup packed brown sugar
1 1/2 teaspoons cinnamon
1/2 teaspoon salt
6 Tablespoons cold butter, cut into slices

Brown Sugar Glaze:
2 Tablespoons butter
2 Tablespoons packed brown sugar
1 Tablespoon milk
1/2 teaspoon vanilla extract
1/2 to 3/4 cup powdered sugar

Preheat the oven to 400F.

Place the sliced apples in a large bowl, set aside.  In a small bowl, combine the sugar, flour, and cinnamon.  Sprinkle the mixture over the sliced apples and toss to coat evenly.  Pour the melted butter over the apples, and toss again, to coat.  Set aside.

For the crumble, in a food processor, place the flour, sugar, brown sugar, cinnamon, and salt, and pulse several times until blended.  Scatter the sliced butter over the top and pulse until the mixture resembles sandy crumbs.

Toss the apple mixture one more time, then arrange the apples in the crust.  Sprinkle all of the crumble mixture over the apples, letting it fall between the cracks and gaps in the apples.  Place the pie in the oven and bake for 40 minutes, covering loosely with foil to prevent the top from overbrowning.  Reduce the oven temperature to 350F and bake the pie for an additional 40 to 45 minutes, or until the apples are tender in the center and bubbling at the edges.  Remove the pie from the oven.

For the glaze, place the butter and brown sugar in a small saucepan and bring to a boil, stirring frequently.  Boil for several minutes, then remove from the heat and stir in the milk, followed by the vanilla.  Stir in the powdered sugar (starting with 1/2 cup and adding more as needed to reach your desired consistency) until smooth.  Drizzle the glaze over the warm pie.  Serve warm, or chill and serve cold.  Makes 8 servings.

Enjoy!  -Cardamommy


Friday, January 16, 2015

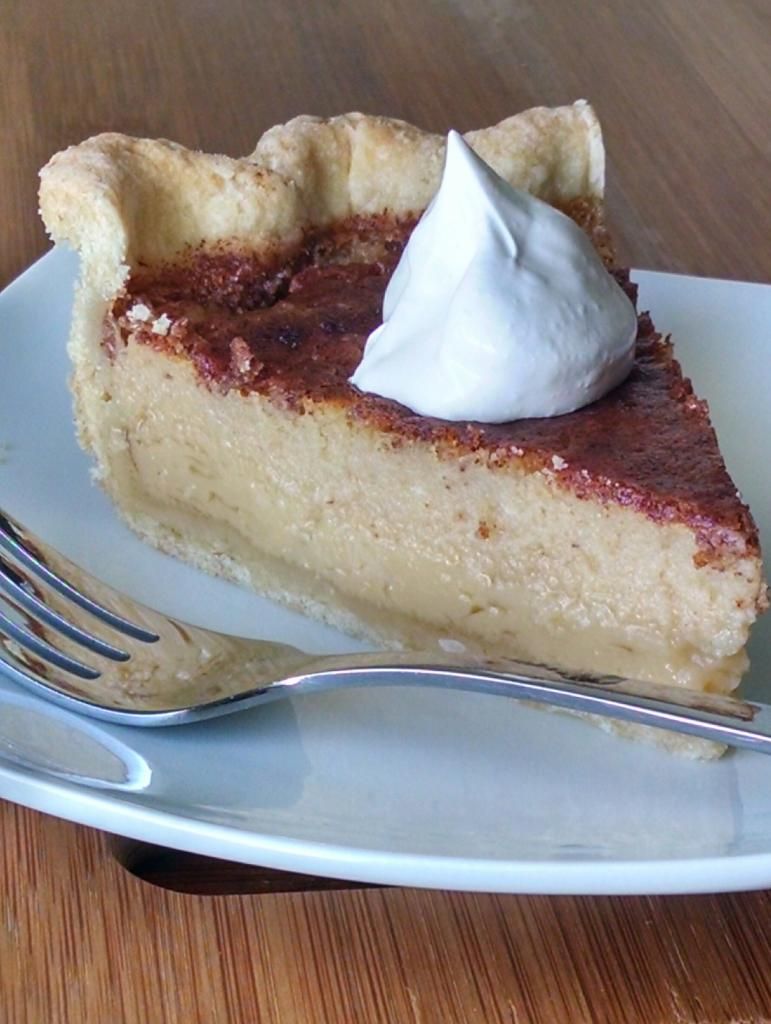
Cinnamon Honey Buttermilk Pie


I don't think that I have ever made a buttermilk pie.  Mostly, I think, because I was a tiny bit afraid that it would taste like buttermilk.  In a pie.  Now, don't get me wrong, I like buttermilk.  Just not in pie form, I don't think.  I once made a buttermilk chocolate pudding and I really wasn't a fan because I could really taste the buttermilk tang through the chocolate. This pie is so amazing!  It doesn't taste like tangy buttermilk, but has a wonderful custard flavor and the honey comes through very nicely.  Just lightly spiced with cinnamon, this pie is just perfect!


Cinnamon Honey Buttermilk Pie

9 inch unbaked pie crust
1/2 cup butter, melted
2/3 cup granulated sugar
1/2 cup honey
1/2 teaspoon salt
3 Tablespoons all purpose flour
3 eggs, lightly beaten
2 teaspoons vanilla extract
1 cup buttermilk
1 teaspoon cinnamon

Preheat the oven to 350F.  

Stir together the melted butter, sugar, and honey until smooth.  Add then salt and flour, and stir until combined.  Stir in the eggs and vanilla.  Add the buttermilk and cinnamon and stir until completely incorporated.  

Pour the mixture into the unbaked pie crust and bake in the preheated oven for 15 minutes.  Reduce the oven temperature to 325F, and continue to bake the pie for 40 to 45 more minutes, or until the filling jiggles slightly.  Remove the pie from the oven and let cool completely (and chill if desired) before serving.  Makes about 8 servings.

Enjoy!  -Cardamommy

Friday, December 19, 2014

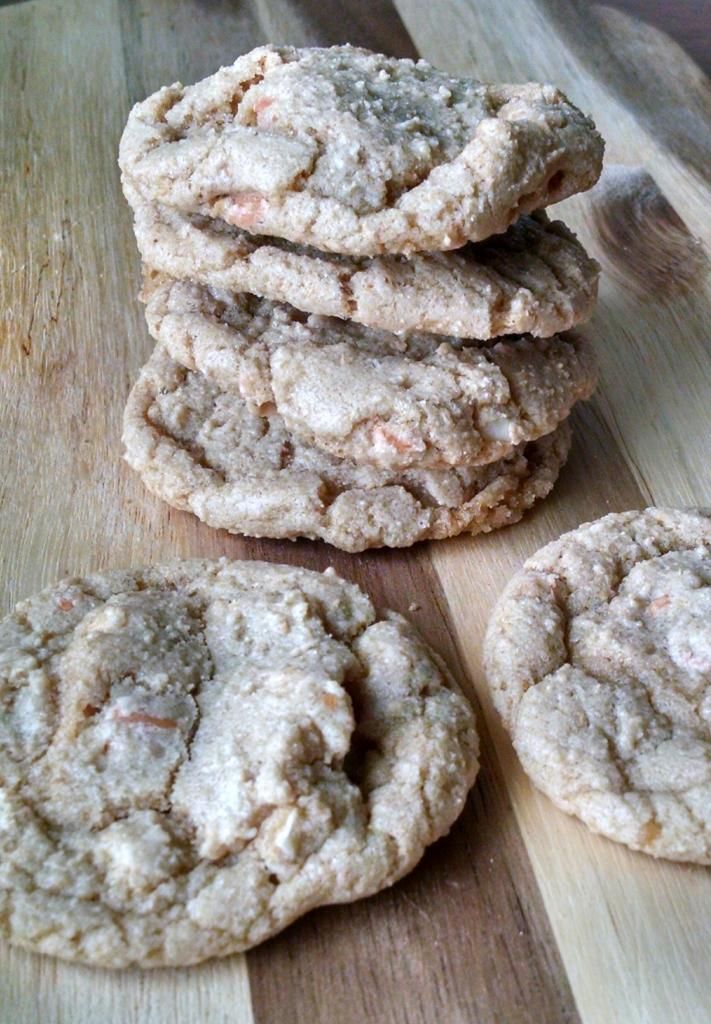
Cashew Butterscotch Chip Cookies


I realized recently that it has been a long time since I have made anything with cashews.  I love cashews...they are one of the few types of nuts that I like. These crunchy and chewy cookies contain butterscotch chips and cashews, and are quite a delicious little treat. Original recipe found here.

Cashew Butterscotch Chip Cookies

1/2 cup butter, room temperature
1 cup granulated sugar
1 cup packed brown sugar
1/2 teaspoon baking powder
1/2 teaspoon baking soda
1 teaspoon salt
2 eggs
2 teaspoons vanilla
1 cup white whole wheat flour
1 cup all purpose flour
3/4 cups salted roasted cashew halves or pieces
3/4 cup butterscotch chips

Preheat the oven to 375F.  Line a baking sheet with parchment paper.

In a large bowl, cream together the butter, sugar, brown sugar, baking powder, baking soda, and salt.  Beat in the eggs, one at a time, followed by the vanilla.  Beat until incorporated.  Add the white whole wheat flour, and all purpose flour, and beat until combined.  Stir in the cashews and butterscotch chips.

Shape the dough into tablespoon size balls and place on the prepared baking sheet.  Bake in the preheated oven for 8 to 9 minutes, or until the edges are just golden brown and the center is set.  Remove cookies from the oven and let cool on the pan for several minutes.  Transfer cookies to a cooling rack to cool completely.  Makes about 3 dozen cookies.

Enjoy!  -Cardamommy

Friday, December 5, 2014

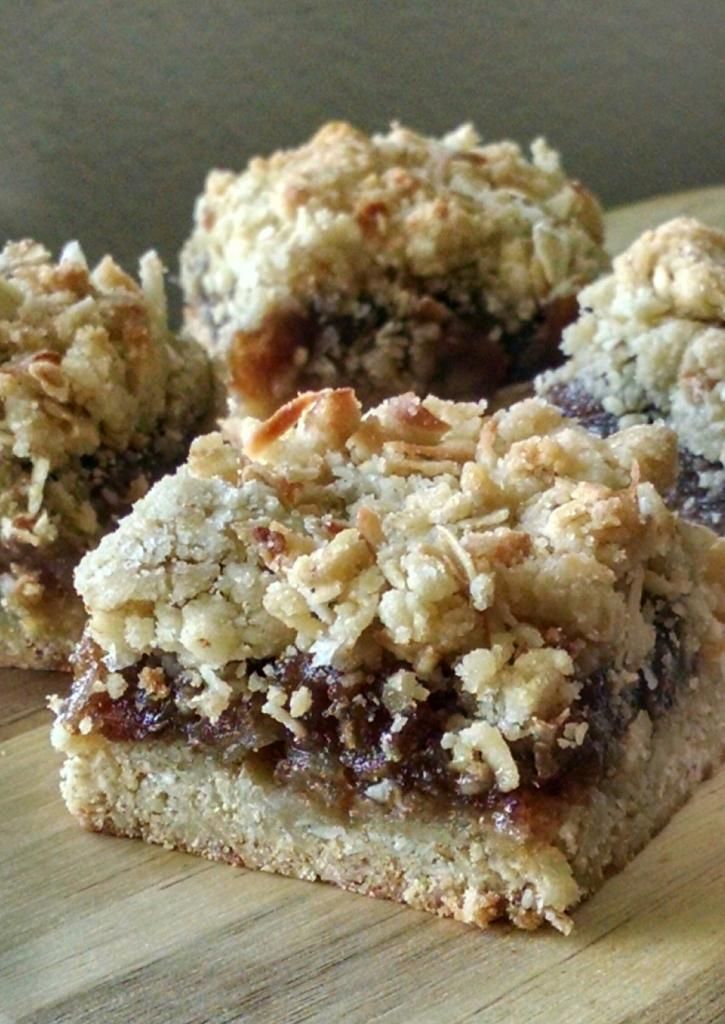
Coconut Maple Date Bars


I love dates.  I mean, I really love dates!  I don't often think of things to make with dates, though.  I stumbled across this recipe though, and thought it would be perfect! These bars are so simple and delicious, and perfect for those extra dates you've been wanting to do something with!  Original recipe found here.

Coconut Maple Date Bars

Maple Date Filling:
12 ounces chopped, pitted dates
3/4 cups water
1/3 cup maple syrup

Crust:
1/2 cup butter, room temperature
2/3 cup granulated sugar
1 cup all purpose flour
1 cup old fashioned oatmeal
1 cup shredded coconut
1/4 teaspoon baking soda
1/4 teaspoon salt

For the maple date filling, place the dates, water, and syrup in a small saucepan.  Bring to a boil over medium heat, stirring occasionally.  Reduce heat to low and continue to simmer, stirring frequently, until the mixture is very thick, about 10 minutes.  Remove from the heat and let cool.

Preheat the oven to 400F.  Lightly grease a 9x9 inch square baking pan.  Set aside.

For the crust, cream together the butter and sugar until light and fluffy.  Add the flour, oatmeal, coconut, baking soda, and salt, and beat until well blended and crumbly.  Place 2 cups of the crust mixture into the prepared pan and press evenly onto the bottom of the pan.  Spread the cooled date mixture evenly over the top of the crust.  Sprinkle the remaining crumbs on top of the date filling.

Place the bars in the preheated oven and bake for about 18 to 20 minutes, or until the top is lightly browned.  Remove from the oven and let cool completely before cutting.  Makes 16 servings.

Enjoy!  -Cardamommy

Monday, November 10, 2014

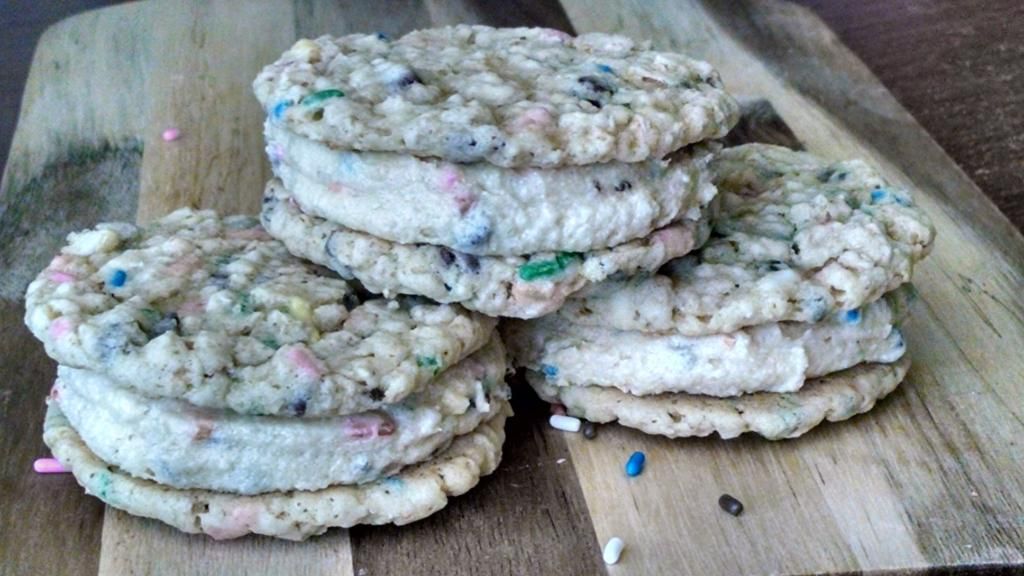
Cake Batter Oatmeal Cookie Dough Sandwiches


I have been dreaming about cake batter cookie dough for weeks now, and trying to figure out something to make with cookie dough in it.  I was getting desperate.  I was almost ready to just make a batch, freeze it, and eat the dough just like that.  Then I saw this recipe and I figured it out.  I made a few changes to the original cookie recipe, and turned the cookie dough into frosting! The cookies bake up nice and soft and chewy, and the cake batter cookie dough frosting will leave you scraping every last bit out of the bowl.


Cake Batter Oatmeal Cookie Dough Sandwiches

Cake Batter Oatmeal Cookies:
1/2 cup (1 stick) butter, room temperature
1/2 cup granulated sugar
6 Tablespoons packed brown sugar
1 egg
1 teaspoon vanilla extract
1 teaspoon butter flavoring
3/4 cup all purpose flour
1/2 cup yellow cake mix (from a box mix)
1 cup quick cooking oatmeal
1/2 teaspoon salt
1/2 teaspoon baking soda
1/4 cup mini chocolate chips
6 Tablespoons rainbow sprinkles

Cake Batter Cookie Dough Frosting:
1/2 cup (1 stick) butter, room temperature
1/3 cup packed brown sugar
1 cup powdered sugar
1/4 cup all purpose flour
1/2 cup yellow cake mix (from a box mix)
1/4 teaspoon salt
1 teaspoon vanilla extract
1 teaspoon butter flavoring
1 to 2 teaspoons milk (if necessary to reach desired consistency)
1/4 cup mini chocolate chips
2 Tablespoons rainbow sprinkles

Preheat the oven to 350F.  Line a baking sheet with parchment paper.  Set aside.

In a large bowl, cream together the butter, granulated sugar, and brown sugar until light and fluffy.  Add the egg, vanilla extract, and butter flavoring and beat until well blended.  Add the flour, cake mix, oatmeal, salt, and baking soda, and beat until just combined.  Beat in the chocolate chips and sprinkles.

Scoop the dough into tablespoons size balls and place on the prepared baking sheet.  Bake in the preheated oven for 8 to 9 minutes.  Remove from the oven and let cool on the pan for about 5 minutes.  Carefully (these are really soft!) transfer to a cooling rack to cool completely before frosting.

For the frosting, cream together the butter, brown sugar, and powdered sugar until light and fluffy.  Beat in the flour, cake mix, and salt until blended.  Add the vanilla extract and butter flavoring and beat until combined.  Beat in the milk if necessary to reach desired consistency.  Beat in the chocolate chips and sprinkles.  

To make the cookie sandwiches, spread or pipe the frosting on the back of one cookie.  Press another cookie on top of the frosting.  Makes about 12 cookie sandwiches.

Enjoy!  -Cardamommy


Friday, October 31, 2014

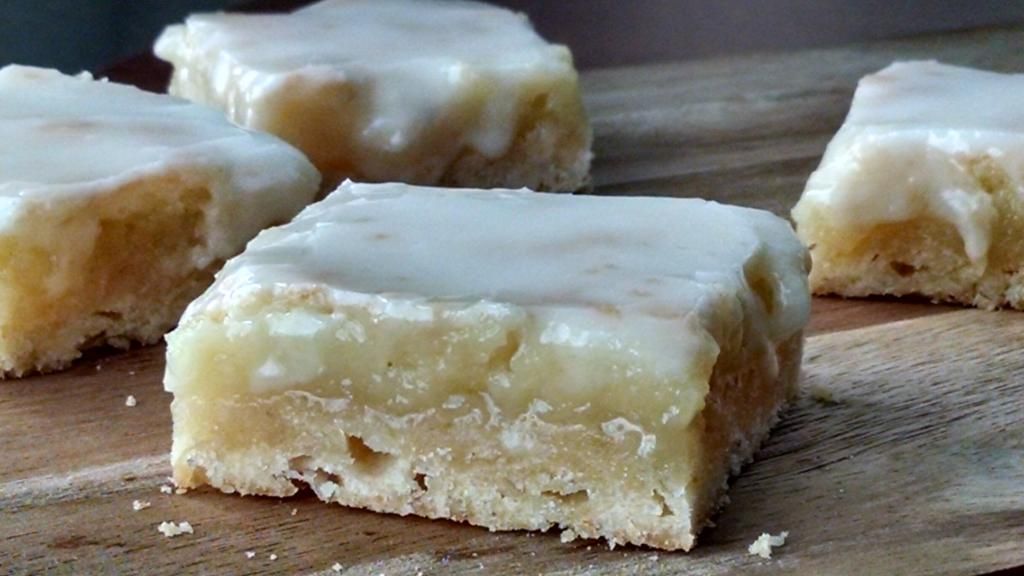
Glazed Lemon Bars


Needing to use a bag full of lemons recently, I asked my family what I should make.  My husband adamantly requested lemon bars, and I realized that we haven't had lemon bars in a really long time, and I'm not sure I've even ever made lemon bars!  Obviously, his request was the perfect opportunity to do so.  I adapted these lemon bars from this recipe, and we really loved them!

Glazed Lemon Bars

Crust:
1 cup all purpose flour
1/4 cup granulated sugar
1 teaspoon lemon zest
1/2 cup (1 stick) butter

Lemon Filling:
2 eggs
1 cup granulated sugar
2 Tablespoons all purpose flour
1/2 teaspoon baking powder
1 teaspoon lemon zest
2 Tablespoons fresh lemon juice

Glaze:
1/2 cup powdered sugar
1 to 2 Tablespoons fresh lemon juice

Preheat the oven to 350F.  Lightly grease an 8x8 inch square baking dish.  Set aside.

For the crust, in a medium bowl, combine the flour, sugar, and lemon zest.  Cut in the butter using a fork or pastry blender until the mixture resembles coarse crumbs.  Pour the crumb mixture into the prepared pan and press evenly.  Bake in the preheated oven for 15 to 20 minutes, or until golden brown.  While the crust is baking, make the lemon filling.

For the lemon filling, in a medium bowl, whisk together the eggs, sugar, flour, baking powder, and lemon zest until smooth.  Carefully whisk in the lemon juice.  When the crust has finished baking, remove from the oven and immediately pour the lemon filling over the warm crust.  Return to the oven and bake for about 18 to 20 more minutes, or until the top is lightly browned.  Remove from the oven and let cool completely.

For the glaze, stir together the powdered sugar and lemon juice until smooth.  Pour the glaze over the cooled bars.  Cut into squares and serve.  Makes 16 servings.

Enjoy!  -Cardamommy


Related Posts Plugin for WordPress, Blogger...