Showing posts with label Cheese Cake. Show all posts

Friday, March 13, 2015

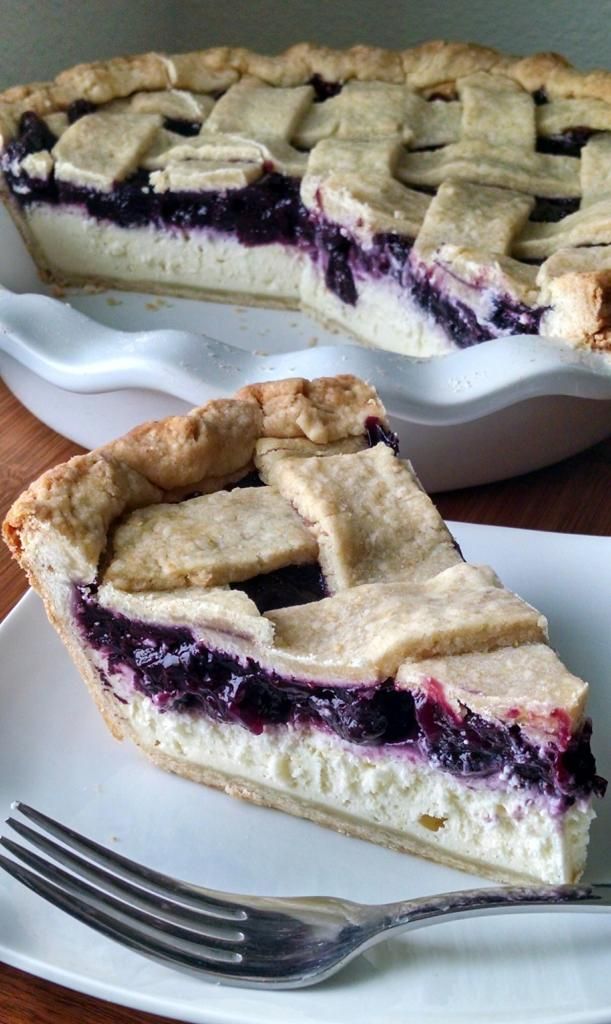
Blueberry Lemon Cheesecake Pie


So, a while ago, I made this Cherry Cheesecake Pie, and everyone loved it and begged me to make it again.  I thought it was good, but I felt that the canned pie filling detracted from the deliciousness.  So, I decided to make it again, but this time with my own pie filling, and it was so much better!!!  My husband loves all things blueberry, so this pie is for him (although he'll probably have to fight the rest of us for it!).  I used frozen blueberries, although I'm sure you could just as easily use fresh.  


Blueberry Lemon Cheesecake Pie

Blueberry Pie Filling:
1/2 cup granulated sugar
3 Tablespoons cornstarch
2 Tablespoons lemon juice
3 cups frozen blueberries (you could substitute fresh)

Cream Cheese Filling:
9 inch double pie crust, rolled out
2 packages (8 ounces each) cream cheese, room temperature
1/2 cup granulated sugar
1 Tablespoon cornstarch
Zest of 1 lemon
1 egg

In a small saucepan, stir together the sugar and cornstarch until blended.  Add the lemon juice and stir until smooth.  Add the blueberries and cook over medium-high heat, stirring frequently, until the mixture starts bubbling.  Continue to cook, stirring constantly for about 2 minutes, or until thick.  Let cool.

Preheat the oven to 350F. Place one pie crust layer in a 9 inch pie plate.

In a large bowl or a food processor, beat together the cream cheese, sugar, and cornstarch until smooth.  Add the lemon zest and egg and beat until well combined and smooth.  Pour the cream cheese mixture into the prepared pastry crust and smooth the top.  Gently spoon the cooled blueberry pie filling evenly over the top of the cream cheese mixture.

Cut the remaining pie crust into 1/2 inch strips and arrange in a lattice over the top of the pie.  Seal and crimp the edges as desired.  Bake in the preheated oven for 50 to 60 minutes, or until the blueberry filling is bubbling and the crust is golden brown (if the crust browns too quickly, cover loosely with foil).  Remove the pie from the oven and let cool completely on a cooling rack. Serve at room temperature, or chill before serving.  Makes 8 servings.

Enjoy!  -Cardamommy

Monday, February 2, 2015

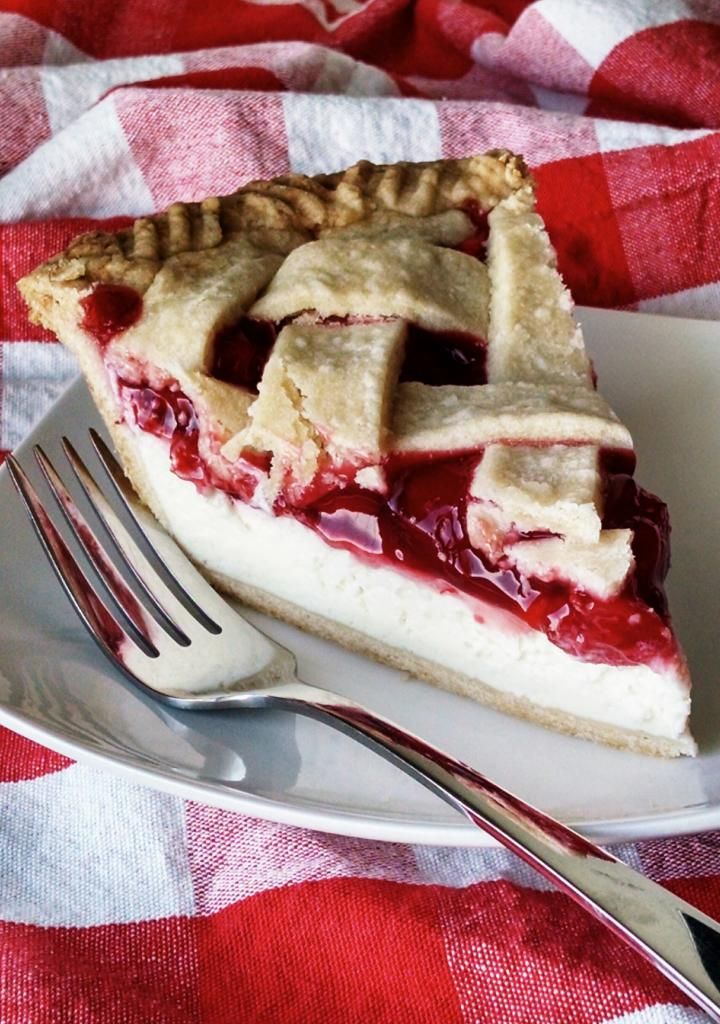
Cherry Cheesecake Pie


I've had my eye on this pie for a while now, and I am so incredibly glad that I made it.  Because it was amazing.  I don't often make cheesecake, but this one spoke to me.  Partly because it was a pie, and partly because it was gorgeous!  I am so happy with the way it turned out.  It was so simple to put together, just like a pie.  My husband rightly suggested that you can make this pie with any kind of fruit topping you'd like.  I'm pretty sure that I'll have the opportunity to try out lots because everyone loved it, and I totally can't wait to make it again!  

Cherry Cheesecake Pie

9 inch double pie crust (I used this one, or use a refrigerated crust)
2 packages (8 ounces each) cream cheese (regular or neufchatel), room temperature
1/2 cup granulated sugar
1 Tablespoon cornstarch
1 egg
1/2 teaspoon almond extract
1 can (21 ounces) cherry pie filling (or any other flavor pie filling)

Preheat the oven to 350F. Place one pie crust layer in a 9 inch pie plate.

In a large bowl or a food processor, beat together the cream cheese, sugar, and cornstarch until smooth.  Add the egg and almond extract and beat until well combined and smooth.  Pour the cream cheese mixture into the prepared pastry crust and smooth the top.  Gently spoon the cherry pie filling evenly over the top of the cream cheese mixture.

Cut the remaining pie crust into 1/2 inch strips and arrange in a lattice over the top of the pie.  Seal and crimp the edges as desired.  Bake in the preheated oven for 50 to 60 minutes, or until the cherry filling is bubbling and the crust is golden brown (if the crust browns too quickly, cover loosely with foil).  Remove the pie from the oven and let cool completely on a cooling rack. Serve at room temperature, or chill before serving.  Makes 8 servings.

Enjoy!  -Cardamommy

Monday, December 29, 2014

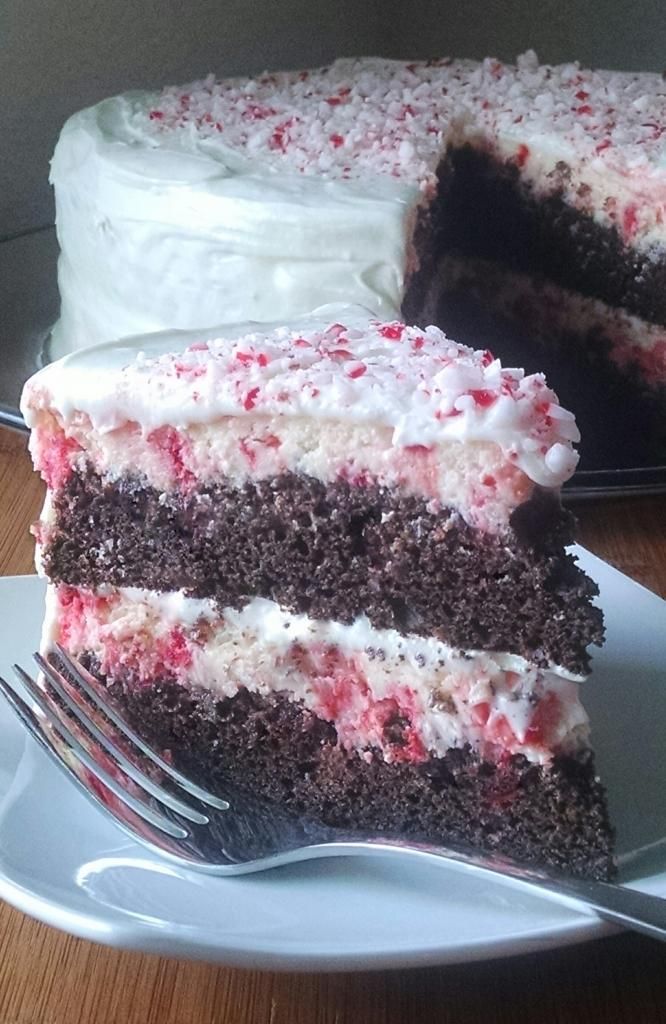
Chocolate Peppermint Cheesecake Layer Cake


This cake.  This made me happy.  Partly because it was moist chocolate cake.  Partly because it was peppermint cheesecake.  Partly because it had peppermint cream cheese marshmallow frosting on it.  Partly because I seriously tweaked the recipe and it turned out amazing!  I'm going to be honest and tell you that I wasn't sure it would come together, but it totally did, and it was perfecty!  The flavors and textures together are awesome, but it also just looks pretty, and so easy!  Believe it or not, it wasn't that difficult to put together.  Totally worth it! Recipe adapted from here.

Chocolate Peppermint Cheesecake Layer Cake

Chocolate Cake:
1 box chocolate cake mix
1 cup water
1/2 cup sour cream
1/3 cup canola oil
3 eggs
1 box (4 serving size) instant chocolate pudding

Peppermint Cheesecake:
24 ounces (3 8-ounce packages) cream cheese, room temperature
3/4 cup granulated sugar
1 teaspoon vanilla
3/4 cup sour cream
3 eggs
1 bag (10 ounces) peppermint baking chips

Peppermint Cream Cheese Marshmallow Frosting:
4 ounces cream cheese, room temperature
1/4 cup butter (1/2 stick), room temperature
12 ounces (about 3 cups) powdered sugar
1 teaspoon peppermint extract
7 ounce jar marshmallow cream

Preheat the oven to 350F.  Place 2 strips of foil (about 3 to 4 inches wide) inside two 9 inch round cake pans (2 strips per pan) in the form of an X, with the ends hanging over the sides. Spray the pan and foil with cooking spray.  Set aside.

For the chocolate cake, in a large bowl whisk together the chocolate cake mix, water, sour cream, oil, and eggs until well blended.  Add the chocolate pudding mix and whisk until combined.  Batter will be thick.  Spread the batter evenly into the prepared pans and smooth the top.  Bake the cakes for 20 to 25 minutes, or until a toothpick inserted in the center comes out clean.  Remove the cakes from the oven and carefully flatten the top of the cakes by pressing down gently with the back of a spatula.  

While the cakes are baking, make the peppermint cheesecake.  In a large bowl, beat together the cream cheese, sugar, and vanilla until smooth.  Beat in the sour cream.  Beat in the eggs, one at a time, and beat until well blended and smooth.  Stir in t he peppermint baking chips.  Pour the cheesecake batter evenly over the two flattened cakes (still in the pans) and smooth the tops.  Bake for 25 to 30 minutes, or until the center of the cheesecakes slightly wobbly.  Remove the cakes from the oven and run a knife around the edges to loosen the cakes from the pans.  Let the cakes cool, then chill for 2 to 4 hours, until completely cold.  

When you are ready to assemble the cake, make the frosting.  Beat together the cream cheese and butter until smooth.  Beat in the powdered sugar, 1 cup at a time, until blended.  Beat in the peppermint extract and marshmallow cream until smooth.

Remove the cakes from the refrigerator, and using the foil as handles, carefully lift the cakes out of the pans.  Place one cake layer on a serving plate and spread about 1/2 cup of frosting over the top, just enough for a very thin layer to cover the cheesecake.  Place the second cake on top of the first and use the remaining frosting to frost the top and sides of the cake.  Garnish with crushed peppermints, if desired.  Makes 16 to 20 servings.

Enjoy!  -Cardamommy


Friday, March 14, 2014

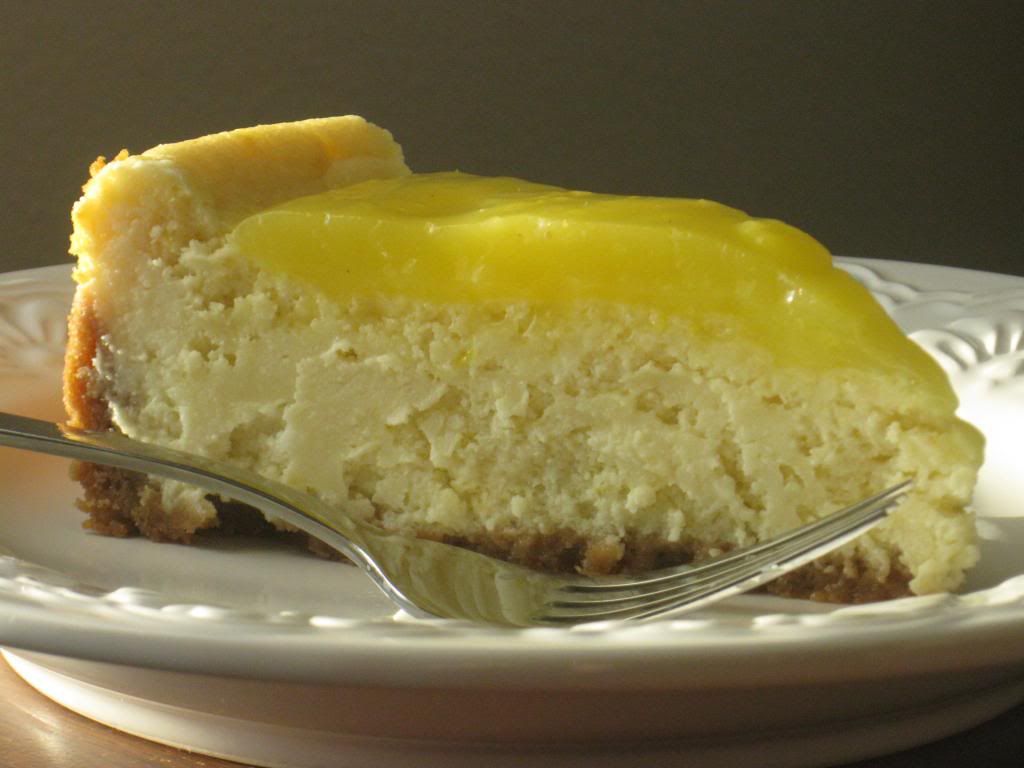
Lemon Curd Cheesecake


I've been in a lemon mood lately, and this cheesecake is next up.  I rarely make cheesecake.  I like it, but don't really crave it to the point where I need to have it a lot.  My oldest Hungry Puppy decided that it was definitely time for me to make a cheesecake, and we definitely owe thanks to her for that request!  This cheesecake is delicious.  It has a very subtle lemon flavor on it's own, but with the lemon curd on top it is perfection.  The lemon curd gives it that major wow factor.  This cheesecake is a little time consuming, but all in all pretty simple.  A lot of the time involved is chilling the baked cheesecake and the lemon curd.  Do yourself a springtime favor, make this cheesecake!  Original recipe from Fine Cooking.

Lemon Curd Cheesecake

For the crust:
8 ounces vanilla wafers or golden oreos (with the filling scraped out)
2 Tablespoons granulated sugar
7 Tablespoons butter, melted

Cheesecake Filling:
3 packages (8 ounces each) cream cheese, room temperature
1 cup ricotta cheese
2 Tablespoon all purpose flour
1/4 teaspoon salt
1 1/4 cups granulated sugar
2 Tablespoons fresh lemon zest
1 Tablespoon vanilla extract
4 eggs

Lemon Curd:
2 eggs
1/2 cup granulated sugar
1/2 cup fresh lemon juice (from about 2 or 3 lemons)
2 Tablespoons butter
1 Tablespoon lemon zest

Preheat the oven to 375F.

In a food processor, process the vanilla wafers or oreos until they are crumbs.  Add the sugar and pulse until combined.  Pour the cookie crumbs in a medium bowl and add the melted butter.  Stir until the crumbs are evenly moistened.  Pour the moistened crumbs into a 9 inch springform pan, and press evenly over the bottom of the pan and about 1 to 2 inches up the sides of the pan.

Bake the cookie crust in the preheated oven for 9 to 10 minutes, or until lightly browned.  Remove crust from the oven and let cool completely while you make the cheesecake filling.

Reduce the oven temperature to 300F.

For the filling, beat together the cream cheese, ricotta cheese, flour, and salt until well combined, fluffy and smooth.  Add the sugar, lemon zest, and vanilla and beat until blended and smooth.  Beat in the eggs, one at a time, until just combined.  Pour the filling into the prepared and cooled crust, and smooth the top.

Bake the cheesecake for about 55 minutes, or until the edges are slightly puffed and the center looks done, but wobbles when you move it.  Remove the cheesecake from the oven and let cool completely on a cooling rack.  Cover with plastic wrap and chill for about 8 hours, or overnight.  

While the cheesecake is chilling, make the lemon curd.  In a small saucepan, whisk together the eggs and sugar until combined.  Whisk in the lemon juice.  Over medium-high heat, cook the mixture, stirring constantly until the mixture is steaming and thickened and just barely starts to bubble.  Remove from the heat and stir in the lemon zest and butter.  Transfer the lemon curd to a medium bowl, cover and chill until cold.

When ready to serve, run a thin knife around the edge of the cheesecake to loosen it from the sides of the springform pan, then unclasp the edge of the pan and remove the sides.  Spread the chilled lemon curd evenly over the top of the cheesecake.  Cut into wedges and serve.  Makes about 12 to 16 servings.

Enjoy!  -Cardamommy


Friday, December 27, 2013

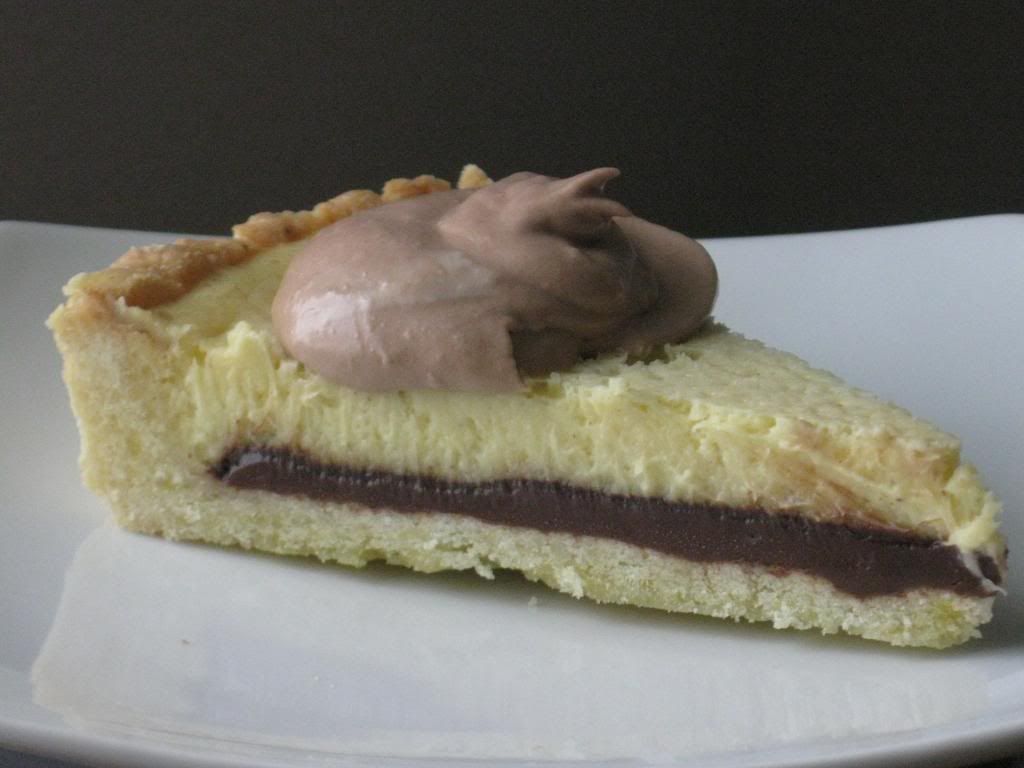
Nutella Eggnog Tart


I faced a difficult decision on what dessert to make for Christmas dinner this year.  We wanted to do something a little different, but I had no idea where to go with it!  We finally settled on some kind of eggnog dessert, but it was really tough to figure out what to make.  I finally came across this recipe, and inspiration hit.  I modified the recipe to incorporate the nutella, and it turned out amazing.  The eggnog and nutella work really well together and don't overpower each other.  The nutella whipped cream...well, what can you really say about that except for yum!  Note:  If you use a 9 inch tart pan, you may have a very small bit of the eggnog filling left over that doesn't fit in the tart shell.  Just pour it into a lightly greased ramekin and bake it.

Nutella Eggnog Tart

Crust:
1 1/4 cups all purpose flour
1/4 cup granulated sugar
1/2 teaspoon salt
7 Tablespoons butter, room temperature
1 large egg
1/2 cup Nutella

Cream Cheese Eggnog Filling:
12 ounces Cream cheese, room temperature
1/2 cup granulated sugar
5 Tablespoons eggnog, divided
2 large eggs
2 large egg yolks
1 teaspoon vanilla extract
1/2 teaspoon rum extract
1/2 teaspoon ground nutmeg
1/4 teaspoon salt

Nutella Whipped Cream:
1 cup heavy whipping cream
2 Tablespoons powdered sugar
4 Tablespoons nutella

In a food processor, pulse together the flour, sugar, salt, butter and egg until a dough forms.  Press the dough evenly onto the bottom and up the sides of a 9 or 10 inch tart pan with a removable bottom.  Place the tart shell in the refrigerator and chill for about 30 minutes.

Preheat the oven to 350F.  Remove the tart shell from the refrigerator and line with aluminum foil.  Fill the foil lined shell with pie weights, or uncooked rice.  Bake for 20 minutes.  Remove pie from the oven, and carefully remove aluminum foil and pie weights.  Return the tart to the oven and bake for 20 minutes, or until the tart shell is golden brown.  Remove the tart shell from the oven and immediately spoon the nutella into the bottom of the shell, spreading it evenly to the edges. Let cool completely.

Reduce the oven temperature to 300F.

For the cream cheese eggnog filling, place the cream cheese, sugar, and 2 tablespoons of the eggnog into a food processor and blend until smooth.  Scrape down the sides of the food processor bowl.  Add the eggs, egg yolks, remaining 3 tablespoons of eggnog, vanilla extract, rum extract, nutmeg, and salt.  Process until smooth.  Gently pour the cream cheese filling over the nutella in the tart shell.

Bake the tart for about 35 minutes, or until the filling is set, but jiggles slightly in the center.  Remove the tart from the oven and cool completely.  Cover the tart and refrigerate until cold.

When ready to serve, make the nutella whipped cream.  Beat the whipping cream and powdered sugar together until stiff peaks form.  Add the nutella and beat gently until incorporated.  Remove the sides of the tart pan, and cut the tart into wedges.  Spoon the nutella whipped cream over the individual pieces.  Makes 12 to 16 servings.

Enjoy!  -Cardamommy


Friday, July 26, 2013

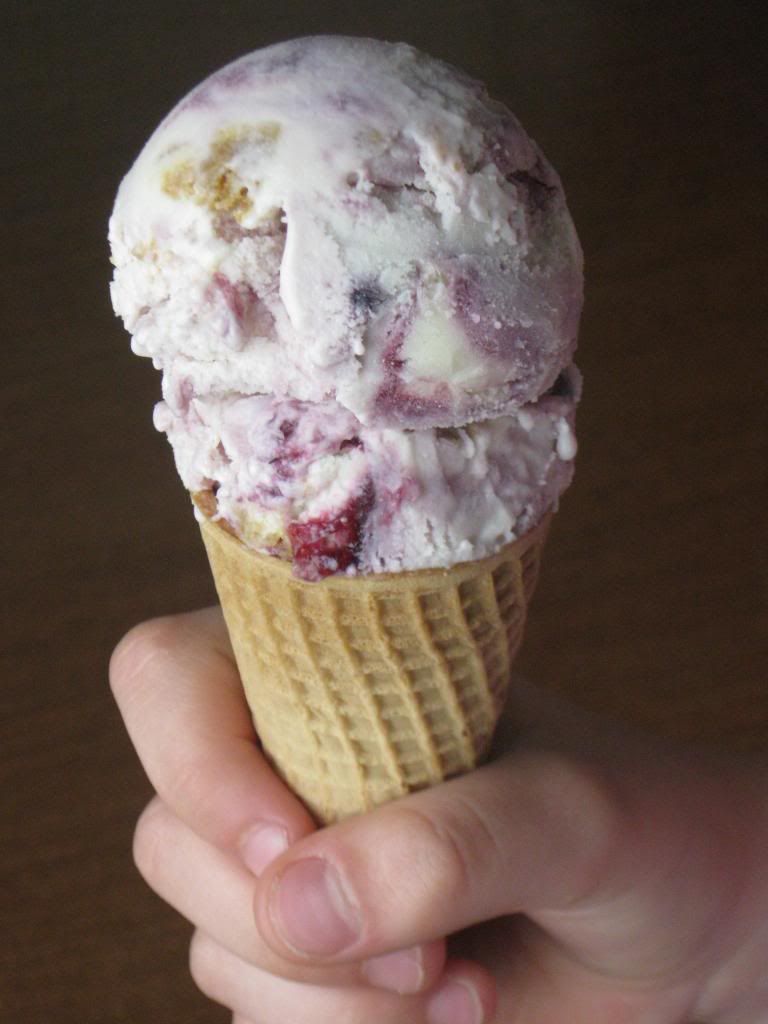
Blackberry Cheesecake Ice Cream


I threw this ice cream together the other day, and it is a huge hit at my house.  It has a wonderful cream cheese flavor with swirls of blackberry pie filling and chunks of cheesecake throughout. 

Blackberry Cheesecake Ice Cream

4 cups half and half or whipping cream
1 cup granulated sugar, divided
pinch of salt
8 ounces cream cheese, room temperature
2 eggs
2 teaspoons vanilla extract
1 can (21 ounces) blackberry pie filling
6 ounces (about 1 cup) cheesecake, chopped

In a medium saucepan over medium heat, whisk together the half and half, 1/2 cup sugar, and salt.  Heat until mixture comes to a simmer.

In a large bowl, whisk together the remaining 1/2 cup sugar, cream cheese, and eggs.  Once the half and half mixture is simmering, slowly pour about 1/2 of it into the cream cheese mixture, whisking constantly.  Return the combined mixture to the saucepan, and continue heating over medium heat, stirring constantly until the mixture thickens.  Do not boil, or the eggs will scramble (and no one wants scrambled egg ice cream!).  

Remove the mixture from the heat and stir in the vanilla extract.  Let cool to room temperature, then cover and refrigerate until completely chilled.

Pour the ice cream mixture into your ice cream freezer and process according to manufacturer's directions.  Once the ice cream has finished churning, spoon into a large bowl.  Add the blackberry pie filling and cheesecake pieces, and fold in 3 to 4 times (this will leave ribbons of pie filling).  Transfer to a freezer container and store in the freezer. Makes about 8 cups.

Enjoy!  -Cardamommy

Related Posts Plugin for WordPress, Blogger...